

Brownie Dirt Pudding is a party in a bowl—literally! This playful dessert brings together the deep, fudgy goodness of brownies with silky chocolate pudding, all topped off with cheeky gummy worms wriggling through crumbly “dirt.” Every spoonful feels like a miniature adventure, where creamy layers and chocolate bursts mingle in perfect harmony. You don’t need to be a pastry chef to nail this; even as a beginner you’ll find the process delightfully fuss-free. From mixing up a boxed brownie batter to watching it bake into a golden-edged square, then crumbling it up like edible treasure, you’ll build layers that satisfy both chocolate cravings and your inner child’s taste for whimsy.
When I first whipped this up for a backyard barbecue, guests eyed the gummy worms with curious grins—some cautious, others eager. By the second bite, their faces lit up, voices chimed in approval, and suddenly my dessert table was the star of the show. I love how this no-fuss sweet can be prepped ahead of time, leaving more moments to mingle with friends instead of hovering in the kitchen. Whether you’re celebrating a birthday, gearing up for Halloween, or simply craving a fun after-dinner treat, Brownie Dirt Pudding brings out smiles and nostalgia in equal measure. So grab your mixing bowls, roll up your sleeves, and let’s dig into this delight together!
KEY INGREDIENTS IN BROWNIE DIRT PUDDING
Every great dessert starts with quality ingredients, and Brownie Dirt Pudding is no exception. From the fudgy brownie base to the creamy filling and whimsical toppings, each element plays a vital role in creating a harmonious, multi-textured treat. Below, you’ll find the star players that transform simple pantry staples into an unforgettable sweet experience.
- Brownie mix
A reliable shortcut to fudgy, chocolatey goodness without the extra work. This boxed blend provides the rich, chewy base that crumbles into “soil,” offering bursts of intense cocoa flavor with every bite.
- Instant chocolate pudding mix
Adds a smooth, velvety layer that contrasts beautifully with the chewy brownie crumbles. Its quick-setting formula means you’ll have luscious pudding in minutes after a few stirs.
- Cold milk
Hydrates the pudding mix and helps achieve that creamy consistency. Chilling the milk first ensures the pudding sets firm, making those layers stand tall and proud.
- Cream cheese
Brings a subtle tang and pillowy texture to the middle layer. Beating it until it’s completely smooth prevents lumps and creates a stable cushion for the pudding.
- Powdered sugar
Sweetens and stabilizes the cream cheese layer without graininess. It blends seamlessly, lending a silky mouthfeel and balanced sweetness.
- Whipped topping
Lightens the cream cheese mixture into a fluffy cloud. Its airy texture softens the dense brownie crumbles and enriches each spoonful.
- Chocolate sandwich cookies
Crushed into fine crumbs, they mimic garden dirt for a striking, thematic finish. The crisp cookie bits add a delightful crunch and extra cocoa notes.
- Gummy worms
The whimsical crowning touch! Their chewy, fruity contrast gives this dessert its signature “wormy” charm, inviting smiles and playful digging with your spoon.
HOW TO MAKE BROWNIE DIRT PUDDING
Ready to dive into a dessert that’s as fun to make as it is to eat? Follow these detailed steps and you’ll have a show-stopping treat in no time. This process combines baking, chilling, and layering, but don’t worry—each stage is straightforward and perfect for even first-time bakers. Let’s get started!
1. Preheat your oven according to the brownie mix package instructions. Prepare the brownie batter as directed on the box, ensuring you grease a pan or line it with parchment paper for foolproof removal. Pour the batter evenly and bake until the edges pull away slightly and the center is set. Allow the brownies to cool completely once baked.
2. While the brownies are cooling, prepare the chocolate pudding. In a medium bowl, vigorously whisk together the instant pudding mix and cold milk until the mixture thickens and you see gentle peaks form. Set aside to let it fully set; this ensures a firm, creamy layer.
3. In a separate large bowl, beat the softened cream cheese until it’s perfectly smooth and free of lumps. Gradually add the powdered sugar and continue to beat until everything is fully combined and lightened. Gently fold in the whipped topping using a spatula, ensuring you maintain a fluffy texture.
4. Once the brownies are cooled, crumble them into small, bite-sized pieces on a cutting board or in a bowl. Set aside about a quarter of the crumbles to use as a final topping to make that dirt effect extra authentic.
5. Crush the chocolate sandwich cookies by placing them in a sturdy plastic bag and using a rolling pin or by pulsing them in a food processor until they resemble fine crumbs ready to sprinkle.
6. In a large serving bowl or individual cups, begin layering the dessert: start with a base of brownie crumbles, followed by a generous layer of the cream cheese mixture, then a thick spoonful of chocolate pudding, and a sprinkle of cookie crumbs. Repeat these layers until all components are used up, finishing with a coat of cookie crumbs.
7. Top the final layer with gummy worms for decoration, pressing them slightly into the cookie crumbs to create a playful “dirt” effect that invites everyone to dig in.
8. Chill in the refrigerator for at least 2 hours before serving. This resting time allows the layers to set and the flavors to meld into one gloriously cohesive dessert.
SERVING SUGGESTIONS FOR BROWNIE DIRT PUDDING
When it’s time to serve your Brownie Dirt Pudding, presentation is half the fun! Whether you’re hosting a festive gathering or simply spoiling yourself, these serving ideas will make your creation look as irresistible as it tastes.
- Serve in individual parfait glasses for an elegant touch. Layer each cup uniformly so the chocolate, cream, and cookie layers are visible through the glass—your guests will love seeing every decadent tier.
- Pair with a cold glass of milk or a bold espresso. The creamy pudding and rich brownie blend beautifully with milky sweetness or the bitter edge of coffee, balancing textures and flavors.
- Garnish with fresh berries or mint sprigs. The bright pops of color from raspberries, strawberries, or a few mint leaves contrast the deep chocolate hues and add a hint of freshness.
- Choose a themed presentation. For a kid’s party, scatter candy eyes around the worms; for a Halloween bash, tuck miniature plastic gravestones in the “dirt.” These little accents take the playful vibe up a notch.
HOW TO STORE BROWNIE DIRT PUDDING
Proper storage is key to keeping your Brownie Dirt Pudding fresh, creamy, and absolutely irresistible for days. With a few simple steps, you can preserve the texture and prevent any sogginess or flavor loss—so every spoonful tastes just as fantastic as the day you first served it.
When you’re ready to stow leftovers, transfer the pudding to an airtight container. This protects against odors in the fridge and maintains the moisture balance in the layers. If you’ve made the pudding in individual cups, simply cover each cup tightly with plastic wrap.
- Keep the dessert refrigerated at all times, ideally on a middle shelf where the temperature stays steady. This prevents the whipped topping from breaking down and guarantees the pudding layer remains firm.
- For longer storage, you can freeze individual portions. Wrap each serving in plastic film and then aluminum foil to lock in freshness. Thaw in the refrigerator overnight before serving to maintain texture.
- If you’re short on fridge space, store the crunchy cookie crumbs separately in a sealed bag and sprinkle them on top just before serving. This ensures that final layer stays crisp and avoids sogginess.
- Always label your container with the date so you can enjoy it within 3–4 days. After that, the layers might shift, and the gummy worms can become overly chewy.
CONCLUSION
Brownie Dirt Pudding is the ultimate blend of playful presentation and indulgent flavor. We’ve walked through every step—from baking the fudgy brownie base and whipping up creamy layers to crushing cookies and carefully layering your dessert. Along the way, you’ve learned how to choose ingredients, master techniques like folding and whisking, and even jazz up your final presentation with serving ideas that make a statement. Don’t forget to note the prep time (about 30 minutes), bake time (30 minutes), and that all-important rest in the fridge (2 hours) for the best results. This beginner-friendly dessert proves that you don’t need elaborate skills or exotic ingredients to create something truly memorable.
Feel free to print this article or save it for your next gathering—having the full recipe at your fingertips means you can dive in whenever a chocolate craving hits. And if you’re hungry for more, scroll down to find a handy FAQ section below that answers all your burning questions. Whether you’re craving feedback, have tips of your own, or need a helping hand as you assemble your layers, I’d love to hear from you. Drop a comment with your thoughts, share your own decorating twists, or let me know if you hit any snags—I’m here to chat and help make your Brownie Dirt Pudding adventure as fun and delicious as possible!
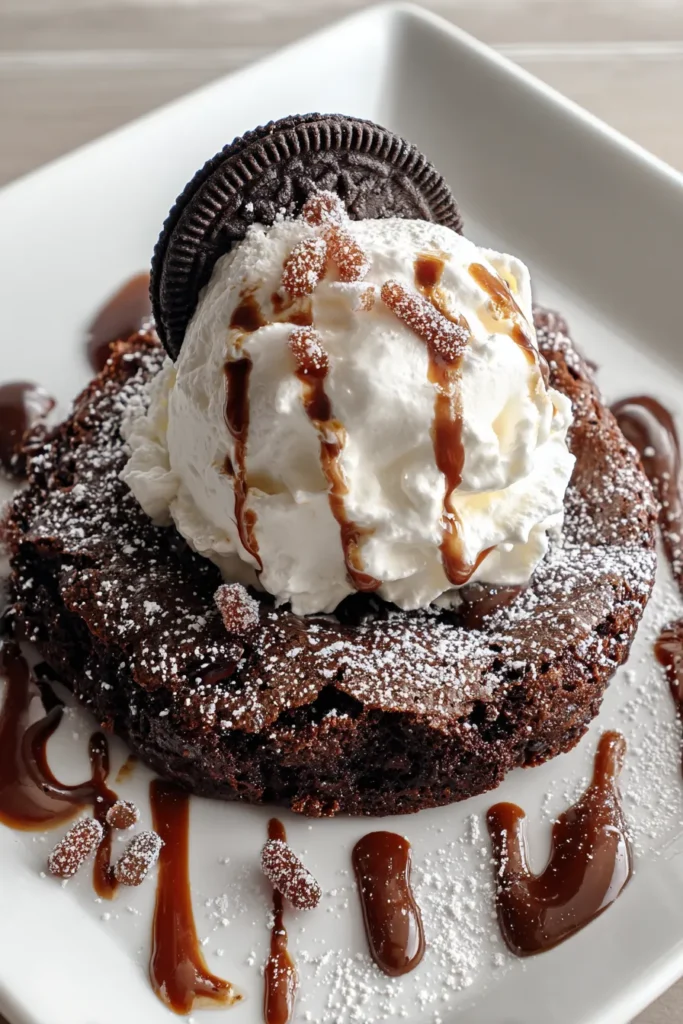

Brownie Dirt Pudding
Description
Experience a delectable combination of crumbled brownies, fluffy cream cheese, and rich chocolate pudding, all topped with cookie crumbs and gummy worms for a whimsical touch!
Ingredients
Instructions
-
Preheat your oven according to the brownie mix package instructions. Prepare the brownie batter as directed on the box and bake in a greased pan. Allow brownies to cool completely once baked.
-
While the brownies are cooling, prepare the chocolate pudding. In a medium bowl, whisk together the instant pudding mix and cold milk until it thickens. Set aside to let it set.
-
In a separate large bowl, beat the softened cream cheese until smooth. Slowly add in the powdered sugar and continue to beat until well combined. Gently fold in the whipped topping until fully incorporated.
-
Once brownies are cooled, crumble them into small pieces. Divide the crumbled brownies, setting aside a portion for the topping.
-
Crush the chocolate sandwich cookies in a plastic bag using a rolling pin, or in a food processor, until they resemble fine crumbs.
-
In a large serving bowl or individual cups, begin layering the dessert: start with a layer of brownie crumbles, followed by a layer of the cream cheese mixture, a layer of chocolate pudding, and a sprinkle of cookie crumbs. Repeat layers until ingredients are used up, ending with a layer of cookie crumbs.
-
Top the final layer with gummy worms for decoration, pressing them slightly into the cookie crumbs to create a "dirt" effect.
-
Chill in the refrigerator for at least 2 hours before serving to let the flavors meld together.
Note
- Brownie crumbles can be a bit chunky if you prefer a chewier texture in your pudding.
- You can substitute store-bought brownies to save time.
- This recipe can be customized with different pudding flavors, like vanilla or butterscotch.
- For a fun twist, consider using colorful candy worms or adding edible flowers.

