

Few things evoke memories like a slice of warm, homemade cinnamon apple pie glistening on a dessert plate. That first bite, when your fork breaks through the golden, flaky crust into tender, cinnamon-spiced apples, is nothing short of magical. The filling, a harmonious blend of sweet sugar, tart Granny Smith or Honeycrisp apples, and a whisper of nutmeg, feels like a comforting hug for your taste buds. Whether you’re winding down after a long week or hosting friends for Sunday dinner, this classic dessert brings everyone together around the table. Its rustic charm and stellar flavor make it a timeless favorite for autumn gatherings, holiday dinners, or simply when you crave a little homemade indulgence.
In my own kitchen, making this pie has become a cherished ritual. I remember the first time I rolled out the dough on a floured countertop, nervously trying to achieve the perfect thickness for that irresistibly crisp bite. Now, I take my time pressing the chilled butter into the flour just so, creating those irresistible layers of flakiness. When the pie comes out of the oven, the kitchen fills with a spiced sweetness that instantly transports me back to childhood. Each slice pairs beautifully with a scoop of vanilla ice cream or a dollop of freshly whipped cream—comfort food at its finest. Whether you’re an experienced baker or an enthusiastic beginner, this recipe invites you to gather your ingredients, embrace the intermediate-level challenge, and treat yourself to a dessert that’s truly unforgettable.
KEY INGREDIENTS IN CLASSIC HOMEMADE CINNAMON APPLE PIE
Before we dive into the step-by-step magic of pie-making, let’s get acquainted with the stars of the show. Each ingredient plays a crucial role in building that perfect balance of flaky crust, tender fruit, and cozy spice blend. Here’s what you’ll need:
- All-purpose flour
This versatile flour forms the backbone of the crust and also acts as a thickening agent in the filling. Its gluten structure provides just enough elasticity for rolling while ensuring a tender, flaky bite.
- Unsalted butter
Chilled and diced, it’s mixed into the flour to create pockets of fat that melt during baking. The result? A golden, flaky crust that practically crumbles with delicious ease.
- Salt
A small pinch enhances all the flavors, from the buttery dough to the sweet apple filling. It’s a crucial element that balances sweetness and rounds out the taste.
- Ice water
Kept cold to prevent butter from softening during mixing. Adding it a tablespoon at a time helps bind the dough without overworking gluten, preserving tenderness.
- Apples
Granny Smith or Honeycrisp are recommended for their crisp texture and bright flavor. When peeled, cored, and sliced, they become juicy, tender morsels that absorb the sugar and spices beautifully.
- Granulated sugar
Sweetens the fruit without making it overwhelmingly sugary. It also helps draw out the natural juices from the apples, creating a luscious, syrupy filling.
- Ground cinnamon
The signature spice in this pie, it brings warmth and a comforting depth that pairs perfectly with baked apples.
- Ground nutmeg
Just a hint adds an aromatic layer of spice, enhancing the cinnamon and elevating the overall flavor profile.
- Lemon juice
Brightens the filling and prevents apple slices from browning. Its subtle tang balances the sweetness and keeps the fruit tasting fresh.
- Egg yolk
Combined with milk to make a rich egg wash, it gives the top crust a beautiful golden sheen and attractive browning.
- Milk
Helps thin out the egg yolk for an even, glossy finish, sealing in moisture and flavor.
HOW TO MAKE CLASSIC HOMEMADE CINNAMON APPLE PIE
Baking the perfect cinnamon apple pie is a rewarding process that transforms simple pantry staples into a show-stopping dessert. Follow these steps carefully for a flaky crust and a tender, spiced filling that nobody can resist.
1. In a large mixing bowl, combine the flour and salt. Add the diced, chilled butter and use a pastry cutter or your fingertips to work it into the flour until the mixture resembles coarse crumbs with pea-sized pieces of butter throughout.
2. Stir in the ice water, one tablespoon at a time, just until the dough begins to come together. Be gentle—do not overmix, or the crust may become tough. Gather the dough into a disk, wrap it in plastic wrap, and refrigerate for at least one hour to firm up the butter.
3. Preheat your oven to 425°F (220°C), allowing it ample time to reach the ideal temperature for that initial burst of heat.
4. In another bowl, toss the apple slices with sugar, cinnamon, nutmeg, flour, and lemon juice, ensuring each slice is coated evenly to create a juicy, well-spiced filling.
5. Divide the chilled dough in half. On a floured surface, roll out one half into a circle large enough to fit a 9-inch pie plate. Transfer it carefully and press it into the bottom and up the sides of the dish.
6. Fill the crust with the apple mixture, spreading the fruit evenly. Dot the top with small pieces of butter to add richness as the pie bakes.
7. Roll out the second dough half and drape it over the filling. Seal the edges by crimping or pressing with a fork, then trim any excess dough. Cut several small slits in the top crust to allow steam to escape.
8. In a small bowl, beat the egg yolk with milk. Brush this mixture over the entire top crust to achieve a glossy, golden finish.
9. Bake in the preheated oven for 15 minutes, then reduce the heat to 350°F (175°C). Continue baking for 35 to 45 minutes, or until the apple slices are tender and the crust turns a deep, golden brown. Let cool before slicing to ensure the filling sets perfectly.
SERVING SUGGESTIONS FOR CLASSIC HOMEMADE CINNAMON APPLE PIE
Every slice of this cinnamon apple pie deserves a little extra flair when it’s time to serve. Whether you’re entertaining guests or simply treating yourself to a slice after dinner, here are some delightful ways to elevate your presentation and complement those spiced apple flavors.
This pie shines brightest when the pastry is warm, so consider serving it shortly after it cools just enough to hold its shape. Place a generous slice on a sturdy dessert plate and let your chosen accompaniment take center stage alongside it. A cool, creamy topping contrasts beautifully with the tender fruit and rich crust, while a warm sauce adds an indulgent touch to every forkful. Balance intense sweetness with a hint of acidity or spice in your beverages to round out the experience. With these suggestions, you’ll turn each serving into a memorable moment.
- Classic Vanilla Ice Cream
Serve a spoonful of smooth vanilla ice cream on the side. As it gently melts over the hot pie, it adds a creamy, sweet contrast that highlights the warmth of the spiced apples.
- Whipped Cream Clouds
Lightly sweeten fresh whipped cream with a hint of powdered sugar and a dash of cinnamon. A tall dollop creates an airy, elegant pairing that’s delightfully melt-in-your-mouth.
- Homemade Caramel Drizzle
Warm a batch of salted caramel sauce and drizzle it over each slice just before serving. The rich, buttery notes of caramel amplify the apple’s natural sweetness.
- Aromatic Coffee or Tea
Brew a robust cup of coffee or a spiced tea blend for a warming beverage. The slight bitterness or herbal notes cut through the pie’s sweetness, offering a balanced finish.
HOW TO STORE CLASSIC HOMEMADE CINNAMON APPLE PIE
Proper storage ensures that your homemade pie stays as fresh and flavorful as the moment it came out of the oven. Whether you’ve baked ahead for a gathering or simply have leftovers to enjoy, these methods will help retain that perfect texture and spiced sweetness. Keeping temperature, humidity, and wrapping techniques in mind is key to preserving the crust’s flakiness and the filling’s juiciness, so you’ll get that satisfying bite every time you reheat or serve the next day.
- Room Temperature
Once the pie has cooled completely, cover it loosely with plastic wrap or aluminum foil. It will stay fresh for up to two days at room temperature. This method keeps the crust crisp and the filling moist without introducing condensation.
- Refrigeration
For longer storage, place the wrapped pie in the refrigerator for up to five days. The cooler environment slows bacterial growth, but be aware that the crust may soften slightly; reheating can help restore some crispness.
- Freezing
To freeze individual slices or the whole pie, first flash-freeze uncovered on a baking sheet for one hour, then wrap tightly in plastic wrap and foil. Store in the freezer for up to three months. Thaw overnight in the fridge before reheating.
- Reheating Tips
Preheat your oven to 350°F (175°C). Place the pie on a baking sheet and warm for 15–20 minutes if refrigerated, or 25–30 minutes from frozen. This method revives the flaky crust and heats the filling evenly without making it soggy.
CONCLUSION
This Classic Homemade Cinnamon Apple Pie is more than just a dessert—it’s a celebration of comforting flavors and time-honored baking techniques. From mixing the buttery, flaky crust to tossing juicy apple slices in a perfectly spiced cinnamon-nutmeg blend, each step brings you closer to that triumphant moment when you slice into a golden masterpiece. With intermediate-level instructions and thoughtful tips on preparation, cooking, and resting times, you’re fully equipped to achieve pie perfection. The result is a warm, comforting treat that transforms simple ingredients into a cozy, inviting experience. Don’t forget that this recipe yields around 400 calories per serving and fits into any dessert course, whether you’re hosting a holiday feast or simply craving an indulgent snack. Feel free to print this article and save it for later use—you’ll find the detailed FAQ below for answers to common baking questions and troubleshooting tips.
We’d love to hear how your pie turned out! Leave us a comment if you added a personal twist—maybe a pinch of ginger or a blend of apple varieties for extra complexity. If any step felt tricky or you have questions about substitutions, we’re here to help. Share your stories, photos, and feedback so we can all learn and enjoy this classic dessert together. Happy baking, and may every slice bring warmth and joy to your table!
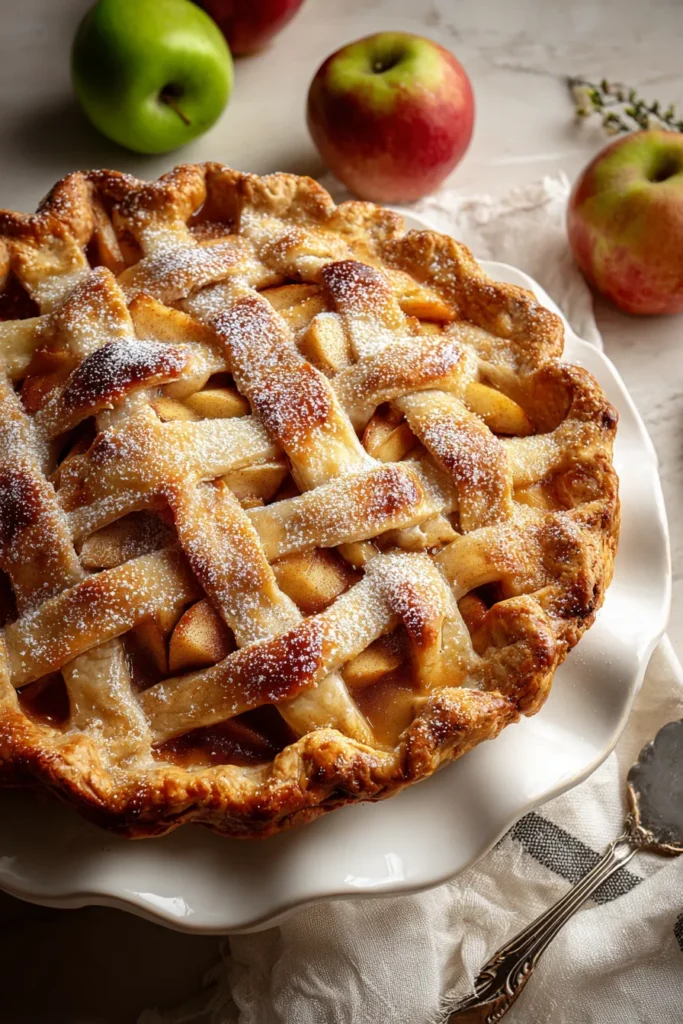

Classic Homemade Cinnamon Apple Pie
Description
This homemade cinnamon apple pie features a flaky crust, tender apples, and a perfect blend of spices, making it a comforting dessert for any occasion.
Ingredients
Instructions
-
In a large mixing bowl, combine the flour and salt. Add the diced, chilled butter and mix until the mixture resembles coarse crumbs.
-
Stir in the ice water, a tablespoon at a time, until the dough comes together. Do not overmix. Wrap in plastic wrap and refrigerate for at least 1 hour.
-
Preheat your oven to 425°F (220°C).
-
In another bowl, toss the apple slices with sugar, cinnamon, nutmeg, flour, and lemon juice.
-
Divide the chilled dough in half. Roll out one half on a floured surface to fit into a 9-inch pie plate.
-
Fill the crust with the apple mixture and dot with small pieces of butter on top.
-
Roll out the remaining dough and place over the filling. Seal the edges and cut away excess dough. Make several small slits in the top crust to allow steam to escape.
-
Beat the egg yolk with milk. Brush the mixture over the top crust.
-
Bake in the preheated oven for 15 minutes. Reduce the heat to 350°F (175°C) and continue baking for 35 to 45 minutes, or until the apples are tender and the crust is golden brown. Let cool before serving.
Note
- For extra flavor, add a pinch of ginger or cloves to the apple mixture.
- Try mixing different types of apples for a more complex flavor profile.
- Let the pie cool completely before slicing to ensure the filling sets properly.
- Serve with vanilla ice cream or whipped cream for an indulgent treat.

