

There’s something irresistibly bewitching about biting into a rich, fudgy brownie that practically oozes dark chocolate with every mouthful. These Spooky Dark Chocolate Halloween Brownies capture that hauntingly delicious essence, serving up treats that are both devilishly decadent and delightfully festive. Swirled with molten chocolate and crowned with playful, ghoulish sprinkles, they’re the perfect way to celebrate All Hallows’ Eve. Whether you’re hosting a haunted gathering, looking to impress trick-or-treaters, or simply craving a cozy kitchen project, these brownies blend the primal pleasure of dark chocolate with a spirited seasonal twist. Each bite brings out notes of intense cocoa, a whisper of cinnamon warmth, and the satisfying crack of a brownie crust that gives way to a gooey interior—just the kind of treat that makes Halloween unforgettable.
Diving into this recipe is a breeze for any adventurous home baker, though it does rank at an intermediate difficulty due to its precise melting and folding steps. In just 15 minutes of active prep time, followed by 35 minutes in the oven and a 30-minute cooling rest, you’ll end up with a 9×9 pan brimming with nearly 300 calories of chocolaty goodness per square. This dessert course is all about balance: velvety dark chocolate, silky melted butter, a duo of sugars for sweetness, and a hint of cinnamon to warm the soul. And let’s not forget those eyeball candies and orange-and-black sprinkles that turn simple brownies into a fang-tastic masterpiece. Trust me, once you slice into these brownies and taste that perfect blend of spice and chocolate, you’ll want to stash away this recipe for every autumn to come.
KEY INGREDIENTS IN SPOOKY DARK CHOCOLATE HALLOWEEN BROWNIES
Before you embark on this spellbinding baking adventure, let’s gather the star ingredients that make these brownies shine. Each component plays its own crucial role, coming together to create that signature fudgy texture and deep chocolate flavor you crave.
- Unsalted Butter
This provides the luscious fat base that lends richness and moisture. Melting it together with chocolate ensures a glossy, smooth brownie batter and helps develop a tender crumb.
- Dark Chocolate
The heart of these brownies, dark chocolate brings intense cocoa flavor and a slightly bittersweet contrast that balances the sugars. Opt for high-quality bars for the best results.
- Granulated Sugar
Adds sweetness and helps create the classic crackly brownie top. It also works with the eggs to give structure, ensuring the perfect chew.
- Light Brown Sugar
Infuses a hint of caramel-like depth and extra moisture thanks to its molasses content, boosting the fudginess and mouthfeel.
- Large Eggs
Acting as a binding agent, eggs give brownies their structure and contribute to a rich, custardy interior when whisked properly.
- Vanilla Extract
A splash of vanilla heightens all the chocolatey notes and rounds out the flavor profile with a touch of warmth.
- All-Purpose Flour
Provides the necessary gluten structure to hold the brownies together. Proper measurement prevents overmixing and keeps the texture dense yet tender.
- Unsweetened Cocoa Powder
Intensifies chocolate flavor without adding extra fat or sugar, and darkens the batter for a more dramatic, spooky appearance.
- Salt
A small pinch enhances the sweetness and brings out the full complexity of the chocolate, balancing flavors perfectly.
- Ground Cinnamon
Introduces a subtle warmth and aromatic dimension that feels especially cozy and seasonal in every bite.
- Halloween-Themed Sprinkles or Candy Decorations
These festive accents add a playful crunch and vibrant pops of color, transforming simple brownies into show-stopping treats.
HOW TO MAKE SPOOKY DARK CHOCOLATE HALLOWEEN BROWNIES
Get ready to transform a handful of simple ingredients into a pan of hauntingly good brownies. Follow each step carefully to ensure a fudgy center, crackly top, and a festive finish that screams Halloween fun!
1. Preheat your oven to 350°F (175°C). Grease a 9×9-inch baking pan, then line it with parchment paper, leaving an overhang on two sides so you can lift the brownies out easily once they’re baked.
2. In a medium-sized saucepan over low heat, combine the butter and chopped dark chocolate. Stir continuously until they’re fully melted into a silky, lump-free mixture. Remove from heat and let it cool just enough so you won’t scramble the eggs.
3. In a large bowl, whisk together the granulated sugar, brown sugar, room-temperature eggs, and vanilla extract until the mixture is smooth and slightly pale. This step incorporates air for a lighter texture.
4. Slowly drizzle the melted chocolate-butter mixture into the sugar-egg bowl, whisking constantly to create a unified, glossy batter without lumps.
5. In a separate bowl, sift the all-purpose flour, unsweetened cocoa powder, salt, and ground cinnamon. Sifting prevents clumps and ensures an even distribution of cocoa and spices.
6. Using a rubber spatula, gently fold the dry ingredients into the wet batter until just combined. Avoid overmixing to keep the brownies dense and fudge-like.
7. Pour the batter into your prepared pan, using the spatula to spread it into an even layer, scraping down the sides to capture every bit of chocolatey goodness.
8. Scatter your Halloween-themed sprinkles or candy decorations evenly over the surface, pressing them in lightly so they stick during baking.
9. Bake for 30–35 minutes, or until the edges are set and a toothpick inserted into the center comes out with a few moist crumbs clinging to it.
10. Let the brownies cool completely in the pan on a wire rack. Once cool, use the parchment overhang to lift them out and slice into spooky squares.
SERVING SUGGESTIONS FOR SPOOKY DARK CHOCOLATE HALLOWEEN BROWNIES
When it comes to serving these fudgy delights, there are endless ways to amplify their spooky charm. Whether you’re presenting them at a Halloween bash or enjoying them solo with a mug of something warm, these suggestions will elevate your brownie experience and make every bite a memorable treat.
- Witch’s Brew Pairing
Serve a brownie alongside a steaming cup of spiced coffee or hot chocolate whipped with cinnamon and a splash of vanilla. The warm drink complements the brownie’s cocoa depth and adds a cozy, magical vibe to each bite.
- Ghostly Ice Cream Sandwiches
Cut brownies into rectangles and sandwich a scoop of vanilla or pumpkin ice cream between two pieces. Roll the edges in crushed candy corn or mini pumpkins for a playful twist.
- Monster Milkshake
Blend a brownie chunk with milk, vanilla ice cream, and a drizzle of chocolate syrup. Top with whipped cream, chocolate shavings, and a surprise sprinkle of edible glitter for a spine-tingling shake.
- Haunted Dessert Platter
Arrange brownie squares on a black slate or decorative platter, interspersing them with miniature candy pumpkins, candy eyeballs, and caramel apples. It’s a showstopper that invites guests to help themselves.
HOW TO STORE SPOOKY DARK CHOCOLATE HALLOWEEN BROWNIES
Ensuring these brownies stay just as luscious days after baking means using the right storage techniques. Proper storage maintains that moist, decadent texture and preserves both flavor and festive decorations. Whether you want to make them a day ahead or spread out tastings over a week, these methods will keep your brownies at their best.
- Room-Temperature Airtight Container
Once fully cooled, place brownies in a single layer inside an airtight container. Separate layers with parchment paper to prevent sticking. Stored this way, they’ll remain moist and fresh for up to 3 days.
- Refrigeration for Extended Freshness
If you need them to last up to a week, store brownies in a sealed container in the fridge. Bring them to room temperature before serving, or warm a slice in the microwave for 5–10 seconds to revive that gooey center.
- Freezing Individual Squares
For long-term storage (up to 3 months), wrap each brownie square tightly in plastic wrap, then place all squares in a freezer-safe bag. Thaw overnight in the refrigerator or defrost gently at room temperature.
- Warm & Gooey Revival
When ready to serve chilled or frozen brownies, pop a piece in the microwave for about 5–7 seconds. This quick heat brings back that freshly-baked, molten-chocolate feel without overcooking.
CONCLUSION
From the very first forkful of these Spooky Dark Chocolate Halloween Brownies, you’re treated to a celebration of textures and flavors: the crisp brownie top giving way to a plush, fudgy interior; the deep bittersweet notes of dark chocolate dancing with hints of cinnamon; and the playful crunch of festive sprinkles that transform a simple dessert into a seasonal showstopper. We’ve walked through every step—from melting the butter and chocolate to folding in dry ingredients just so—making sure you feel confident tackling this intermediate-level recipe. With just 15 minutes of prep, 35 minutes of baking, and a 30-minute rest, you’ll end up with a pan full of ghoulishly good goodies that deliver roughly 300 calories of Velvet-Underworld delight per square.
Feel free to print and save this article for all your Halloween baking adventures—stash it in your recipe binder or pin it to your kitchen board. You can also scroll down to find a handy FAQ section below that addresses common questions, from chocolate substitutions to customizing your spice levels. If you try this recipe, I’d love to hear how it turned out. Drop a comment or share your own spooky spins, and let me know if you have any questions or need a hand perfecting that crackly brownie crust. Happy haunting—and even happier baking!
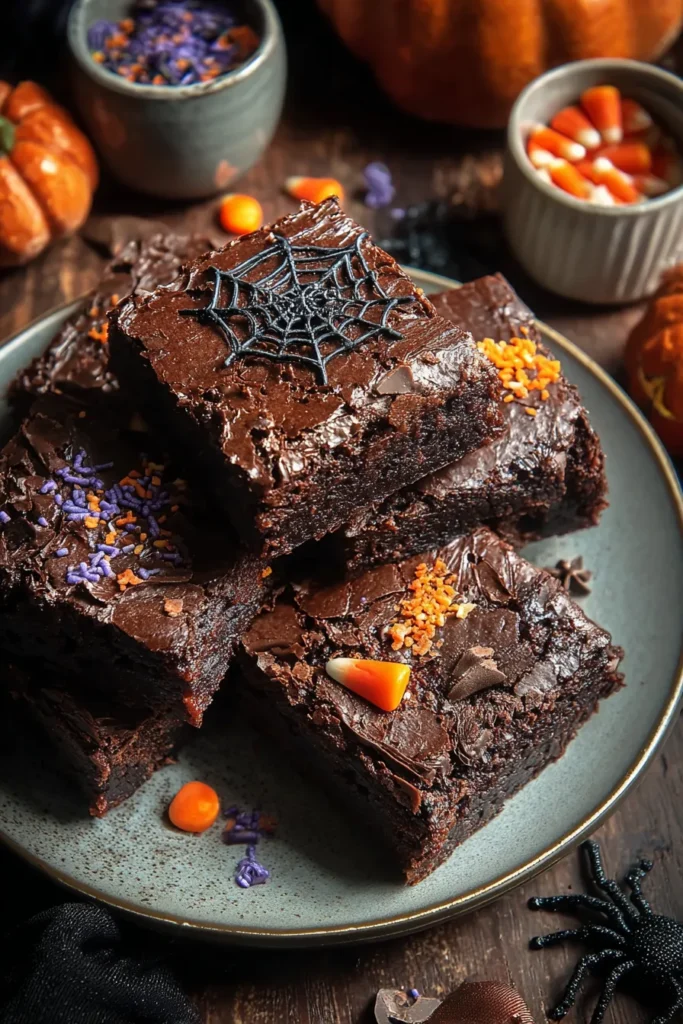

Spooky Dark Chocolate Halloween Brownies
Description
These moist and fudgy brownies, rich with dark chocolate and topped with festive sprinkles, are perfect for Halloween gatherings. Each bite is a delightful blend of sweetness and spice.
Ingredients
Instructions
-
Preheat your oven to 350°F (175°C). Grease and then line a 9x9 inch (23x23 cm) baking pan with parchment paper, leaving an overhang on the sides to lift the brownies out easily after baking.
-
In a medium-sized saucepan over low heat, melt the butter and the chopped dark chocolate together. Stir until smooth and combined, then remove from heat and allow to cool slightly.
-
In a large bowl, whisk the granulated sugar, brown sugar, eggs, and vanilla extract together until combined and smooth.
-
Slowly pour the melted chocolate mixture into the sugar mixture, whisking constantly until combined.
-
In a separate bowl, sift together the flour, cocoa powder, salt, and cinnamon.
-
Gently fold the dry ingredients into the wet ingredients with a spatula until just combined. Be careful not to overmix.
-
Pour the batter into the prepared baking pan and spread it into an even layer.
-
Sprinkle the Halloween-themed sprinkles or candy decorations evenly over the top for a festive touch.
-
Bake in the preheated oven for 30-35 minutes, or until the brownies are set in the center and a toothpick inserted into the center comes out with a few moist crumbs.
-
Allow to cool in the pan on a wire rack. Lift the brownies out using the parchment paper once completely cool, then cut into squares.
Note
- For an extra spooky touch, use orange and black sprinkles or candy eyes.
- You can substitute dark chocolate with semi-sweet if preferred.
- These brownies stay fresh for up to a week when stored in an airtight container.
- Microwave a brownie for a few seconds for a delightful gooey texture.

