

There’s something utterly bewitching about combining rich, velvety dark chocolate with playful Halloween flair. These Spooky Dark Chocolate Ghost Brownies aren’t just your average dessert—they’re a celebration of deep cocoa intensity and a dash of whimsical fun. Each bite brings a fudgy, almost molten center, contrasted by the crisp top layer that crackles under your teeth. Then, as you trail your fork through that luscious terrain, ghostly figures in bright white chocolate float atop the darkness, offering a delightful surprise before you even taste them. The result is a decadent treat that blends sophistication with the lighthearted spirit of Halloween.
Whether you’re gearing up for a haunted house party or simply seeking a cozy night in with a spooky twist, these brownies are your secret weapon. The hauntingly delicious design is sure to spark smiles and a few startled glances—especially from those who didn’t expect such gourmet goodness dressed in playful ghostly attire. From the first swirl of melted dark chocolate on your spoon to the final piped spooky face, you’ll find yourself immersed in a baking adventure that’s as fun as it is indulgent. Get ready to don your apron, unleash your creativity, and whip up a batch that’s guaranteed to steal the show at any gathering.
KEY INGREDIENTS IN SPOOKY DARK CHOCOLATE GHOST BROWNIES
Before we dive into the magic of assembling and baking, let’s talk about the stars of the show: the ingredients. Each one plays a crucial role in crafting the perfect balance of fudgy texture, intense flavor, and that spooky charm atop every square.
- Unsalted butter
This creamy base provides luscious moisture and rich mouthfeel. By using unsalted butter, you control the salt levels precisely, ensuring the chocolate’s complexity shines.
- Dark chocolate
Chopped into chunks, this ingredient brings depth and an intense, bittersweet cocoa profile. When melted, it forms the heart of the brownie, creating that signature fudgy interior.
- Granulated sugar
The sweet counterpoint to dark chocolate’s richness, sugar also helps create that delicate, crackly crust on top as it melts and recrystallizes during baking.
- Large eggs
Eggs offer structure and lift, binding ingredients together while contributing to a tender crumb. Added one at a time, they ensure a smooth, homogeneous batter.
- Vanilla extract
A splash of pure vanilla brightens the deep chocolate notes, rounding out the flavor and adding a subtle, fragrant warmth.
- Salt
Just a pinch enhances sweetness and intensifies cocoa flavors, preventing the brownies from tasting flat or overly sweet.
- All-purpose flour
This provides the framework for the brownies. It’s enough to give structure without making them cakey, so you still get that desirable gooey center.
- Unsweetened cocoa powder
Boosts the chocolate flavor and deepens the color. It also absorbs moisture, contributing to a fudgier consistency.
- White chocolate chips or candy melts
Melted and piped on top, these create the adorable ghost shapes. Their bright hue pops against the dark surface.
- Edible black gel or icing
Used for adding spooky facial details, this finishing touch brings each ghost to life with personality and flair.
HOW TO MAKE SPOOKY DARK CHOCOLATE GHOST BROWNIES
Let’s roll up our sleeves and get ready to transform these ingredients into hauntingly delicious brownies. Each step guides you through creating a tender, fudgy base and finishing with ghostly decorations that’ll wow any crowd.
1. Preheat your oven to 350°F (175°C). Grease and line an 8×8-inch baking pan with parchment paper, allowing some overhang for easy removal.
2. In a medium saucepan over low heat, melt the butter and chopped dark chocolate together, stirring frequently with a heatproof spatula until smooth and glossy. Remove from heat and let cool slightly.
3. Stir the granulated sugar into the melted chocolate mixture until fully incorporated. Then, add in the eggs one at a time, mixing well after each addition to maintain a smooth batter. Stir in the vanilla extract and salt.
4. Sift together the all-purpose flour and unsweetened cocoa powder into a separate bowl. Gradually add this dry mixture into the chocolate mix, folding gently with a spatula until just combined—avoid overmixing to keep the brownies tender.
5. Pour the rich brownie batter into the prepared pan, spreading it evenly with a spatula or an offset spatula for a perfectly smooth surface.
6. Bake for 25–30 minutes or until a toothpick inserted into the center comes out with a few moist crumbs. Resist the urge to overbake if you love gooey brownies.
7. Once baked, allow the brownies to cool in the pan on a wire rack until they reach room temperature. This rest period lets the interior set for cleaner cuts.
8. While the brownies are cooling, melt the white chocolate chips or candy melts according to package instructions—usually in a heatproof bowl over simmering water or in short bursts in the microwave. Transfer the melted chocolate to a piping bag or a small ziplock bag, snipping off a corner.
9. After the brownies are completely cool, cut them into rectangular or ghost shapes using a cookie cutter or a sharp knife.
10. Use the melted white chocolate to draw ghostly figures on top of each brownie. Create cute, flowing silhouettes as you pipe.
11. Finally, add facial details—eyes, mouths, or even tiny eyebrows—using the edible black gel or icing. Let the decorated brownies sit for a few minutes until the chocolate hardens slightly before serving.
SERVING SUGGESTIONS FOR SPOOKY DARK CHOCOLATE GHOST BROWNIES
Bringing these ghost brownies to the table is as fun as baking them. Whether you’re hosting a Halloween bash or surprising loved ones, consider these playful plating ideas to step up the spooky factor.
- Haunted Dessert Platter
Arrange brownies on a large slate or dark tray, interspersed with orange and black candies, edible spiders, and crinkled parchment “cobwebs” to create an eerie scene.
- Warm with Ice Cream
Serve a brownie square still slightly warm beside a scoop of vanilla bean ice cream. The contrast between hot, gooey chocolate and cold, creamy ice cream is positively spellbinding.
- Caramel Drizzle Delight
Drizzle warmed salted caramel sauce over each brownie just before serving. The sweet-salty swirl enhances the dark chocolate depth and adds a glossy finish.
- Ghostly Hot Chocolate Pairing
Pair brownies with mini mugs of creamy hot chocolate topped with toasted marshmallows. Guests can dunk or bite, creating a whimsical, interactive treat spread.
HOW TO STORE SPOOKY DARK CHOCOLATE GHOST BROWNIES
Keeping these brownies fresh and decadent is easy with the right storage methods. Whether you plan to enjoy them over the next few days or save them for later, here’s how to preserve that fudgy texture and vibrant decoration.
- Room Temperature
Once fully cooled, place brownies in an airtight container lined with parchment paper. Store at room temperature away from direct sunlight for up to 3 days. This maintains a perfect balance of chewiness and moist crumb.
- Refrigeration
For up to a week of freshness, layer brownies in an airtight container, separating each with parchment paper to protect decorations. Chill in the fridge—this firms up the chocolate and intensifies the cocoa flavor.
- Freezing Technique
Individually wrap each brownie in plastic wrap, then place all pieces in a freezer-safe bag. Freeze for up to 3 months. Thaw at room temperature when ready to serve. Ghost decorations may soften but retain shape.
- Airtight Container Tips
If you live in a humid climate, add a small silica gel food-safe packet to absorb moisture. This little trick keeps the top crust crisp and prevents decorations from smudging.
CONCLUSION
Baking these Spooky Dark Chocolate Ghost Brownies is more than just following a recipe—it’s a journey into the playful side of confectionery. From melting the deep, rich chocolate to carefully piping whimsical ghosts, you’ll experience each step with delight and maybe even a few giggles at your adorably spooky creations. Whether you’re a beginner baker or a seasoned pro, the straightforward instructions and accessible ingredients make this a fantastic project. And once you’ve tasted the contrast between the fudgy interior and crisp top, you’ll understand why these treats are perfect for Halloween gatherings or a special night in.
Feel free to print this article and save it for later so you’ll always have the full recipe on hand when the mood strikes. You can also find a FAQ below with answers to common questions about substitutions, troubleshooting, and more. I’d love to hear how your ghost brownies turned out—did you experiment with different faces or add extra spices? Drop a comment, ask any questions, or share your feedback if you try this recipe. Happy baking and may your Halloween season be deliciously haunting!
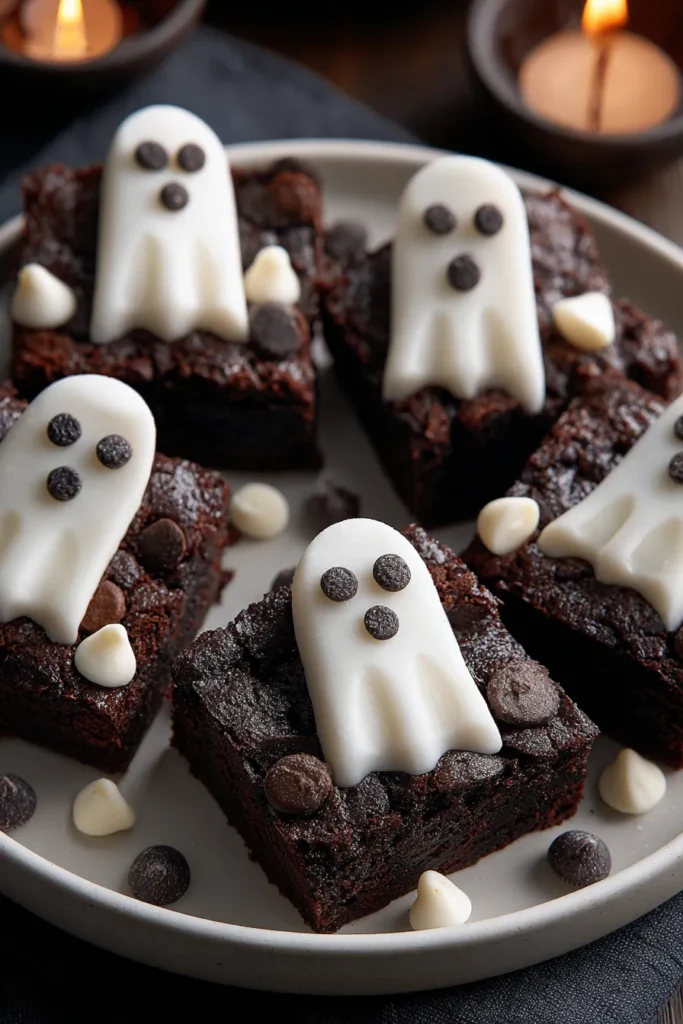

Spooky Dark Chocolate Ghost Brownies
Description
These rich dark chocolate brownies are topped with whimsical ghost designs, blending decadence with festive fun. Perfect for Halloween gatherings or a spooky night in!
Ingredients
Instructions
-
Preheat your oven to 350°F (175°C). Grease and line an 8x8 inch baking pan with parchment paper, allowing some overhang for easy removal.
-
In a medium saucepan over low heat, melt the butter and chopped dark chocolate together, stirring frequently until smooth. Remove from heat and let cool slightly.
-
Stir the sugar into the melted chocolate mixture. Then, add in the eggs one at a time, mixing well after each addition. Stir in the vanilla extract and salt.
-
Sift together the flour and cocoa powder. Gradually add this dry mixture into the chocolate mix, folding gently until just combined. Be careful not to overmix.
-
Pour the brownie batter into the prepared baking pan, spreading it evenly with a spatula.
-
Bake for 25-30 minutes or until a toothpick inserted into the center comes out with a few moist crumbs. Do not overbake for gooey brownies.
-
Allow the brownies to cool in the pan on a wire rack once baked.
-
While the brownies are cooling, melt the white chocolate chips or candy melts according to package instructions. Transfer the melted chocolate to a piping bag or a small ziplock bag with a corner snipped off.
-
Once the brownies are cool, cut them into rectangular or ghost shapes with a cookie cutter or knife.
-
Use the melted white chocolate to draw ghostly figures on top of each brownie. Add details, such as spooky faces, using the edible black gel or icing.
-
Let the decorated brownies set for a few minutes until the chocolate hardens slightly before serving.
Note
- For extra flavor, sprinkle a pinch of sea salt on top of the brownies before baking.
- To make them gluten-free, substitute all-purpose flour with an equal amount of gluten-free baking flour.
- Customize faces with different expressions for fun variations and personality.
- These ghostly brownies make a delightful Halloween treat and are perfect for themed parties.

