

Bursting with rich, buttery sweetness and just the right touch of sea salt, this treat is a luscious tussle of sweet and salty that delights every dessert lover’s palate. Imagine biting into a buttery cookie crust that yields to a velvety caramel layer—smooth, indulgent, and as golden as sunshine. Experience the perfect blend of rich, buttery caramel with a hint of sea salt, all atop a buttery cookie crust. This delightful treat is a crowd-pleaser at any gathering! Whether you’re hosting a family brunch, bringing a dish to a potluck, or simply craving a homemade indulgence, these salted caramel bars deliver on flavor, texture, and that irresistible “just-one-more” factor.
As an intermediate-level recipe, you’ll spend about 20 minutes prepping, 20 minutes baking, and then rest your creation in the fridge for roughly 2 hours. Slicing into 16 generous squares, each serving rings in at around 350 calories—perfect for savoring slowly with friends or family. With pantry staples like granulated sugar, butter, flour, and a hint of vanilla extract, this recipe transforms simple ingredients into an unforgettable dessert. So roll up your sleeves, preheat that oven to 350°F (177°C), and let’s dive into a caramel adventure that’s as fun to make as it is to eat.
KEY INGREDIENTS IN SALTED CARAMEL DESSERT
Every delicious bake starts with top-notch ingredients, and our salted caramel dessert is no exception. From the crystalline sweetness of sugar to the creamy richness of butter and cream, each component plays a starring role in building layers of flavor and texture.
- Granulated sugar
This is the heart of the caramel sauce. As it melts, it transforms into a deep amber liquid, providing that signature sweet foundation and glossy sheen.
- Unsalted butter (room temperature)
Cut into pieces, it’s whisked into the molten sugar to create a creamy, cohesive sauce. Having it at room temperature ensures it melds smoothly without seizing.
- Heavy cream (room temperature)
Drizzled slowly into the hot caramel, it adds luscious creaminess and balances the intensity of the sugar, yielding that dreamy, pourable texture.
- Sea salt
A sprinkle of this crystalline gem intensifies flavor, cutting through the sweetness with a hint of briny contrast that elevates every bite.
- All-purpose flour
The base of our cookie crust, it provides structure and a tender crumb, forming the perfect platform for our rich caramel layer.
- Unsalted butter (melted)
Combined with flour, powdered sugar, and vanilla, this melted butter binds the crust ingredients, delivering a rich, buttery foundation that’s crisp around the edges.
- Powdered sugar
Added to the crust mix, it enhances tenderness and lends just a touch of sweetness without weighing down the cookie base.
- Vanilla extract
A whisper of pure vanilla rounds out the crust’s flavor, adding floral warmth that harmonizes beautifully with the caramel.
- Dark chocolate chips (optional)
Melted and drizzled on top, they introduce a bittersweet accent and a visual flourish that complements the salted caramel’s golden hue.
HOW TO MAKE SALTED CARAMEL DESSERT
Ready to embark on this indulgent journey? Follow these steps carefully to achieve that dreamy balance of textures—from crisp cookie base to silky caramel top—and don’t be afraid to watch, learn, and have fun along the way.
1. Begin by making the salted caramel sauce. In a medium saucepan set over medium heat, add the granulated sugar and stir constantly with a rubber spatula or wooden spoon. You’ll notice the sugar first clumping together before melting into a thick, amber-colored liquid. Keep stirring to prevent any burning spots.
2. Once the sugar has fully melted into a smooth syrup, add the room-temperature unsalted butter, piece by piece. The mixture will rapidly bubble—that’s normal. Continue stirring until the butter has completely melted in, about two minutes. This step gives your caramel that ultra-rich, buttery flavor.
3. Very slowly, drizzle in the room-temperature heavy cream while stirring continuously. Expect more bubbling and a dramatic transformation as the cream integrates. Once combined, allow the mixture to boil gently for one minute to thicken slightly.
4. Remove the pan from heat and stir in the sea salt. This final twist of flavor enhances the overall profile. Let the caramel cool to room temperature—you’ll see it continue to thicken as it rests.
5. While the caramel cools, preheat your oven to 350°F (177°C) and prepare the crust. In a large mixing bowl, combine all-purpose flour, melted unsalted butter, powdered sugar, and vanilla extract. Stir until all ingredients are fully incorporated, forming a soft, crumbly dough.
6. Line a 9×9-inch baking pan with parchment paper and press the dough evenly into the bottom. Aim for a uniform layer so it bakes to a consistent texture.
7. Bake for 15–20 minutes or until the edges are very lightly browned. Remove from the oven and let the crust cool completely in the pan.
8. Once the crust is cool, pour the cooled salted caramel sauce over it. Use an offset spatula or the back of a spoon to spread it into an even layer.
9. If you’re adding an extra flourish, melt the dark chocolate chips in short bursts in the microwave or over a double boiler. Drizzle the melted chocolate over the caramel in a decorative pattern.
10. Transfer the pan to the refrigerator and chill for about two hours, or until the caramel is fully set.
11. After the chill time, lift the parchment paper and slice the dessert into bars or squares. A sharp knife gives the cleanest cuts.
12. Serve the bars at room temperature to enjoy the ideal contrast between the tender crust and the smooth, slightly gooey caramel.
SERVING SUGGESTIONS FOR SALTED CARAMEL DESSERT
Presenting these decadent bars is part of the fun—there’s nothing like gathering friends around a plate of glossy, golden squares and watching eyes light up. To make each bite a little celebration, consider how you plate, garnish, and accompany these treats. Whether it’s the elegance of a single bar perched beside a scoop of ice cream or the rustic charm of a stack on a wooden board, serving style can turn a simple dessert into a memorable moment. For 16 servings that average around 350 calories each, you can mix and match these ideas depending on your occasion: casual coffee chats, formal dessert spreads, or gifting homemade sweetness in charming tins. Elevate your presentation and watch your salted caramel dessert become the star of any gathering.
- Pair with a scoop of vanilla ice cream for a delightful hot-and-cold contrast. Place the ice cream on a shallow plate, then lean a bar against it so the melting cream mingles with the buttery crust.
- Garnish each square with a sprinkle of crushed pecans or walnuts to add crunch and a toasty, nutty aroma. Press a few pieces gently into the caramel before chilling for a perfect adhesion.
- Serve alongside fresh berries—raspberries or sliced strawberries add a pop of color and a bright, tart counterpoint to the caramel’s sweetness. Lay the fruit in a crescent around the bars for a pretty presentation.
- Drizzle with extra melted chocolate (dark, milk, or white) in thin ribbons across each piece. Use a fork or a piping bag with a small tip to create delicate lines that double as art and flavor boost.
HOW TO STORE SALTED CARAMEL DESSERT
Proper storage ensures that every bite tastes as fresh as the day you made it. The buttery crust stays crisp, and the caramel retains its silky smoothness when you follow a few simple tips. Since this dessert benefits from chilling time, it’s happiest when kept cool and protected from excess moisture or strong odors. Whether you’re saving leftovers for a midweek treat or preparing bars in advance for an event, these methods will maintain the ideal texture and flavor. Pay attention to container type, temperature, and layering so your salted caramel bars stay picture-perfect until you’re ready to serve again.
- Refrigerator (Best Short-Term): Place the sliced bars in a single layer inside an airtight container lined with parchment paper. Keep at the back of the fridge where temperatures stay most consistent. They’ll stay fresh for up to five days.
- Freezer (For Longer Storage): Individually wrap each square in plastic wrap, then transfer to a sealable freezer bag. Label with the date and freeze for up to two months. Thaw in the refrigerator overnight before serving.
- Caramel Sauce Only: Spoon leftover cooled salted caramel into a glass jar with a tight lid. Store in the fridge for up to two weeks. Gently warm in short microwave bursts or in a warm water bath before reusing.
- Layer Protection: If stacking bars in a container, place parchment or wax paper between layers to prevent sticking. This keeps edges crisp and your bars looking pristine.
CONCLUSION
From the first bubbling notes of melting sugar to the final set of that golden, glossy surface, this salted caramel dessert journey is a true celebration of flavor, texture, and the joy of homemade treats. You’ve learned how simple pantry ingredients—granulated sugar, butter, cream, a dash of sea salt, flour, and a touch of vanilla—transform into layers of pure indulgence atop a tender, buttery cookie crust. We’ve walked step by step through melting sugar into amber perfection, carefully incorporating butter and cream, and crafting a crust that bakes to light golden edges. Along the way, we’ve explored serving ideas, storage tips, and little ways to customize—or elevate—each bar with ice cream, nuts, berries, or chocolate drizzle. Whether you’re an intermediate-level baker looking to expand your repertoire or a caramel fanatic seeking that perfect sweet-salty harmony, this recipe has something special for you to print, save, and savor again and again. Don’t forget to tuck this guide into your recipe binder or pin it on your kitchen board for easy reference. And keep scrolling—there’s an FAQ below to answer any lingering questions!
If you try these salted caramel bars, I’d love to hear how they turned out! Did your kitchen fill with the intoxicating scent of bubbling sugar? Which serving suggestion stole the show at your gathering? Whether you have a question about technique, a tip on customizing the crunch level, or simply want to share your caramel-loving triumphs, leave a comment below. Your feedback not only helps me refine these recipes but also inspires fellow home cooks to dive in with confidence. Happy baking, and here’s to many more golden, gooey moments in your kitchen!
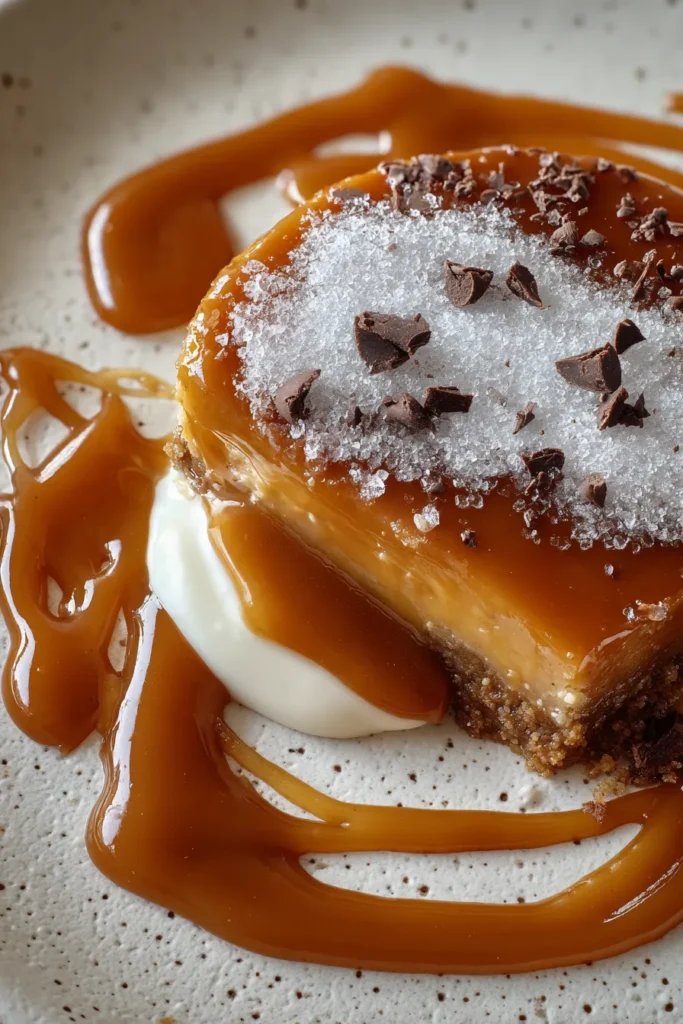

Salted Caramel Dessert
Description
Experience the perfect blend of rich, buttery caramel with a hint of sea salt, all atop a buttery cookie crust. This delightful treat is a crowd-pleaser at any gathering!
Ingredients
Instructions
-
Begin by making the salted caramel sauce. In a medium saucepan over medium heat, melt the granulated sugar, stirring constantly with a rubber spatula or wooden spoon. The sugar will form clumps and eventually melt into a thick amber-colored liquid as you continue to stir. Be careful not to burn.
-
Once the sugar is completely melted, add the unsalted butter. The mixture will rapidly bubble. Stir the butter into the caramel until fully melted, about 2 minutes.
-
Very slowly, drizzle the heavy cream into the caramel while stirring. Again, expect the mixture to bubble up. Allow the mixture to boil for 1 minute.
-
Remove the pan from heat, and stir in the sea salt. Allow to cool to room temperature before using. While it cools, the caramel will continue to thicken.
-
To prepare the base or crust for the dessert, preheat the oven to 350°F (177°C).
-
In a large bowl, combine the flour, melted butter, powdered sugar, and vanilla extract. Mix until ingredients are fully incorporated.
-
Press the dough evenly into the bottom of a 9x9-inch baking pan lined with parchment paper.
-
Bake in the preheated oven for 15-20 minutes or until the edges are very lightly browned. Remove from oven and allow to cool completely.
-
Once the crust is cool, pour the salted caramel sauce over the baked cookie crust. Spread it into an even layer.
-
If desired, melt the dark chocolate chips and drizzle over the salted caramel layer.
-
Refrigerate the dessert until the caramel is set, about 2 hours.
-
Once set, slice the dessert into bars or squares. Serve at room temperature for the best texture.
Note
- You can store the leftover salted caramel in the refrigerator for up to 2 weeks. Warm it up before using it again.
- If you prefer a thicker caramel layer, consider doubling the caramel recipe.
- For an added crunch, you can sprinkle crushed pecans or walnuts over the caramel before it sets.
- This dessert pairs wonderfully with a scoop of vanilla ice cream.
- Ensure all ingredients for the caramel are at room temperature to avoid splattering when added.

