

Every autumn morning feels a little cozier when you wake up to the thought of biting into a crisp, golden pastry hiding a sweet pumpkin filling. There’s something addictive about that flaky dough giving way to the smooth warmth of pumpkin puree, sweetened with brown sugar and kissed by autumn spices. These homemade Pumpkin Pie Pop Tarts capture everything we love about fall in one handheld treat. They’re guaranteed to bring a smile whether you’re enjoying a quiet breakfast at home or surprising friends at a weekend brunch gathering. The combination of buttery crust, spiced pumpkin center, and glossy vanilla glaze makes each bite a mini celebration of the season.
Beyond their mouthwatering taste, these pop tarts are surprisingly simple to make. With just a handful of everyday ingredients and about 20 minutes of prep time, you’ll be assembling these pastries faster than the oven preheats. Once they’re tucked together and baked to golden perfection—which takes about 25 minutes—they’ll rest briefly before you finish them with a drizzle of sweet glaze. In no time, you’ll have a batch of eight irresistible tarts ready to serve. Whether you keep them all for yourself or package them up as edible gifts, you’ll fall in love with how easy and fun it is to create this twist on a fall classic.
KEY INGREDIENTS IN PUMPKIN PIE POP TARTS
To make these flaky, flavor-packed pop tarts, you’ll rely on a mix of pantry staples and simple baking essentials. Each element plays an important role in creating that balance between tender crust and velvety, spiced filling.
- Refrigerated pie crust: Provides the buttery, flaky base and top layer that bakes up beautifully golden. Using pre-made crust saves time without sacrificing that homemade texture.
- Canned pumpkin puree: Gives the filling its rich orange hue and silky mouthfeel. Pumpkin brings natural sweetness and that unmistakable fall character.
- Brown sugar: Adds depth with its molasses notes, enhancing the pumpkin’s sweetness and supporting caramelization at the edges.
- Pumpkin pie spice: A fragrant blend of cinnamon, ginger, nutmeg, and cloves that infuses each bite with cozy warmth.
- Salt: Balances sweetness and heightens the flavors of pumpkin and spice, making every note pop.
- Egg (for egg wash): Brushed on the pastry edges and tops, it ensures a glossy, golden finish and seals the layers together.
- Powdered sugar: Forms the base of the sweet glaze, offering a smooth canvas for milk and vanilla to shine.
- Milk: Thins the powdered sugar into a luscious drizzle or spreadable icing.
- Vanilla extract: Adds aromatic sweetness and rounds out the glaze with familiar bakery flavor.
- Coarse sugar: Sprinkled on top for optional crunch and decorative sparkle, giving a playful textural contrast.
HOW TO MAKE PUMPKIN PIE POP TARTS
Let’s roll up our sleeves and transform these simple ingredients into mouthwatering pop tarts. By following a few straightforward steps, you’ll achieve that perfect combination of crisp pastry and rich pumpkin filling.
1. Preheat your oven to 350°F (175°C) and line a baking sheet with parchment paper. This ensures even baking and easy cleanup.
2. Unroll the refrigerated pie crusts onto a lightly floured surface. Gently use a rolling pin to slightly flatten and smooth out any creases.
3. Cut the pie crusts into rectangles, about 3×4 inches each. Aim for roughly eight rectangles per sheet to yield a total of sixteen layers for eight pop tarts.
4. In a medium bowl, mix together the pumpkin puree, brown sugar, pumpkin pie spice, and salt until the mixture is smooth and evenly spiced.
5. Spoon about a tablespoon of the pumpkin mixture onto half of the rectangles. Spread it into an even layer, leaving a small border around each edge for sealing.
6. Brush the beaten egg around the edges of the filled rectangles to create an egg wash seal.
7. Place another crust rectangle on top of each filled base. Press the edges firmly with the tines of a fork to secure the two layers together.
8. Puncture the tops of each pop tart with a fork in a few places to allow steam to escape during baking.
9. Arrange the assembled pop tarts on the prepared baking sheet and brush their tops with any remaining egg wash for shine.
10. Bake in the preheated oven for 20–25 minutes, or until each tart is puffed and golden brown along the edges.
11. While the pop tarts bake, prepare the glaze by whisking together powdered sugar, milk, and vanilla extract in a small bowl until smooth and drizzly.
12. Once baked, remove the pop tarts and let them cool on a rack for about 10 minutes.
13. Drizzle or spread the vanilla glaze over each pop tart.
14. Optionally, sprinkle coarse sugar over the glaze for extra crunch, then allow the glaze to set before serving. Enjoy the seasonal delight of homemade Pumpkin Pie Pop Tarts!
SERVING SUGGESTIONS FOR PUMPKIN PIE POP TARTS
When it comes time to plate these pop tarts, presentation and pairing can elevate your autumnal treat to showstopper status. Whether you’re hosting a brunch or simply treating yourself, these serving ideas will inspire creativity and make every bite feel special. From warm, comforting accompaniments to decorative garnishes, you can customize how you showcase these pastries based on the occasion and your personal style.
- Serve warm with whipped cream: Heat each pop tart briefly in a toaster oven or conventional oven, then top with a dollop of freshly whipped cream and a light dusting of cinnamon for a café-style experience.
- Pair with a steaming beverage: Create the ultimate morning ritual by serving alongside a spiced latte, chai tea, or a mug of hot chocolate. The interplay of flavors will feel like a cozy hug in a cup.
- Arrange on a seasonal dessert board: Surround your pop tarts with sliced apples, candied pecans, and pumpkin-spiced nuts on a wooden platter. Add small bowls of extra glaze or caramel sauce for dipping.
- Garnish with autumnal twists: Before the glaze sets, press in a few chopped toasted pumpkin seeds or a light sprinkle of cinnamon sugar. The subtle crunch and added warmth will take your presentation to the next level.
HOW TO STORE PUMPKIN PIE POP TARTS
Maintaining that fresh-baked taste and perfect texture requires proper storage. Whether you want to savor these pop tarts over a couple of days or stash extras for later, following the right method will keep them tasting like they just came out of the oven. Factors like moisture, temperature, and container choice all play a role in preserving both the flaky crust and the luscious filling.
- Store at room temperature: Once fully cooled, place the pop tarts in an airtight container lined with parchment paper. They will remain fresh and crispy for up to two days without losing flavor.
- Refrigerate for extended freshness: If you want to keep them a bit longer (up to a week), refrigerate in a sealed container. Let them come to room temperature or briefly warm in a low oven before enjoying.
- Freeze for longer storage: Layer pop tarts between sheets of wax or parchment paper inside a freezer-safe bag or container. Freeze flat for up to one month. To serve, thaw at room temperature and reheat in a toaster oven.
- Reheat for fresh-baked taste: Warm individual tarts in a 300°F oven for 5–7 minutes or simply pop them into a toaster oven. This restores that flaky texture and slightly melty glaze for an almost freshly baked experience.
CONCLUSION
From the very first bite of buttery crust to the last lick of sweet vanilla glaze, these Pumpkin Pie Pop Tarts are a celebration of fall flavors wrapped up in a convenient, handheld pastry. We’ve covered everything from the key ingredients that bring depth and warmth to the filling, to the step-by-step process that yields golden, flaky results every time. You’ve learned how to seal and bake the tarts perfectly, then finish them with a simple yet irresistible glaze. Plus, we’ve explored creative ways to serve these treats—with whipped cream, spiced beverages, and decorative boards—so you can customize your presentation for family breakfasts or festive gatherings. Storage tips ensure that your pop tarts stay fresh whether you enjoy them right away or save extras for later.
Feel free to print this article and keep it in your recipe binder or bookmark it for when the craving strikes. You’ll also find a FAQ below to answer any lingering questions you might have. If you give these pop tarts a try, I’d love to hear how they turned out! Please leave your comments, questions, or feedback if you need a hand with any of the steps or if you discover a fun twist of your own. Happy baking, and here’s to many cozy mornings filled with the sweet taste of pumpkin spice!
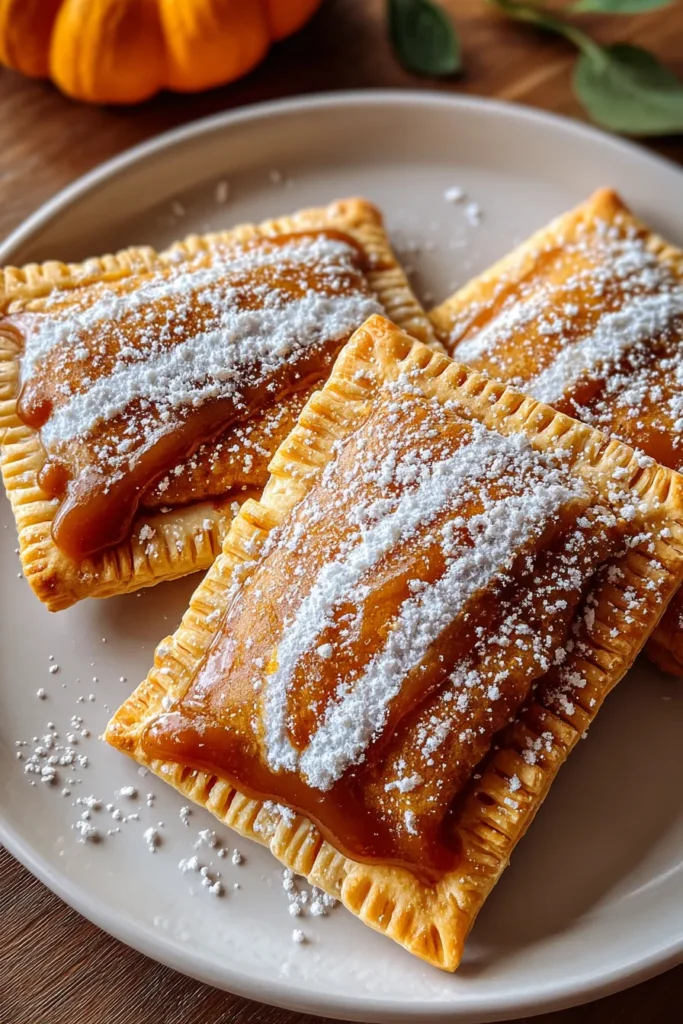

Pumpkin Pie Pop Tarts
Description
These delightful pop tarts blend the rich flavors of pumpkin and warm spices, wrapped in a flaky crust. They're a fun and tasty twist on a classic fall dessert!
Ingredients
Instructions
-
Preheat your oven to 350°F (175°C) and line a baking sheet with parchment paper.
-
Unroll the refrigerated pie crusts onto a lightly floured surface. Use a rolling pin to slightly flatten each crust.
-
Cut the pie crusts into rectangles, about 3x4 inches. You should have approximately 8 rectangles per sheet.
-
In a medium bowl, mix together the pumpkin puree, brown sugar, pumpkin pie spice, and salt until smooth.
-
Spoon about a tablespoon of the pumpkin mixture onto half of the rectangles. Spread evenly, leaving a small border around the edges.
-
Brush the beaten egg around the edges of the filled rectangles to help seal.
-
Place another rectangle on top of each filled rectangle. Press the edges with a fork to seal the two layers together.
-
Puncture the tops of each pop tart with a fork to allow steam to escape during baking.
-
Place the pop tarts on the prepared baking sheet and brush the tops with the remaining egg wash.
-
Bake in the preheated oven for about 20-25 minutes, or until the crust is golden brown.
-
While the pop tarts bake, prepare the glaze by whisking together powdered sugar, milk, and vanilla extract in a small bowl until smooth.
-
Once pop tarts are baked and cooled, drizzle or spread the glaze over the top of each one.
-
Optionally, sprinkle coarse sugar over the glazed pop tarts for added texture.
-
Allow the glaze to set before serving. Enjoy the seasonal delight of homemade Pumpkin Pie Pop Tarts!
Note
- These pop tarts are great for breakfast or dessert, especially during the fall.
- You can store leftovers in an airtight container at room temperature for up to 2 days.
- Customize your glaze with a bit of cinnamon for an extra touch of spice.
- For a vegan version, you can use a dairy-free crust and substitute the egg wash with plant-based milk.

