

There’s something undeniably comforting about a dessert that comes together in minutes but feels like a warm hug on a crisp autumn evening. The Easy Pumpkin Dump Cake is exactly that kind of magic—an effortless fall favorite you’ll want to make again and again! With just a handful of pantry staples and a cheerful 15-minute prep time, this beginner-friendly dessert transforms classic pumpkin flavors into a luscious layer of pure sweetness, all crowned with a golden cake topping and optional pecan crunch. Whether you’re racing the clock before a cozy family dinner or sneaking in a quick treat for yourself, this recipe delivers big on taste with minimal effort. Even novice bakers will marvel at how smoothly the ingredients meld together, weaving rich cinnamon-scented pumpkin through every bite.
Once this dump cake spends 50 to 60 minutes in a hot 350°F oven, your kitchen will fill with the lovely scent of warming spices that set hearts aflutter. After a brief 10-minute rest, the cake emerges with a set center and bubbling edges, ready to be sliced into about twelve generous servings—each slice around 350 calories of pure seasonal delight. Serve it at your next Halloween gathering, cozy weekend brunch, or as a sweet finale to your Thanksgiving feast. It’s the perfect recipe for anyone craving that classic pumpkin pie vibe without the fuss of a traditional pie crust, making it a standout among your fall recipes and an easy dessert that feels anything but simple.
KEY INGREDIENTS IN PUMPKIN DUMP CAKE
Every great dish starts with quality ingredients, and this Pumpkin Dump Cake is no exception. Each component plays a special role in creating the perfect balance of creamy pumpkin, sweet cake, and tender crunch. Here’s what you’ll need:
- Pumpkin Puree
Brings that rich, velvety pumpkin flavor and bright orange hue. It forms the moist base layer, carrying the warming spices and delivering a natural sweetness.
- Evaporated Milk
Adds creamy body without watering down the puree. It helps thin the pumpkin slightly for even baking and contributes to a custard-like texture.
- Eggs
Act as a binding agent, giving structure to the pumpkin layer and helping it set properly in the baking process.
- Granulated Sugar
Sweetens the pumpkin mixture and balances the earthy puree, ensuring each mouthful tastes like a perfect fall treat.
- Ground Cinnamon
Offers classic warmth and sweetness, reinforcing the cozy flavor profile we all love in autumn desserts.
- Ground Ginger
Imparts a subtle zing that brightens the overall taste and pairs harmoniously with other spices.
- Ground Nutmeg
Adds a slightly nutty, aromatic note that deepens the pumpkin’s natural richness.
- Ground Cloves
Delivers a touch of earthy intensity, rounding out the spice blend with a hint of complexity.
- Salt
Enhances all the flavors, preventing the dessert from tasting flat and balancing the sweetness.
- Yellow Cake Mix
Serves as the easy “dump” topping, creating a fluffy, golden crust with minimal effort and maximum buttery flavor.
- Unsalted Butter, Melted
Drizzled over the dry cake mix, it transforms the powder into a tender, golden crust and binds everything together.
- Chopped Pecans (optional)
Add delightful crunch and a nutty counterpoint to the soft pumpkin layer, elevating texture and taste.
- Whipped Cream or Vanilla Ice Cream
Provides a cool, creamy contrast when serving, melting slightly over the warm cake for extra indulgence.
HOW TO MAKE PUMPKIN DUMP CAKE
This recipe is all about simplicity without sacrificing flavor. Below, you’ll find step-by-step instructions that turn these key ingredients into a luscious, spiced dessert perfect for any occasion.
1. Preheat your oven to 350°F (175°C) and grease a 9×13-inch baking dish with cooking spray or butter. Ensuring the pan is well-coated prevents sticking and makes cleanup a breeze.
2. In a large mixing bowl, combine the pumpkin puree, evaporated milk, eggs, sugar, cinnamon, ginger, nutmeg, cloves, and salt. Use a whisk to blend everything until the mixture is smooth and the spices are evenly distributed.
3. Pour the whipped-together pumpkin mixture into the prepared baking dish, using a spatula to spread it into an even layer that covers the bottom completely.
4. Sprinkle the dry yellow cake mix evenly over the pumpkin layer, taking care to cover every inch so you’ll get that characteristic buttery cake topping throughout.
5. Drizzle the melted butter in a steady stream over the cake mix. Aim for full coverage, allowing the butter to saturate the dry mix and create a uniform golden crust.
6. If you’re using pecans, scatter the chopped nuts across the top, adding a crunchy contrast that complements the creamy pumpkin below.
7. Bake in the preheated oven for 50–60 minutes, or until the edges are golden brown and the center feels set when gently shaken. You’ll know it’s ready when you see the pumpkin layer bubbling slightly at the edges.
8. Allow the cake to cool for about 10 minutes before slicing. Serve each piece warm or at room temperature with a dollop of whipped cream or a scoop of vanilla ice cream.
SERVING SUGGESTIONS FOR PUMPKIN DUMP CAKE
Once your Pumpkin Dump Cake emerges from the oven in all its golden glory, the real fun begins—presenting and sharing this autumnal delight with eager friends and family. Serving is more than just plating; it’s an opportunity to highlight the soft pumpkin base, crunchy cake topping, and warming spices that make this dessert a fall stand-out. Whether you’re cozying up on a chilly afternoon or crafting a centerpiece for your Thanksgiving table, these ideas will help you personalize every slice. I often reach for my favorite rustic stoneware to emphasize the cake’s homestyle charm, but fine porcelain can lend an elegant touch for holiday gatherings. Consider pairing each portion with warm spiced drinks or chilled glasses of dessert wine to balance sweetness and temperature contrast. From simple dollops of whipped cream to layered parfaits featuring chunks of cake and whipped topping, these suggestions ensure each serving feels intentional, festive, and delicious.
- Serve Warm
Plate the cake while it’s still warm, so the crumbly top stays slightly crisp. Warm plates also keep the dessert cozy longer and accentuate the spiced pumpkin flavors.
- Add a Scoop of Vanilla Ice Cream
Place a cold, creamy scoop on each slice. As it melts into the pumpkin layer, you get a luscious temperature contrast that feels downright decadent.
- Sprinkle Extra Pecans
Toast chopped pecans lightly in a dry skillet before adding them on top. The extra toasting enhances their nutty aroma and adds a satisfying crunch.
- Dust with Cinnamon or Powdered Sugar
A light dusting of cinnamon or powdered sugar creates a beautiful presentation and a hint of extra sweetness or spice with each bite.
HOW TO STORE PUMPKIN DUMP CAKE
After savoring the initial festive servings of your Pumpkin Dump Cake, knowing how to store any extras properly can mean enjoying that seasonal magic for days to come. With the right techniques, your leftover slices will maintain their tender pumpkin layer, buttery cake topping, and optional pecan crunch without drying out or absorbing unwanted fridge odors. From wrapping at room temperature for short-term treats to deep chilling or freezing for longer storage, each method offers a reliable way to hold on to that homemade warmth. When it’s time to revisit your cake, simple reheating in an oven or microwave brings back that just-baked sensation. Below, you’ll find four detailed approaches—complete with container suggestions and timing guidelines—so every slice feels freshly baked and ready to enjoy.
- Room Temperature Storage
Once fully cooled, cover the baking dish tightly with plastic wrap or aluminum foil. At room temperature, the cake stays moist for about one day—perfect for serving the next afternoon.
- Short-Term Refrigeration
Transfer slices to an airtight container and store in the refrigerator for up to three days. This method preserves the pumpkin’s moisture and keeps the topping from becoming too dense.
- Freezing Individual Portions
Flash-freeze single slices on a baking sheet, then move them into a freezer-safe bag with parchment paper between each slice. They’ll keep for up to three months.
- Freezing the Whole Cake
Wrap the entire cooled cake tightly in plastic wrap, then in a layer of foil. Label with the date and freeze for up to two months. Thaw overnight in the fridge before reheating.
CONCLUSION
As we’ve walked through every step of crafting this Easy Pumpkin Dump Cake—our fall favorite you’ll want to make again and again—you’ve learned how simple it is to blend pantry staples like pumpkin puree, cake mix, and warming spices into a show-stopping dessert. From the 15-minute prep and beginner-friendly instructions to the 50–60 minutes of cozy oven baking, this recipe is all about making your life easier without sacrificing flavor. You’ve discovered how each key ingredient, from evaporated milk to optional pecans, plays a vital role in creating that perfect balance of smooth pumpkin, sweet cake, and crunchy topping. Serving suggestions highlight ways to personalize each slice, and storage tips ensure you can savor leftovers for days. Don’t forget that this article is printable for your recipe binder, so you can easily reference it whenever inspiration strikes. Scroll down to find a helpful FAQ section that answers common questions, and keep this guide at your fingertips for stress-free baking all season long.
I hope this deep dive into Pumpkin Dump Cake has ignited your passion for simple baking and inspired you to fill your kitchen with the delightful scents of cinnamon and nutmeg. Whether you’re celebrating with friends on Thanksgiving or sneaking a midnight treat for yourself, this approachable dessert strikes the perfect balance between ease and indulgence. If you give it a try, please leave a comment below sharing your experience—did you swap in pumpkin pie spice, add extra nuts, or discover a new topping you love? Your questions, stories, and feedback help us all become better home cooks, and I can’t wait to hear about your baking adventures. Remember, I’m here to help troubleshoot any sticky spots or share extra tips if you need them. Happy baking, and may your kitchen always be filled with warmth, laughter, and the cozy flavors of fall!
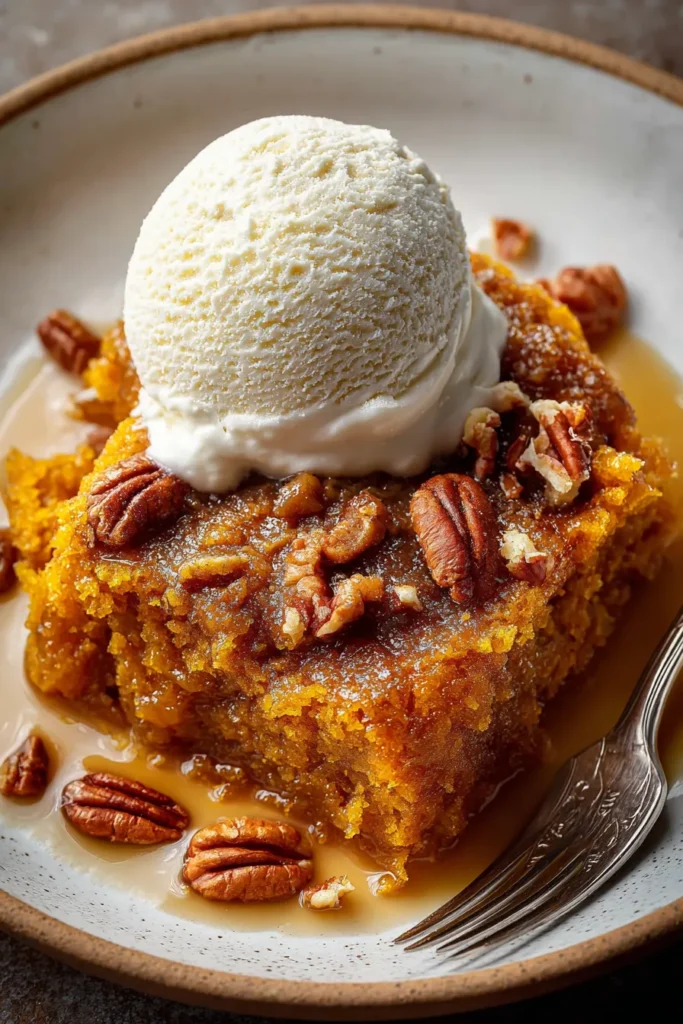

Pumpkin Dump Cake
Description
This Pumpkin Dump Cake features a luscious pumpkin layer topped with a buttery cake mix and chopped pecans, creating a warm and comforting dessert that’s perfect for any occasion.
Ingredients
Instructions
-
Preheat your oven to 350°F (175°C). Grease a 9x13-inch baking dish with cooking spray or butter.
-
In a large mixing bowl, combine the pumpkin puree, evaporated milk, eggs, sugar, cinnamon, ginger, nutmeg, cloves, and salt. Whisk everything together until smooth and well combined.
-
Pour the pumpkin mixture into the prepared baking dish and spread it evenly.
-
Sprinkle the dry cake mix evenly over the pumpkin mixture, ensuring it covers the surface completely.
-
Drizzle the melted butter evenly over the top of the cake mix. Try to cover as much of the dry mix as possible.
-
If using, sprinkle the chopped pecans on top of the butter.
-
Bake in the preheated oven for 50-60 minutes, or until the edges are golden brown and the center is set. You should see the pumpkin layer bubbling slightly at the edges.
-
Allow the cake to cool slightly before serving. Serve warm or at room temperature with a dollop of whipped cream or a scoop of vanilla ice cream.
Note
- This cake is called "dump" cake because some of the ingredients are literally dumped in the pan, making it a quick and easy recipe.
- You can substitute pumpkin pie spice for the individual spices if you prefer.
- Adding pecans on top not only gives a delightful crunch but also complements the pumpkin flavor beautifully.
- This recipe can be prepared a day in advance. Simply reheat it before serving for best taste.
- Store any leftovers in the refrigerator for up to 3 days.

