

Healthy No-Bake Strawberry Cheesecake Protein Bites blend creamy cheesecake filling studded with fresh strawberry pieces and a nutty oat-protein shell for a tender, chewy snack that packs a protein punch. With cheesy strawberry swirls meeting oat and almond protein, each bite balances subtle tang, light sweetness, and high-protein goodness—no oven required. Whether you’re craving a clean-eating dessert or a grab-and-go treat, this intermediate recipe is your new kitchen BFF. Let’s dive in and whip up a batch you’ll want to keep coming back to!
Key Ingredients
Before getting started, gather these simple yet powerful ingredients that make each bite shine. Every component—from the oat-almond base to the strawberry-studded cheesecake layer—plays a key role in delivering that perfect texture and flavor balance.
- 1 cup (90 g) quick oats or rolled oats, finely ground: Provides a hearty, chewy base that binds the bites and adds texture.
- 1/4 cup (30 g) almond flour or finely ground almonds: Contributes a nutty flavor and tender crumb to the base.
- 2 scoops (about 60 g) vanilla or unflavored whey/plant protein powder: Boosts the protein content and enhances the vanilla notes.
- 2 tbsp (24 g) coconut sugar, light brown sugar, or granulated sweetener of choice: Adds natural sweetness to balance the tang of the cheesecake layer.
- 1/4 tsp fine sea salt: Elevates and balances all the flavors in both layers.
- 3 tbsp (45 g) plain Greek yogurt (or thick dairy-free yogurt): Adds creaminess and moisture to the base mixture.
- 2 tbsp (30 ml) unsweetened almond milk (or milk of choice), plus 1–3 tbsp extra if needed: Adjusts the consistency, ensuring a cohesive dough.
- 1 tsp pure vanilla extract: Infuses a warm flavor note that complements the protein powder.
- 1 cup (140 g) finely diced fresh strawberries (plus extra for garnish if desired): Delivers fresh bursts of fruit flavor in the cheesecake layer.
- 4 oz (115 g) reduced-fat cream cheese or dairy-free cream cheese, softened to room temperature: Creates the classic cheesecake creaminess and tang.
- 1/3 cup (80 g) plain or vanilla Greek yogurt (or thick dairy-free yogurt): Lightens the filling with extra creaminess and subtle tang.
- 1–2 tbsp (15–30 ml) honey, maple syrup, or agave syrup, to taste: Provides liquid sweetness and balances strawberry acidity.
- 1 1/2 scoops (about 45 g) vanilla protein powder: Packs extra protein into the cheesecake filling without altering texture.
- 1 tsp lemon juice: Brightens the filling with refreshing acidity.
- 1/2 tsp pure vanilla extract: Enhances the aroma and sweetness of the cheesecake layer.
- Pinch of fine sea salt: Fine-tunes the flavor balance, ensuring a perfect sweet-tart combo.
- 3–4 tbsp (15–20 g) finely crushed freeze-dried strawberries: Offers a vibrant pink coating and intense strawberry flavor.
- 2–3 tbsp (15–20 g) finely ground oats, almond flour, or coconut flour: Provides a neutral “classic cheesecake” coating option.
- Extra diced fresh strawberries, for pressing on top: Adds a pop of fresh garnish and texture.
- A drizzle of melted white chocolate or yogurt chips, for decoration (optional): Delivers a sweet, visually appealing finish.
How To Make Healthy No-Bake Strawberry Cheesecake Protein Bites
Ready to turn these ingredients into delightful protein bites? This no-bake method walks you through prepping, mixing, chilling, and decorating—no oven needed. By following these steps, you’ll create tender, cheesecake-like bites with juicy strawberry pockets, perfect for a healthy snack or dessert.
1. Line a small baking sheet or flat container with parchment paper, then pulse whole rolled oats in a food processor or blender until they resemble a fine, flour-like texture.
2. In a medium bowl, whisk together ground oats, almond flour, protein powder, coconut sugar, and salt to evenly distribute the dry ingredients. Add Greek yogurt, almond milk, and vanilla extract, stirring with a spoon or spatula until a thick, slightly sticky dough forms. Adjust with extra almond milk or oat flour/protein powder as needed for the right consistency.
3. Transfer the base mixture to the fridge for 10–15 minutes to firm up, making it easier to roll later.
4. In another bowl, beat softened cream cheese until smooth with a spoon, spatula, or hand mixer. Stir in Greek yogurt, honey or maple syrup, lemon juice, vanilla extract, and salt. Add vanilla protein powder and mix until thick like a soft frosting. Gently fold in the diced strawberries without crushing them.
5. For swirled bites, remove the base from the fridge, add half the cheesecake mixture, and gently fold to create marbled streaks. Reserve the rest of the cheesecake layer. For filled truffle-style bites, keep both mixtures separate for wrapping later.
6. If making filled bites, scoop 1/2–1 tsp cheesecake mounds onto a parchment-lined plate and freeze for 15–20 minutes to firm up.
7. Scoop 1½–2 tbsp of the base mixture, roll into balls between your palms, or flatten into 2–2.5-inch discs if filling. Lightly oil or dust your hands with oat flour to prevent sticking.
8. To fill, place a frozen cheesecake mound in the center of each disc, wrap the base around it, pinch to seal, and roll into a smooth ball.
9. Prepare coatings by placing crushed freeze-dried strawberries in one bowl and ground oats/almond/coconut flour in another. Melt white chocolate or yogurt chips in short bursts if using.
10. Roll some bites in freeze-dried strawberries, others in the flour blend, or leave plain. Drizzle with melted white chocolate and press extra diced strawberries on top if desired.
11. Arrange bites on the parchment-lined tray without touching and refrigerate for 1–2 hours to set. For a firmer, fudgy texture, freeze for 30–45 minutes.
12. Serve chilled directly from the fridge. If frozen, let sit at room temperature for 5–10 minutes before enjoying for optimal cheesecake texture.
Serving Suggestions
These protein bites are incredibly versatile and look as good as they taste. Whether you’re hosting friends or packing lunches, here are some fun ways to present and enjoy them:
- Chilled Elegance: Arrange bites on a chilled platter straight from the fridge so their creamy center and cheesecake swirl stay perfectly set.
- Berry Garnish: Surround the bites with extra fresh strawberry slices and a few mint leaves for a burst of color and aroma.
- Chocolate Drizzle: Drizzle melted white chocolate or yogurt chips over each bite for a sweet, decorative finish.
- Snack Pack: Layer 2–3 bites in small containers lined with parchment paper for an on-the-go protein boost anywhere, anytime.
Tips For Perfect Healthy No-Bake Strawberry Cheesecake Protein Bites
A few simple tweaks will ensure your bites turn out flawless every time. From boosting protein to making allergy-friendly swaps, these pointers will help you dial in the ideal texture, sweetness, and flavor:
- For higher protein, add an extra half scoop of protein powder to either the base or cheesecake mixture, adjusting with a splash of milk or yogurt if it becomes too dry.
- For lower sugar, use a zero-calorie sweetener in the base and a small amount of liquid stevia or monk fruit in the cheesecake layer.
- For gluten-free bites, use certified gluten-free oats and ensure your protein powder is gluten-free.
- For dairy-free bites, swap Greek yogurt and cream cheese for coconut or almond-based yogurt and vegan cream cheese, and choose a plant-based protein powder.
- For a nut-free version, replace almond flour with additional oat flour and use oat milk or another nut-free milk alternative.
- For extra strawberry flavor, add 1–2 tbsp of crushed freeze-dried strawberries directly into the cheesecake mixture.
- For a stronger “cheesecake tang,” increase the lemon juice slightly and use plain (not overly sweet) yogurt.
- For a grab-and-go snack size, roll smaller, 1 tbsp portions and cut the cheesecake centers even smaller, making about 24–28 mini bites.
- For social sharing, present a variety of coatings on a platter, add fresh strawberries and mint leaves around the bites, and drizzle extra sauce or melted chocolate across the plate for a visually striking display.
How To Store It
Proper storage keeps these bites fresh and flavorful, so you can enjoy them all week long or stash some in the freezer for later:
- Refrigerator: Place bites in an airtight container lined with parchment paper. Store for up to 4–5 days for easy snacking.
- Freezer: Spread bites on a tray and freeze individually for 30–45 minutes. Transfer to a freezer-safe bag and store for up to 2 months.
- Layering: Separate layers with parchment to prevent sticking and preserve their shape and coatings.
- Serving Prep: To enjoy from frozen, thaw at room temperature for 5–10 minutes or in the fridge for 15–20 minutes to reach that perfect cheesecake-like softness.
Frequently Asked Questions
Here are some quick answers to common questions about these protein-packed bites:
- Q: How long does it take to prepare these healthy no-bake strawberry cheesecake protein bites?
Active preparation time is about 20–25 minutes, which includes grinding oats (if needed), mixing the base dough, preparing the cheesecake layer, and shaping the bites. You’ll need an additional 10–15 minutes of chilling the base before rolling and at least 1–2 hours in the refrigerator to fully set the bites. If you choose to freeze them for a firmer texture, add another 30–45 minutes.
- Q: My base mixture is too dry and crumbly or too wet and sticky. How can I fix the consistency?
If the dough is too dry, add unsweetened almond milk (or milk of choice) 1 teaspoon at a time until the mixture holds together when pressed. If it remains crumbly, you can also add a bit more Greek yogurt or an extra half scoop of protein powder to help bind. If the base is too wet, sprinkle in additional finely ground oats or protein powder one tablespoon at a time until it forms a cohesive, slightly sticky dough that can be rolled into balls without falling apart.
- Q: What’s the best way to preserve small pieces of strawberry in the cheesecake layer without turning it pink or runny?
Finely dice fresh strawberries to about 1/8- to 1/4-inch pieces and gently fold them into the smooth cheesecake mixture only after all other ingredients are fully combined. Use a spatula or spoon to fold just until the fruit is evenly dispersed—overmixing will break down the berries and release additional juice, potentially making the mixture too soft and less creamy in appearance.
- Q: How should I store these bites, and how long will they remain fresh?
Store the finished bites in an airtight container in the refrigerator for up to 4–5 days. If you prefer a firmer, almost fudge-like texture or want to extend the shelf life, freeze them in a single layer on a tray until solid, then transfer them to a freezer-safe bag or container. Frozen bites will keep for about 2 months; thaw in the fridge for 15–20 minutes or at room temperature for 5–10 minutes before serving.
- Q: Can I use frozen strawberries instead of fresh, and do I need to adjust anything?
Yes, you can substitute frozen strawberries. Thaw and drain them thoroughly to remove excess moisture, then pat dry with paper towels before dicing. This prevents excess liquid from making the cheesecake layer too runny. You may need to add a touch more protein powder to regain a thick, frosting-like consistency if additional juice seeps into the mixture.
- Q: How can I make these bites nut-free, dairy-free, or gluten-free?
For a nut-free version, replace almond flour with extra oat flour and use oat milk or another nut-free milk. For dairy-free, swap Greek yogurt and cream cheese for a thick coconut or almond-based yogurt and dairy-free cream cheese, and choose a plant-based protein powder. For gluten-free, ensure you use certified gluten-free oats and verify that your protein powder is also labeled gluten-free. Adjust liquid ratios as needed when you make these swaps to maintain the right consistency.
- Q: What’s the secret to achieving a beautiful marbled swirl effect without overmixing?
After chilling the base briefly, spoon about half of the prepared strawberry cheesecake mixture into the base dough and use a spatula to gently fold only until you see streaks of white and pink. Avoid vigorous stirring—stop as soon as marbling appears. Reserve the remaining cheesecake layer for either filling the centers of truffle-style bites or dolloping on top after shaping to enhance the contrast and keep the swirl defined.
What Makes This Special
This recipe works its magic by marrying a creamy, tangy cheesecake filling with bursts of fresh strawberries and a protein-rich oat-almond shell—all without turning on the oven. The flexibility to swirl, fill, and coat these bites means you can customize each variation to your taste or occasion. They’re fun to make, even more fun to share, and crazy delicious when you need a guilt-free pick-me-up. Feel free to print this guide and save it for later—then come back and drop a comment if you try them or have any questions!
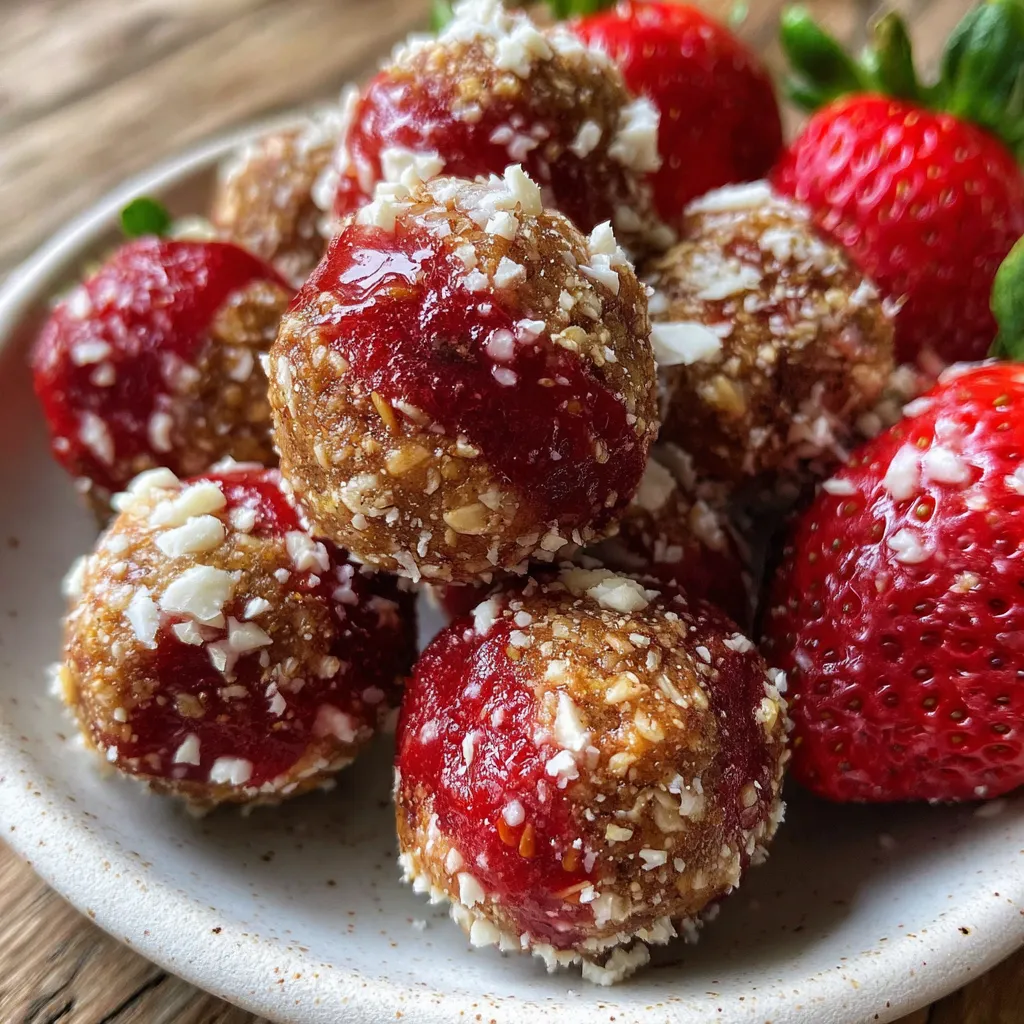

Healthy No-Bake Strawberry Cheesecake Protein Bites
Description
Creamy cheesecake filling studded with fresh strawberry pieces, coated in a nutty oat-protein shell that yields a tender, chewy texture. Each bite balances a subtle tang, light sweetness, and protein-packed goodness.
Ingredients
Instructions
-
Prepare tools and pan:
-
- Line a small baking sheet or flat container with parchment paper for chilling the bites.
-
- If your oats are whole rolled oats, pulse them in a food processor or blender until you get a fine, flour-like texture.
-
Make the base mixture:
-
- In a medium bowl, combine ground oats, almond flour, vanilla or unflavored protein powder, coconut sugar (or sweetener), and salt. Whisk to evenly distribute the dry ingredients.
-
- Add Greek yogurt, almond milk, and vanilla extract.
-
- Stir with a spoon or spatula until a thick, slightly sticky dough forms. If it seems too dry or crumbly, add extra almond milk 1 teaspoon at a time; if too wet, add 1–2 tbsp more oat flour or protein powder until it holds together when pressed.
-
Chill the base briefly:
-
- Place the base mixture in the refrigerator for about 10–15 minutes while you prepare the cheesecake layer. This helps it firm up and makes rolling easier later.
-
Prepare the strawberry cheesecake mixture:
-
- In a separate medium bowl, add the softened cream cheese. Beat with a spoon, spatula, or hand mixer until smooth and creamy.
-
- Add Greek yogurt, honey or maple syrup, lemon juice, vanilla extract, and salt. Mix until smooth and well combined.
-
- Add vanilla protein powder and mix again. The mixture should be thick, like a soft frosting or thick dip. If it is runny, add 1–2 tbsp extra protein powder; if it becomes too thick and chalky, add 1–2 tsp yogurt or a splash of milk.
-
- Gently fold in the finely diced strawberries so they are evenly distributed without smashing them completely.
-
Combine base and cheesecake components:
-
Option 1 – Swirled bites:
-
- Take the base mixture out of the fridge.
-
- Add about half of the strawberry cheesecake mixture to the base and gently fold to create a marbled effect; avoid overmixing so you can still see streaks of white and pink.
-
- Reserve the remaining cheesecake mixture for filling the centers or spooning on top.
-
Option 2 – Filled “truffle” style bites:
-
- Keep the base and cheesecake mixtures separate.
-
- You will wrap the base mixture around small dollops of the cheesecake mixture to create a filled center.
-
Portion the cheesecake filling (for filled bites):
-
- If making filled bites, line a plate with parchment.
-
- Using a teaspoon, scoop small mounds (about 1/2 tsp to 1 tsp each) of the cheesecake mixture onto the plate. You want roughly 16–20 little mounds.
-
- Place the plate in the freezer for 15–20 minutes to firm up the centers so they are easier to wrap.
-
Shape the base balls:
-
- Scoop about 1 1/2 to 2 tbsp of the base mixture for each bite.
-
- Roll between your palms to form a ball. If it sticks too much, very lightly oil your hands or dust them with oat flour.
-
- If you made swirled bites (Option 1), you can fully shape them at this step and skip to chilling and coating.
-
- If you are planning to fill them, flatten each ball into a disc about 2–2.5 inches (5–6 cm) in diameter and set aside on a parchment-lined tray.
-
Fill the bites (for truffle style):
-
- Remove the cheesecake mounds from the freezer; they should be firm but not rock-hard.
-
- Place one cheesecake mound in the center of a flattened disc of base mixture.
-
- Carefully fold the edges of the base up and around the filling, pinching to seal completely.
-
- Roll gently between your palms to form a smooth ball, ensuring no filling is exposed.
-
- Repeat until all the base mixture and centers are used. If you have some leftover cheesecake mixture, you can serve it as a dip, spoon a tiny bit on top of each bite, or enjoy it on the side with fruit.
-
Prepare coatings or toppings:
-
- Place crushed freeze-dried strawberries in a shallow bowl.
-
- In another bowl, place a few tablespoons of finely ground oats, almond flour, or coconut flour.
-
- If using, melt a small amount of white chocolate or yogurt chips in the microwave in 15–20 second bursts, stirring between each, until smooth. Allow to cool slightly before drizzling.
-
Coat the bites:
-
- Roll some bites in crushed freeze-dried strawberries for a vibrant pink coating.
-
- Roll others in the oat or almond flour mixture for a more neutral, “classic cheesecake” look.
-
- You can leave a few plain or mix coatings for variety.
-
- If desired, lightly drizzle with melted white chocolate or yogurt chips and top with a small piece of fresh strawberry for extra flair.
-
Chill to set:
-
- Arrange all finished bites on the parchment-lined tray, ensuring they do not touch.
-
- Refrigerate for at least 1–2 hours to allow the flavors to meld and the texture to firm up. For a slightly firmer, more “fudgy” bite, you can freeze them for 30–45 minutes.
-
Serve:
-
- Serve chilled, straight from the fridge.
-
- If stored in the freezer, let sit at room temperature for 5–10 minutes before eating so they soften slightly and taste more cheesecake-like.
-
Storage:
-
- Store in an airtight container in the refrigerator for up to 4–5 days.
-
- For longer storage, freeze in a single layer until solid, then transfer to a freezer-safe bag or container. They will keep well for about 2 months when frozen.
Note
- For higher protein, add an extra half scoop of protein powder to either the base or cheesecake mixture, adjusting with a splash of milk or yogurt if it becomes too dry.
- For lower sugar, use a zero-calorie sweetener in the base and a small amount of liquid stevia or monk fruit in the cheesecake layer.
- For gluten-free bites, use certified gluten-free oats and ensure your protein powder is gluten-free.
- For dairy-free bites, swap Greek yogurt and cream cheese for coconut or almond-based yogurt and vegan cream cheese, and choose a plant-based protein powder.
- For a nut-free version, replace almond flour with additional oat flour and use oat milk or another nut-free milk alternative.
- For extra strawberry flavor, add 1–2 tbsp of crushed freeze-dried strawberries directly into the cheesecake mixture.
- For a stronger “cheesecake tang,” increase the lemon juice slightly and use plain (not overly sweet) yogurt.
- For a grab-and-go snack size, roll smaller, 1 tbsp portions and cut the cheesecake centers even smaller, making about 24–28 mini bites.
- For social sharing, present a variety of coatings on a platter, add fresh strawberries and mint leaves around the bites, and drizzle extra sauce or melted chocolate across the plate for a visually striking display.

