

Decadent Creamy Italian Tiramisu Cheesecake marries the best of two worlds: the creamy indulgence of cheesecake with the beloved flavors of classic tiramisu. Layers of coffee-soaked ladyfingers meet velvety mascarpone and cream cheese, all atop a crisp chocolate biscuit crust. Rich cream cheese and mascarpone fuse into a silky filling while espresso-kissed ladyfingers lend a coffee aroma that dances on your palate. This recipe is your ticket to a show-stopping dessert guaranteed to impress—let’s dive in!
Key Ingredients
Before you begin, gather these essentials to build every layer of this luscious tiramisu cheesecake:
- 200 g chocolate biscuits: provides a crunchy, cocoa-rich base for the crust
- 75 g granulated sugar: sweetens the crust and balances the chocolate notes
- 100 g unsalted butter: binds the biscuit crumbs into a firm foundation
- 200 g ladyfingers: soaks up espresso and liqueur to create that classic tiramisu layer
- 2 tablespoons instant espresso powder: infuses each bite with bold coffee flavor
- 3 tablespoons coffee liqueur: deepens the coffee notes and adds a hint of warmth
- 600 g cream cheese: offers a tangy, luxurious texture in the cheesecake filling
- 250 g mascarpone cheese: brings silky richness and authentic Italian flair
- 3 large eggs: helps set the cheesecake for a smooth, custardy interior
- 120 g granulated sugar: sweetens and lightens the cream cheese-mascarpone blend
- 1 teaspoon vanilla extract: adds a sweet, aromatic undertone to the filling
- 1 tablespoon cornstarch: stabilizes the batter for a perfect set
- 200 ml heavy whipping cream: whipped for a light, pillowy topping
- 2 tablespoons powdered sugar: sweetens the whipped cream without grit
- 2 tablespoons unsweetened cocoa powder: dusted on top for a dramatic finish
How To Make Decadent Creamy Italian Tiramisu Cheesecake
Ready to create layers of pure bliss? This recipe combines a rich chocolate crust, coffee-soaked ladyfingers, and a creamy cheese filling, all baked in a water bath for sublime texture. You’ll finish with a fluffy whipped cream topping and a dusting of cocoa for that signature tiramisu look.
1. Preheat the oven to 160°C and grease a 23 cm springform pan, then wrap the outside of the pan with foil to prevent leaks during the water bath.
2. Place the chocolate biscuits in a food processor and pulse until they form fine, even crumbs.
3. Melt the butter in a small saucepan, stir in 75 g of granulated sugar until dissolved, then combine with the biscuit crumbs and press firmly into the bottom of the prepared pan for a solid crust.
4. Bake the crust for 10 minutes, then remove and let cool slightly so it holds its shape when you add the next layer.
5. In a shallow bowl, mix the espresso powder with the coffee liqueur, then quickly dip each ladyfinger and arrange them in a single layer over the cooled crust for that classic tiramisu foundation.
6. In a large bowl, beat the cream cheese, mascarpone and 120 g granulated sugar on medium speed until smooth and creamy, scraping down the sides as needed.
7. Add the eggs one at a time, mixing on low speed until just incorporated, then blend in the vanilla extract and cornstarch for stability.
8. Pour the cheesecake batter over the soaked ladyfingers and use a spatula to smooth the top into an even layer.
9. Place the springform pan in a larger roasting pan and pour hot water into the outer pan until it reaches halfway up the springform sides to create a gentle water bath.
10. Bake for 50 minutes or until the edges are set and the center has a slight jiggle when tapped—this ensures a creamy, custardy core.
11. Turn off the oven, crack the door open and let the cheesecake cool inside for 1 hour before removing and chilling in the refrigerator for at least 4 hours or overnight for the cleanest slices.
12. Whip the heavy cream with the powdered sugar until stiff peaks form, then spread evenly over the chilled cheesecake for a light, airy finish.
13. Dust the top with unsweetened cocoa powder, let stand for 10 minutes to set the design, then slice and serve your masterpiece.
Serving Suggestions
To elevate each slice of your tiramisu cheesecake, consider these fun serving ideas that highlight its creamy layers and coffee kick:
- Extra Cocoa Dusting: Sift a fine layer of cocoa powder just before serving for a dramatic, café-style finish.
- Fresh Berries: Garnish plates with plump raspberries or strawberries to cut through the richness with a bright, fruity pop.
- Espresso Shot Pairing: Serve alongside a small shot of freshly brewed espresso to amplify the coffee flavors and awaken the palate.
- Chocolate Shavings: Use a vegetable peeler on a chocolate bar to create delicate curls atop the whipped cream for extra elegance.
Tips For Perfect Decadent Creamy Italian Tiramisu Cheesecake
This tiramisu cheesecake balances creamy, custardy layers with coffee-kissed ladyfingers, so a few insider tips go a long way toward perfection. Keep everything at the right temperature, handle the water bath with care, and allow ample chilling time. Follow these simple pointers, and you’ll be rewarded with silky cheesecake slices every time!
- Use full fat cream cheese and mascarpone for a richer flavor
- Ensure the cheesecake is fully chilled for clean slices
- Store loosely covered in the refrigerator for up to three days
- Substitute strong brewed espresso for instant powder for a bolder coffee taste
How To Store It
Proper storage will keep your tiramisu cheesecake fresh and flavorful, whether you plan to enjoy it over a few days or save it for later:
- Refrigerator Storage: Store the fully assembled cheesecake loosely covered in the fridge for up to three days; this prevents moisture buildup while maintaining creaminess.
- Freezer Storage: Wrap the chilled cheesecake tightly in plastic wrap and freezer-proof foil, then freeze for up to one month to preserve every layer.
- Thawing: Transfer the frozen cheesecake to the refrigerator and thaw overnight before whipping the cream topping and dusting with cocoa—this ensures perfect texture.
Frequently Asked Questions
Ready to answer your burning tiramisu cheesecake questions? Let’s clear up common concerns so you can bake with confidence:
- Q: How can I tell when the tiramisu cheesecake is perfectly baked?
After about 50 minutes in the oven, the edges of the cheesecake should look set and slightly puffed, while the center retains a gentle wobble when you tap the pan. The water bath helps regulate the heat and prevent overbaking. Once you see the jiggle, turn off the oven, crack the door, and let it cool inside for one hour to finish setting gradually.
- Q: Can I substitute strong brewed espresso for the instant powder and coffee liqueur?
Yes. Use 2 tablespoons of cooled, strong brewed espresso in place of the instant espresso powder and coffee liqueur mixture. For added depth, you can stir in a teaspoon of coffee liqueur into the brewed espresso, but it’s optional if you prefer an alcohol-free version.
- Q: What’s the best way to prevent cracks on the cheesecake surface?
Baking in a water bath is crucial to prevent cracks by providing gentle, even heat. Make sure the outside of your springform pan is well wrapped in foil to keep water out of the crust. After baking, let the cheesecake cool gradually in the turned-off, slightly open oven for one hour before chilling; this slow temperature change minimizes cracking.
- Q: How far in advance can I prepare components or assemble the entire cheesecake?
You can make the crust and soak the ladyfingers up to a day ahead and keep them covered at room temperature. The cheesecake can be fully baked and chilled overnight for optimal flavor and cleaner slices. Whip the cream and dust the cocoa powder just before serving to maintain fresh texture and appearance.
- Q: What are the best storage and make-ahead options for leftovers?
Store the fully assembled tiramisu cheesecake loosely covered in the refrigerator for up to three days. For longer storage, wrap the chilled cheesecake tightly in plastic wrap and freeze for up to one month; thaw in the refrigerator overnight before whipping the topping and serving.
- Q: How can I adapt this recipe for a gluten-free diet?
Swap the chocolate biscuits and ladyfingers for certified gluten-free versions. You can also use almond flour mixed with melted butter and sugar to form a gluten-free crust. Ensure all other ingredients, like any substituted liqueur or powders, are labeled gluten-free.
- Q: What’s the secret to achieving stiff peaks when whipping the cream topping?
Chill your mixing bowl and beaters in the freezer for 10 minutes before starting, and use heavy whipping cream straight from the fridge. Begin whipping at medium speed until foam forms, then increase to high speed while gradually adding the powdered sugar. Stop as soon as firm peaks hold their shape to avoid overbeating and graininess.
What Makes This Special
This Decadent Creamy Italian Tiramisu Cheesecake is like a hug in dessert form: a sumptuous chocolate base, coffee-soaked cookies, and an ultra-smooth cheese filling that play off each other in perfect harmony. The water bath bake and chilled topping tricks ensure every slice is flawless—and yes, you’ll want to print and save this for future celebrations. I’d love to hear how your creation turns out, so drop a comment, share your tweaks, or ask any questions if you need a hand. Enjoy every coffee-kissed bite!
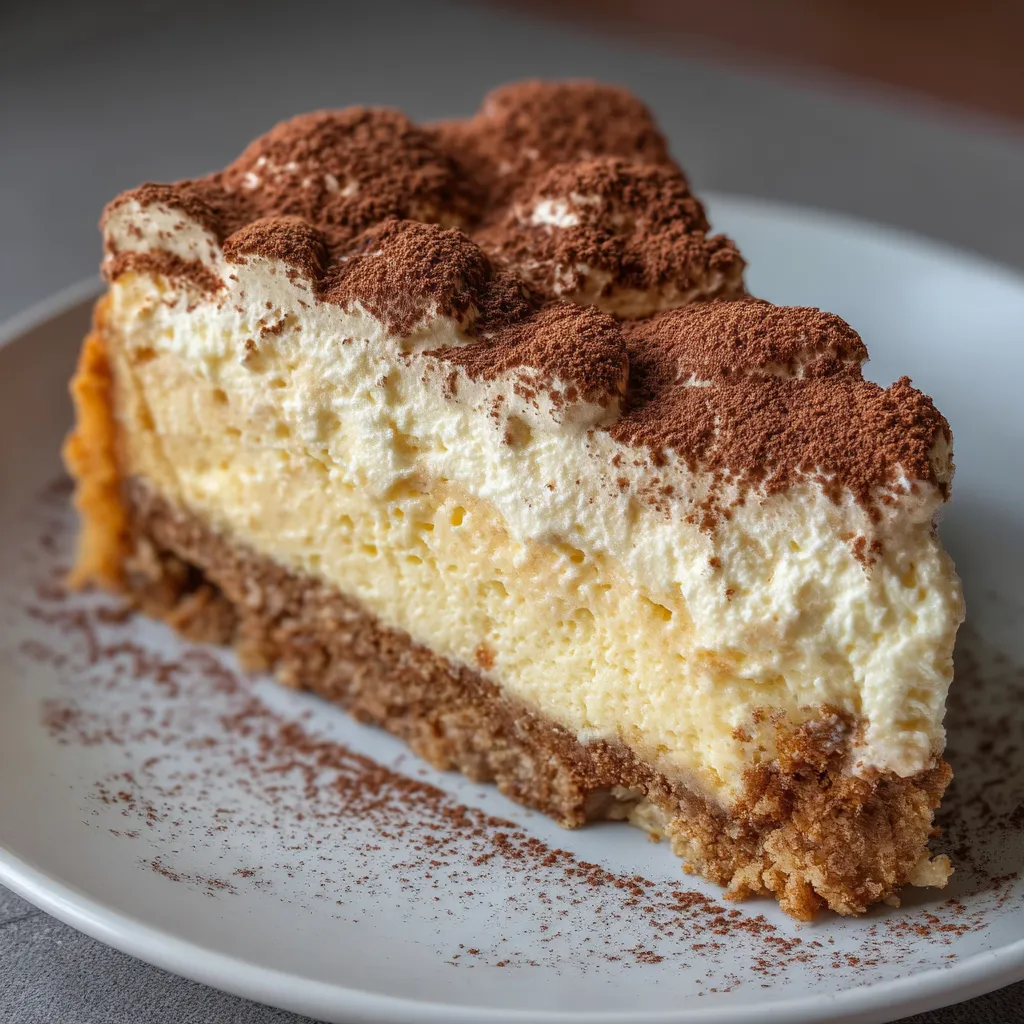

Decadent Creamy Italian Tiramisu Cheesecake
Description
Rich cream cheese and mascarpone fuse into a silky filling atop a crisp chocolate biscuit crust, while espresso-kissed ladyfingers lend a coffee aroma that dances on your palate.
Ingredients
Instructions
-
Preheat the oven to 160°C and grease a 23 cm springform pan, then wrap the outside of the pan with foil.
-
Place the chocolate biscuits in a food processor and pulse until they form fine crumbs.
-
Melt the butter in a small saucepan, stir in 75 g of granulated sugar, then combine with the biscuit crumbs and press firmly into the bottom of the prepared pan.
-
Bake the crust for 10 minutes, then remove and let cool slightly.
-
In a shallow bowl mix the espresso powder with the coffee liqueur, then quickly dip each ladyfinger and arrange them in a single layer over the cooled crust.
-
In a large bowl beat the cream cheese, mascarpone and 120 g granulated sugar until smooth and creamy.
-
Add the eggs one at a time, mixing on low speed until just incorporated, then blend in the vanilla extract and cornstarch.
-
Pour the cheesecake batter over the soaked ladyfingers and smooth the top with a spatula.
-
Place the springform pan in a larger roasting pan and pour hot water into the outer pan to come halfway up the springform for a water bath.
-
Bake for 50 minutes or until the edges are set and the center has a slight jiggle.
-
Turn off the oven, crack the door open and let the cheesecake cool inside for 1 hour before removing and chilling in the refrigerator for at least 4 hours or overnight.
-
Whip the heavy cream with the powdered sugar until stiff peaks form, then spread evenly over the chilled cheesecake.
-
Dust the top with unsweetened cocoa powder, let stand for 10 minutes, then slice and serve.
Note
- Use full fat cream cheese and mascarpone for a richer flavor
- Ensure the cheesecake is fully chilled for clean slices
- Store loosely covered in the refrigerator for up to three days
- Substitute strong brewed espresso for instant powder for a bolder coffee taste

