

If you’ve ever craved that perfect crunch that snaps between your teeth when you’re reaching for a snack, crisp homemade refrigerator pickles are here to satisfy that craving. There’s something almost magical about turning bright-green cucumber slices into tangy, sweet, and savory delights in just a few simple steps. By marinating those freshly sliced cucumbers and onions in a warm brine infused with mustard seeds, peppercorns, dill seeds, and smashed garlic, you unlock layers of flavor that evolve with every hour they rest in the fridge. Each bite becomes a celebration of texture and taste, as the vinegar’s bright zip contrasts beautifully with the subtle sweetness of sugar and the mellow earthiness of fresh dill sprigs. You’ll find yourself reaching back into the jar over and over, drawn by that irresistible symphony of flavors.
Beyond their addictive taste, these refrigerator pickles also embody convenience and creativity. No special canning equipment is needed—just a bowl, a saucepan, and some mason jars. Whether you’re looking for a quick side dish to elevate a sandwich, an appetizer that will vanish in seconds at your next gathering, or a crunchy snack to keep in the fridge for afternoon cravings, these pickles have got you covered. The process feels almost meditative as you layer ingredients, stir spices, and imagine the flavors melding together. And once you’ve tasted that first crisp bite, you’ll never go back to store-bought versions again.
KEY INGREDIENTS IN CRISP HOMEMADE REFRIGERATOR PICKLES
Before diving into the step-by-step process, let’s talk about the essentials that make these pickles stand out. Each ingredient plays a unique role, contributing to the overall crunch, tang, and aromatic depth you’ll experience.
- Cucumbers
These garden-fresh slices provide the signature crunch and mild, refreshing base. Choose firm, evenly sized cucumbers for uniform pickling and the best texture.
- Onions
Thinly sliced rings add a subtle sweetness and slight bite that balances the acidity of the brine, enhancing both flavor and visual appeal.
- White vinegar
The acidic backbone of the brine, it not only delivers that classic pickle tang but also helps preserve the cucumbers while accentuating other spices.
- Water
Dilutes the vinegar to create a balanced brine, ensuring the pickles aren’t overwhelmingly sour and allowing the sugar and salt to harmonize.
- Salt
Essential for drawing moisture out of the cucumbers, it contributes crispness and intensifies the overall flavor profile.
- Sugar
Provides a hint of sweetness that counteracts the vinegar’s sharpness, creating a smooth, well-rounded taste.
- Mustard seeds
Offer a gentle pop of tangy, slightly bitter heat, adding dimension and texture when you bite into the pickles.
- Whole black peppercorns
Introduce warm, aromatic spice that lingers on the tongue, complementing the vinegar’s acidity and the garlic’s pungency.
- Dill seeds
Impart an earthy, grassy aroma reminiscent of classic dill pickles, deepening the brine’s herbal complexity.
- Garlic cloves
Smashed to release their oils, these add bold, savory notes and a whisper of spice that permeates every slice.
- Red pepper flakes
Optional, but perfect for those who love a bit of heat. They add a lively, lingering spice that warms the palate.
- Fresh dill
The final flourish: bright, feathery sprigs tucked between the cucumbers lend a fresh, verdant aroma and vivid color.
HOW TO MAKE CRISP HOMEMADE REFRIGERATOR PICKLES
Ready to transform these ingredients into crunchy tangy pickles? Follow along for a simple, beginner-friendly process that yields maximum flavor with minimal fuss.
1. Thoroughly wash your cucumbers and onions under cool running water. Pat dry and then use a sharp knife or mandoline to slice the cucumbers into 1/4-inch rounds and the onions into delicate, thin rings.
2. In a large mixing bowl, layer the cucumber slices and onion rings. This helps distribute the vegetables evenly so they absorb the brine uniformly as it cools.
3. Place a medium saucepan over medium heat and pour in the white vinegar, water, salt, and sugar. Stir occasionally to dissolve the salt and sugar completely, creating a clear, cohesive brine.
4. Once the salt and sugar have fully dissolved, remove the saucepan from the heat. Stir in the mustard seeds, whole black peppercorns, dill seeds, smashed garlic cloves, and red pepper flakes if you’re going for that spicy kick.
5. Carefully pour the hot brine over the layered cucumbers and onions, ensuring every piece is fully submerged. Use a clean spoon to gently mix, so the spices and garlic are evenly distributed.
6. Tuck the fresh dill sprigs into the mixture, pushing them between layers of cucumbers for maximum aroma. Cover the bowl with a lid or plastic wrap and allow to cool to room temperature.
7. When the mixture reaches room temperature, transfer the pickled vegetables into clean mason jars or airtight containers, ensuring the brine still covers everything completely.
8. Seal the jars tightly and place them in the refrigerator. Let the pickles marinate for at least 24 hours before enjoying, remembering that longer rest times deepen the flavor.
9. Dive in and enjoy your crisp homemade refrigerator pickles! For the best taste and crunch, consume them within 2 to 3 weeks.
SERVING SUGGESTIONS FOR CRISP HOMEMADE REFRIGERATOR PICKLES
Once your pickles have soaked up all those vibrant flavors, they’re ready to shine in countless ways. Whether you’re crafting a meal, rounding out a snack platter, or simply craving something crunchy, these pickles bring brightness, zing, and texture to any dish. Their balanced blend of tang, sweetness, and spice makes them a versatile companion, elevating even the simplest of bites. From classic sandwich layers to unexpected salad toppers, there’s no limit to how you can enjoy these homemade gems. Below are some of our favorite ways to put them center stage.
- Tangy Sandwich Booster
Layer pickle slices on your favorite sandwich or wrap to add an instant burst of acidity and crunch. For best results, press them gently into the bread so their juices mingle with your fillings.
- Charcuterie Board Highlight
Place pickles alongside cured meats, cheeses, and olives on a wooden board. Their bright flavor cuts through rich cheeses and fatty meats, offering a refreshing palate cleanser between bites.
- Salad Accent
Chop the pickles into bite-sized pieces and sprinkle over green salads or grain bowls. They add a delightful zing that wakes up leafy greens, quinoa, or chickpeas.
- Solo Snack
Keep a jar in the fridge door and pop them straight into your mouth for a guilt-free, low-calorie snack. Enjoy them cold for maximum crispness.
HOW TO STORE CRISP HOMEMADE REFRIGERATOR PICKLES
Proper storage is key to preserving the perfect crunch and vibrant flavors of your pickles. These simple refrigerator pickles don’t require pressure canning, but they do need a cool environment and airtight conditions. By following a few basic guidelines, you’ll ensure your pickles stay fresh, flavorful, and safe to eat for weeks on end. Remember that temperature fluctuations or air exposure can lead to loss of crispness or off-flavors, so consistent, cool conditions are essential. Here are some tried-and-true methods to keep your pickles at their best:
- Airtight Mason Jars
Transfer the cooled pickles and brine into sterilized jars, filling them to just below the rim. Tighten the lids firmly to prevent air from entering, which helps maintain crispness.
- Label and Date
Use a piece of masking tape or a reusable chalk label to note the date you prepared the pickles. This helps you track freshness and ensures you enjoy them within the optimal 2–3 week window.
- Consistent Refrigeration
Store the jars on a stable refrigerator shelf, away from the door. Aim for a temperature between 35°F and 40°F (2°C–4°C) to slow down any microbial activity and keep the flavors bright.
- Avoid Freezing
Never freeze homemade pickles, as ice crystals will rupture cell walls in the cucumbers, resulting in mushy textures once thawed. Stick to fridge storage only.
CONCLUSION
Whether you’re a seasoned home cook or a curious beginner, these crisp homemade refrigerator pickles offer a delightful way to elevate any meal. You’ve learned how simple ingredients—cucumbers, onions, vinegar, sugar, salt, and a handful of aromatic spices—can transform into something extraordinary with just a little time and patience. Step by step, you mastered the art of creating a balanced brine, layering flavors, and ensuring that each slice remains perfectly submerged and infused with tangy goodness. You discovered serving ideas that turn ordinary dishes into memorable bites, whether you’re stacking pickles on a sandwich, spotlighting them on a charcuterie board, adding them to salads, or enjoying them straight from the jar. Plus, you now know how to store your pickles for weeks of crunchy, bright enjoyment without sacrificing taste or texture.
Feel free to print this article or save it for later use—your future self will thank you when you’re craving that satisfying snap of homemade pickles. Below, you’ll find a FAQ section to answer any lingering questions about technique, variations, or troubleshooting. If you try out the recipe, I’d love to hear how it turned out! Leave a comment with your favorite spice additions, any questions you might have, or feedback on the process. Your experiences and insights help build a community of eager home cooks sharing kitchen victories, one crisp bite at a time.
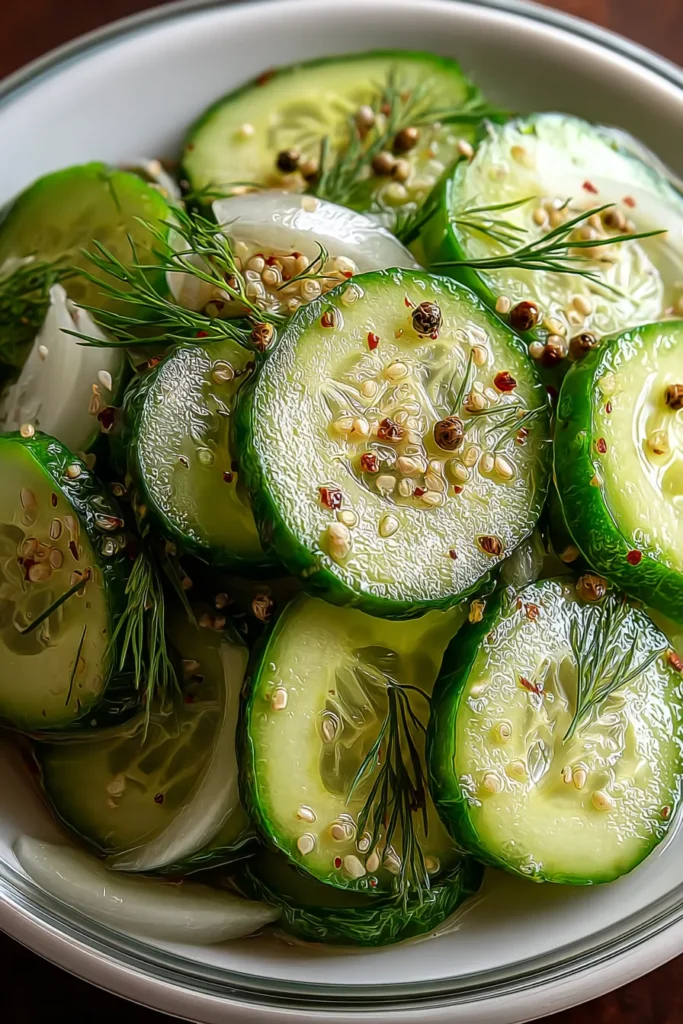

Crisp Homemade Refrigerator Pickles
Description
Experience the perfect balance of crunch and tang with our homemade refrigerator pickles, packed with garlic and spices for a flavor explosion in every bite.
Ingredients
Instructions
-
Start by thoroughly washing your cucumbers and onions. Slice the cucumbers into rounds, about 1/4-inch thick. Slice the onions into thin rings.
-
In a large bowl, layer the cucumber slices and onions. Set aside while you prepare the pickling brine.
-
In a medium saucepan, combine the white vinegar, water, salt, and sugar. Heat the mixture over medium heat, stirring occasionally, until the salt and sugar have dissolved completely.
-
Once the brine solution is ready, remove it from heat and add the mustard seeds, black peppercorns, dill seeds, garlic cloves, and red pepper flakes (if using). Stir well to combine.
-
Carefully pour the brine over the cucumber and onion mixture, ensuring all vegetables are fully covered. Use a spoon to mix everything, so the spices are evenly distributed.
-
Tuck the fresh dill sprigs into the mixture. Cover the bowl with a lid or plastic wrap and let it cool to room temperature.
-
Once cooled, transfer the pickled vegetables into mason jars or airtight containers. Make sure the brine covers the cucumbers and onions completely.
-
Seal the jars or containers and place them in the refrigerator. Allow the pickles to marinate for at least 24 hours before enjoying, though they will get more flavorful the longer they sit.
-
Enjoy your crisp homemade refrigerator pickles within 2 to 3 weeks for optimal taste and crunch.
Note
- These pickles are perfect as a side dish, sandwich topping, or even as a snack.
- Feel free to experiment by adding other spices like coriander seeds or fennel seeds to customize the flavor.
- If you're not a fan of spicy foods, simply omit the red pepper flakes.
- Always use fresh cucumbers for the best texture and taste.
- Adjust the sweetness of your pickles by increasing or decreasing the sugar based on your taste preferences.

