

Crisp Homemade Dill Pickles truly bring a burst of flavor and texture to any snack or meal. From the very first crunch, you’ll experience the satisfying snap of garden-fresh cucumbers infused with garlicky warmth and herbal brightness. This recipe walks you through the entire process—no need for fancy equipment or years of pickling know-how. Whether you’re gearing up for a summer cookout, looking to elevate your lunchtime sandwich, or hunting for that perfect tangy nibble, these pickles deliver every time. With just 30 minutes of hands-on preparation and another 30 minutes of gentle simmering, you’ll be on your way to curing crisp, zesty pickles that store beautifully for up to a year in a cool, dark pantry.
Beyond the delicious crunch, making your own dill pickles is an adventure in preserving seasonal bounty. As a beginner-friendly canning recipe, it invites home cooks of all skill levels to join in the magic of fermentation—minus any intimidating jargon. You’ll gather simple pantry staples—cucumbers, vinegar, salt, garlic, dill seed, peppercorns—and assemble them in sterilized jars. Then you’ll seal and let time work its wonders for one to two weeks of rest. Each jar yields about 80 calories per two pickle spears, making them a guilt-free addition to appetizers, lunches, or afternoon snacks. By the end of this article, you’ll be armed with all the tips and tricks you need to transform fresh cucumbers into irresistibly crunchy dill pickles, ready to charm your taste buds and impress your friends.
KEY INGREDIENTS IN CRISP HOMEMADE DILL PICKLES
Every ingredient in these dill pickles plays an essential role in creating that perfect blend of tang, spice, and snap. From the crispness of fresh cucumbers to the piquant heat of optional red pepper flakes, you’ll learn why each component matters and how it contributes to your final jar of pickles.
- Pickling cucumbers: These firm, narrow cucumbers provide that unmistakable crunch. Their thin skin and minimal seeds make them ideal for absorbing brine without becoming soggy.
- Distilled white vinegar: The backbone of the brine, vinegar brings bright acidity that preserves the cucumbers and delivers tangy zip in every bite.
- Water: Balancing out the vinegar’s strength, water ensures your brine isn’t overpowering and helps distribute flavors evenly.
- Sea salt or pickling salt: Unlike table salt, these salts dissolve cleanly in brine, enhancing flavor without cloudiness or additives—critical for a clear, crisp result.
- Garlic cloves: Crushed garlic cloves infuse each jar with savory depth, complementing the dill’s freshness and adding aromatic warmth.
- Dill seed: A concentrated burst of dill flavor, the seeds release oils that permeate the cucumbers, heightening that classic pickly taste.
- Black peppercorns: Whole peppercorns lend a gentle spiciness and a hint of earthy warmth, providing a subtle counterpoint to the brine’s acidity.
- Fresh dill heads: These leafy heads contain essential oils that deliver the signature dill aroma and flavor, giving your pickles a garden-fresh brightness.
- Red pepper flakes (optional): For those who crave a little heat, a teaspoon of fiery flakes per jar adds a bold, spicy kick that dances on your palate.
HOW TO MAKE CRISP HOMEMADE DILL PICKLES
Now that you’ve gathered all your ingredients, let’s dive into the canning process. This step-by-step guide walks you through preparing your jars, crafting the brine, layering flavors, and sealing everything for a perfect homemade preserve.
1. Thoroughly wash your canning jars with hot, soapy water. Rinse them completely, then sterilize by submerging them in boiling water for at least 10 minutes. Remove and let them air dry on a clean towel.
2. Wash the cucumbers under running water and trim off the blossom end—this prevents enzymes from causing soft spots. Decide whether to leave them whole, halve them, or slice into spears, depending on your preference.
3. In a large saucepan, combine vinegar, water, and salt. Bring the mixture to a rolling boil, stirring until the salt dissolves, then reduce heat to maintain a warm brine.
4. Into each sterilized jar, place 1–2 crushed garlic cloves, one head of fresh dill, a teaspoon of dill seed, and a few black peppercorns. If you’re after a spicy kick, stir in a teaspoon of red pepper flakes.
5. Pack the prepared cucumbers tightly into the jars, leaving about ½ inch of headspace at the top to allow for expansion during processing.
6. Pour the hot brine over the cucumbers, ensuring they are completely submerged. This locks in flavor and prevents spoilage.
7. Remove trapped air bubbles by gently tapping each jar on the counter. Use a non-metallic spatula or chopstick to slide around the edges and adjust as needed. Wipe the rims with a damp cloth.
8. Secure the lids and rings snugly, then process the jars in a hot water bath for 10 minutes to create a vacuum seal.
9. Remove the jars and let them cool at room temperature. Once cooled, move them to a cool, dark spot. Allow at least one week of curing—two weeks for peak flavor—before opening.
SERVING SUGGESTIONS FOR CRISP HOMEMADE DILL PICKLES
Serving these tangy, crunchy wonders is half the fun! Whether you’re elevating a casual meal or crafting a snack board, dill pickles bring a burst of flavor and texture that brightens every bite. Here are four inspired ways to showcase your homemade pickles:
- Serve alongside gourmet sliders: Pair pickle chips with mini burgers for a tangy contrast that cuts through juicy beef and rich cheese.
- Build a tangy relish tray: Slice pickles into coins, then arrange on a board with cured meats, assorted cheeses, olives, and crackers for an irresistible appetizer spread.
- Elevate your salad game: Chop dill pickles into small pieces and toss them into potato or pasta salads. The vinegar brine adds a delightful zing and keeps salads refreshingly crisp.
- Snack straight from the jar as a low-calorie treat: Two pickle spears clock in at just around 80 calories, making them a perfect guilt-free munch when cravings strike.
HOW TO STORE CRISP HOMEMADE DILL PICKLES
Proper storage ensures your homemade dill pickles stay crisp, flavorful, and safe to enjoy over months. With a few simple strategies, you’ll maintain peak crunch and tang from the first jar to the last. Keep in mind that factors like temperature and light exposure play a big role in preserving both texture and taste.
- Store sealed jars in a cool, dark pantry or cupboard, ideally between 50°F and 70°F. Avoid direct sunlight, which can degrade flavor and color over time.
- Once opened, transfer the jar to your refrigerator. The cold temperature keeps pickles crunchy and prevents the growth of unwanted bacteria.
- Always use a clean utensil when removing pickles from the jar. Avoid dipping in fingers or other items that might introduce contaminants.
- Label jars with the date of canning. While unopened jars can last up to a year, it’s best to enjoy them within six months for optimal flavor and texture.
CONCLUSION
I hope you’ve enjoyed this deep dive into the art of crafting crisp homemade dill pickles. From gathering simple, fresh ingredients to mastering the canning process, you’re now equipped with everything you need to transform summer cucumbers into tangy, crunchy treasures. Remember, the magic truly happens during the one-to-two-week curing period, so be patient and resist the temptation to peek too soon. Once that time has passed, you’ll be greeted by vivid green pickles bursting with garlicky warmth, herbal dill notes, and a satisfying snap that elevates any meal.
Feel free to print this article and save it in your recipe binder for easy reference. You can also find a FAQ section below, where I address common questions about pickling, canning safety, and flavor variations. If you try this recipe—or if you have any comments, questions, or feedback—please let me know! I love hearing about your pickling successes, substitutions you’ve experimented with, or any tips you’ve picked up along the way. Happy pickling, and here’s to many crunchy cravings satisfied!
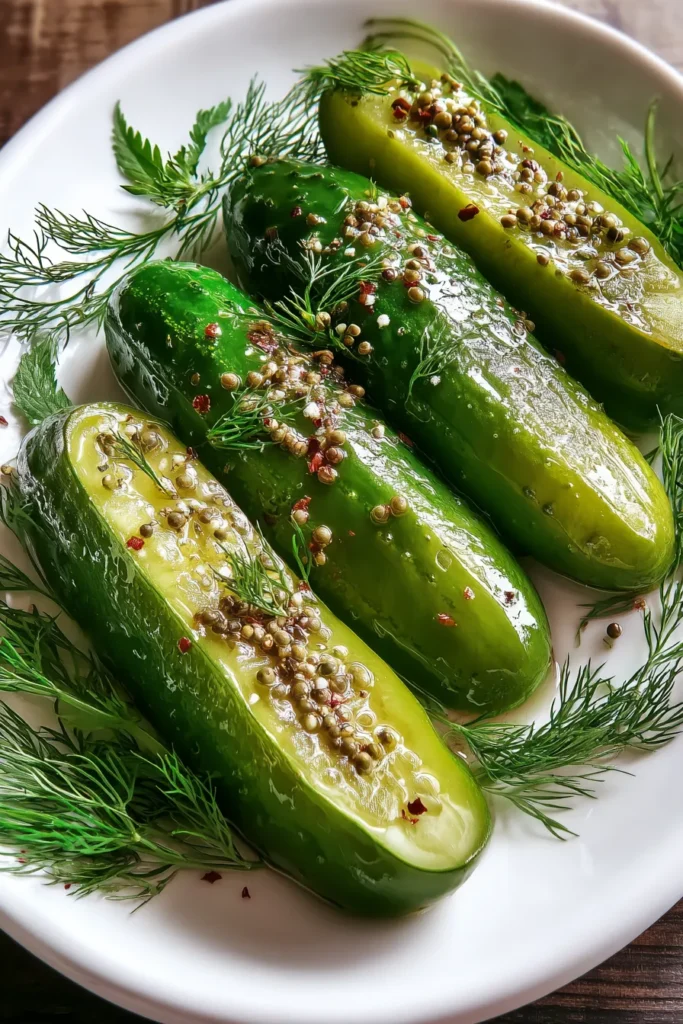

Crisp Homemade Dill Pickles
Description
Bursting with tangy flavor and a satisfying crunch, these dill pickles are a must-have for sandwiches, snacks, or straight from the jar. Perfectly seasoned and irresistibly fresh!
Ingredients
Instructions
-
Prepare your canning jars by thoroughly washing them with hot, soapy water. Rinse well, then sterilize them by submerging them in boiling water for at least 10 minutes. Allow them to air dry on a clean towel.
-
Wash the cucumbers well and cut off the blossom end. You can leave them whole, halve them, or slice them into spears.
-
In a large saucepan, combine the vinegar, water, and salt. Bring to a boil, then reduce the heat to keep the brine warm.
-
Into each sterilized jar, place 1-2 crushed garlic cloves, a head of dill, 1 teaspoon of dill seed, and a few peppercorns. If using red pepper flakes, add 1 teaspoon per jar.
-
Pack the cucumbers tightly into the jars, leaving about 1/2 inch headspace at the top.
-
Pour the hot brine over the cucumbers in each jar, ensuring they are completely submerged.
-
Remove any air bubbles by gently tapping the jar on the counter and adjusting the contents if necessary. Wipe the rims clean with a damp towel.
-
Secure the lids onto the jars, then process them in a hot water bath for 10 minutes to seal.
-
Allow the pickles to cool to room temperature before moving them to a cool, dark place to cure for at least one week, preferably two, for the best flavor.
Note
- The blossom end of cucumbers contains enzymes that can cause pickles to soften, so be sure to slice it off.
- For a sturdier crunch, consider adding grape leaves to the jars. They contain tannins that preserve crispness.
- Customize your pickles by experimenting with additional spices like mustard seeds, coriander seeds, or even a bay leaf for different flavors.
- These pickles will keep for up to a year in a cool, dark pantry as long as the jars remain sealed. Once opened, store in the refrigerator and consume within a month for the best taste.

