

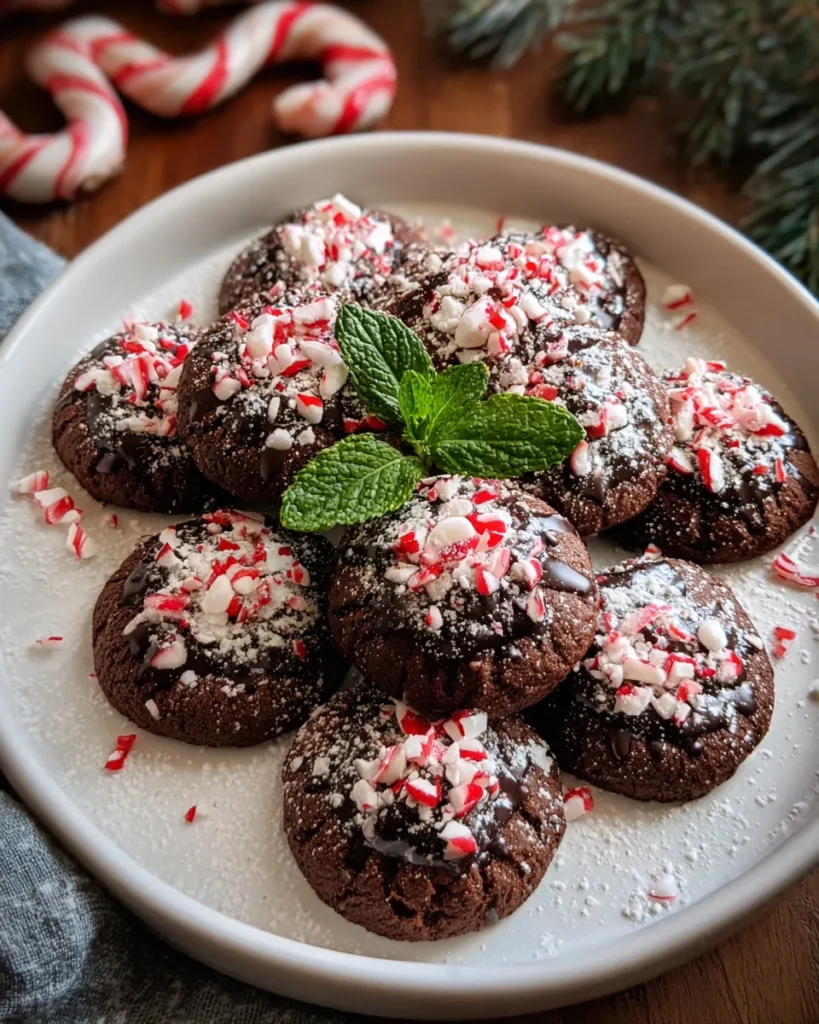
Winter is my absolute favorite time to be in the kitchen, and nothing screams "holiday cheer" quite like the combination of rich cocoa and cool mint. These Chocolate Peppermint Blossoms are a festive showstopper that brings back so many memories of messy flour fights and holiday playlists. With a soft, fudge-like base rolled in snowy powdered sugar and crowned with a striped kiss, they look impressive but are surprisingly easy for beginners to master. I can’t wait for you to whip up a batch for your next cookie swap or cozy night by the fire!
Key Ingredients
Getting everything ready before you start baking makes the process so much smoother and more enjoyable. You don't need any fancy equipment for this recipe, just some pantry staples and that star ingredient, the peppermint candy. Here is everything you need to gather to create these chewy, minty delights:
- 1 ¾ cups all-purpose flour: Provides the perfect structure for the cookie so it stays soft but holds its shape.
- ⅓ cup unsweetened cocoa powder: Delivers that deep, rich chocolate flavor that balances the sweet candy topping.
- ½ teaspoon baking soda: Helps the cookies rise just enough to create that tender, fudgy texture we love.
- ¼ teaspoon salt: Enhances the chocolate flavor and balances the sweetness of the sugar and candy.
- ¾ cup unsalted butter, softened: Essential for creaming with the sugar to create a light, fluffy base for the dough.
- 1 cup granulated sugar: Sweetens the cocoa dough and aids in creating crisp edges with a soft center.
- 1 large egg: Acts as the binding agent to hold all the delicious ingredients together.
- 1 tablespoon peppermint extract: Infuses the entire cookie with that signature cool, wintry mint flavor.
- ½ cup powdered sugar (for rolling): Creates a beautiful snowy coating and adds a touch of extra sweetness to the exterior.
- 24 chocolate peppermint candies (such as Hershey’s Peppermint Kisses), unwrapped: The festive crown jewel that adds a creamy, crunchy mint finish to every bite.
How To Make Chocolate Peppermint Blossoms
This recipe is wonderfully straightforward, making it a fantastic project for beginner bakers or a fun activity to do with kids. The process follows the classic method of mixing dry ingredients, creaming butter and sugar, and then combining the two. The real magic happens right at the end when you press the candy into the hot cookie, slightly melting the bottom so it adheres perfectly. Just remember that the dough needs to be rolled in sugar before baking to get that crinkle effect. Let's get baking!
1. Start by preheating your oven to 350°F (175°C) so it is ready to go, and line a baking sheet with parchment paper to prevent sticking and ensure easy cleanup.
2. In a medium bowl, whisk together the all-purpose flour, cocoa powder, baking soda, and salt until they are evenly distributed, then set this dry mixture aside.
3. Grab a large mixing bowl and cream together the softened butter and granulated sugar; keep beating for about 2-3 minutes until the mixture looks light and fluffy.
4. Next, beat in the egg and the peppermint extract, ensuring you mix until everything is well combined and smooth.
5. Gradually add the dry ingredients you set aside earlier into the wet ingredients, mixing on low speed until just combined, being careful not to overmix the dough.
6. Using a tablespoon or cookie scoop for consistency, form the dough into small balls that are about 1 inch in diameter.
7. Roll each ball in the powdered sugar until it is thoroughly coated, then place them on your prepared baking sheet, spacing them about 2 inches apart to allow for spreading.
8. Bake in your preheated oven for 8-10 minutes; you are looking for the cookies to be set but still soft to the touch.
9. Immediately after removing the pan from the oven, gently press one chocolate peppermint candy into the center of each hot cookie to secure it.
10. Allow the cookies to cool on the baking sheet for 5 minutes to firm up slightly before transferring them to a wire rack to cool completely.
Serving Suggestions
Once these beauties have cooled, the fun really begins because there are so many delightful ways to serve them. Whether you are hosting a festive holiday party or just treating yourself after a long week, presentation can elevate these simple cookies into an elegant dessert. They look stunning piled high on a platter, but pairing them with the right beverage or side really brings out the cocoa and mint notes. Here are a few of my favorite ways to enjoy these winter treats.
- Holiday Cookie Platter: Arrange these blossoms in a circle on a festive tray alongside gingerbread men and sugar cookies to create a colorful and textured centerpiece for your dessert table.
- Hot Cocoa Companion: Serve a couple of cookies on a saucer next to a steaming mug of hot chocolate topped with whipped cream, as the minty flavor perfectly complements the warm drink.
- Ice Cream Sandwich: Take two cooled cookies and sandwich a small scoop of vanilla bean ice cream between the flat sides for a decadent, cold treat that tastes like a fancy peppermint sundae.
- Gift Bags: Place three or four cookies in clear cellophane bags tied with red and white ribbon to make adorable edible gifts for teachers, neighbors, or coworkers during the holiday season.
Tips For Perfect Chocolate Peppermint Blossoms
Even though this recipe is rated for beginners, a few insider tips can take your cookies from good to absolutely bakery-quality. I have learned through trial and error that small tweaks can make a massive difference in texture and flavor. The beauty of this recipe lies in its versatility; you can easily adapt it to fit your schedule or your specific taste preferences. Don't be afraid to play around with the components once you get the hang of the basics. Here are some helpful notes to ensure your baking session is a total success.
- Make Ahead Magic: These cookies are perfect for holiday gatherings and can easily be made ahead of time, saving you stress on the day of your party.
- Flavor Control: The peppermint flavor can be adjusted by varying the amount of extract you use, so feel free to add less for a hint of mint or more for a bold kick to suit your taste.
- White Chocolate Twist: For a unique twist and a different visual look, try using white chocolate peppermint candies instead of the traditional chocolate ones.
- Storage Life: These cookies can be stored in an airtight container for up to a week, meaning you can enjoy fresh-tasting treats for days after baking.
- Extra Crunch: Experiment by adding crushed candy canes directly to the dough before baking to give your cookies an extra crunch and a burst of festive flavor!
How To Store It
Nothing is sadder than baking a delicious batch of cookies only to have them go stale overnight. Luckily, these blossoms are quite sturdy and hold up well if treated correctly. Proper storage ensures that the outside stays slightly crisp while the inside remains chewy and fudgy. Since these contain chocolate candies that can melt or bloom if they get too warm, keeping them in the right environment is key. Here is how I keep my cookies fresh and delicious.
- Room Temperature: Store the completely cooled cookies in an airtight container on the counter for up to one week, separating layers with wax paper to keep them from sticking.
- Freezing Dough: You can freeze the unbaked dough balls (without sugar coating) on a baking sheet, then transfer them to a freezer bag for up to 3 months; just roll in sugar and bake from frozen, adding a minute or two to the time.
- Freezing Baked Cookies: Place fully baked and cooled cookies in a freezer-safe container for up to 3 months, thawing them on the counter before serving to maintain the texture.
Frequently Asked Questions
I know that trying a new recipe can sometimes bring up a few questions, especially when you want everything to turn out perfectly for the holidays. I have gathered the most common questions I get asked about these minty chocolate treats to help you troubleshoot before you even turn on the oven.
- Q: How do I know when the cookies are finished baking?
A: You should bake the cookies in a preheated 350°F (175°C) oven for 8 to 10 minutes. The cookies are considered done when they are set but still soft to the touch.
- Q: Can I adjust the peppermint intensity or add texture to these cookies?
A: Yes, the peppermint flavor can be adjusted by varying the amount of peppermint extract used. Additionally, you can experiment by adding crushed candy canes to the dough to add extra crunch and flavor.
- Q: When is the correct time to place the chocolate candy in the center?
A: You must gently press one chocolate peppermint candy into the center of each cookie immediately after removing them from the oven, before allowing them to cool on the baking sheet for 5 minutes.
- Q: Can I use a different type of candy instead of standard chocolate peppermint ones?
A: Yes, while the recipe calls for chocolate peppermint candies like Hershey’s Peppermint Kisses, the notes suggest using white chocolate peppermint candies for a unique twist.
- Q: How should I store the cookies after they have cooled completely?
A: Once cooled, these cookies can be stored in an airtight container for up to a week. They are also noted as being easily made ahead of time for holiday gatherings.
- Q: How should the dough be prepared before placing it on the baking sheet?
A: You should use a tablespoon or cookie scoop to form the dough into balls approximately 1 inch in diameter. Then, roll each ball in powdered sugar until fully coated before placing them 2 inches apart on the parchment-lined baking sheet.
What Makes This Special
Why does this recipe work? Honestly, because it combines the two best food groups: chocolate and more chocolate, with a side of breath freshener! Jokes aside, the contrast between the chewy cookie and the snap of the candy is pure magic. It’s the kind of recipe that makes you look like a pro baker without the stress of a complicated technique. You definitely want to hit that print button or save this page because once you bring these to a cookie swap, people are going to demand the recipe. If you give these a try, please leave a comment below or ask any questions you might have. I’d love to hear how your holiday baking adventures turn out!

Chocolate Peppermint Blossoms
Description
Soft, fudge-like cookies are coated in sweet powdered sugar and crowned with a striped peppermint kiss for a wintry treat that balances rich cocoa with cool mint.
Ingredients
Instructions
-
Preheat your oven to 350°F (175°C) and line a baking sheet with parchment paper.
-
In a medium bowl, whisk together the all-purpose flour, cocoa powder, baking soda, and salt. Set aside.
-
In a large mixing bowl, cream together the softened butter and granulated sugar until the mixture is light and fluffy, about 2-3 minutes.
-
Beat in the egg and peppermint extract, mixing until well combined.
-
Gradually add the dry ingredients to the wet ingredients, mixing on low speed until just combined. Do not overmix.
-
Using a tablespoon or cookie scoop, form the dough into balls about 1 inch in diameter.
-
Roll each ball in powdered sugar until coated and then place them on the prepared baking sheet, spacing them about 2 inches apart.
-
Bake in the preheated oven for 8-10 minutes, or until the cookies are set but still soft.
-
Immediately after removing from the oven, gently press one chocolate peppermint candy into the center of each cookie.
-
Allow the cookies to cool on the baking sheet for 5 minutes before transferring them to a wire rack to cool completely.
Note
- These cookies are perfect for holiday gatherings and can easily be made ahead of time.
- The peppermint flavor can be adjusted by varying the amount of extract to suit your taste.
- For a unique twist, try using white chocolate peppermint candies instead of chocolate ones.
- These cookies can be stored in an airtight container for up to a week.
- Experiment by adding crushed candy canes to the dough for extra crunch and flavor!

