

There is something incredibly comforting about finding a dessert that tastes like a labor of love but actually comes together with supermarket shortcuts. This Cheesecake Crescent Rolls Casserole is exactly that kind of magic trick, turning humble refrigerated dough and cream cheese into a breakfast bake that rivals your favorite bakery danish. It is perfect for busy mornings or lazy weekends when you want something sweet without spending hours in the kitchen. I honestly can’t wait for you to try this recipe because it transforms simple staples into a golden, flaky, and creamy masterpiece that everyone always asks for seconds of.
Key Ingredients
Before we start baking, let's gather everything we need. This recipe relies on standard pantry and fridge staples, making it a convenient option when you need a last-minute treat. Here are the stars of the show:
- 2 cans of refrigerated crescent roll dough: This forms the buttery and flaky crust and top layer that perfectly sandwiches the filling.
- 16 ounces of cream cheese, softened: The base of our filling that ensures a rich, smooth, and tangy texture.
- 1 cup of granulated sugar: Adds just the right amount of sweetness to balance the tang of the cream cheese.
- 1 teaspoon of vanilla extract: Provides a warm and aromatic flavor depth to the cheesecake layer.
- 3 large eggs: Essential for binding the filling and giving it that classic custard-like consistency.
- 1/2 cup of sour cream: Adds moisture and a slight tanginess to keep the filling light and creamy.
- 1 teaspoon of lemon juice (optional): A splash of citrus helps cut through the richness and brightens the overall flavor profile.
- 1/4 cup of powdered sugar (for dusting): A light dusting at the end gives the casserole a professional and bakery-style finish.
- Fresh berries or fruit (for garnish, optional): Adds a pop of color and freshness that complements the rich cheese filling.
- Cooking spray or butter (for greasing the baking dish): Ensures your casserole doesn't stick and serves up easily.
How To Make Cheesecake Crescent Rolls Casserole
This recipe is all about layering, similar to how you might assemble a lasagna but much sweeter and faster. The process involves creating a sandwich effect where the creamy cheesecake filling is tucked safely between two layers of dough. It is incredibly satisfying to spread that smooth filling over the bottom crust. Just remember to handle the dough gently to keep those layers airy and light. Once it is in the oven, your kitchen will smell absolutely amazing.
1. Preheat your oven to 350°F (175°C). Prepare a 9×13 inch baking dish by greasing it lightly with cooking spray or butter.
2. Unroll one can of crescent roll dough and arrange the pieces in the bottom of the baking dish. Pinch the seams together to form a solid layer.
3. In a large mixing bowl, beat the cream cheese using an electric mixer until smooth and creamy.
4. Gradually add the granulated sugar to the cream cheese, mixing until well combined.
5. Add the vanilla extract, sour cream, and lemon juice (if using) into the cream cheese mixture. Mix until everything is well incorporated.
6. Add the eggs one at a time, mixing on low speed after each addition until just combined. Be careful not to overmix.
7. Pour the cheesecake filling over the crescent roll layer in the baking dish, spreading it evenly with a spatula.
8. Unroll the second can of crescent roll dough and layer it over the cheesecake filling, pinching the seams together as before. This will form the top layer.
9. Bake in the preheated oven for 35-40 minutes, or until the top is golden brown and the filling is set. Check by inserting a toothpick in the center; it should come out clean.
10. Once baked, remove from the oven and let the casserole cool in the pan for a few minutes. Before serving, dust the top with powdered sugar and add fresh berries or fruit for garnish if desired.
11. Slice into squares and serve warm, at room temperature, or chilled depending on your preference.
Serving Suggestions
One of the best things about this casserole is its versatility when it comes time to eat. Whether you are hosting a festive brunch or just treating the family on a Sunday morning, presentation can make a big difference. You can lean into the breakfast vibe with hot beverages or dress it up as a decadent dessert. Here are a few ways to serve this dish that will make your guests think you bought it from a high-end bakery.
- Classic Warm Comfort: Serve the squares while they are still warm from the oven to enjoy the contrast between the flaky crust and the soft, melty filling.
- Chilled Dessert Style: For a texture that resembles a traditional New York cheesecake, chill the baked casserole in the fridge for at least two hours and serve it cold for a denser bite.
- Berry Compote Topping: Instead of just fresh fruit, simmer berries with a little sugar to make a quick warm fruit sauce to ladle over individual slices.
- Brunch Buffet Platter: Slice the casserole into smaller, bite-sized mini squares and arrange them on a platter for an easy finger-food option at parties.
Tips For Perfect Cheesecake Crescent Rolls Casserole
I want to make sure your baking experience is completely stress-free and successful. Over time, I have found that a few small adjustments can really elevate this simple recipe. These tips focus on planning ahead and adding little creative touches that make the dish your own. It is really hard to mess this up, but keeping these notes in mind will ensure you get that perfect golden crust and creamy center every single time you bake it.
- Make-Ahead Magic: This casserole can be made a day ahead and stored in the refrigerator; allowing it to sit means the flavors will meld beautifully overnight before you even bake it.
- Flavor Twist: You can easily customize the filling if you substitute flavored cream cheese (like strawberry or vanilla) for a fun twist on the classic taste.
- Extra Creamy: If you really want to impress your guests, top with whipped cream for an extra indulgent touch right before serving.
- Drink Pairings: To balance the sweetness of the dish, pair with a coffee or tea for a delightful breakfast or brunch option that feels complete.
How To Store It
Since this recipe contains dairy and eggs, proper storage is crucial to keeping it safe and delicious. You might not have many leftovers because it is just that good, but if you do, you want to make sure they taste just as great the next day. The texture changes slightly when chilled, becoming denser and fudgier, which many people actually prefer. Here is how to keep your casserole fresh.
- Refrigerate Promptly: Because of the cream cheese filling, you should place any leftovers in the refrigerator within two hours of baking to ensure they remain food safe.
- Airtight Protection: Store the squares in an airtight container or cover the baking dish tightly with plastic wrap to prevent the edges from drying out.
- Storage Life: When stored properly in the fridge, this casserole will stay fresh for up to 3 to 4 days.
- Freezing Option: You can freeze individual slices wrapped in plastic wrap and foil for up to 2 months, then thaw them in the refrigerator overnight.
Frequently Asked Questions
I know you might have a few questions before you get started, especially if you are baking this for the first time. Here are the most common things people ask about this recipe to help you feel confident in the kitchen.
- Q: Can this recipe be prepared ahead of time, and how does that affect the flavor?
Yes, this casserole is actually an excellent option for making in advance. According to the recipe notes, you can bake the casserole a day ahead and store it in the refrigerator. Doing so allows the flavors to meld beautifully overnight, potentially enhancing the taste compared to serving it immediately after baking.
- Q: How do I ensure the cheesecake filling has the correct texture and consistency?
To achieve a smooth and creamy filling, you must start with softened cream cheese and beat it until smooth before adding other ingredients. When adding the eggs, it is important to mix them in one at a time on low speed and only until just combined. Overmixing the eggs can affect the texture of the cheesecake layer.
- Q: How can I tell when the casserole is fully cooked and safe to remove from the oven?
You should bake the dish at 350°F (175°C) for approximately 35 to 40 minutes. The visual indicators that the casserole is done are a golden brown top crust and a filling that has set. You can confirm this by inserting a toothpick into the center of the casserole; if it comes out clean, the dish is ready.
- Q: What is the proper technique for handling the crescent roll dough for the top and bottom layers?
For both the bottom and top layers, you need to unroll the cans of refrigerated dough and arrange the pieces in the 9×13 inch baking dish. The most critical step is to pinch the seams together where the perforated triangles meet to form a single, solid sheet. This ensures the filling stays contained in the middle and provides a uniform crust.
- Q: Are there any variations suggested for the filling if I want to change the flavor profile?
The recipe notes suggest a fun twist by substituting the standard plain cream cheese with flavored cream cheese, such as strawberry or vanilla. Additionally, while the main recipe lists lemon juice as optional, adding it can provide a subtle brightness to the filling. You can also customize the presentation by serving it with different fresh berries or fruit.
What Makes This Special
This recipe is truly special because it bridges the gap between a convenient breakfast bake and a sophisticated dessert. The combination of the tangy, rich filling with the buttery convenience of crescent rolls makes it a winner every time. It is a fantastic recipe to have in your back pocket for holidays or just a random Tuesday treat. Don't forget to print this article or save it for later so you can find it easily when the craving strikes. If you try this Cheesecake Crescent Rolls Casserole or have any questions while making it, please leave a comment below because I would love to hear how it turned out for you!
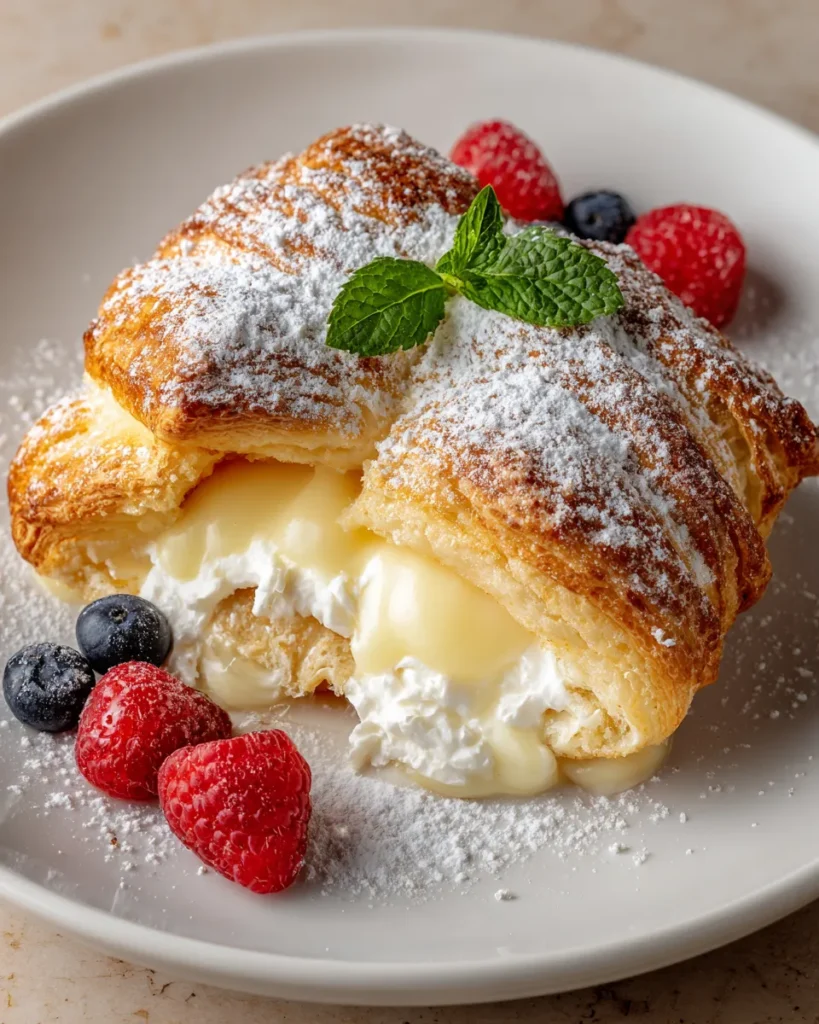

Cheesecake Crescent Rolls Casserole
Description
This sweet bake features a luscious cream cheese filling nestled between sheets of flaky dough. Finished with powdered sugar, it offers the comfort of a warm danish in casserole form.
Ingredients
Instructions
-
Preheat your oven to 350°F (175°C). Prepare a 9x13 inch baking dish by greasing it lightly with cooking spray or butter.
-
Unroll one can of crescent roll dough and arrange the pieces in the bottom of the baking dish. Pinch the seams together to form a solid layer.
-
In a large mixing bowl, beat the cream cheese using an electric mixer until smooth and creamy.
-
Gradually add the granulated sugar to the cream cheese, mixing until well combined.
-
Add the vanilla extract, sour cream, and lemon juice (if using) into the cream cheese mixture. Mix until everything is well incorporated.
-
Add the eggs one at a time, mixing on low speed after each addition until just combined. Be careful not to overmix.
-
Pour the cheesecake filling over the crescent roll layer in the baking dish, spreading it evenly with a spatula.
-
Unroll the second can of crescent roll dough and layer it over the cheesecake filling, pinching the seams together as before. This will form the top layer.
-
Bake in the preheated oven for 35-40 minutes, or until the top is golden brown and the filling is set. Check by inserting a toothpick in the center; it should come out clean.
-
Once baked, remove from the oven and let the casserole cool in the pan for a few minutes. Before serving, dust the top with powdered sugar and add fresh berries or fruit for garnish if desired.
-
Slice into squares and serve warm, at room temperature, or chilled depending on your preference.
Note
- This casserole can be made a day ahead and stored in the refrigerator; flavors will meld beautifully overnight.
- Substitute flavored cream cheese (like strawberry or vanilla) for a fun twist.
- Top with whipped cream for an extra indulgent touch.
- Pair with a coffee or tea for a delightful breakfast or brunch option.

