

Fall is practically bottled up in this silky, cinnamon-spiced apple pie filling that’s ready to transform any dessert into a cozy masterpiece. With every spoonful, you’ll taste the perfect balance of tart Granny Smith apples or honey-sweet Honeycrisp slices, tenderly enveloped in a glossy, warmly spiced sauce. Whether you’re rolling out a flaky crust for a classic pie, folding it into pastries, or dolloping it over vanilla ice cream, this filling becomes the heart of every recipe it touches. From the very first stir to the gentle bubble on the stovetop, you’ll be swept away by the mixture of sweet sugars and autumnal spices marrying together in perfect harmony.
What makes this apple pie filling truly shine is its ease and versatility. Designed with beginner bakers in mind, it takes just fifteen minutes of hands-on preparation, another fifteen minutes of gentle cooking, and a short ten-minute rest before it’s ready for action—no pastry expertise required! You’ll find yourself reaching for this recipe again and again, whether you’re planning a holiday feast or craving a spontaneous midnight treat. Best of all, each serving clocks in around 300 calories, so you can savor the homemade goodness without any guilt. Grab your apron, cue your favorite playlist, and get ready to fill your kitchen with the cozy spirit of fall—one spoonful at a time.
KEY INGREDIENTS IN APPLE PIE FILLING
Before diving into the cooking process, let’s explore the simple yet essential ingredients that give this apple pie filling its unbeatable flavor and texture. Each component plays a crucial role, whether it’s building the sweet-spicy base, thickening the sauce, or ensuring the apples stay tender but intact. You’ll find these pantry staples are easy to source year-round, making this recipe a reliable go-to whenever an apple craving strikes.
- Apples
Crisp and tangy varieties like Granny Smith or sweet Honeycrisp are ideal. Their firm texture holds up during cooking, providing tender slices that still have a pleasant bite.
- Lemon Juice
A splash of acidity helps prevent the apples from browning and balances the sweetness, giving the filling a bright, fresh undertone.
- Granulated Sugar
The backbone of the sweetness, it dissolves smoothly to create the base of the syrupy sauce.
- Brown Sugar
Adds a rich, caramel-like depth that complements the tart apples and spicy notes.
- Cornstarch
Acts as the thickening agent, ensuring the sauce becomes glossy and coats each apple slice perfectly without being gloopy.
- Ground Cinnamon
The star spice in this filling, providing warm, comforting flavor that evokes all the best memories of fall baking.
- Ground Nutmeg
Offers a subtle, nutty sweetness that pairs beautifully with cinnamon, adding complexity to the spice blend.
- Ground Allspice
Brings a hint of clove and peppery warmth, rounding out the spiced profile in just the right way.
- Salt
Enhances all the flavors, making the sweetness more pronounced and the spices more vibrant.
- Water
Forms the liquid base for the spiced syrup, allowing each spice to bloom and meld.
- Vanilla Extract
A final whisper of floral sweetness that elevates the overall flavor, tying all the ingredients together.
- Butter
Adds richness and a silky finish, giving the sauce a luxurious mouthfeel.
HOW TO MAKE APPLE PIE FILLING
Bringing this apple pie filling to life is a straightforward process that highlights simple techniques any home cook can master. You’ll start by treating your apples, then create a smooth spiced syrup before combining them into tender, flavorful perfection. Let’s walk through each step.
1. In a large mixing bowl, toss the sliced apples with the lemon juice to prevent browning and set aside. This step locks in the fresh flavor and vibrant color of the apples.
2. In a large saucepan, combine the granulated sugar, brown sugar, cornstarch, cinnamon, nutmeg, allspice, and salt. Stir until well combined to ensure the spices are evenly distributed throughout the mixture.
3. Gradually add the water to the sugar and spice mixture in the saucepan, stirring constantly to prevent lumps and create a smooth base for your filling.
4. Place the saucepan over medium heat and continue stirring until the mixture comes to a boil. Once boiling, let it cook for 2 minutes, which activates the cornstarch and thickens the sauce into a glossy texture.
5. Remove the saucepan from the heat and stir in the vanilla extract and butter, mixing until the butter is fully melted and incorporated, which adds a luscious creaminess to the filling.
6. Add the prepared apple slices to the saucepan, ensuring they are evenly coated with the sauce so each piece picks up that warm, spiced flavor.
7. Return the saucepan to medium heat and cook for 5-7 minutes, occasionally stirring, until the apples are tender but not mushy, retaining a pleasant bite.
8. Let the apple pie filling cool slightly before using it in your favorite pie crust or storing it in an airtight container in the refrigerator for later use. This resting period helps the sauce to set and thicken just a bit more.
SERVING SUGGESTIONS FOR APPLE PIE FILLING
Once you’ve crafted this dreamy apple pie filling, you’ll discover countless ways to showcase its autumnal charm. In this section, we’ll explore creative and delicious ideas to serve this versatile filling, whether you’re entertaining guests or indulging in a quiet evening at home. From classic presentations to unexpected pairings, each suggestion will elevate your dessert game and delight every sweet tooth.
- A Classic Pie: Spoon the filling into a flaky pie crust, weave a lattice top or cover with a full crust, and bake until golden brown. Serve warm with a dusting of powdered sugar and a scoop of vanilla ice cream for a timeless treat.
- Handheld Turnovers: Fill squares of puff pastry or pie dough with a generous spoonful of filling, fold over into triangles, and seal the edges. Brush with an egg wash, sprinkle coarse sugar on top, and bake until puffed and crispy for on-the-go delights.
- Rustic Galette: Spread the filling in the center of a round sheet of dough, leaving a border. Fold the edges inward to create a free-form tart, brush with milk, and bake until the crust is golden. The open-faced design is both charming and extra-easy to assemble.
- Ice Cream Sundae: Warm the filling slightly and drizzle it over scoops of rich vanilla or caramel gelato. Top with toasted pecans, a swirl of whipped cream, and a sprinkle of cinnamon for an elevated sundae that screams indulgence.
HOW TO STORE APPLE PIE FILLING
Preserving the fresh flavors and perfect texture of your homemade apple pie filling is key to enjoying it time and again. Whether you’re making a big batch ahead of holiday baking or saving leftovers for other desserts, these storage tips will help maintain its cozy spice blend and tender apples. Follow these recommendations to keep your filling tasting just as vibrant as the day you made it.
- Refrigerator Storage
Transfer cooled filling into an airtight container and store in the fridge for up to one week. Make sure the lid seals tightly to prevent the apples from absorbing other flavors.
- Freezer Method
Portion the cooled filling into freezer-safe bags, remove excess air, and lay flat to freeze for up to three months. Thaw in the refrigerator overnight before using and gently reheat on the stovetop.
- Mason Jar Preservation
Ladle the still-warm filling into sterilized glass jars, seal, and refrigerate. This method allows for easy stacking and a charming presentation if you plan to gift the filling to friends.
- Ice Cube Tray Portions
Spoon small amounts of filling into an ice cube tray, freeze until solid, then transfer cubes into a resealable bag. These bite-sized portions are perfect for quick topping needs, like ice cream or oatmeal.
CONCLUSION
From the first glance at lists of pantry staples to the final notes of sweet spice on your taste buds, this homemade apple pie filling recipe is designed to make every step of the process feel effortless and joyful. Whether you’re a baking novice or a seasoned kitchen enthusiast, these simple ingredients—tart apples, warming spices, velvety sugars, and a touch of vanilla—come together in under thirty minutes to create a versatile filling that works in pies, tarts, turnovers, and beyond. The mix of cinnamon, nutmeg, and allspice balances beautifully against the sweet-tart apple base, while cornstarch ensures the perfect, glossy thickness. You’ll love how easily it transforms your desserts into cozy autumn celebrations. Feel free to adjust sugar levels or experiment with a pinch of ginger or cloves for an extra aromatic punch. And remember, you can print this article and save it in your recipe binder, so it’s just a reach away when you’re ready to bake.
After you try out this filling, let us know how it turned out! You can also find an FAQ below for troubleshooting common questions about apple varieties, thickening tricks, and storage hacks. We’d love to hear your feedback, anecdotes, or any creative twists you come up with—did you swirl it into your morning pancakes or layer it in a cheesecake? Drop a comment, ask a question, or share your experiences so we can all keep learning and baking together. Your input helps fellow home cooks bring that warm taste of fall into their homes, one slice (or scoop!) at a time.
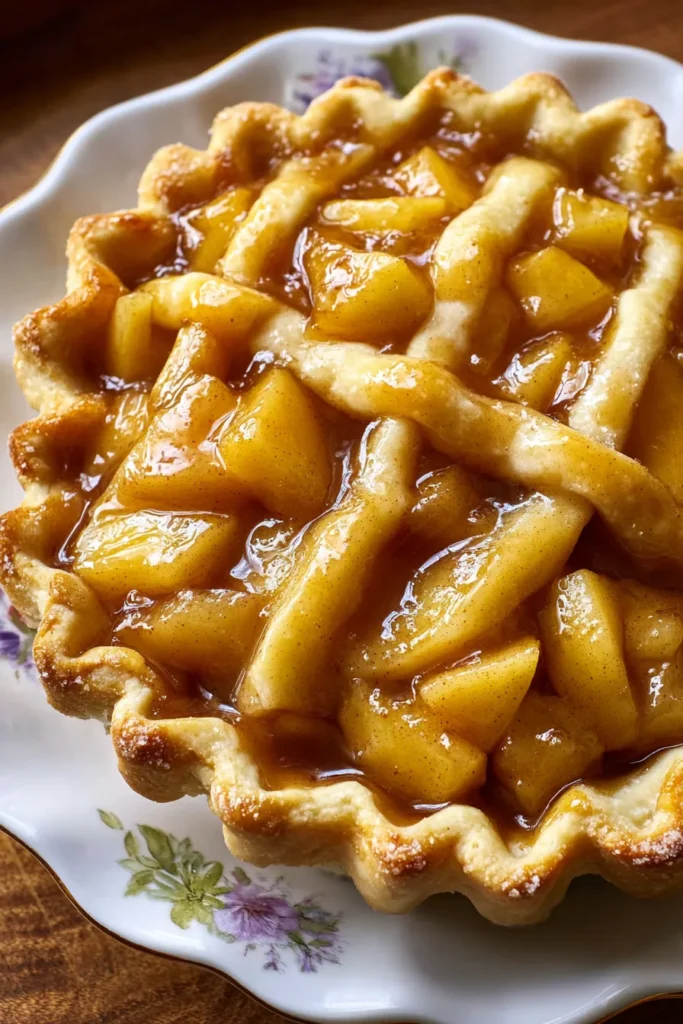

Apple Pie Filling
Description
This apple pie filling is a perfect blend of tart and sweet apples, enhanced with cozy spices. It's incredibly versatile, great for pies, tarts, or even ice cream toppings!
Ingredients
Instructions
-
In a large mixing bowl, toss the sliced apples with the lemon juice to prevent browning and set aside.
-
In a large saucepan, combine the granulated sugar, brown sugar, cornstarch, cinnamon, nutmeg, allspice, and salt. Stir until well combined.
-
Gradually add the water to the sugar and spice mixture in the saucepan, stirring constantly to prevent lumps.
-
Place the saucepan over medium heat and continue stirring until the mixture comes to a boil. Boil for 2 minutes, until it thickens and becomes smooth.
-
Remove the saucepan from the heat and stir in the vanilla extract and butter, mixing until the butter is fully melted and incorporated.
-
Add the prepared apple slices to the saucepan, ensuring they are evenly coated with the sauce.
-
Return the saucepan to medium heat and cook for 5-7 minutes, occasionally stirring, until the apples are tender but not mushy.
-
Let the apple pie filling cool slightly before using it in your favorite pie crust or storing it in an airtight container in the refrigerator for later use.
Note
- For a more robust flavor, try adding a pinch of ground cloves or ginger.
- This filling can be stored in the refrigerator for up to a week or frozen for up to 3 months.
- Be mindful of the apple variety, as different apples offer varying levels of sweetness and texture.
- Adjust the sugar levels according to your preferred sweetness and the natural sweetness of your apples.
- Ideal for use in pies, tarts, turnovers, or as a topping for ice cream.

