

Savor the flaky goodness of homemade Apple & Cream Cheese Danish, a perfect blend of sweet and savory delights! If you’ve ever craved a breakfast treat that feels a little fancy without requiring endless hours in the kitchen, this is your ticket to pastry bliss. With just a handful of simple pantry staples, you can whip up something that looks straight out of a café display case. Think about that first bite: layers of buttery, golden puff pastry giving way to a pillowy cloud of tangy-sweet cream cheese, all crowned by tender apple slices dusted with warm cinnamon and caramel-kissed brown sugar. It’s beginner-friendly, yet impressive enough to serve when guests drop by or to indulge in for yourself on a lazy Sunday morning.
This easy recipe comes together in just about 20 minutes of prep time, bakes in under 18 minutes, and needs a brief five-minute rest before you dig in—perfect for busy home cooks who want maximum reward with minimal fuss. Each Danish clocks in around 250 calories, so you can treat yourself mindfully without derailing your day. Whether you’re planning a cozy brunch, a mid-afternoon pick-me-up, or a dessert that feels a bit more sophisticated, this Apple & Cream Cheese Danish checks all the boxes. As someone who’s spent endless weekends experimenting in the kitchen, I promise you that the payoff—flaky layers, creamy center, and spiced apples—will have everyone reaching for seconds.
KEY INGREDIENTS IN APPLE & CREAM CHEESE DANISH
Before we dive into the fun of rolling, folding, and baking, let’s get to know the stars of our show. Each component plays a vital role, from ensuring a flaky crust to delivering that luscious, melt-in-your-mouth filling.
- Puff Pastry
This ready-to-use sheet provides the classic, airy layers that define a Danish. When thawed but still chilled, it bakes up into crisp, buttery crescents of pastry heaven.
- Cream Cheese
Softened to a silky consistency, cream cheese lends a tangy richness that contrasts beautifully with the sweetness of the apples and sugars.
- Granulated Sugar
This fine, white sugar sweetens the cream cheese filling, helping it set up with a smooth, custard-like texture as it bakes.
- Vanilla Extract
A splash of vanilla brightens the cream cheese mixture, adding warmth and depth of flavor without overpowering the delicate pastry.
- Apple
Thinly sliced apples add a juicy, crisp bite. Their natural tartness becomes perfectly balanced once coated in cinnamon and brown sugar.
- Ground Cinnamon
Just a hint gives those apple slices a cozy, aromatic spice note that evokes autumn comfort.
- Brown Sugar
A touch of molasses-rich sweetness caramelizes during baking, creating little pockets of gooey goodness atop each Danish.
- Egg
Beaten and used in the egg wash, it ensures the pastry edges bake to a brilliant golden brown and develop a beautiful sheen.
- Milk
Mixed with the egg wash, milk slightly thins the coating so it spreads evenly and seals the folds for a flawless finish.
- Powdered Sugar
An optional dusting adds a delicate sweetness and a picture-perfect look, like a dusting of fresh snow on your pastries.
HOW TO MAKE APPLE & CREAM CHEESE DANISH
Let’s walk through how to assemble these delightful pastries step by step. From prepping your puff pastry to sealing each envelope of goodness, these instructions will guide you toward bakery-quality results in your own kitchen.
1. Preheat your oven to 400°F (200°C) and line a baking sheet with parchment paper. This ensures even baking and makes cleanup a breeze.
2. On a lightly floured surface, roll out the puff pastry sheet to smooth out any fold lines. Use a sharp knife or a pizza cutter to cut it into four equal squares, taking care to keep the edges neat.
3. In a small bowl, whisk together the cream cheese, granulated sugar, and vanilla extract until completely smooth and creamy. Scrape down the sides to incorporate every bit.
4. Spoon a heaping tablespoon of the cream cheese mixture into the center of each puff pastry square, leaving a small border around the edges for folding.
5. Arrange the apple slices over the cream cheese layer, then sprinkle each bundle with ground cinnamon and brown sugar for that signature sweet-spiced flavor.
6. Gently fold the corners of each puff pastry square toward the center, pressing lightly to seal and create an elegant envelope shape. Ensure edges are snug so no filling leaks out.
7. In another small bowl, whisk the beaten egg with milk to create a glossy egg wash. Brush the pastry edges and folds so they’ll bake up with a rich golden hue.
8. Bake in the preheated oven for 15–18 minutes, or until the pastries have puffed up beautifully and turned a deep, golden brown.
9. Remove from the oven and let the Danishes cool slightly on the baking sheet. If desired, dust lightly with powdered sugar for a delicate finishing touch before serving.
SERVING SUGGESTIONS FOR APPLE & CREAM CHEESE DANISH
When it comes to presenting these Danishes, you can let your creativity shine. They’re versatile enough to star at breakfast, brunch, snack time, or as an elegant dessert. Pair them wisely, and you’ll elevate each flaky, creamy bite to new heights. Whether you’re hosting a brunch buffet or simply treating yourself to a cozy café moment at home, these serving ideas will help you showcase the Danishes in style.
- Warm with a Drizzle of Caramel
Heat your Danishes in a toaster oven until the edges are crisp once more, then drizzle warm caramel sauce over the top for an extra layer of indulgence. A sprinkle of flaky sea salt balances the sweetness perfectly.
- With a Scoop of Vanilla Ice Cream
Serve a warm Danish alongside a generous scoop of rich vanilla ice cream. The contrast of hot pastry and cold, creamy ice cream creates a delightful play of temperatures and textures.
- Accompanied by Fresh Berries
Arrange a handful of seasonal berries—think raspberries, blueberries, or sliced strawberries—on the side. The bright fruit adds color, a burst of freshness, and a slightly tart counterpoint to the sweet Danish.
- Styled on a Brunch Platter
Place your Danishes on a rustic wooden board with small bowls of whipped cream, fruit preserves, and toasted nuts. Guests can customize their toppings, making your brunch spread interactive and fun.
HOW TO STORE APPLE & CREAM CHEESE DANISH
Leftover Danishes can be just as tempting as when they first come out of the oven, if you know how to preserve their flaky texture and creamy filling. Proper storage ensures your pastries stay fresh, avoid sogginess, and maintain that irresistible bite. Below are some methods to keep them tasting home-baked, even hours or a couple of days later.
- Store at Room Temperature
If you plan to eat them within a few hours, place cooled pastries in an airtight container or cover them loosely with foil. This keeps them crisp on the outside while preserving the cream cheese center for up to a day.
- Refrigerate for Longer Freshness
For storage up to 2 days, arrange the Danishes on a plate and cover with plastic wrap, or tuck them into an airtight container in the fridge. Before serving, let them come to room temperature or warm briefly in a low oven to refresh the crust.
- Freeze for Extended Storage
To extend their life up to 1 month, flash-freeze the cooled Danishes on a baking sheet, then transfer them to a resealable freezer bag. Place parchment paper between layers to prevent sticking. Thaw overnight in the fridge and reheat as desired.
- Reheat to Restore Flakiness
Whether from the fridge or freezer, place Danishes in a toaster oven or conventional oven at 350°F (175°C) for about 5–8 minutes. This revives the puff pastry’s crispiness without overcooking the filling.
CONCLUSION
We’ve taken a delightful journey through the world of home-baked Apple & Cream Cheese Danish, exploring every step from gathering key ingredients to mastering the perfect golden finish. You’ve learned how simple components—puff pastry, cream cheese, sugar, and apples—come together in a symphony of textures and flavors that feels both sophisticated and surprisingly easy to achieve. As you tuck into that first warm, buttery bite, you’ll appreciate how each layer contributes: the flakiness of the pastry, the creamy tang of the cheese, the tender sweetness of the apples spiced with cinnamon and brown sugar. This recipe proves that beginner-friendly doesn’t mean basic—it means anyone can create something extraordinary with just a little guidance and enthusiasm.
Feel free to print this article and save it in your recipe binder, or pin it to your digital kitchen board so it’s always within reach. You can also scroll down to find our FAQ section below for quick answers to common questions, whether you want tips on choosing apple varieties or tricks for perfect pastry puff. If you give this Danish recipe a whirl, I’d love to hear how it turned out for you. Drop your comments, questions, or feedback below—let me know if you experimented with different apples, added a pinch of nutmeg, or discovered a new favorite way to serve these golden pockets of joy. Happy baking, and may every bite bring a smile to your table!
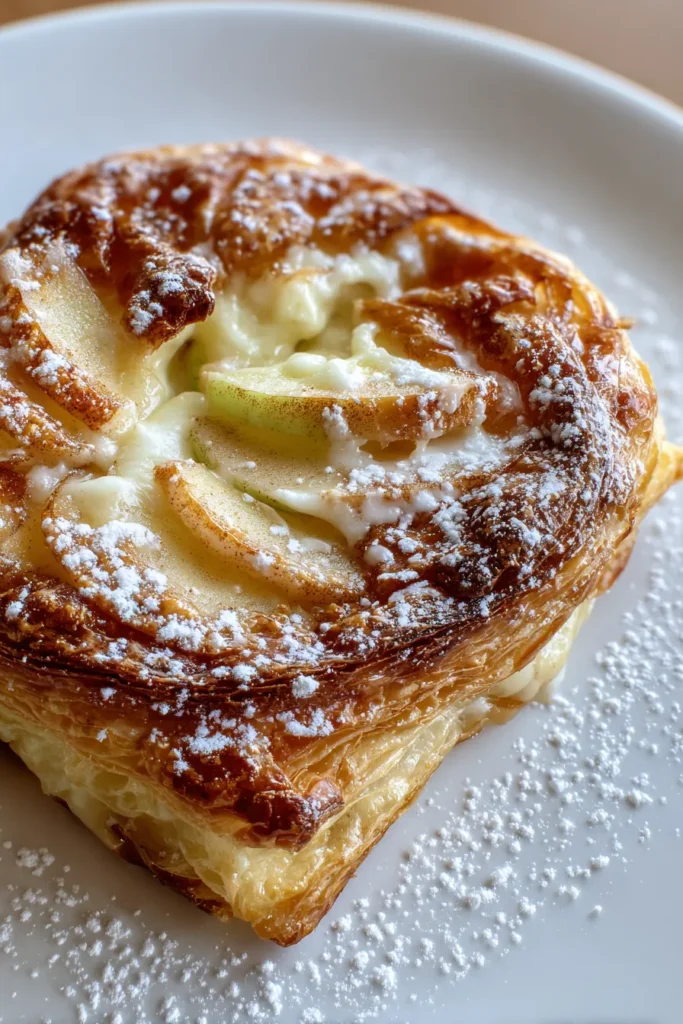

Apple & Cream Cheese Danish
Description
Experience the delightful combination of flaky pastry, creamy filling, and spiced apples in this easy-to-make Danish that's perfect for any occasion.
Ingredients
Instructions
-
Preheat your oven to 400°F (200°C) and line a baking sheet with parchment paper.
-
On a lightly floured surface, roll out the puff pastry sheet to eliminate any fold lines and cut it into four equal squares.
-
In a small bowl, combine the cream cheese, granulated sugar, and vanilla extract until smooth and creamy.
-
Spread a heaping tablespoon of the cream cheese mixture onto the center of each puff pastry square.
-
Layer the apple slices over the cream cheese, then sprinkle the apple with ground cinnamon and brown sugar.
-
Fold the corners of the puff pastry squares towards the center and gently press to seal.
-
In a small bowl, whisk together the beaten egg and milk to create an egg wash. Brush the edges of the pastries with the egg wash to ensure a golden brown finish.
-
Bake in the preheated oven for 15-18 minutes or until the pastries are puffed and golden brown.
-
Allow them to cool slightly before dusting with powdered sugar if desired.
Note
- For a richer flavor, you can add a pinch of nutmeg to the apple cinnamon mixture.
- Make sure your puff pastry is completely thawed but still cold to maintain its structure.
- Consider serving your danish with a scoop of vanilla ice cream for added indulgence.
- Store leftovers in an airtight container for up to 2 days, and reheat in a toaster oven for best results.
- You can experiment with different apple varieties for unique flavors; Granny Smith and Honeycrisp work particularly well.

