

These rich, chewy chocolate protein bites loaded with oats, peanut butter, and a hint of maple sweetness are your new go-to snack. Vegan No-Bake Chocolate Protein Balls blend creamy peanut butter, rich cocoa, and hearty oats into bite-sized treats. Rolled in dairy-free chips, they offer a comforting, chocolaty energy boost with each chilled nibble. Perfect for breakfast, post-workout fuel, or an afternoon pick-me-up, they’re beginner-friendly and require no oven time. Keep reading to discover how simple it is to whip up these indulgent, healthy snacks and why they’ll become a staple in your kitchen.
Key Ingredients
Get ready to gather these wholesome staples for your protein-packed bites:
- 1 cup rolled oats: Provides hearty texture and slow-release energy for sustained fullness.
- 1/2 cup vegan chocolate protein powder: Boosts plant-based protein and deepens the chocolate flavor.
- 1/2 cup natural peanut butter: Adds creamy richness and healthy fats to bind the mixture.
- 1/4 cup maple syrup: Sweetens naturally while helping the dough stick together.
- 2 tablespoons unsweetened cocoa powder: Intensifies the chocolate taste without added sugar.
- 1 teaspoon vanilla extract: Lifts the flavors with a warm, fragrant note.
- Pinch salt: Balances sweetness and enhances the chocolate profile.
- 2 tablespoons ground flaxseed: Introduces extra fiber and helps thicken the dough.
- 2 tablespoons dairy-free mini chocolate chips: Add burst-size pockets of melty chocolate in every bite.
How To Make Vegan No-Bake Chocolate Protein Balls
These protein balls come together in just a few simple steps—no baking required. You’ll first build a dry foundation, then bring in the sticky, sweet ingredients that hold everything together. After folding in the dairy-free chocolate chips, you’ll shape each ball and chill them until firm. Follow the detailed steps below, and you’ll have a tray of perfectly uniform, fudgy bites in under an hour.
1. In a large bowl combine rolled oats, vegan chocolate protein powder, unsweetened cocoa powder, ground flaxseed, and a pinch of salt, stirring until the dry ingredients are evenly mixed.
2. Add natural peanut butter, maple syrup, and vanilla extract, then stir vigorously until a thick, cohesive dough forms with no streaks of dry mix.
3. Fold in dairy-free mini chocolate chips gently so they’re uniformly distributed throughout the mixture without smashing them.
4. If the dough feels too dry and crumbly, add a teaspoon of water or extra maple syrup at a time until it holds together easily.
5. Scoop out tablespoon-sized portions and roll them between your palms, forming smooth, compact balls.
6. Place the balls on a parchment-lined plate or tray and chill in the refrigerator for 30 minutes to set.
Serving Suggestions
Once your balls are perfectly chilled, it’s time to serve them in style. Whether you’re hosting brunch or packing lunches, these bites adapt beautifully:
- Arrange on a decorative platter with fresh berries and mint for a brunch spread that looks as good as it tastes.
- Pack in portable containers layered with parchment paper for an on-the-go breakfast or office snack.
- Pair with a cold brew or almond milk latte as a post-workout treat that balances protein and flavor.
- Sprinkle extra dairy-free chips or a dusting of cocoa powder on top just before serving for a photo-ready finish.
Tips For Perfect Vegan No-Bake Chocolate Protein Balls
Nailing the texture and flavor is a breeze with these friendly pointers. Whether you’re aiming for fudgy or firm, these tips from my kitchen help you get it just right:
- Store in an airtight container in the refrigerator for up to one week.
- Freeze in a single layer on a tray before transferring to a freezer bag for up to three months.
- Swap peanut butter for almond or sunflower seed butter to change the flavor.
- Roll the balls in shredded coconut or crushed nuts for added texture.
How To Store It
Keeping these protein balls fresh and delicious is key to enjoying them all week long. Follow these storage techniques to maintain their chewy consistency and chocolaty depth:
- Airtight Refrigerator Storage: Store in an airtight container in the fridge for up to one week, lining with parchment to prevent sticking.
- Flash-Freezing in the Freezer: Arrange balls in a single layer on a parchment-lined tray, freeze until firm, then transfer to a freezer-safe bag for up to three months.
- Layering with Parchment: Place parchment paper between layers in your container—whether fridge or freezer—to lift out treats without damage.
Frequently Asked Questions
Here are quick answers to the most common questions—no fluff, just helpful info:
- How long does it take to prepare and chill the Vegan No-Bake Chocolate Protein Balls?
Active prep time is about 10–15 minutes, which includes measuring ingredients, mixing the dough, and rolling the balls. After shaping, you’ll need to chill them in the refrigerator for 30 minutes to firm up, so total time is around 45 minutes.
- What should I do if the dough is too dry or too sticky?
If the dough feels too dry and crumbly, add a teaspoon of water or extra maple syrup at a time until it holds together. If it’s overly sticky, stir in a tablespoon of rolled oats or ground flaxseed until it’s easier to handle and roll into balls.
- Can I substitute the peanut butter with another spread?
Yes. You can swap natural peanut butter for almond butter, sunflower seed butter, or cashew butter. Keep in mind that different nut and seed butters vary in oil content, so you may need to adjust the liquid ratio by adding a little more maple syrup or oats to achieve the right consistency.
- How many protein balls does this recipe yield?
Using tablespoon-sized scoops, this recipe makes approximately 20–24 protein balls, depending on how firmly you pack the scoops and the exact size you roll.
- What’s the best way to store these protein balls, and how long will they stay fresh?
Store the balls in an airtight container in the refrigerator for up to one week. Place a piece of parchment paper between layers to prevent sticking. To extend their shelf life, you can freeze them for up to three months.
- How do I freeze the protein balls so they don’t stick together?
Lay the rolled balls in a single layer on a parchment-lined tray and freeze for about one hour. Once they’re firm, transfer them to a freezer-safe bag or container. This flash-freeze method prevents them from clumping together.
- Are there ways to vary the flavor or texture of this recipe?
Absolutely. You can roll the chilled balls in shredded coconut, crushed nuts, or extra cocoa powder for added texture and flavor. To change the sweetness, swap maple syrup for agave or brown rice syrup. You can also stir in spices like cinnamon or a pinch of chili powder for a twist.
What Makes This Special
What really sets these Vegan No-Bake Chocolate Protein Balls apart is their perfect balance of rich chocolate, nutty warmth, and wholesome oats all in one bite—no baking required. They’re a no-fuss, beginner-friendly recipe that feels indulgent yet fuels your day with plant-based protein. Go ahead, print this article and tuck it into your recipe binder for whenever you need a quick energy boost. Got questions or tried the recipe? Drop a comment below—I’d love to hear how they turned out or help troubleshoot any kitchen adventures!
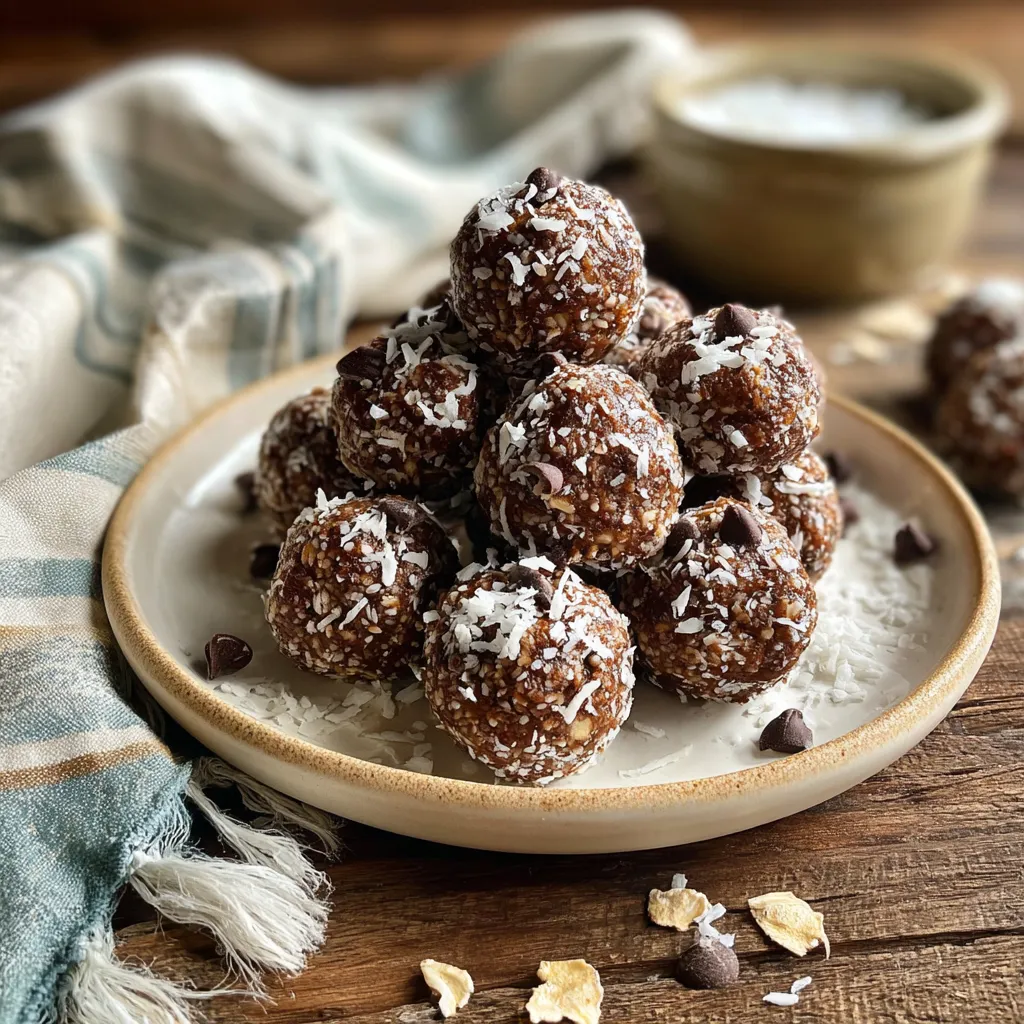

Vegan No-Bake Chocolate Protein Balls
Description
These vegan no-bake chocolate protein balls blend creamy peanut butter, rich cocoa, and hearty oats into bite-sized treats. Rolled in dairy-free chips, they offer a chewy, chocolaty energy boost with each chilled nibble.
Ingredients
Instructions
-
In a large bowl combine rolled oats, protein powder, cocoa powder, ground flaxseed, and salt.
-
Add peanut butter, maple syrup, and vanilla extract and stir until a thick dough forms.
-
Fold in dairy-free mini chocolate chips evenly throughout the mixture.
-
If the dough is too dry, add a teaspoon of water or extra maple syrup until it holds together.
-
Scoop out tablespoon-sized portions and roll them between your palms to form balls.
-
Place the balls on a plate or tray lined with parchment paper and chill in the refrigerator for 30 minutes.
Note
- Store in an airtight container in the refrigerator for up to one week.
- Freeze in a single layer on a tray before transferring to a freezer bag for up to three months.
- Swap peanut butter for almond or sunflower seed butter to change the flavor.
- Roll the balls in shredded coconut or crushed nuts for added texture.

