

There’s something undeniably comforting about a batch of Traditional German Butter Cookies fresh from the oven. As these little golden rounds bake, they fill the kitchen with a warm sweetness that feels like a cozy hug. Each cookie has that perfect balance of crisp edges and tender centers, providing a slight crunch before melting effortlessly on your tongue. Baking these treats is not only a delightful sensory experience but also a fun way to bond with loved ones—whether you’re shaping stars with your kids or sneaking a taste of dough when no one’s looking (guilty as charged!).
What makes these butter cookies truly special is how simple ingredients come together to create a classic dessert that’s beloved across generations. With just butter, sugar, a touch of vanilla, flour, and a few pantry staples, you can whip up around 40 of these melt-in-your-mouth gems in under an hour. There’s nothing fussy about rolling, cutting, and decorating—though you’re absolutely encouraged to sprinkle them with powdered sugar or dip them in chocolate for an extra flourish. Whether you’re a beginner baker or a seasoned pro, these cookies are foolproof, festive, and perfect for holiday baking or as an anytime treat with your afternoon coffee.
KEY INGREDIENTS IN TRADITIONAL GERMAN BUTTER COOKIES
Before we dive into the baking process, let’s take a look at the star players in this recipe. Each ingredient plays a unique role in delivering that classic buttery flavor and delightful crunch.
- Unsalted Butter
This is the foundation of our cookies—creamy, rich, and crucial for that melt-in-your-mouth texture. Using unsalted butter lets you control the overall saltiness, ensuring each bite stays balanced.
- Granulated Sugar
Beyond adding sweetness, sugar helps create tiny air pockets when creamed with butter, giving the cookies a light and fluffy structure.
- Vanilla Extract
A splash of vanilla brings warmth and depth, elevating the overall flavor profile with its sweet, aromatic notes.
- Egg
The egg acts as a binder, providing structure and moisture so that the dough holds its shape and bakes into tender cookies.
- All-Purpose Flour
This versatile flour provides the necessary gluten to bind everything together while keeping the cookies tender rather than chewy.
- Salt
A pinch of salt sharpens all the flavors, cutting through the sweetness and enhancing the buttery richness.
- Baking Powder
A small amount of leavening gives the cookies a gentle lift, ensuring they’re not too dense while still holding their shapes beautifully.
- Powdered Sugar (Optional)
Dusting with powdered sugar adds a snowy finish and a delicate sweetness—perfect for holiday presentation.
- Chocolate (Optional)
Whether melted for dipping or drizzled on top, chocolate adds a decadent twist that pairs beautifully with the buttery base.
HOW TO MAKE TRADITIONAL GERMAN BUTTER COOKIES
Let’s roll up our sleeves and bring these buttery delights to life. From preheating the oven to that satisfying final sprinkle, each step is straightforward and rewarding.
1. Preheat your oven to 180°C (350°F). Line a baking sheet with parchment paper to prevent the cookies from sticking and to ensure even browning.
2. In a large mixing bowl, cream together the softened butter and granulated sugar until the mixture is light and fluffy, about 3 to 5 minutes. This step incorporates air, creating that tender texture.
3. Add the vanilla extract and the egg to the butter-sugar mixture. Mix until fully combined, making sure the egg is well integrated for a smooth, cohesive batter.
4. In a separate bowl, whisk together the all-purpose flour, salt, and baking powder. Gradually add the dry ingredients to the wet mixture on low speed to avoid flour puffing everywhere. Mix just until the dough comes together.
5. Once the dough is formed, either roll it out on a lightly floured surface to about 0.5 cm (1/4 inch) thick or use a cookie press for decorative shapes.
6. Cut the dough into your favorite shapes—stars, hearts, circles—and place them on the prepared baking sheet, leaving space for slight spreading.
7. Bake for 10 to 12 minutes, or until the edges begin to turn golden. Keep a close eye to prevent over-browning, as cookie size can affect timing.
8. Remove the baking sheet from the oven and let the cookies cool on the sheet for 5 minutes. Then transfer them to a wire rack to cool completely.
9. Once cooled, dust with powdered sugar or dip/drizzle in melted chocolate for an elegant finish and extra flavor.
SERVING SUGGESTIONS FOR TRADITIONAL GERMAN BUTTER COOKIES
When it comes to serving these delightful treats, presentation and pairing matter just as much as baking them. Whether you’re hosting a casual get-together or gifting cookies during the holiday season, these ideas will help you shine!
- Festive Platter
Arrange the cookies on a decorative holiday platter. Add sprigs of fresh rosemary or holly for a pop of color, and serve alongside a bowl of whipped cream or jam for dipping.
- Tea Party Delight
Pair your butter cookies with a selection of teas—think chamomile, Earl Grey, or peppermint. Stack them in a tiered cake stand and watch your guests’ eyes light up.
- Gift Jars
Layer the cookies in glass jars with tissue paper separators. Tie the lid with a ribbon and attach a handwritten tag. These make thoughtful cookie gift ideas that friends and family will adore.
- Chocolate Lovers’ Bundle
Display cookies half-dipped in dark chocolate on parchment paper. Sprinkle with sea salt or crushed nuts for texture, then present on a wooden board for a rustic, gourmet touch.
HOW TO STORE TRADITIONAL GERMAN BUTTER COOKIES
Keeping your butter cookies fresh ensures each bite stays just as perfect as when they first came out of the oven. Follow these tips to maintain their texture and flavor over several days.
Proper storage not only preserves taste but also makes these cookies an excellent make-ahead dessert. Whether you’re planning for holiday gatherings or afternoon coffee breaks, having cookies stored correctly means you’ll always have a sweet treat on hand. Start by letting your cookies cool completely to room temperature before packing them away. Any residual warmth can create condensation and soften your crisp edges.
- Airtight Containers
Store cooled cookies in an air-tight container at room temperature. Place parchment paper between layers to prevent sticking and maintain their crunchy texture. They’ll stay fresh for up to a week.
- Refrigeration
For longer storage, keep cookies in the refrigerator in a sealed container. This can extend their shelf life to about two weeks, though it may slightly soften the texture—just let them come back to room temperature before serving.
- Freezing
Layer cookies in freezer-safe bags or containers with parchment paper between layers. Freeze for up to three months. Thaw at room temperature for about an hour before enjoying.
- Protect from Moisture
Keep your storage area cool and dry. Avoid placing containers near heat sources or in humid areas of the kitchen, as moisture can rob the cookies of their delightful crunch.
CONCLUSION
I hope this deep dive into Traditional German Butter Cookies has inspired you to preheat your oven and get rolling! From the first taste of that rich, buttery dough to the final drizzle of chocolate, every moment of this recipe is a celebration of simple, heartwarming baking. With a total preparation time of just 15 minutes and a quick 12-minute bake, you can whip up around 40 cookies in under an hour—making this an easy cookie recipe that’s perfect for holiday baking or cozy weekend treats.
Feel free to print this article and save it for later reference. You can also find a FAQ below to answer any lingering questions you might have. Don’t be shy about sharing your results! If you give these cookies a whirl, drop a comment, ask questions, or leave feedback on how they turned out. I’m here to help you troubleshoot any baking hiccups or celebrate your cookie successes. Happy baking, and may your kitchen be filled with the warmth and sweetness of these classic German delights!
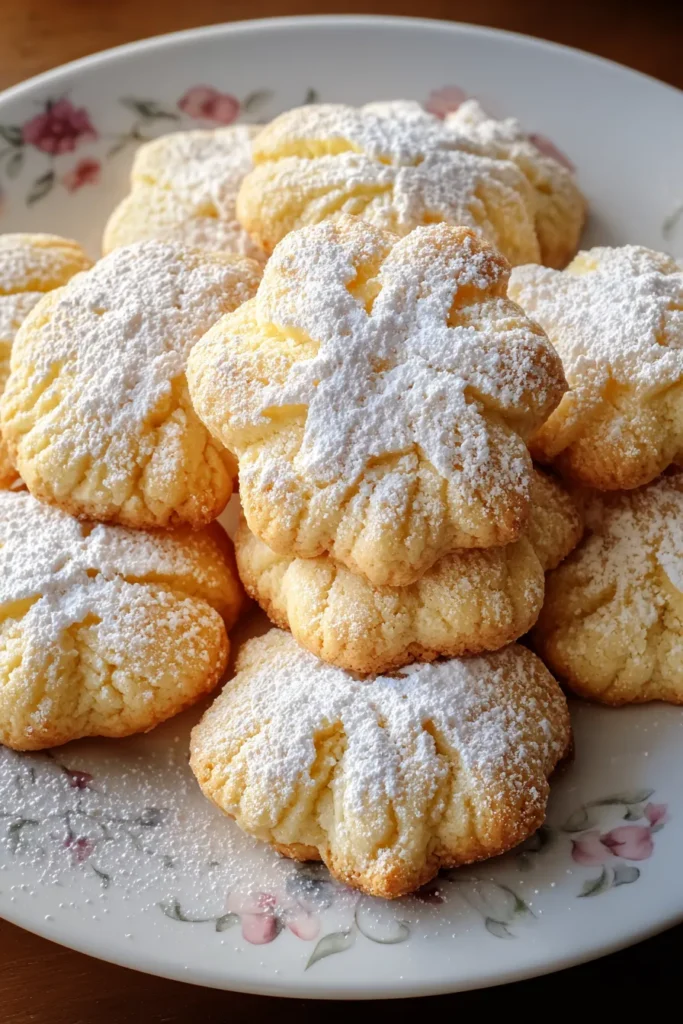

Traditional German Butter Cookies
Description
These classic butter cookies have a rich, buttery flavor and a delightful crunch that makes them perfect for any occasion. Enjoy them plain or dressed up with chocolate!
Ingredients
Instructions
-
Begin by preheating your oven to 180°C (350°F). Prepare a baking sheet by lining it with parchment paper to prevent sticking.
-
In a large mixing bowl, cream together the softened butter and granulated sugar until the mixture is light and fluffy. This process should take about 3 to 5 minutes.
-
Add the vanilla extract and the egg to the butter-sugar mixture. Mix until fully combined, ensuring the egg is well integrated into the batter.
-
In a separate bowl, whisk together the all-purpose flour, salt, and baking powder. Gradually add the dry ingredients to the wet mixture while mixing at a low speed to avoid flour flying everywhere. Mix just until the dough comes together.
-
Once the dough is formed, you can either roll it out onto a floured surface to cut shapes or use a cookie press for decorative cookies. If rolling out, aim for a thickness of about 0.5 cm (1/4 inch).
-
Cut the dough into desired shapes—classic options include stars, hearts, or circles. Place the cut-out cookies onto the prepared baking sheet, leaving some space between each cookie as they will spread slightly.
-
Bake the cookies in the preheated oven for about 10 to 12 minutes, or until the edges are just starting to turn golden. Keep an eye on them as baking times can vary based on the size of the cookies.
-
Once done, remove the baking sheet from the oven and let the cookies cool on the sheet for 5 minutes before transferring them to a wire rack to cool completely.
-
If desired, once the cookies are cool, you can dust them with powdered sugar or dip/drizzle them in melted chocolate for an additional treat.
Note
- These cookies can be stored in an airtight container at room temperature for up to a week.
- For variation, feel free to add lemon zest or almond extract to enhance the flavor.
- These cookies make great gifts during the holiday season when decorated or packaged nicely.
- You can roll the dough into logs, chill, and then slice for a different presentation.

