

When you spread a spoonful of this homemade plum jam across a warm slice of toast, your senses will be transported to a sunny orchard afternoon where the plums are at the peak of ripeness. This Sweet and Tangy Plum Jam is all about embracing the bold, luscious flavor of freshly harvested plums, harmonized by a bright kiss of lemon and rounded out with a whisper of warming spices. Every mouthful sings with the deep purple hue of summer and the lively snap of citrus, making it a stand-out option for breakfast spreads or an elegant topping for late-night treats. There’s an irresistible tension between the natural sweetness of the fruit and the subtle acidity of lemon juice and zest that wakes up your taste buds and leaves you craving more. With every spoonful, you’ll catch hints of cinnamon and ginger dancing at the back of your palate, adding unexpected warmth that feels like a cozy hug in jam form.
Launching yourself into the world of home canning can feel like stepping into a time-honored tradition, but this recipe keeps the process refreshingly simple. Even if you’ve never made jam before, the clear steps and accessible ingredients will have you feeling confident and excited about your culinary adventure. The impressive swirl of ruby-red jam in each jar is not only a treat for your morning toast but also a beautiful gift for friends and family. And thanks to a brief maceration period, you don’t need fancy equipment—just a large non-reactive pot, a trusted wooden spoon, and a bit of patience. As the sugar gently draws out the sweet plum juices, you’ll notice the mixture glistening with promise, ready to transform into a silky, spoon-worthy masterpiece with the addition of lemon’s zing and spices’ gentle caress. Whether you’re looking to impress at a weekend brunch or simply want a versatile spread that elevates everyday meals, this Sweet and Tangy Homemade Plum Jam recipe will become a staple in your repertoire, one that you’ll revisit season after season.
KEY INGREDIENTS IN SWEET AND TANGY HOMEMADE PLUM JAM
Every great jam starts with high-quality components that bring out the best in one another. In this recipe, each ingredient plays a crucial role in developing the flavor, texture, and color of your finished jam. From fresh fruit to a hint of spice, here’s what you’ll need:
- Ripe plums: These bring vibrant color, natural pectin, and deep fruitiness. Choosing perfectly ripe plums ensures maximum sweetness and that signature jammy texture.
- Granulated sugar: Sugar not only sweetens but also acts as a preservative, allowing your jam to set properly. It balances the fruit’s tartness and gives the jam its glossy sheen.
- Lemon juice: Fresh lemon juice adds essential acidity, helping the jam to gel and enhancing all the fruity flavors with a bright, zesty lift.
- Lemon zest: The fine citrus oils in lemon zest contribute an aromatic kick and a delicate tang that highlights the plums without overwhelming them.
- Ground cinnamon (optional): A pinch of cinnamon lends a warm, earthy note that deepens the flavor profile and pairs beautifully with stone fruit.
- Ground ginger (optional): Ginger adds a subtle spicy undertone, introducing complexity and a gentle heat that lingers on the palate.
- Salt: Just a touch of salt balances the sweetness and elevates the overall flavor, making each spoonful more vibrant.
HOW TO MAKE SWEET AND TANGY HOMEMADE PLUM JAM
Creating homemade jam is a gratifying, hands-on experience that yields delicious results. Follow these detailed steps to transform fresh plums into a luscious spread:
1. Prepare the plums by washing them thoroughly, removing the pits, and chopping them into small pieces. Measure out 4 cups of chopped plums to ensure the perfect fruit-to-sugar ratio.
2. Place the chopped plums in a large non-reactive pot. Add the granulated sugar and let the mixture sit, covered, for about 30 minutes. This maceration helps the sugar draw out the plum juices, creating a natural syrup.
3. After 30 minutes, stir in the lemon juice, lemon zest, ground cinnamon, ground ginger, and salt. Mix thoroughly so that every plum piece is coated and flavors meld.
4. Place the pot over medium-high heat and bring the mixture to a boil. Stir frequently to prevent scorching; the bubbling jam can rise quickly, so keep a close eye.
5. Once boiling, reduce heat to medium-low. Continue simmering the jam, stirring occasionally, for 25–30 minutes or until it becomes noticeably thicker.
6. To check the set, spoon a small amount onto a chilled plate and let it cool for a minute. If it wrinkles when nudged with your finger, it’s ready. If not, simmer a few minutes longer and test again.
7. When the jam reaches the desired consistency, remove from heat. Using a ladle, carefully transfer the hot jam into sterilized jars, leaving about 1/4-inch headspace.
8. Wipe the jar rims with a clean, damp cloth to remove any residue. Seal each jar with lids and rings, ensuring a snug fit.
9. For longer storage, process the sealed jars in a boiling water bath for 10 minutes. This step ensures a proper seal and extends shelf life.
10. Allow jars to cool completely at room temperature. Check the seals by pressing the center of each lid; a firm seal will not flex. Store in a cool, dark place. Once opened, keep refrigerated.
SERVING SUGGESTIONS FOR SWEET AND TANGY HOMEMADE PLUM JAM
This Sweet and Tangy Homemade Plum Jam shines on its own, but there are countless delicious ways to showcase its vibrant flavor. Whether you’re hosting friends for brunch, whipping up a quick snack, or planning a cozy dessert, these serving ideas will inspire you to get creative:
- Spread a thick layer of warm jam over toasted artisanal bread or a flaky croissant for an indulgent breakfast that highlights the jam’s balance of sweet and tart.
- Turn your jam into a savory-sweet meat glaze by brushing it over chicken thighs, pork tenderloin, or salmon during the last 10 minutes of roasting. The sugars caramelize beautifully, creating a glossy, flavorful crust.
- Fill homemade pastries—such as turnovers, thumbprint cookies, or danishes—with a dollop of plum jam. Pairing the jam with buttery dough and a dusting of powdered sugar makes for an irresistible treat.
- Assemble a cheese board featuring creamy goat cheese, sharp cheddar, or aged brie alongside crackers, nuts, and fresh fruit. A small bowl of this jam provides a luscious contrast that brings the whole spread to life.
HOW TO STORE SWEET AND TANGY HOMEMADE PLUM JAM
Proper storage preserves the freshness, flavor, and texture of your homemade jam so you can enjoy it long after canning day. Follow these guidelines to maintain quality and safety:
- Shelf storage: Unopened and properly sealed jars can be stored in a cool, dark pantry or cupboard for up to 12 months. Avoid direct sunlight and temperature extremes to prevent color and flavor degradation.
- Refrigeration: After opening, keep jars tightly sealed and store them in the refrigerator. Use within 4–6 weeks for optimal taste and to prevent mold growth.
- Freezing portions: Spoon jam into freezer-safe containers, leaving headspace for expansion. Label and date each container. Frozen jam can last up to 6 months; thaw in the fridge before use.
- Labeling and dating: Always mark each jar or container with the preparation date. This simple step helps you rotate stock and ensures you enjoy the jam at peak flavor.
CONCLUSION
Bringing this Sweet and Tangy Homemade Plum Jam recipe into your kitchen guarantees a burst of sunshine and warmth in every spoonful. You’ve seen how ripe plums, zesty lemon, a touch of spice, and a bit of sugar collaborate to create a spread that elevates everything from breakfast toast to savory entrees. The straightforward process—washing, chopping, macerating, cooking, and canning—makes this jam approachable even for beginner home cooks. With clear steps and minimal equipment, you’ll soon have perfectly sealed jars lined up, ready to brighten your pantry. Feel free to print and save this article for future reference, and remember that an FAQ section follows below to address any lingering questions you might have.
If you give this recipe a try, I’d love to hear how it turned out! Drop your comments, questions, or feedback below. Share your own twists—maybe you experimented with cardamom or star anise, or you discovered a new favorite way to serve it. Whether you need clarification on a step or just want to celebrate a successful batch, let’s chat. Happy jam-making, and here’s to sweet, tangy adventures in your kitchen!
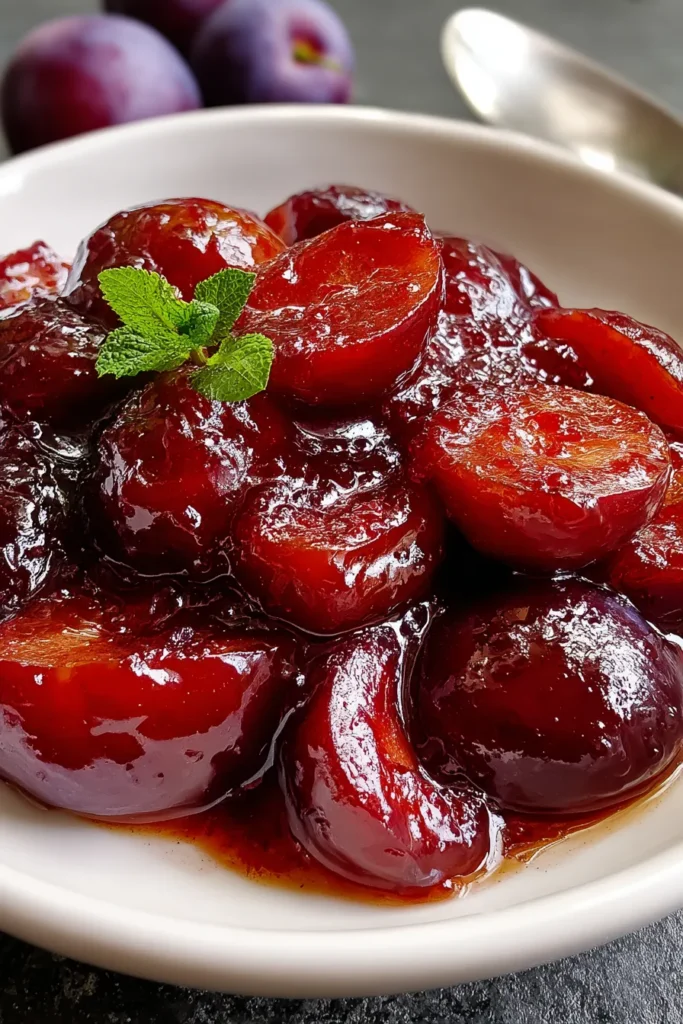

Sweet and Tangy Homemade Plum Jam
Description
This homemade plum jam mixes the sweetness of ripe plums with a zesty lemon twist, complemented by warm spices for a deliciously rich spread that elevates your toast!
Ingredients
Instructions
-
Prepare the plums by washing them thoroughly, removing the pits, and chopping them into small pieces. Measure out 4 cups of chopped plums.
-
Place the chopped plums in a large non-reactive pot. Add in the granulated sugar and let the mixture sit for about 30 minutes. This will help draw out the juices from the plums.
-
After 30 minutes, add the lemon juice, lemon zest, ground cinnamon, ground ginger, and salt to the plum and sugar mixture. Mix well to combine all the ingredients.
-
Place the pot over medium-high heat and bring the mixture to a boil. Stir frequently to prevent sticking, and be cautious as the mixture can bubble vigorously.
-
Once boiling, reduce the heat to medium-low and continue cooking the jam, stirring occasionally. Allow it to simmer for about 25-30 minutes, or until it has thickened and reached the desired consistency.
-
To check if the jam has set, place a small spoonful on a chilled plate and let it sit for a minute. If it wrinkles when you push it with your finger, it's done. If not, continue to simmer for a little longer and test again.
-
Once the jam is at the desired consistency, remove it from the heat. Carefully ladle the hot jam into sterilized jars, leaving about 1/4-inch headspace.
-
Wipe the rims of the jars with a clean, damp cloth. Seal the jars with lids and rings.
-
Process the jars in a boiling water bath for 10 minutes to ensure proper sealing, if you plan to store them for a longer period.
-
Allow the jars to cool completely at room temperature. Check the seals and store in a cool, dark place. Once opened, keep refrigerated.
Note
- For a deeper flavor, consider roasting the plums before starting the jam-making process.
- You can adjust the sugar to taste, especially if your plums are very sweet.
- Use this jam as a glaze for roasted meats or as a filling for pastries and desserts.
- Experiment with other spices like star anise or cardamom for a unique twist.
- Always use ripe plums for the best flavor and natural sweetness.

