

There’s something irresistibly rewarding about stirring up a pot of sweet and tangy homemade apricot jam in your very own kitchen. The moment those sun-kissed apricots meet the bubbling sugar and zesty lemon, you’ll feel that burst of summertime goodness no jar can fully contain. It’s a recipe that gently coaxes out the natural sweetness of ripe fruit, while the bright lemon juice and zest keep things delightfully balanced. This isn’t just any jam—it’s a vibrant spread you’ll want to dollop on everything from morning toast to flaky pastries. As your wooden spoon swirls through the simmering mixture, you’ll hear the soft pop of bubbling fruit, a gentle promise that your efforts will be rewarded with a rich, glossy preserve that speaks of sunshine and simple pleasures.
Beyond its mouthwatering flavor, this apricot jam recipe is perfectly suited for beginner cooks and home-preserving enthusiasts alike. With just a few pantry staples, basic equipment, and around 20 minutes of hands-on prep plus about 30 minutes of cooking time, you’ll transform fresh apricots into a luscious fruit preserve. After a brief rest of 10 minutes, your jam will be ready to fill jars, with each ½-cup serving clocking in at around 350 calories. Whether you’re planning a lazy weekend breakfast, a casual brunch with friends, or baking an elegant tart for dessert, this versatile jam enhances every bite. So roll up your sleeves, summon your inner home chef, and let’s dive into the perfect balance of sweet and tangy in this delightful apricot jam!
KEY INGREDIENTS IN SWEET AND TANGY HOMEMADE APRICOT JAM
Before we get cooking, let’s take a moment to appreciate the star players in this jam masterpiece. Every ingredient brings its own magic, from the juicy fruit itself to the pinch of vanilla that adds depth. Here’s what you’ll need:
- Fresh apricots
Ripe apricots provide the foundational fruity sweetness and natural pectin that helps thicken the jam. Look for plump, fragrant fruit free of blemishes to ensure the best flavor and color.
- Granulated sugar
Sugar not only sweetens the jam but also works as a preservative, extending its shelf life when properly canned. It balances the tartness of the apricots and lemon, giving the jam its classic glossy finish.
- Fresh lemon juice
Lemon juice introduces bright acidity to keep the jam from tasting flat. The citric acid also helps the pectin set, ensuring your jam achieves that perfect spreadable consistency.
- Lemon zest
By adding aromatic oils and a punch of citrus flavor, lemon zest elevates the jam’s complexity. These tiny flecks of bright rind create bursts of freshness in every spoonful.
- Water
Water helps dissolve the sugar and jump-starts the cooking process. It prevents the fruit from scorching on the bottom of the pan while you bring everything to a gentle boil.
- Pure vanilla extract
A splash of vanilla is optional but highly recommended for a warm, cozy undertone. This little bit of scent rounds out the fruitiness and makes the jam taste even more indulgent.
HOW TO MAKE SWEET AND TANGY HOMEMADE APRICOT JAM
Getting this dreamy apricot jam from fresh fruit to glossy jars is easier than you might think. Follow these detailed steps to ensure each batch turns out perfectly thick, sweet, and tangy.
1. Begin by thoroughly washing the apricots. Cut them in half, remove the pits, and then chop the fruit into small pieces. Taking the time to clean and uniformly chop the apricots ensures even cooking and a smooth final texture.
2. In a large saucepan or a pot, combine the chopped apricots, sugar, lemon juice, lemon zest, and water. Stir the mixture to combine, making sure every piece of fruit is coated in sugar. This even coating helps the sugar dissolve quickly when heated.
3. Over medium heat, bring the mixture to a slow boil. Stir frequently to prevent sticking and ensure even cooking—scraping the bottom with a wooden spoon helps avoid burnt sugar bits.
4. Once the mixture starts to boil, reduce the heat to medium-low and simmer. Continue to stir occasionally until the apricots are soft and the mixture thickens. This gentle simmering takes about 20–30 minutes and lets excess liquid evaporate.
5. For a smoother jam, use an immersion blender directly in the pot to purée the mixture. Alternatively, you can carefully transfer the hot jam to a blender and purée in batches. This step breaks down any large fruit pieces for a uniform consistency.
6. Taste the jam to see if it requires more sugar, depending on your preference for sweetness. Adjust carefully, stirring well so the extra sugar dissolves fully.
7. If using, stir in the vanilla extract and let the mixture simmer for another 5 minutes. This finishing touch infuses the jam with a subtle, cozy aroma.
8. Test if the jam has reached the desired consistency by placing a small spoonful onto a chilled plate. Allow it to cool for a minute. If it thickens and wrinkles when pushed with a finger, it’s ready. If not, continue to simmer in short increments, testing again.
9. Once the jam has reached the desired consistency, remove it from the heat. Carefully ladle the hot jam into sterilized jars, leaving about 1/4 inch of headspace at the top to allow for expansion.
10. Seal the jars with lids and let them cool at room temperature. Store in the refrigerator for up to 3 weeks, or process in a water bath to can for longer storage according to proper canning guidelines.
SERVING SUGGESTIONS FOR SWEET AND TANGY HOMEMADE APRICOT JAM
After all that loving work, it’s time to enjoy your homemade apricot jam in ways that make every bite feel like a celebration. These serving ideas will help you showcase its vibrant flavor and silky texture, whether you’re hosting a brunch or simply sweetening your daily routine.
- Classic Toast and Butter
Spread a generous layer of jam over warm, toasted slices of artisan bread with a pat of creamy butter. The contrast between the crunchy toast, soft butter, and fruity jam is pure breakfast bliss.
- Flaky Pastries and Danish Filling
Gently warm the jam and use it as a pastry filling in croissants, puff pastry tarts, or danishes. A dollop of jam in the center of dough and a sprinkle of sliced almonds makes for an elegant dessert.
- Yogurt Parfaits and Smoothie Bowls
Layer jam with Greek yogurt, granola, and fresh berries in tall glasses for a beautiful parfait. Swirl a spoonful into your morning smoothie bowl for an extra pop of sweet and tangy flavor.
- Savory Glaze for Meats
Whisk apricot jam with a splash of soy sauce, garlic, and mustard to create a savory-sweet glaze for roasting chicken or pork. Brush it on during the last 10 minutes of cooking for a glossy, flavorful finish.
HOW TO STORE SWEET AND TANGY HOMEMADE APRICOT JAM
Proper storage ensures your homemade jam stays vibrant, fresh, and bursting with flavor whenever you reach for it. Here are some tried-and-true tips to maintain that just-made taste well into the future.
When you’re not diving straight into a jar, keeping jam airtight and cool is key. Exposure to air, moisture, or fluctuating temperatures can lead to spoilage or flavor loss. Use clean utensils each time you dip into the jar to avoid introducing contaminants, and always re-seal the lid tightly after every use. Below are a few methods to suit your kitchen setup and how long you’d like to keep your jam.
- Refrigeration
Store unopened or opened jars in the coldest part of the refrigerator. Properly sealed, your apricot jam will stay fresh for up to three weeks. Make sure there’s no condensation inside the jar by wiping the rim before sealing.
- Water Bath Canning
For long-term pantry storage, process your sealed jars in a boiling water bath for 10 minutes. This creates a stable, vacuum-sealed environment. Label jars with dates, and your jam can last up to one year in a cool, dark place.
- Freezing
If you prefer, portion jam into freezer-safe containers or silicone molds, leaving some headspace for expansion. Thawed jam may be slightly less thick but retains its bright flavor. It can last up to six months in the freezer.
- Cool, Dark Pantry
Unopened, properly canned jars may be stored in a dry pantry away from direct sunlight. Keep temperatures between 50–70°F for optimal shelf life, and avoid stacking heavy items on top of the jars to prevent seal failure.
CONCLUSION
This Sweet and Tangy Homemade Apricot Jam has everything you love about summer fruit preserved in a jar—bright citrus notes, warm vanilla undertones, and the perfect balance of sweetness and tartness. Crafted from simple ingredients and beginner-friendly techniques, it transforms fresh apricots into a versatile spread that shines on breakfast tables and dinner plates alike. You’ve seen how each step, from selecting ripe fruit to achieving the ideal gel, contributes to that luscious final result. With just a bit of stirring, simmering, and blending, you’ll end up with jam worthy of gifting, sharing, or enjoying in cozy solitude.
Feel free to print this article and save it for later reference—your printed copy will be a handy guide when apricot season rolls around again. And if you’re curious about common questions or troubleshooting—everything from how to know if your jam has set to creative variations—you’ll find a FAQ section below. Did you try this recipe? Have thoughts, questions, or suggestions? Drop a comment and let me know how your jam turned out or if there’s anything you need help with. I always love hearing from fellow home cooks and preserving enthusiasts!
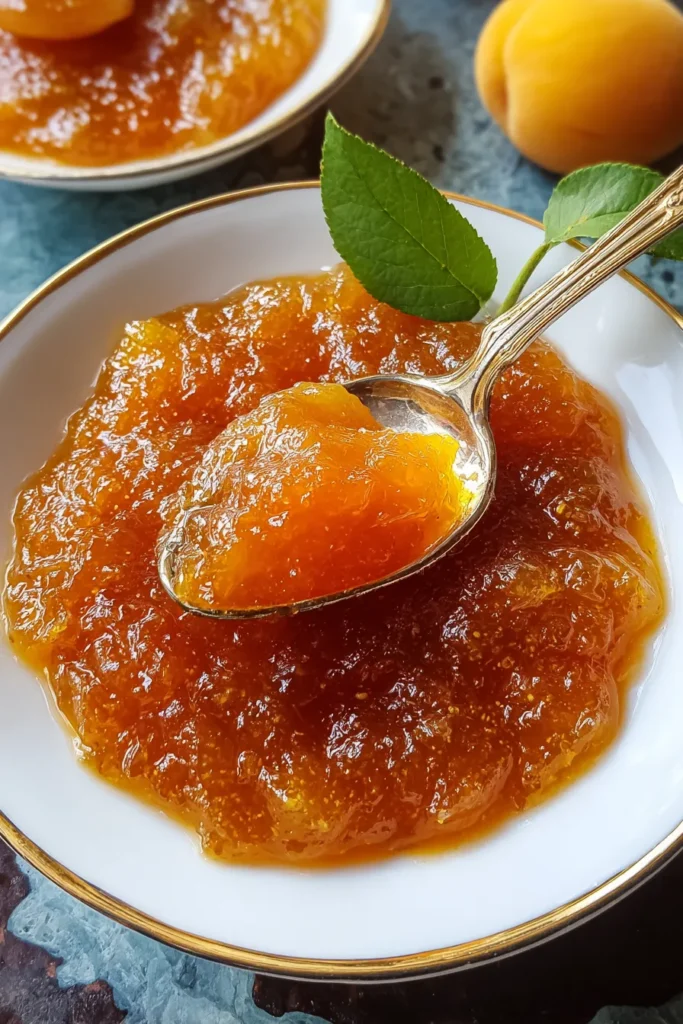

Sweet and Tangy Homemade Apricot Jam
Description
This homemade apricot jam bursts with the vibrant flavors of fresh apricots, sweet sugar, and a zesty hint of lemon. Perfect on toast or as a fruity glaze!
Ingredients
Instructions
-
Begin by thoroughly washing the apricots. Cut them in half, remove the pits, and then chop the fruit into small pieces.
-
In a large saucepan or a pot, combine the chopped apricots, sugar, lemon juice, lemon zest, and water. Stir the mixture to combine.
-
Over medium heat, bring the mixture to a slow boil. Stir frequently to prevent sticking and ensure even cooking.
-
Once the mixture starts to boil, reduce the heat to medium-low and simmer. Continue to stir occasionally until the apricots are soft and the mixture thickens. This should take about 20-30 minutes.
-
For a smoother jam, use an immersion blender directly in the pot to purée the mixture. Alternatively, you can carefully transfer the mixture to a blender and purée in batches.
-
Taste the jam to see if it requires more sugar, depending on your preference for sweetness.
-
If using, stir in the vanilla extract and let the mixture simmer for another 5 minutes.
-
Test if the jam has reached the desired consistency by placing a small spoonful onto a chilled plate. Allow it to cool for a minute. If it thickens and wrinkles when pushed with a finger, it's ready. If not, continue to simmer.
-
Once the jam has reached the desired consistency, remove it from the heat. Carefully ladle the hot jam into sterilized jars, leaving about 1/4 inch space at the top.
-
Seal the jars with lids and let them cool at room temperature. Store in the refrigerator for up to 3 weeks or can them using proper canning techniques for longer storage.
Note
- This jam pairs beautifully with toast, croissants, or even as a filling for pastries.
- For a unique twist, add a pinch of cinnamon or nutmeg to the mixture.
- Apricot jam can also serve as a glaze for roasting meats, such as chicken or pork.
- If apricots are out of season, try using dried apricots; just remember to soak them before cooking.

