

Sweet and Tangy Baked Rhubarb Crisp brings tart rhubarb pieces melded with lemon-kissed sweetness under a golden oat and cinnamon crumble, creating a warm, bubbling dessert that’s as comforting as it is vibrant. This beginner-friendly recipe comes together in under an hour and fills your kitchen with steamy, tangy-sweet goodness—perfect for a cozy night in or an impressive finish to any meal. Ready to turn those bright pink stalks into the crispiest treat? Let’s dive in!
Key Ingredients
Let’s meet the simple ingredients that make this dessert shine:
- 2 cups chopped rhubarb: Brings vibrant tartness and a sturdy texture that holds up under baking.
- 1/2 cup granulated sugar: Sweetens the rhubarb and balances its natural tang.
- 2 tablespoons cornstarch: Thickens the filling to a perfect, pourable consistency.
- 1 tablespoon lemon juice: Adds a bright, zesty kick that complements the fruit.
- 1 teaspoon vanilla extract: Infuses a warm, aromatic depth into the filling.
- 3/4 cup old-fashioned rolled oats: Forms the hearty base of the crisp’s crunchy topping.
- 1/2 cup all-purpose flour: Blends with oats to create a golden-brown crumble.
- 1/2 cup packed brown sugar: Lends caramel notes and sweetness to the topping.
- 1 teaspoon ground cinnamon: Spices the crumble with warm, cozy flavor.
- 1/4 teaspoon salt: Enhances all the sweet and tangy elements.
- 6 tablespoons cold unsalted butter cubed: Binds the topping and browns to a buttery crisp.
How To Make Sweet and Tangy Baked Rhubarb Crisp
This crisp comes together quickly using basic techniques—tossing fruit, mixing crumbs, and baking until bubbly and golden. Even if you’re new to baking, these clear steps will guide you to a perfect fruit dessert with a satisfyingly crunchy topping.
1. Preheat your oven to 375°F and lightly grease an 8-inch baking dish with butter or nonstick spray to prevent sticking.
2. In a large bowl, toss the chopped rhubarb with 1/2 cup granulated sugar, 2 tablespoons cornstarch, 1 tablespoon lemon juice, and 1 teaspoon vanilla extract. Stir until each piece is well coated, then transfer to the prepared dish and spread into an even layer.
3. In another bowl, combine 3/4 cup rolled oats, 1/2 cup all-purpose flour, 1/2 cup packed brown sugar, 1 teaspoon ground cinnamon, and 1/4 teaspoon salt. Add the 6 tablespoons cold butter, then use a pastry cutter or your fingertips to cut in the butter until the mixture resembles coarse crumbs.
4. Sprinkle the oat topping evenly over the rhubarb, covering the fruit completely for a uniform golden crust.
5. Bake for 30 to 35 minutes, or until the topping is golden brown and the filling is bubbling at the edges.
6. Remove from the oven and let rest for 10 minutes, allowing the juices to settle for clean slices and perfect spoonfuls.
Serving Suggestions
Once your Sweet and Tangy Baked Rhubarb Crisp is ready, the fun continues with serving. This dessert shines warm from the oven, its crunchy topping and juicy filling making every bite a delight. Here are four easy ways to elevate each spoonful:
- Scoop of vanilla ice cream: Top a warm square so it melts slowly into the tangy fruit.
- Dollop of whipped cream: Add a light, airy swirl to balance the rhubarb’s tartness.
- Fresh strawberry slices: Echo the mixed fruit variation and add a burst of color and sweetness.
- Zest of lemon: Sprinkle a hint of lemon peel over the top for an extra zing.
Tips For Perfect Sweet and Tangy Baked Rhubarb Crisp
A few friendly pointers can turn a good crisp into a showstopper. Keep these notes close at hand next time you bake:
- Substitute half the rhubarb with sliced strawberries for a mixed fruit variation.
- Use gluten-free oats and flour to make this recipe gluten-free.
- Serve warm with a scoop of vanilla ice cream or a dollop of whipped cream.
- Store leftovers in an airtight container in the refrigerator for up to 3 days.
How To Store It
To enjoy leftovers without losing any flavor or texture, proper storage is key. Let your crisp cool slightly, then follow this simple method to keep it tasting fresh:
- Refrigerate cooled portions in an airtight container for up to 3 days, preserving the filling’s thickness and the topping’s crunch.
Frequently Asked Questions
Got a quick question? Here are some friendly answers to the most common queries:
- How long does it take to prepare and bake the Sweet and Tangy Baked Rhubarb Crisp?
It takes about 10 minutes to prepare the ingredients—chopping rhubarb, measuring sugars, and making the crumble topping—followed by 30 to 35 minutes of baking at 375°F. After removing it from the oven, allow the crisp to rest for 10 minutes before serving, for a total time of around 50 to 55 minutes.
- My filling sometimes turns out too runny. How can I ensure the rhubarb mixture thickens properly?
Make sure to coat the rhubarb evenly with 2 tablespoons of cornstarch and ½ cup of granulated sugar before baking; cornstarch is the key thickening agent. Also, avoid slicing the rhubarb too thinly—about ½-inch pieces work best—so the cornstarch can absorb excess moisture effectively. Finally, letting the crisp rest for the full 10 minutes helps the juices set rather than run all over the plate.
- Can I make the crisp ahead of time and bake later?
Yes. Prepare the rhubarb layer and the oat topping separately, then cover and refrigerate each component for up to 24 hours. When ready, assemble them in the greased baking dish, bake at 375°F for the specified 30 to 35 minutes, and let it rest 10 minutes before serving. This approach maintains a fresh, crispy topping.
- What are the best ways to serve and reheat leftovers?
Serve warm with a scoop of vanilla ice cream or a dollop of whipped cream to balance the tartness of the rhubarb. For leftovers, cover the baking dish with foil and reheat in a 350°F oven for 10 to 12 minutes until warmed through, which helps the topping regain its crisp texture. You can also microwave individual portions for 30 to 45 seconds, though the topping may soften slightly.
- How can I adapt this recipe to make it gluten-free?
Substitute the all-purpose flour with a gluten-free 1:1 baking flour and use certified gluten-free old-fashioned oats. Ensure your brown sugar and other ingredients are also labeled gluten-free to prevent cross-contamination. The texture and bake time remain the same.
- Is it possible to customize the fruit filling beyond rhubarb?
Absolutely. You can replace half or all of the rhubarb with sliced strawberries for a sweet-and-tangy blend; blueberries or raspberries also work well. If mixing fruits, toss them with the granulated sugar, cornstarch, lemon juice, and vanilla extract just as you would the rhubarb to maintain consistent sweetness and thickness.
- How should I store leftover crisp, and how long will it keep?
Transfer any cooled leftovers into an airtight container and refrigerate for up to 3 days. Before serving, reheat as described above. If you prefer a crisp topping, briefly pop portions under a broiler for 1 to 2 minutes, watching closely to avoid burning.
What Makes This Special
This Sweet and Tangy Baked Rhubarb Crisp is a delightful dance between bold rhubarb tang and a buttery, cinnamon-kissed oat topping—perfect for both weeknight baking and weekend showstoppers. Its beginner-friendly steps, adaptable fruit options, and cozy textures make it a recipe you’ll come back to again and again. Feel free to print and save this article for easy reference in your cookbook or on your fridge. If you try it, I’d love to hear how it turned out—drop a comment, share your tweaks, or ask any questions!
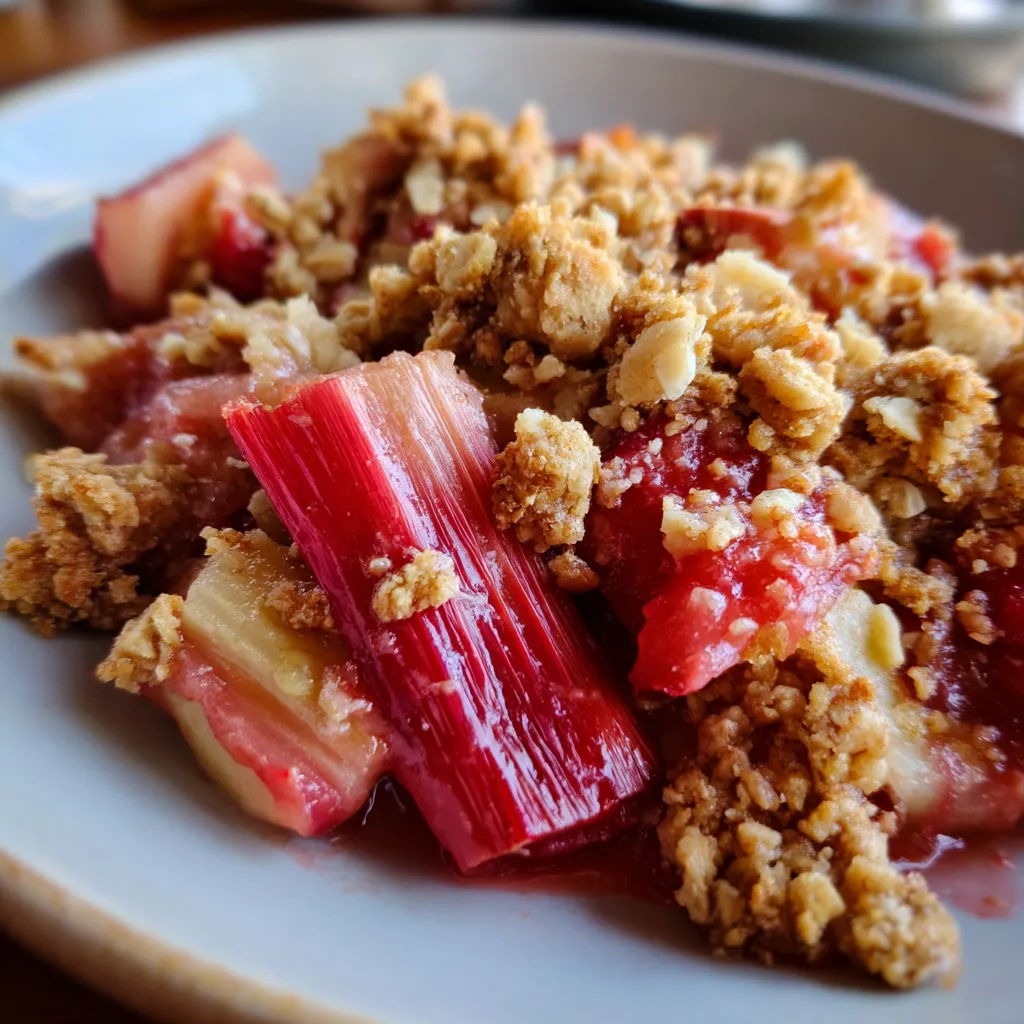

Sweet and Tangy Baked Rhubarb Crisp
Description
Chopped rhubarb is tossed in sugar, cornstarch, and lemon juice, then blanketed with a buttery oat, flour, and cinnamon topping. As it bakes, the kitchen fills with steamy tart-sweet aromas and the crumble turns golden and crisp.
Ingredients
Instructions
-
Preheat the oven to 375°F and lightly grease an 8-inch baking dish.
-
In a bowl, toss chopped rhubarb with granulated sugar, cornstarch, lemon juice, and vanilla extract until evenly coated, then transfer to the prepared dish.
-
In another bowl, combine oats, flour, brown sugar, cinnamon, and salt, then cut in cold cubed butter until the mixture resembles coarse crumbs.
-
Sprinkle the oat topping evenly over the rhubarb layer.
-
Bake for 30 to 35 minutes or until the topping is golden brown and the filling is bubbling.
-
Allow the crisp to rest for 10 minutes before serving.
Note
- Substitute half the rhubarb with sliced strawberries for a mixed fruit variation.
- Use gluten-free oats and flour to make this recipe gluten-free.
- Serve warm with a scoop of vanilla ice cream or a dollop of whipped cream.
- Store leftovers in an airtight container in the refrigerator for up to 3 days.

