

Creamy layers of cheese meet juicy summer berries and glossy jam swirls in this fridge-friendly no-bake cheesecake, where rich mascarpone and cream cheese clouds cradle bursts of fresh berries atop a crunchy graham crust. This Summer Berry No Bake Cheesecake is perfect for hot afternoons when you crave something cool, sweet, and effortless—no oven required! Dive into a dessert that’s as beautiful as it is delicious, and you’ll soon see why it’s the ultimate summer treat.
Key Ingredients
Get ready to layer up flavor with these simple staples:
- 200 g graham cracker crumbs: Forms a crunchy, buttery crust that holds everything together.
- 50 g granulated sugar: Sweetens the crust and balances the tart berries.
- 100 g unsalted butter, melted: Binds the crumbs into a firm, flavorful base.
- 300 g cream cheese, softened: The silky heart of the cheesecake, lending tang and richness.
- 100 g mascarpone, softened: Adds extra creaminess and a subtle hint of sweetness.
- 100 g powdered sugar: Smoothly sweetens the filling without graininess.
- 1 teaspoon vanilla extract: Enhances the sweet, cheesy flavors with warm vanilla notes.
- 240 ml heavy cream, chilled: Whipped into fluffy stiff peaks for a light, airy filling.
- 200 g mixed berries (fresh or thawed): Provides bursts of vibrant, juicy summer flavor.
- 2 tablespoons berry jam: Creates a glossy swirl that ties the whole dessert together.
- 1 tablespoon water: Thins the jam so it beautifully swirls over the cheesecake.
- Additional berries for topping: Garnish for a pop of color and extra fruity bite.
How To Make Summer Berry No Bake Cheesecake
Crafting this no-bake beauty is all about simple steps and gentle folding. You’ll build a buttery graham base, whip a dreamy cheese filling, layer in sweet berries, and finish with a glossy jam swirl. Follow these detailed instructions to ensure each component is perfectly set and bursting with flavor.
1. In a bowl, combine graham cracker crumbs, granulated sugar, and melted butter until the mixture resembles wet sand, ensuring an even texture.
2. Press the crumb mixture firmly into the bottom of a springform pan to form a uniform crust, then chill in the refrigerator for 15 minutes to set.
3. In a separate bowl, beat cream cheese, mascarpone, powdered sugar, and vanilla extract together until smooth and creamy, stopping to scrape the sides as needed.
4. In another chilled bowl, whip heavy cream on medium-high speed until it holds stiff peaks, then gently fold it into the cheese mixture using a spatula.
5. Spread half of the cheesecake filling over the chilled crust and smooth the top with a spatula for an even layer.
6. Spoon half of the mixed berries over the filling, gently pressing them in so they nestle into the cream.
7. Spread the remaining cheesecake filling over the berries and smooth the surface into a flawless, even layer.
8. In a small saucepan over low heat, combine berry jam and water, stirring until the mixture is smooth; remove from heat and let it cool slightly.
9. Pour the jam mixture over the cheesecake surface and use the back of a spoon to create gentle swirls, adding a marbled effect without tearing the filling.
10. Top with additional fresh berries and refrigerate the cheesecake for at least 4 hours—or overnight—until fully set and sliceable.
Serving Suggestions
This Summer Berry No Bake Cheesecake shines when presented with thoughtful touches that elevate every slice. Whether it’s a backyard barbecue or a cozy family gathering, these serving ideas will make your dessert the star of the show.
- Serve each slice on a chilled plate to keep it cool and prevent melting.
- Pair with a tall glass of iced tea or lemonade to complement the sweet, tangy berries.
- Garnish with a dollop of whipped cream and a sprig of fresh mint for a café-worthy finish.
- Add a dusting of powdered sugar through a fine sieve right before serving for an elegant look.
Tips For Perfect Summer Berry No Bake Cheesecake
Nailing that picture-perfect cheesecake is all about patience and quality ingredients. These friendly pointers will help you achieve silky layers, a firm crust, and vibrant fruit accents every time.
- Refrigerate the cheesecake for a minimum of 4 hours to ensure proper setting.
- Use gluten-free graham crackers or cookies to make the crust gluten-free.
- Store leftovers covered in the refrigerator and consume within 2 days for best freshness.
- For a twist, fold a few tablespoons of berry puree into the filling before layering.
How To Store It
Proper storage keeps your cheesecake tasting freshly made—even days later! Follow these guidelines to preserve its texture and flavor:
- Refrigerator: Cover the pan tightly with plastic wrap or transfer slices to an airtight container; store for up to 2 days.
- Freezer: Wrap individual slices in plastic wrap and foil, then freeze for up to 1 month; thaw overnight in the fridge before serving.
- Airtight container: Prevents moisture loss and flavor transfer when storing slices in the fridge.
- Cool, dry spot: If you need to transport the cheesecake, keep it chilled in a well-insulated cooler with ice packs.
Frequently Asked Questions
Here are quick answers to the top questions about this no-bake delight:
- How long does it take to prepare and set the Summer Berry No Bake Cheesecake?
Active prep takes about 20–25 minutes, plus 15 minutes to chill the crust and at least 4 hours (or overnight) to fully set.
- Can I use frozen berries if fresh aren’t available?
Thaw frozen berries completely, drain any excess liquid, and pat them dry before layering to avoid a runny filling.
- How can I make the crust gluten-free?
Swap in an equal amount of gluten-free graham crackers or vanilla cookies, process to fine crumbs, then mix with sugar and butter as directed.
- What is the best way to whip the heavy cream to stiff peaks?
Use a chilled bowl and beaters, start on medium speed, then increase to high and watch closely—stop when the cream holds its shape.
- How do I achieve a smooth jam swirl without tearing the cheesecake surface?
Let the jam mixture cool until just warm, pour gently, and use the back of a spoon for slow, shallow swirls.
- Can I prepare parts of the cheesecake in advance?
Yes—make the crust up to a day ahead and keep the filling covered in the fridge for up to 6 hours before assembly.
- What’s the best way to slice and serve the cheesecake for clean pieces?
Run a sharp knife under hot water, dry it, then slice in one smooth motion, warming the blade between cuts as needed.
What Makes This Special
This Summer Berry No Bake Cheesecake works because it’s a breeze to assemble, requires no baking, and delivers layers of silky cheese, crunchy crust, and juicy fruit in every bite. It’s practically vacation in dessert form—fun to make, stunning to serve, and impossible not to smile over. Go ahead, print this recipe and stash it in your summer binder. If you give it a whirl, drop a comment with your berry-swirl disasters and triumphs—I’d love to hear how yours turned out!
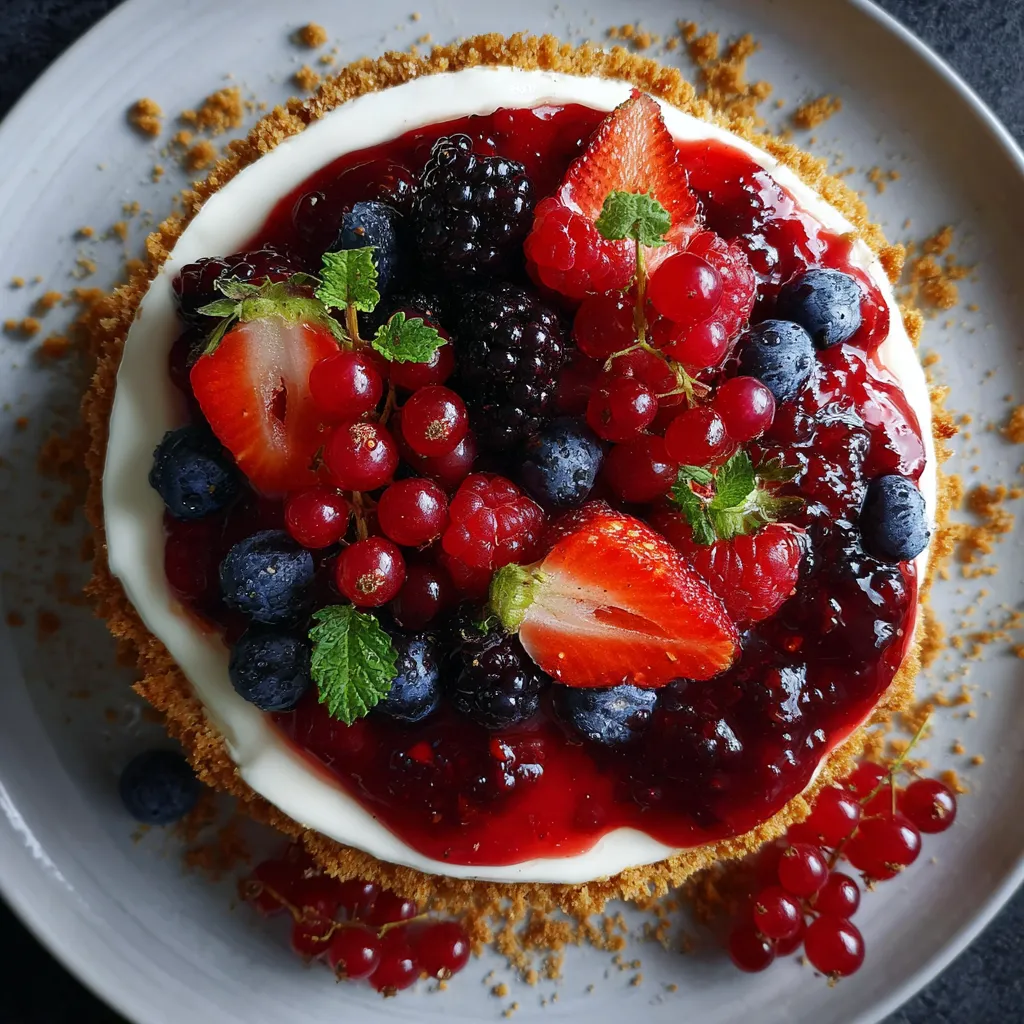

Summer Berry No Bake Cheesecake
Description
Rich mascarpone and cream cheese clouds cradle bursts of fresh berries atop a crunchy graham crust. A sweet jam swirl crowns this silky no-bake cheesecake that chills into perfection.
Ingredients
Instructions
-
In a bowl combine graham cracker crumbs, granulated sugar, and melted butter until mixture resembles wet sand.
-
Press the crumb mixture firmly into the bottom of a springform pan to form an even crust. Chill in the refrigerator for 15 minutes.
-
In a separate bowl beat cream cheese, mascarpone, powdered sugar, and vanilla extract until smooth and creamy.
-
In another chilled bowl whip heavy cream to stiff peaks and gently fold into the cream cheese mixture.
-
Spread half of the cheesecake filling over the chilled crust and smooth the top with a spatula.
-
Spoon half of the mixed berries over the filling and gently press them in.
-
Spread the remaining cheesecake filling over the berries and smooth the surface.
-
In a small saucepan combine berry jam and water over low heat, stirring until smooth. Allow to cool slightly.
-
Pour the jam mixture over the cheesecake surface and use the back of a spoon to swirl it gently.
-
Top with additional fresh berries and refrigerate the cheesecake for at least 4 hours or overnight until fully set.
Note
- Refrigerate the cheesecake for a minimum of 4 hours to ensure proper setting.
- Use gluten-free graham crackers or cookies to make the crust gluten-free.
- Store leftovers covered in the refrigerator and consume within 2 days for best freshness.
- For a twist, fold a few tablespoons of berry puree into the filling before layering.

