

When autumn leaves start to dust the sidewalks and the air takes on that crisp, cozy edge, there’s nothing more comforting than a homemade treat that warms you from the inside out. Salted Caramel Apple Bars bring together all the goodness of soft, tender apples, rich caramel swirls, and a hint of flaky sea salt in every bite. Every time I bake these bars, my kitchen turns into a haven of warmth and nostalgia—reminding me of family gatherings around the dinner table, laughter echoing off the walls, and the satisfying crackle when I gently lift a warm bar from the pan. With each forkful, you get that perfect marriage of sweet and salty, tender cake and gooey caramel, and it feels like a big, delicious hug.
I still remember the first time I tasted a bite of these ooey-gooey wonders. My best friend and I had just climbed out from a long hike through amber woods, cheeks flushed from the cold, when I pulled these bars from the oven. The steam curled into the air, and we each topped our slice with a scoop of vanilla ice cream—pure bliss. Since then, I’ve tweaked and perfected this recipe to make it incredibly beginner-friendly, so you can delight your loved ones without breaking a sweat. Whether you’re planning a holiday get-together, a cozy weekend coffee break, or just need a pick-me-up, these bars deliver charm, flavor, and that irresistible caramel pull that’s impossible to resist. Trust me, once they’re gone you’ll be scrambling for a second batch!
KEY INGREDIENTS IN SALTED CARAMEL APPLE BARS
Every great recipe starts with a handful of pantry staples and fresh produce that work in harmony to create something truly special. In these salted caramel apple bars, each ingredient plays a unique part—building a tender crumb, infusing warmth with spices, or contributing that addictive caramel-salty contrast we all love.
- Unsalted butter
This melted butter brings a rich, buttery foundation to the bars and ensures the crumb stays moist. Using unsalted butter lets you control the overall salt content, so those driftings of flaky sea salt shine through perfectly.
- Granulated sugar
The classic sweetness of granulated sugar helps tenderize the batter and feeds the golden crust on top. It balances the tartness of the apples and gives the bars a satisfying lift.
- Brown sugar
Packed with molasses notes, brown sugar deepens the caramel flavor profile and adds a hint of chewiness. It also lends a warm, toasty color when baked.
- Vanilla extract
This fragrant extract elevates every layer of flavor, enhancing both the buttery base and the spiced apples. It’s a small addition but makes a huge difference in aroma and taste.
- Eggs
Eggs bind the ingredients together and contribute structure, giving these bars a tender yet sturdy texture that holds up to the apple chunks and caramel swirls.
- All-purpose flour
The backbone of our batter, all-purpose flour provides enough gluten development to hold everything together without making the bars tough—resulting in a light, tender crumb.
- Baking powder
This leavening agent helps the bars rise just enough so they’re airy, not dense. It ensures an even bake and tender mouthfeel.
- Salt
A pinch of salt in the dry ingredients enhances all the flavors, from the butter to the sugar and the natural sweetness of the apples. It’s an unsung hero in baking.
- Apples
Fresh apples add juiciness, natural sweetness, and a bit of tart contrast. Chopping them into bite-size pieces ensures every bar has a tender apple bite.
- Ground cinnamon
A warm spice that complements the apples perfectly. Cinnamon adds depth and that cozy autumn vibe in each mouthful.
- Nutmeg
Just a touch of nutmeg gives a subtle earthy warmth that rounds out the spice blend, making the apples taste even more comforting.
- Caramel sauce
Drizzles of caramel add that signature ooey-gooey richness. As it bakes, it melds into pockets of gooey delight throughout the bars.
- Flaky sea salt
A final sprinkle of flaky sea salt transforms these bars by cutting through the sweetness and highlighting the caramel, creating an irresistible sweet-savory finish.
HOW TO MAKE SALTED CARAMEL APPLE BARS
This straightforward process transforms simple ingredients into luscious bars with a tender crumb, spiced apples, and ribbons of caramel. Follow each step carefully to achieve that perfect texture and flavor.
1. Preheat your oven to 350°F (175°C). Grease and line a 9×13-inch baking dish with parchment paper, leaving some overhang for easy removal once the bars are baked.
2. In a large bowl, pour in the melted butter, then add the granulated sugar, brown sugar, and vanilla extract. Use a whisk to combine until the mixture is smooth, glossy, and free of lumps.
3. Crack in the eggs, one at a time, and beat after each addition. Mixing each egg thoroughly ensures a uniform batter and prevents streaks of flour later on.
4. In a separate bowl, sift together the all-purpose flour, baking powder, and salt. Gradually add these dry ingredients to the wet mixture, stirring just until no pockets of flour remain—overmixing can lead to dense bars.
5. In another bowl, toss the chopped apples with ground cinnamon and nutmeg. Ensure each piece is coated so the spices distribute evenly when folded into the batter.
6. Gently fold the spiced apples into the batter. Use a rubber spatula to lift from the bottom, making sure the apple pieces are evenly distributed without deflating the batter.
7. Transfer the batter into the prepared pan, using a spatula to smooth the top into an even layer that will bake uniformly.
8. Drizzle the caramel sauce over the top of the batter in an even layer. Then, use a knife or wooden skewer to swirl the caramel into the batter, creating beautiful ribbons throughout.
9. Bake for 35–40 minutes, or until the edges turn golden brown and a toothpick inserted into the center comes out clean or with just a few moist crumbs attached.
10. Remove the bars from the oven and immediately sprinkle the top with flaky sea salt. The heat helps it adhere, creating that perfect sweet-salty crunch.
11. Let the bars cool in the pan on a wire rack. Once completely cool, use the parchment overhang to lift them out and cut into generous squares for serving.
SERVING SUGGESTIONS FOR SALTED CARAMEL APPLE BARS
When these bars come out of the oven, they’re at their peak of flavor and texture. Whether you’re sharing at a potluck, pairing with beverages, or creating a dessert buffet, these serving ideas will showcase the gooey caramel, tender apples, and that flirty hint of sea salt. Presentation can be just as fun as baking—play with garnishes, temperature contrasts, and complementary flavors to make every bite a memorable moment.
- Warm with ice cream
Serve each bar warm and top it with a scoop of vanilla bean ice cream. The contrast between the hot, gooey caramel and cold, creamy ice cream creates a dreamy texture and flavor experience.
- Drizzle extra caramel
Just before serving, pour a little extra caramel sauce over each square for added decadence. A light dusting of cinnamon on top elevates its bakery-style appeal.
- Pair with hot beverages
Offer these bars alongside a steaming cup of spiced apple cider or pumpkin latte. The spices in the drink echo the cinnamon and nutmeg in the bars, creating a harmonious flavor duo.
- Garnish with toasted nuts
Sprinkle chopped pecans or walnuts on top for an extra crunch. Toasting the nuts first enhances their flavor and adds a nutty aroma that complements the caramel and apples.
HOW TO STORE SALTED CARAMEL APPLE BARS
Once you’ve baked these bars, keeping them fresh and flavorful is a breeze. Proper storage ensures they maintain their tender crumb, ooey-gooey caramel pockets, and that flake of sea salt on top. Whether you plan to savor them over a few days or stash extras for spontaneous treats, these methods will preserve the best qualities of your creation. Consistency of texture and flavor is key—avoid overcrowding and moisture exposure to keep each bar tasting like it just came out of the oven.
- Room-temperature storage
Place cooled bars in a shallow container and cover tightly with plastic wrap or an airtight lid. Store at room temperature for up to three days. This method retains the soft crumb while keeping the caramel ribbons gooey.
- Refrigerator method
For longer freshness, stack the bars between layers of parchment paper in an airtight container and refrigerate for up to one week. Bring squares to room temperature or gently warm them before serving.
- Freezer preservation
Individually wrap each cooled bar in plastic wrap, then place them in a resealable freezer bag. Freeze for up to two months. Thaw overnight in the refrigerator or heat in the microwave for quick snacks.
- Preventing condensation
When moving bars from cold storage back to room temperature, allow them to sit in their wrapping for about 30 minutes before unwrapping. This prevents excess moisture from forming and keeps the texture perfect.
CONCLUSION
From the first spoonful of softened apples to that last flick of sea salt on top, these Salted Caramel Apple Bars offer an irresistible combination of flavors and textures that capture the spirit of fall. We’ve covered every phase—from selecting the perfect ingredients and mastering the baking process to creative serving ideas and foolproof storage methods. Whether you’re a seasoned baker or just starting out, this recipe is designed for success in any kitchen. The tender crumb, sweet-spiced apples, and luscious caramel swirls come together in a way that feels both familiar and spectacularly indulgent.
Feel free to print this article and tuck it into your recipe binder for easy access whenever the craving strikes. You can also save it digitally and revisit the tips whenever you need a refresher. Below you’ll find a helpful FAQ section to address common questions and variations, so you’ll be fully prepared to tackle any baking challenge. If you give this recipe a try, I’d love to hear how it turns out—leave a comment, share your feedback, or ask any questions if you need help along the way. Happy baking, and may every bite bring a little extra warmth to your home!
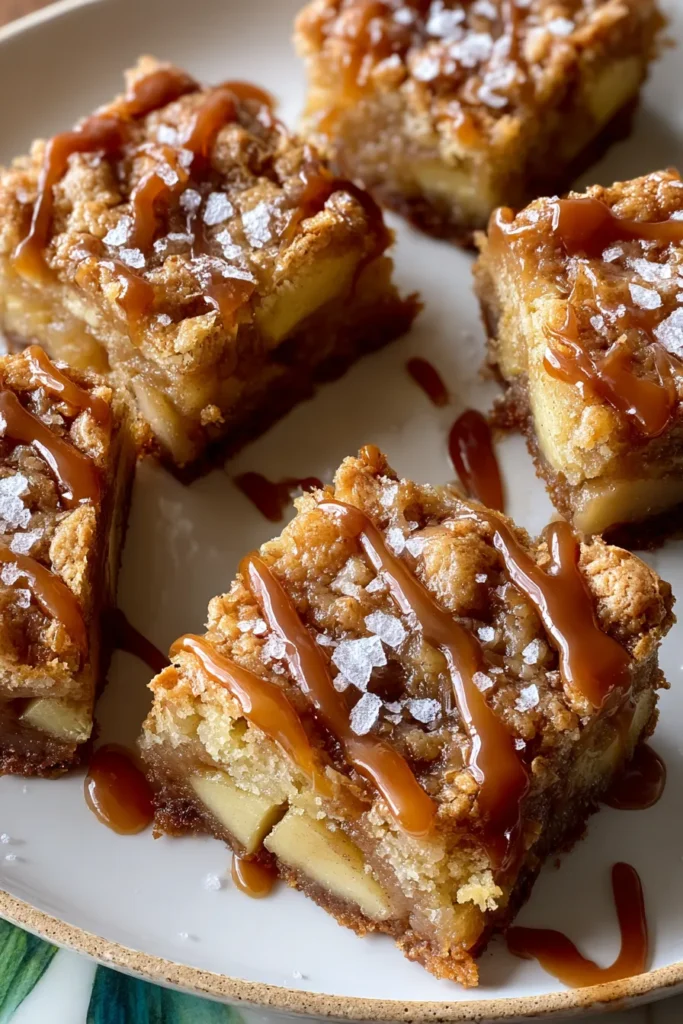

Salted Caramel Apple Bars
Description
These luscious bars combine tender apples with a rich caramel swirl, topped with a sprinkle of flaky sea salt for a mouthwatering dessert that’ll have everyone asking for seconds!
Ingredients
Instructions
-
Preheat your oven to 350°F (175°C). Grease and line a 9x13-inch baking dish with parchment paper, leaving some overhang for easy removal.
-
In a large bowl, combine the melted butter, granulated sugar, brown sugar, and vanilla extract. Whisk until smooth and well combined.
-
Add the eggs, one at a time, beating well after each addition until fully incorporated.
-
In a separate bowl, sift together the all-purpose flour, baking powder, and salt. Gradually add the dry ingredients to the wet ingredients, mixing until just combined.
-
In another bowl, toss the chopped apples with the ground cinnamon and nutmeg until the apples are well coated.
-
Fold the spiced apples into the batter gently, ensuring they are evenly distributed.
-
Spread the batter into the prepared baking dish, smoothing the top with a spatula.
-
Drizzle the caramel sauce evenly over the top of the batter. Use a knife or skewer to gently swirl the caramel into the batter.
-
Bake in the preheated oven for 35-40 minutes, or until the edges are golden brown and a toothpick inserted into the center comes out clean.
-
Remove from the oven and sprinkle with flaky sea salt while still warm. Allow the bars to cool in the pan on a wire rack.
-
Once completely cool, use the parchment overhang to lift the bars from the pan. Cut into squares for serving.
Note
- For an extra touch, you can add chopped nuts such as pecans or walnuts to the batter for a crunchy texture.
- Store the bars in an airtight container at room temperature for up to three days or refrigerate for up to a week.
- You can make homemade caramel sauce for a richer flavor, or use store-bought for convenience.
- Adding a scoop of vanilla ice cream on top of a warmed bar makes for an indulgent dessert treat.

