

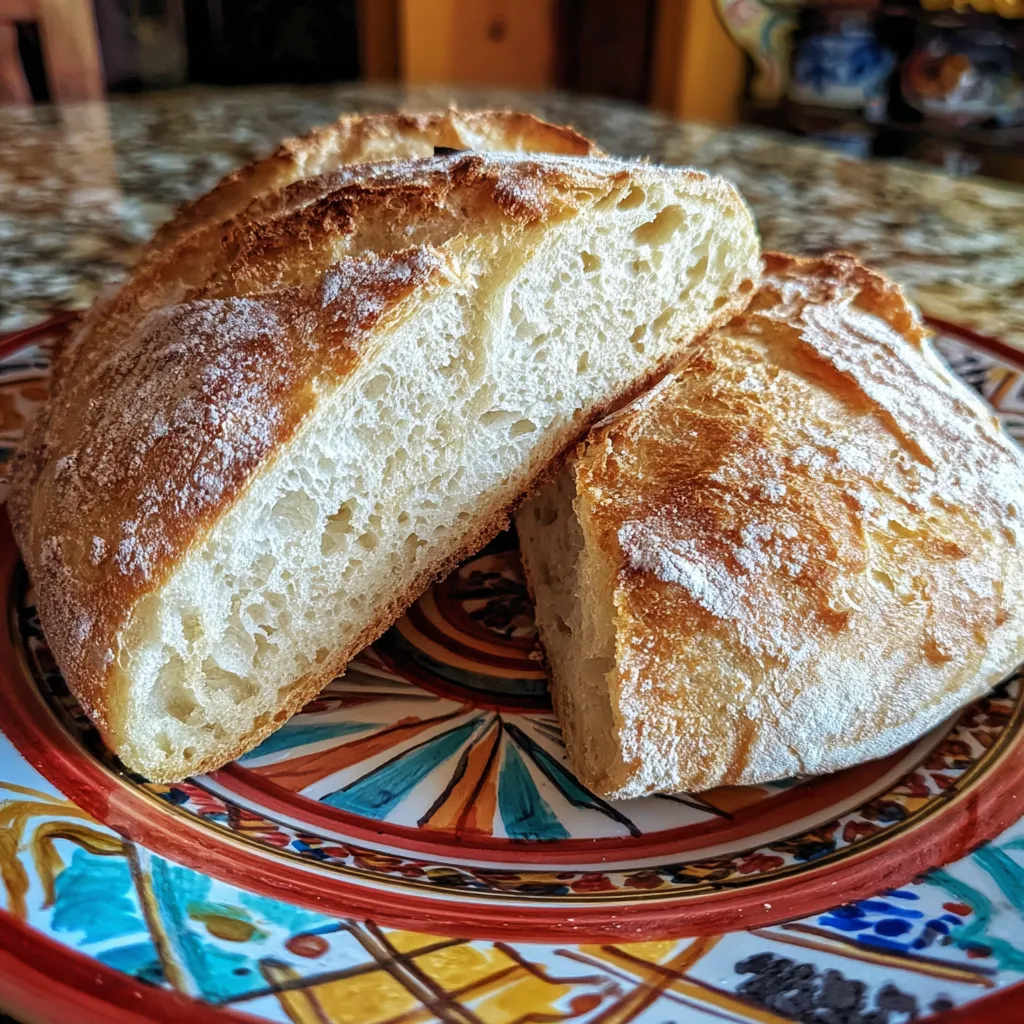
There’s something irresistibly comforting about Rustic Crusty Artisanal Italian Bread that bridges homemade warmth and bakery allure. This golden-crusted loaf boasts a chewy, open crumb scented by olive oil and crowned with a crackling bronze exterior. Sink your teeth into its tender, airy interior, and transport your kitchen to an Italian countryside, experience the simple joy of fresh-baked goodness that brightens any breakfast table.
Key Ingredients
To bake this Rustic Crusty Artisanal Italian Bread, you'll need just five staple ingredients that come together to create its signature texture and flavor. Each component plays a crucial role in achieving that perfect crackling crust and tender, airy crumb.
- 500 g bread flour: Provides the essential structure and gluten network for a chewy, open crumb.
- 350 ml warm water: Hydrates the flour and activates the yeast, ensuring proper fermentation and dough consistency.
- 2 tsp salt: Enhances flavor and helps regulate yeast activity for a controlled rise.
- 1 tsp instant yeast: Leavens the dough, creating the airy interior and light texture.
- 1 tbsp olive oil: Adds a subtle richness and helps yield a slightly tender crust with homemade charm.
How To Make Rustic Crusty Artisanal Italian Bread
Baking this Rustic Crusty Artisanal Italian Bread is a rewarding journey from humble ingredients to a bakery-worthy loaf. We'll guide you through each stage: mixing a shaggy dough, kneading to develop strength, proofing for that signature rise, shaping for oven spring, and finally scoring and baking to achieve a golden, crackly crust. Follow these detailed steps, and you'll master the art of crafting the perfect rustic loaf at home.
1. In a large bowl, whisk together the bread flour, salt, and instant yeast until they’re evenly distributed, ensuring each bite has balanced flavor and consistent rise.
2. Create a well in the center, pour in the warm water and olive oil, then stir with a wooden spoon until a shaggy dough forms with no dry flour pockets remaining.
3. Turn the dough onto a lightly floured surface and knead for 8–10 minutes, developing gluten until the dough feels smooth, elastic, and springs back when pressed.
4. Place the dough in a lightly oiled bowl, cover with a damp cloth, and let it rise in a warm, draft-free spot for 1–1½ hours, or until doubled in size.
5. Gently deflate the dough with your fingertips, shape it into a tight round loaf, and transfer onto a parchment-lined baking sheet or into a proofing basket for added structure.
6. Cover the shaped loaf and let it proof for another 45–60 minutes, until it looks puffed and passes the gentle indentation test.
7. Meanwhile, preheat your oven to 230°C (450°F) with a baking stone or inverted sheet pan on the middle rack to ensure a hot surface for baking.
8. Using a sharp knife or lame, slash the top of the loaf with quick, confident cuts to help control expansion, then slide the dough (with parchment) onto the hot stone or pan.
9. Bake for 20 minutes to set the crust, then reduce the oven temperature to 200°C (390°F), remove any steam source, and continue baking for an additional 15–20 minutes until the crust is deep golden brown.
10. Transfer the bread to a wire rack and let it cool completely before slicing; this final rest allows the crumb to finish cooking and prevents a gummy interior.
Serving Suggestions
Once your Rustic Crusty Artisanal Italian Bread emerges golden and crackling, it’s time to celebrate its versatile nature. Whether you’re enjoying a leisurely breakfast or complementing your favorite pasta, this loaf shines across the table. Below are a few simple yet delightful ways to serve it, each highlighting that chewy crumb and bronze-hued crust.
- Rustic Bruschetta: Toast slices until golden, rub with a garlic clove, drizzle with extra virgin olive oil, and top with fresh tomatoes and basil for a flavor-packed appetizer.
- Olive Oil Dunk: Tear the warm bread into chunks and serve alongside a small bowl of high-quality olive oil with a sprinkle of sea salt and freshly cracked pepper.
- Hearty Sandwiches: Layer thick-cut slices with cured meats, aged cheese, and crisp greens; press lightly for a satisfying panini-style bite.
- Soup Companion: Serve warm slices alongside a rich minestrone or creamy tomato soup, perfect for soaking up savory broth and adding crunchy contrast.
Tips For Perfect Rustic Crusty Artisanal Italian Bread
Mastering this Rustic Crusty Artisanal Italian Bread isn’t just about following the steps—it’s about understanding how little tweaks can take your loaf from good to unforgettable. From creating the perfect steaming environment to knowing exactly when your dough has reached peak readiness, these friendly tips will help you nail the ideal crust and open crumb every time. Keep these pointers in mind before you preheat the oven, and watch your kitchen transform into a mini-Italian bakery.
- Place a small oven-safe dish of water on the bottom rack during the first baking stage to create steam and develop a crisp, crackling crust.
- Bake on a preheated stone or heavy pan to ensure even heat distribution and maximize oven spring for an open, airy crumb.
- Allow the loaf to cool fully on a wire rack; slicing too soon releases steam and can lead to a gummy center.
- Store the completely cooled bread wrapped in a linen cloth at room temperature to maintain its crisp exterior and tender interior.
How To Store It
After all that effort, you’ll want to preserve every bit of fresh-baked goodness from your Rustic Crusty Artisanal Italian Bread. Proper storage not only keeps the crust lively but also maintains that perfectly chewy crumb. Depending on how quickly you plan to enjoy it, here are some smart methods to keep your loaf tasting just-baked, day after day.
- Room-Temperature Linen Wrap: Once completely cooled, wrap the loaf in a clean linen cloth and store it on the counter or in a bread box. The fabric allows moisture to escape slowly, preserving a crisp crust.
- Bread Box Storage: Place the linen-wrapped loaf inside a ventilated bread box to protect it from drafts and keep it from drying out too quickly.
- Freezer Slices: If you won’t finish the loaf within two days, slice it, wrap each piece in parchment or freezer-safe wrap, and store in an airtight container. Toast directly from frozen to revive the crust.
- Reheat Before Serving: Whenever you’re ready to enjoy leftovers, warm slices in a preheated 180°C (350°F) oven for 5–7 minutes to restore crunch and freshness.
Frequently Asked Questions
Got a burning question about baking this loaf? I've got you covered—check out these FAQs for quick answers!
- What is the ideal temperature for the water in this recipe and why?
The water should be warm, around 38–43°C (100–110°F). This temperature activates the instant yeast efficiently without killing it, ensuring a good rise during both the bulk fermentation and proofing stages.
- How can I tell when I’ve kneaded the dough enough?
After 8–10 minutes of kneading on a lightly floured surface, the dough should feel smooth and elastic. You can perform the windowpane test by gently stretching a small piece; if it stretches into a thin, translucent membrane without tearing, the gluten is well developed.
- What adjustments should I make if my dough is too sticky or too dry?
If the dough is too sticky to handle, lightly dust your work surface and your hands with flour, adding no more than 1 tablespoon at a time to avoid drying it out. If it feels overly dry and cracks, sprinkle a teaspoon of warm water over it and continue kneading until it becomes smooth and elastic.
- Why is the second rise important and how do I know when it’s complete?
The second rise (proofing) allows the shaped loaf to relax and produce better oven spring and an open crumb. It’s ready when it has puffed noticeably (about 45–60 minutes) and a gentle press of your fingertip leaves a slight indentation that slowly springs back.
- How can I achieve a crispier crust on this rustic loaf?
Place a small oven-safe dish of water on the bottom rack to generate steam during the first 20 minutes of baking and bake on a preheated stone or inverted sheet pan at 230°C (450°F). The combination of steam and radiant heat promotes a blistered, crackly crust.
- Why must I let the bread cool completely before slicing?
Cooling on a wire rack allows the interior to finish its steam-cooking process. Slicing too soon releases trapped steam, leading to a gummy crumb. Waiting until the loaf is fully cool (at least 1 hour) ensures a light, airy texture.
- What’s the best way to store this artisanal bread to keep it fresh?
Wrap the fully cooled loaf in a clean linen cloth and store it at room temperature. The linen allows moisture to escape slowly, preserving the crust’s crispness while keeping the crumb tender. Avoid plastic, which traps moisture and softens the crust.
What Makes This Special
There’s no magic wand required to bake this Rustic Crusty Artisanal Italian Bread—just simple ingredients, a bit of patience, and a hot oven. The gorgeously crackling crust and airy crumb happen thanks to that dreamy combo of well-developed gluten, gentle proofing, and a splash of olive oil for homemade charm. Go ahead, print this recipe, tuck it into your favorite cookbook, and let the flour fly! If you try it in your kitchen, drop a comment below or send any questions—I'm here to help you conquer the perfect rustic loaf.

Rustic Crusty Artisanal Italian Bread
Description
Sink your teeth into a loaf crowned with a crackling bronze crust and a tender, airy interior, infused with a subtle olive oil note and homemade charm.
Ingredients
Instructions
-
In a large bowl, whisk together the bread flour, salt, and instant yeast until evenly distributed.
-
Create a well in the center and pour in the warm water and olive oil, then stir with a wooden spoon until a shaggy dough forms.
-
Turn the dough onto a lightly floured surface and knead for 8–10 minutes until smooth and elastic.
-
Place the dough in a lightly oiled bowl, cover with a damp cloth, and let rise in a warm spot for 1–1½ hours or until doubled in size.
-
Gently deflate the dough, shape into a round loaf, and place on a parchment-lined baking sheet or in a proofing basket.
-
Cover and let rise for another 45 minutes to 1 hour until puffed.
-
Meanwhile, preheat the oven to 230°C (450°F) with a baking stone or inverted sheet pan on the middle rack.
-
Slash the top of the loaf with a sharp knife, transfer the dough (with parchment) onto the hot surface, and bake for 20 minutes.
-
Reduce oven temperature to 200°C (390°F), remove any steam source if used, and bake for an additional 15–20 minutes until deep golden brown.
-
Let the bread cool completely on a wire rack before slicing.
Note
- For a crispier crust, place a small oven-safe dish of water on the bottom rack to create steam.
- Use a baking stone or preheated heavy pan to ensure even heat and a better oven spring.
- Allow the loaf to cool fully; slicing too soon will yield a gummy interior.
- Store wrapped in a linen cloth at room temperature to maintain crust texture and freshness.

