

If you’re looking for a delightful treat that’s both elegant and approachable, these Rich Creamy Baked Mini Cheesecakes are calling your name. With a crisp graham crust hugging a luscious lemon-kissed filling, each bite is a perfect balance of sweet and tangy. Whether you’re hosting a gathering or craving a personal dessert, these bite-sized marvels are surprisingly easy to make and impossible to resist.
Key Ingredients
Before we dive into the baking magic, let’s gather our essentials. Each ingredient plays a special role, from building the buttery base to creating that silky, wobbly center.
- 1 cup graham cracker crumbs: Forms the crunchy foundation that contrasts beautifully with the creamy filling.
- 2 tbsp granulated sugar: Sweetens and binds the crust for a perfectly set base.
- 4 tbsp unsalted butter, melted: Adds richness and helps the crumbs stick together.
- 16 oz cream cheese, softened: The star of the show, providing that smooth, tangy creaminess.
- 1/2 cup granulated sugar: Sweetens the filling without overpowering the lemon notes.
- 1/2 cup sour cream: Offers a hint of tartness and silky texture.
- 2 large eggs, room temperature: Binds the ingredients and gives structure while keeping the center creamy.
- 1 tsp vanilla extract: Enhances the overall flavor with warm, aromatic notes.
- 1/2 tsp lemon zest: Infuses bright citrus flavor for a refreshing twist.
- 1/4 tsp salt: Balances sweetness and amplifies all the flavors.
How To Make Rich Creamy Baked Mini Cheesecakes
Baking these mini cheesecakes is a fun process that combines simple steps for a show-stopping result. You’ll start by creating a sturdy graham crust, whip together a velvety filling, and then bake everything to that perfect wobbly-center stage. Just follow these detailed steps and you’ll have adorable little cheesecakes ready to chill and impress.
1. Preheat your oven to 325°F and line a 12-cup muffin tin with paper liners to ensure easy removal.
2. In a medium bowl, mix the graham cracker crumbs, 2 tablespoons granulated sugar, and melted butter until the mixture is evenly moistened and resembles wet sand.
3. Press about 1 tablespoon of the crust mixture into the bottom of each liner, using the back of a spoon or a small glass to compact it firmly, then bake for 5 minutes. Let the crusts cool while you prepare the filling.
4. In a large bowl, beat the softened cream cheese on medium speed until completely smooth, then add 1/2 cup granulated sugar and salt, mixing until well combined.
5. Add the sour cream, vanilla extract, and lemon zest, and mix on low speed until just incorporated, scraping down the sides to ensure an even blend.
6. Crack in the eggs one at a time, mixing on low after each addition until the batter is silky—be careful not to overbeat or introduce too much air.
7. Divide the cheesecake batter evenly among the liners, filling each cup about three-quarters full to allow room for a slight rise.
8. Bake for 18–20 minutes, or until the edges are firmly set but the centers still jiggle slightly when gently tapped.
9. Turn off the oven, crack the door open, and let the cheesecakes cool slowly inside for 30 minutes to prevent cracks.
10. Remove the tin from the oven and refrigerate the mini cheesecakes for at least 2 hours before serving to achieve that signature creamy texture.
Serving Suggestions
These mini cheesecakes shine on their own, but a few thoughtful accompaniments can elevate them even more. Here are some of my favorite ways to present these delightful bites:
- Top with a fresh berry compote, spooning vibrant strawberries or blueberries over each cheesecake just before serving.
- Add a dollop of lightly whipped cream flavored with a drop of vanilla for extra richness.
- Garnish with a thin lemon slice or twist, highlighting the zesty lemon flavor and adding a pop of color.
- Serve alongside a steaming cup of espresso or hot tea, balancing the creamy sweetness with a warm, bitter note.
Tips For Perfect Rich Creamy Baked Mini Cheesecakes
With a few insider secrets, you’ll nail these mini cheesecakes every time. Let’s chat about how to keep your centers silky, your crusts crack-free, and your presentation flawless.
- Use room temperature cream cheese for a lump-free batter
- Press the crust firmly to help prevent cracking
- Do not overbake to maintain a creamy center
- Chill fully for best texture and easy removal from liners
How To Store It
Proper storage is key to maintaining the delicate flavor and texture of your mini cheesecakes. Here’s how to keep them at their best until you’re ready to enjoy:
- Refrigerate in an airtight container to prevent moisture loss and fridge odors from seeping in.
- Place parchment paper between layers if you need to stack them, ensuring they don’t stick together.
- Freeze individual cheesecakes on a baking sheet until firm, then transfer to a freezer-safe bag for up to 2 months—just thaw in the fridge before serving.
- Always return them to the coldest part of your fridge promptly after serving to keep the texture perfect.
Frequently Asked Questions
Curious minds often have questions about these adorable cheesecake bites—let’s clear up the most common ones!
- How long does it take to prepare and bake these mini cheesecakes?
From start to finish, plan on about 45 minutes of active prep and assembly, plus 18–20 minutes of baking, 30 minutes of cooling in the turned-off oven, and at least 2 hours of refrigeration. Active time includes mixing and pressing the crust, beating the cheesecake filling, and filling the liners. Make sure to factor in the chilling time to achieve the proper creamy texture before serving.
- Why is it important to use room temperature cream cheese?
Room temperature cream cheese blends smoothly with the sugar and other ingredients, preventing lumps in the batter. Cold cream cheese can result in uneven incorporation, leading to a grainy texture or streaks in the finished cheesecake. Leaving the cream cheese out for about 30 minutes before mixing ensures a silky, uniform batter.
- How do I prevent the mini cheesecakes from cracking on top?
Cracking usually occurs when the batter is overbeaten or the temperature changes too quickly. Mix the eggs in one at a time on low speed, stopping as soon as the batter is smooth, to avoid adding excess air. After baking, turn off the oven, crack the door, and let the cheesecakes cool slowly for 30 minutes. This gradual cooling helps the centers settle without pulling away from the edges and forming cracks.
- Can I substitute the graham cracker crust with another type of crust?
Yes, you can swap in digestive biscuit crumbs or finely crushed vanilla wafer cookies for a slightly different flavor profile. Use the same ratio—1 cup of crumbs, 2 tablespoons of sugar, and 4 tablespoons of melted butter—and press into the liners just as you would with the graham crumbs. Be sure to bake the alternative crust for 5 minutes to set it before adding the filling.
- What is the best way to ensure a creamy center?
To maintain that luscious, creamy center, avoid overbaking and overmixing. The cheesecakes are done when the edges are set but the centers still jiggle slightly when you gently shake the pan. Overbaking will firm the center too much. After you turn off the oven, let them sit inside with the door cracked for 30 minutes; this residual heat gently finishes the cooking without drying out the filling.
- How should I store leftovers, and how long will they keep?
Store the cooled mini cheesecakes in an airtight container in the refrigerator for up to 5 days. Keeping them covered prevents absorption of fridge odors and helps maintain moisture. If you stack them, place parchment paper between layers to avoid sticking. Always return them to the fridge promptly after serving to keep them at a safe temperature.
- Can I freeze the mini cheesecakes?
Yes, you can freeze individual cheesecakes after they’ve chilled completely. Place them on a baking sheet and freeze until firm, then transfer to a freezer-safe container or zip-top bag. They’ll keep for up to 2 months. Thaw in the refrigerator for several hours before serving, and remove the liners if you prefer a clean presentation.
- Why do the instructions call for cooling the cheesecakes in the oven with the door cracked?
Gradual cooling helps prevent sudden temperature changes that can cause the delicate custard to contract and crack. Leaving the cheesecakes in a warm oven with the door ajar allows them to cool slowly and evenly, ensuring a smooth surface and firming the filling just enough before moving them to the refrigerator for final chilling.
What Makes This Special
These Rich Creamy Baked Mini Cheesecakes are a perfect blend of buttery, crunchy crust and tangy, silky filling that still jiggles in the center—proof that the best desserts can come in small packages. They’re special because they balance flavors flawlessly and look stunning at any gathering. Go ahead, print out this recipe, stash it in your binder, and let me know how your first (or fifteenth!) batch turns out. Questions, tweaks, or cheesecake confessions are always welcome—I’d love to hear from you!
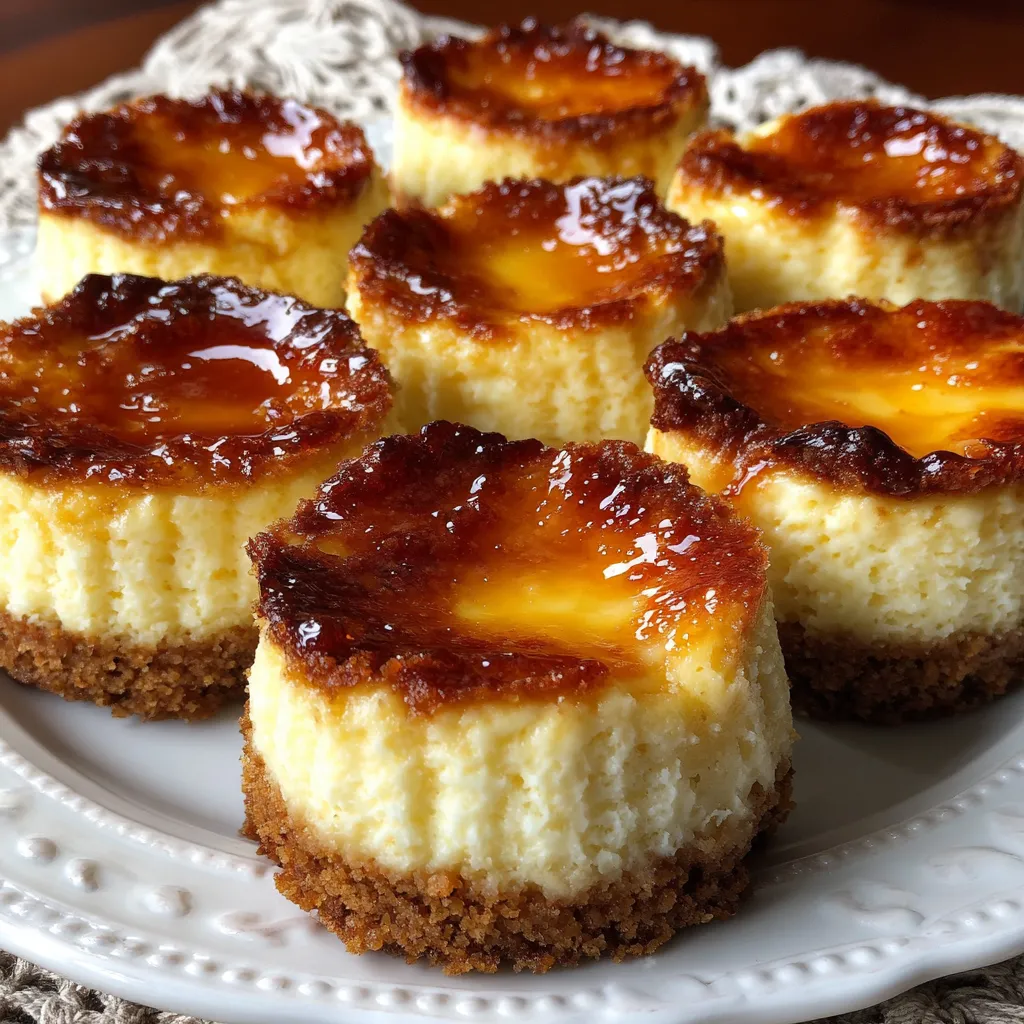

Rich Creamy Baked Mini Cheesecakes
Description
These mini cheesecakes combine a buttery graham base with a smooth, tangy filling that still wobbles slightly at the center, leaving a hint of lemon zest on your tongue.
Ingredients
Instructions
-
Preheat oven to 325°F and line a 12-cup muffin tin with paper liners.
-
In a bowl, mix graham cracker crumbs, 2 tablespoons sugar, and melted butter until evenly moistened.
-
Press about 1 tablespoon of the crust mixture into the bottom of each liner and bake for 5 minutes, then let cool.
-
In a large bowl, beat softened cream cheese until smooth, then add 1/2 cup sugar and salt and mix until combined.
-
Add sour cream, vanilla extract, and lemon zest and mix on low until incorporated.
-
Add eggs one at a time, mixing just until the batter is smooth; avoid overbeating.
-
Divide the cheesecake batter evenly among the liners, filling each about three-quarters full.
-
Bake for 18–20 minutes until the edges are set and the centers still jiggle slightly.
-
Turn off the oven, crack the door, and let the cheesecakes cool inside for 30 minutes.
-
Remove from the oven and refrigerate for at least 2 hours before serving.
Note
- Use room temperature cream cheese for a lump-free batter
- Press the crust firmly to help prevent cracking
- Do not overbake to maintain a creamy center
- Chill fully for best texture and easy removal from liners

