

There’s something truly delightful about whipping up a batch of homemade refrigerator dill pickles. Each crisp bite brings together that perfect harmony of tangy vinegar, subtle sweetness, and aromatic dill that feels like summer in a jar. They’re refreshingly bright on the palate, with just enough saltiness to make every crunch satisfying. Best of all, you don’t need special canning equipment or days of waiting—just a few ingredients, a little prep, and a quick chill in the fridge, and you’re on your way to pickles that rival anything you’d buy at the deli counter.
These pickles are remarkably beginner-friendly yet endlessly customizable. Whether you prefer your spears mild and aromatic or spiced up with a kick of red pepper flakes, you can tailor the flavors to suit your mood. In under an hour, you’ll have your cucumbers sliced (or left whole), a simple brine simmered and cooled, and everything tucked into a glass jar. Then, let patience work its magic: 24 to 48 hours in the refrigerator transforms crisp cucumbers into tangy, garlicky delights. By the time you pop open that jar, the flavors will have deepened into something truly memorable—ready for snacking, sandwich-building, or sharing with friends.
KEY INGREDIENTS IN REFRIGERATOR DILL PICKLES
Before diving into the pickling process, it’s essential to gather fresh, quality ingredients that will shine through in every bite. From crisp cucumbers to fragrant dill, each component plays a unique role in building layers of flavor and texture. Let’s explore what you’ll need and why it matters.
- Small pickling cucumbers
These firm, seed-light cucumbers hold up beautifully to the brining process, retaining their crunch and resisting sogginess.
- Water
The base of the brine that dilutes vinegar and helps transport salt and sugar into the cucumber, ensuring even flavor penetration.
- White vinegar
Provides that classic tangy bite and creates an acidic environment that preserves the cucumbers while balancing flavors.
- Sea salt or kosher salt
Essential for drawing moisture out of the cucumbers and seasoning the brine; it enhances taste without introducing unwanted additives.
- Sugar
Balances the sharpness of the vinegar, rounding out the flavor profile with a hint of sweetness.
- Black peppercorns
Infuse a warm, piquant note that complements the fresh dill and garlic.
- Mustard seeds
Add a gentle heat and earthy undertones that awaken your taste buds with each crunch.
- Coriander seeds
Lend a citrusy, slightly floral flavor that brightens the overall profile.
- Garlic cloves
Impart bold, savory depth, with each smashed clove releasing aromatic oils into the brine.
- Fresh dill
The star herb—vibrant and fragrant—kissing every pickle with that signature dill aroma.
- Red pepper flakes (optional)
For those who crave a little extra heat, these flakes deliver a slow-building warmth without overpowering the classic dill flavor.
HOW TO MAKE REFRIGERATOR DILL PICKLES
Transforming crisp cucumbers into tangy refrigerator pickles is both straightforward and satisfying. Follow these detailed steps to ensure every jar is bursting with flavor and crunch.
1. Slice the cucumbers
Begin by slicing the cucumbers into spears or leaving them whole if you prefer a chunkier pickle. Use a sharp knife to create uniform pieces so they pickle evenly.
2. Prepare the brine
In a medium saucepan, combine water, white vinegar, sea salt, and sugar. Bring the mixture to a boil over medium-high heat, stirring occasionally until the salt and sugar completely dissolve. This seasoned liquid is your brine. Remove from heat and allow it to cool to room temperature.
3. Layer the cucumbers
Take a large, clean glass jar (or several smaller ones) and arrange the cucumber spears in neat layers, leaving some space for spices and herbs to nestle between them.
4. Add spices and herbs
Tuck in peeled and smashed garlic cloves, fresh dill sprigs, black peppercorns, mustard seeds, coriander seeds, and optional red pepper flakes evenly throughout the layers of cucumbers.
5. Pour the brine
Carefully pour the cooled brine into the jar, ensuring the cucumbers are fully submerged under the liquid to promote consistent pickling and prevent spoilage.
6. Seal and shake
Secure the jar lids tightly and give each jar a gentle shake to help distribute the spices and herbs throughout the brine.
7. Refrigerate
Place the sealed jars in the refrigerator. Allow them to marinate for at least 24 hours, though waiting 48 hours will yield the most pronounced flavor.
8. Enjoy and store
Your refrigerator dill pickles will continue to develop flavor over time and can be stored in the fridge for up to one month.
SERVING SUGGESTIONS FOR REFRIGERATOR DILL PICKLES
Once your pickles have reached peak flavor, it’s time to enjoy them in a variety of fun and delicious ways. Whether you’re hosting a casual gathering or simply jazzing up your lunch, these serving ideas will highlight their irresistible crunch and tang.
- On a deli-style sandwich
Layer thick pickle spears alongside rich meats and creamy cheeses for a satisfying bite. Pat the pickles dry before adding them to prevent soggy bread.
- As part of a charcuterie board
Arrange whole spears or quarters with an assortment of artisanal cheeses, cured meats, and nuts for a spirited snack platter.
- Chopped into a pickle relish
Dice pickles finely and mix with mayonnaise, a touch of mustard, and diced onion to create a bright, zesty spread perfect for burgers and hot dogs.
- Topped on a salad or grain bowl
Sprinkle sliced pickles over mixed greens or grain bowls for a tangy pop that balances richer ingredients like avocado or roasted vegetables.
HOW TO STORE REFRIGERATOR DILL PICKLES
Proper storage ensures that your homemade pickles stay crisp, flavorful, and safe to eat for as long as possible. Here are practical methods to maintain quality and freshness.
- Use sterilized glass jars
Always store pickles in clean, well-sterilized glass containers. This prevents unwanted bacteria from spoiling the brine and keeps flavors pure.
- Keep pickles fully submerged
Ensure the brine completely covers the cucumbers at all times. If needed, add extra cooled brine or a clean weight (like a small glass weight) to keep everything beneath the surface.
- Store in the coldest part of the refrigerator
Place your jars toward the back, where temperatures remain most consistent. Avoid the door to prevent temperature fluctuations each time the fridge opens.
- Monitor for signs of spoilage
Check your pickles regularly. If the liquid turns cloudy or you detect any off-smells, it’s best to discard the batch and start fresh.
CONCLUSION
Homemade refrigerator dill pickles are a delightful, beginner-friendly project that transforms humble cucumbers into flavor-packed delights in just a couple of days. From gathering simple ingredients like crisp pickling cucumbers, fragrant dill, and pantry spices to assembling layers in a jar and waiting for that magic 24–48 hours, the process is both straightforward and infinitely rewarding. You’ll love how easy it is to tweak the spice level with red pepper flakes or experiment with additional herbs like bay leaves or dill seeds. These pickles add zip to sandwiches, boards, salads, and more, making them a versatile staple in your kitchen arsenal. Feel free to print this article and save it for later reference, and don’t forget that a handy FAQ section follows below to address any lingering questions you might have.
I hope this guide has inspired you to dive into the world of quick pickling and create your own batch of tangy, crunchy refrigerator dill pickles. If you give this recipe a try or have any thoughts to share—whether it’s a tweak you made, a question about technique, or feedback on how they turned out—I’d love to hear from you. Drop a comment below with your experiences, ideas, or requests for clarification. Happy pickling!
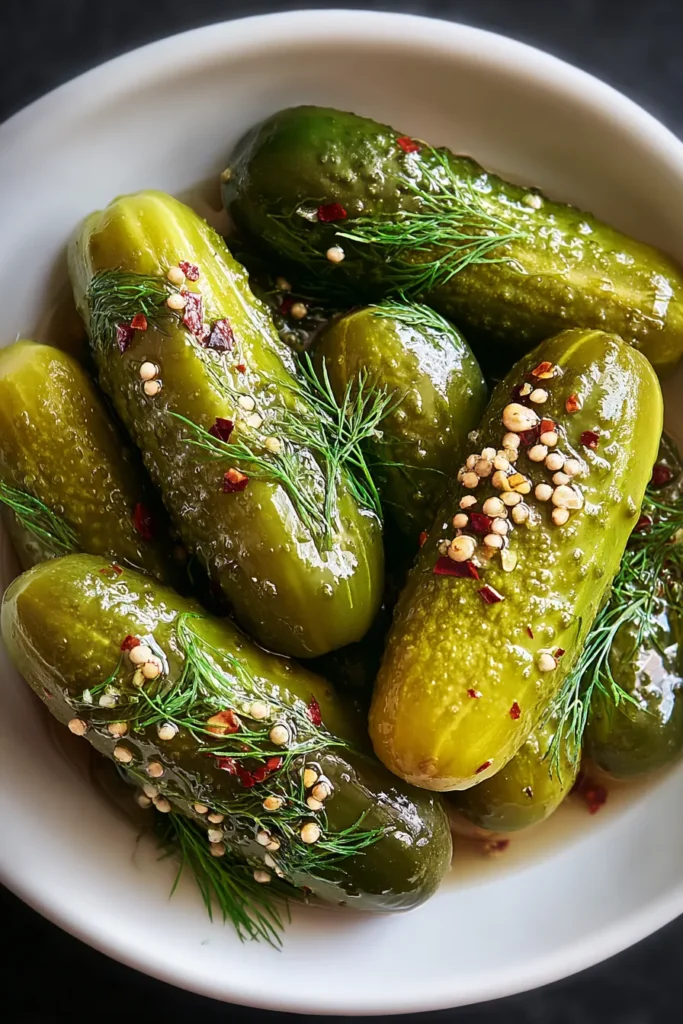

Refrigerator Dill Pickles
Description
Experience the perfect balance of tangy vinegar and fresh dill in these homemade refrigerator dill pickles. Quick to prepare and bursting with flavor, they're a must-try!
Ingredients
Instructions
-
Start by slicing the cucumbers into spears or leave them whole if preferred, for larger pickles.
-
In a medium saucepan, combine the water, white vinegar, sea salt, and sugar. Bring to a boil over medium-high heat, stirring until the salt and sugar dissolve. This is your brine. Let it cool to room temperature.
-
In a large, clean glass jar or several smaller jars, arrange layers of cucumber spears.
-
Tuck in the garlic cloves, fresh dill, black peppercorns, mustard seeds, coriander seeds, and red pepper flakes for a spicy kick, throughout the layers of cucumbers.
-
Pour the cooled brine over the cucumbers, covering them completely with the liquid.
-
Seal the jars with lids and shake them gently to distribute the spices.
-
Place the jars in the refrigerator and allow the pickles to marinate for at least 24 hours. For best flavor, let them sit for 48 hours.
-
These pickles can be stored in the refrigerator for up to a month.
Note
- For extra crunchy pickles, add grape leaves or alum to the jar.
- You can customize the spice level by adjusting the amount of red pepper flakes.
- Feel free to experiment with additional spices such as dill seeds or bay leaves for varied flavors.
- Always ensure that the cucumbers are fully submerged in the brine to prevent spoilage.
- These make for a great gift when placed in decorative jars.

