

These Refrigerator Dill Pickle Garlic Small Batch are your new secret weapon for bright, crunchy snacking that comes together in under 30 minutes of hands-on time. With just a 15-minute prep, 10 minutes of simmering, and a 24-hour rest in the fridge, you’ll have quick and easy crisp dill pickles with a garlic kick that feel like they’ve been brining for weeks. Perfect for beginner cooks (difficulty: Beginner) and nutrition-conscious snackers, each 150-calorie serving (makes about 6 servings) offers that satisfying tang and zip without any complicated canning or fuss. These vibrant refrigerator pickles double as a tasty appetizer or a tangy lunchside, tying together sandwiches, burgers, and charcuterie boards with zesty flair.
I still remember the first time I made these pickles—my kitchen smelled like a farmer’s market stall bursting with fresh dill and crushed garlic, and my family couldn’t stop sampling them straight from the jar. There’s something deeply rewarding about packing cucumbers into clean jars, layering in whole peppercorns and mustard seeds, then watching the magic happen as the flavors marry in the cool of the fridge. Over the next 48 hours, the flavors develop from mellow garlicky notes to a bright, vinegary punch, and that first crunch lets you know it’s all worth the wait. Whether you’re looking to jazz up your weekday sandwiches or impress friends at your next gathering, these small-batch delights are endlessly adaptable—add a pinch of coriander, a dash of fennel seeds, or enjoy them as-is for classic dill and garlic goodness.
KEY INGREDIENTS IN REFRIGERATOR DILL PICKLE GARLIC SMALL BATCH
Before we dive into the step-by-step, let’s talk about the ingredients that make these pickles so irresistibly crisp and flavorful. Each component plays its part in crafting the perfect balance of tang, spice, and herbaceous brightness. Gather these pantry staples and fresh garden finds to transform ordinary cucumbers into vibrant, garlicky gems.
- small cucumbers
These are the foundation of your pickles. Their firm skin and dense flesh provide the signature crunch, while the uniform size ensures even pickling and a consistent flavor in every bite.
- water
Acts as the base of the brine, diluting the vinegar so the acidity doesn’t overpower the pickles. It helps distribute the salt, sugar, and spices evenly throughout the jar.
- white vinegar
Delivers the essential tang that preserves the cucumbers and infuses them with that classic pickle flavor. Its high acidity creates a safe environment for quick refrigerator pickles without traditional canning.
- kosher salt
Draws moisture out of the cucumbers and seasons them uniformly. It enhances the natural cucumber flavor and helps maintain that satisfying crunch.
- granulated sugar
Balances out the sharpness of the vinegar, rounding the flavor profile and adding a hint of sweetness that accentuates the garlic and dill.
- garlic cloves
Peeled and smashed, they release robust garlicky notes that permeate the brine, adding depth and a pleasant savoury bite.
- whole black peppercorns
Provide a warm, mildly spicy kick and a subtle aromatic quality that complements the fresh dill and garlic.
- mustard seeds
Contribute a gentle earthiness and a touch of heat as they swell in the brine, offering little bursts of flavor with each chew.
- red pepper flakes
Infuse the brine with a faint heat that livens up the overall taste without overpowering the dill’s herbal brightness.
- fresh dill
Roughly chopped for maximum surface area, it lends its unmistakable grassy, slightly citrusy aroma and flavor, making these pickles unmistakably “dill.”
HOW TO MAKE REFRIGERATOR DILL PICKLE GARLIC SMALL BATCH
Bringing these pickles to life is a simple but rewarding process—no special equipment required. You’ll prepare the brine, layer in the spices and herbs, pack your cucumbers, and then let time and cold transform them into crunchy delights.
1. Prepare your cucumbers by washing them thoroughly and trimming the ends. If any cucumber is particularly thick, slice it into spears or rounds so that each piece pickles evenly and develops maximum crunch.
2. In a medium saucepan, combine the water, white vinegar, kosher salt, and granulated sugar. Bring the mixture to a simmer over medium heat, stirring continuously until the salt and sugar are completely dissolved. Remove from heat and let the brine cool slightly to prevent shocking the cucumbers.
3. In a clean jar or a few small jars, evenly distribute the garlic cloves, whole black peppercorns, mustard seeds, red pepper flakes, and roughly chopped fresh dill. This layering ensures that every cucumber slice comes into contact with the aromatic spices.
4. Pack the cucumbers tightly into the jars, leaving about 1/4-inch of headspace at the top. This space allows the brine to circulate fully and ensures that nothing sticks out of the liquid.
5. Carefully pour the warm vinegar mixture over the cucumbers, ensuring they are fully submerged. Tap the jar gently on the counter to release any trapped air bubbles, then top off with extra liquid if needed.
6. Seal the jars with lids and set them aside to cool to room temperature. This gradual cooldown helps prevent condensation inside the jar.
7. Once the jars reach room temperature, place them in the refrigerator and allow them to pickle for at least 24 hours before tasting. For the best flavor development, wait 2–3 days—the longer they sit, the more intense and layered the garlic-dill flavor becomes.
SERVING SUGGESTIONS FOR REFRIGERATOR DILL PICKLE GARLIC SMALL BATCH
Elevate your dishes by incorporating these lively pickles in creative ways. Their crisp texture and balanced tang make them a versatile star for everything from casual snacks to gourmet spreads.
- Deli-Style Sandwich Topping
Layer slices of these pickles on a hearty turkey or pastrami sandwich. The bright vinegar note cuts through rich meats and cheeses, adding a refreshing crunch that balances each bite.
- Charcuterie Board Accent
Arrange whole spears or rounds on a cheese board alongside cured meats, olives, and artisan crackers. Their vibrant green hue and spicy-garlic zip bring visual interest and palate-cleansing acidity.
- Salad Crispness Booster
Chop the pickles and stir them into potato salad, egg salad, or coleslaw. The combination of dill, garlic, and peppercorns adds a zesty dimension and extra crunch to creamy, mayo-based salads.
- Garnish for Bloody Marys
Spear a pickle and slide it onto the rim of your cocktail glass. It doubles as an edible garnish that infuses your Bloody Mary with garlicky, herbal notes as you sip.
HOW TO STORE REFRIGERATOR DILL PICKLE GARLIC SMALL BATCH
Proper storage is key to maintaining that fresh, crisp bite and bright flavor. Refrigeration not only preserves the texture but also allows the brining spices to slowly intensify, keeping your pickles delicious for weeks to come.
- Refrigerator Placement
Store the sealed jars on a refrigerator shelf rather than in the door, where temperature fluctuations are more common. This steady, cool environment (around 38–40°F) ensures the pickles keep their crunch.
- Airtight Sealing
Always confirm that jar lids are tightly closed after each use. This prevents contamination, slows oxidation, and helps maintain the vivid green color of the cucumbers.
- Minimal Air Exposure
As you enjoy the pickles, keep the liquid completely covering the cucumbers. If the brine level drops, add a little diluted vinegar solution (equal parts water and vinegar) mixed with a pinch of salt to top up the jar.
- Label and Date
Write the date you packed the pickles on the lid or jar with a permanent marker. While they stay good for up to two months, you’ll know at a glance when they’re at peak flavor (around day 3–14) and when it’s time to make a fresh batch.
CONCLUSION
What began as a few simple ingredients—cucumbers, vinegar, garlic, and dill—has transformed into a small-batch sensation. Throughout this article, we’ve explored the core ingredients that deliver that perfect crunch, walked step by step through the quick simmer-and-pour method, and shared creative ways to serve and store these Refrigerator Dill Pickle Garlic delights. From their easy prep (just 15 minutes!) to the 24-hour rest that develops a depth of tangy, garlicky flavor, these pickles prove that you don’t need complex canning techniques to enjoy homemade preserves. Whether you’re a curious beginner or a seasoned home cook, this recipe combines convenience with gourmet flair, making it an ideal addition to your culinary repertoire. Don’t forget that each 150-calorie serving adds a burst of brightness to sandwiches, salads, and charcuterie boards, and that a well-sealed jar can stay crisp for up to two months.
Feel free to print this article and save it for later reference—you can even jot down your custom spice variations in the margins. Below, you’ll find a helpful FAQ section to address any questions you might have about brine ratios, flavor tweaks, or storage tips. If you try this recipe, let me know how it turned out! Comments, questions, or feedback are always welcome; I’d love to hear about your favorite spice additions or serving hacks. Happy pickling, and here’s to many crunchy, tangy bites ahead!
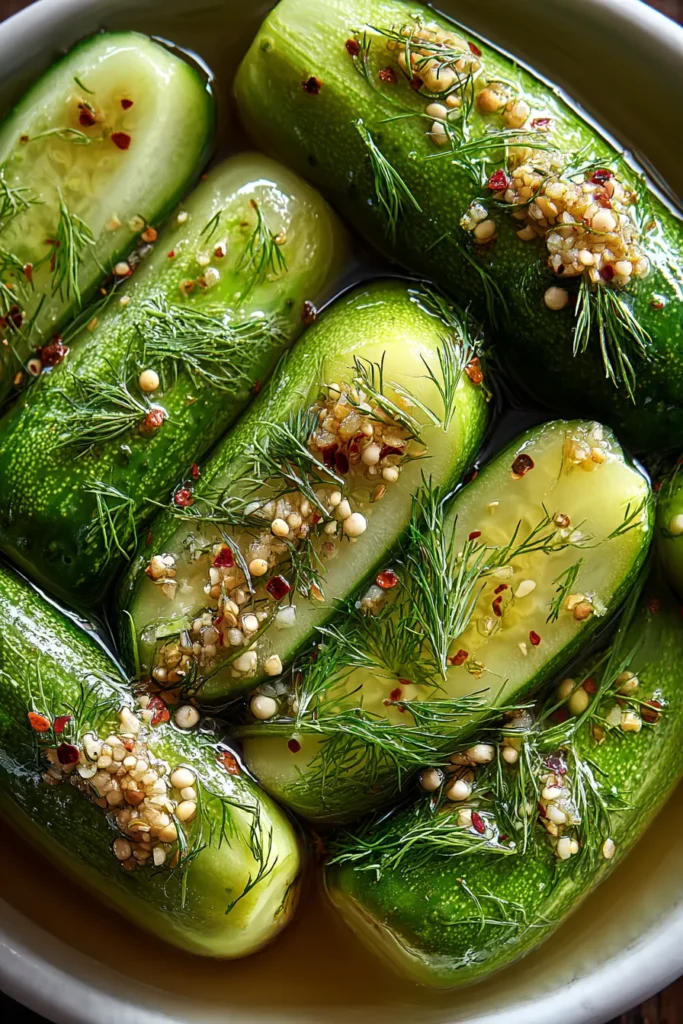

Refrigerator Dill Pickle Garlic Small Batch
Description
These vibrant refrigerator dill pickles are infused with garlic and spices, delivering a crisp, tangy flavor. Perfect on their own or as a zesty addition to your favorite dishes!
Ingredients
Instructions
-
Prepare your cucumbers by washing them thoroughly and trimming the ends. If the cucumbers are particularly thick, you may slice them into spears or rounds.
-
In a medium saucepan, combine the water, white vinegar, salt, and sugar. Bring the mixture to a simmer over medium heat, stirring until the salt and sugar are completely dissolved. Remove from heat and let cool slightly.
-
In a clean jar or a few small jars, evenly distribute the garlic cloves, peppercorns, mustard seeds, red pepper flakes, and chopped dill.
-
Pack the cucumbers tightly into the jars, leaving about 1/4-inch headspace at the top.
-
Carefully pour the warm vinegar mixture over the cucumbers, ensuring they are fully submerged. Tap the jar gently to remove any air bubbles and add more liquid if needed.
-
Seal the jars with lids and let them cool to room temperature.
-
Once cool, place the jars in the refrigerator and allow them to pickle for at least 24 hours before tasting, though 2-3 days will yield more flavor.
Note
- These pickles can last in the refrigerator for up to 2 months if sealed properly.
- Experiment with different spices such as coriander seeds or fennel for unique flavors.
- Ensure cucumbers are of similar size for even pickling.
- The longer the pickles sit in the fridge, the more their flavor develops.

