

Nothing quite compares to the moment when you pull a tray of warm, freshly baked Red Velvet Brownies from the oven. The rich, velvety goodness of a dessert that boasts a gorgeous crimson hue never fails to draw smiles, whether you’re hosting an intimate dinner party or simply indulging in a cozy night at home. These brownies deliver a luxurious, fudgy texture that feels almost decadent with every bite. Subtle notes of cocoa weave through the red velvet base, beautifully accented by creamy white chocolate chips that melt on your tongue and leave you craving just one more square. With a 20-minute prep time, 30 to 35 minutes of baking, and a brief 10-minute rest to set things just right, you’ll be savoring these crimson treats in under an hour. Each square comes in at around 300 calories, making them a suitably rich indulgence for any dessert lover. As an intermediate-level recipe, it’s approachable for confident home bakers and pays off with a show-stopping final result that’s perfect for any Dessert course.
Rolling up your sleeves to whip up these vibrant brownies feels like a mini celebration each time. From melting the unsalted butter until it’s golden and silky to folding in just the right splash of red food coloring and apple cider vinegar, every step builds layers of flavor that culminate in that signature red velvet taste. I often find myself sneaking spoonfuls of batter before it even hits the pan—no judgment here! Whether you’re baking for a birthday, Valentine’s Day, or a laid-back weekend treat, these brownies adapt beautifully to all occasions. The deep red color sets the mood instantly, transforming a simple kitchen into a festive space. The subtle cocoa undertone and the buttery crumb create a harmony of tastes that’s impossible to resist, and the slight tang from the vinegar elevates the sweetness to a sophisticated level. So grab your mixing bowl, cue your favorite playlist, and let’s bake something unforgettable together.
KEY INGREDIENTS IN RED VELVET BROWNIES
Before diving into the baking process, let’s break down the star players that will bring your Red Velvet Brownies to life. Each ingredient is carefully chosen to build the perfect balance of moist texture, vibrant color, and irresistible flavor. You’ll notice how the combination of classic baking staples and special additions come together to create a dessert that’s both familiar and delightfully surprising.
- Unsalted butter
Adds richness, moisture, and helps create that signature fudgy texture. Melting it gently ensures a smooth base for your batter.
- Granulated sugar
Sweetens the brownies and contributes to a shiny, crackly top. It also helps the structure set properly as it dissolves into the butter.
- Brown sugar
Packed with molasses notes, brown sugar deepens the flavor and locks in extra moisture, keeping your brownies wonderfully soft.
- Eggs
Provide structure and lift while contributing to a light and fluffy interior. Beating them in one at a time ensures even incorporation.
- Vanilla extract
Enhances the overall flavor profile with warm, aromatic notes that complement both the cocoa and the red velvet base.
- Red food coloring
Delivers that iconic crimson hue. Whether you choose liquid or gel, mix until the color is evenly distributed.
- Apple cider vinegar
Reacts with the baking powder to boost lift and adds a subtle tang that brightens the sweetness.
- All-purpose flour
The backbone of the brownie, it holds all the ingredients together. Sifting it helps prevent lumps and promotes an even crumb.
- Unsweetened cocoa powder
Provides a mild chocolate flavor and deepens the red tone for a balanced taste without overpowering sweetness.
- Baking powder
Offers gentle rise and a tender texture. Make sure it’s fresh to ensure your brownies bake up perfectly.
- Salt
Balances sweetness and enhances the other flavors, so even a small pinch makes a big difference.
- White chocolate chips
Melt into pockets of creamy sweetness throughout the brownies, adding a gorgeous contrast in both flavor and texture.
HOW TO MAKE RED VELVET BROWNIES
Now that our ingredients are lined up, let’s walk through the process of transforming them into those irresistible Red Velvet Brownies. From preheating the oven to the satisfying moment when you cut into perfectly set squares, each step builds on the last to create this memorable dessert.
1. Preheat your oven to 350°F (175°C). Lightly grease a 9×13-inch baking pan with butter or line it with parchment paper for effortless removal and cleanup.
2. In a medium saucepan, melt the unsalted butter over low heat until it’s completely liquid. Take it off the heat and let it cool just enough so it doesn’t cook the eggs in the next step.
3. In a large mixing bowl, combine the granulated sugar, brown sugar, cooled melted butter, and vanilla extract. Stir until the mixture is smooth and fully incorporated, creating a glossy base.
4. Add the eggs one at a time, beating well after each addition. This aerates the batter and ensures it becomes light and fluffy, which contributes to the brownies’ tender crumb.
5. Stir in the red food coloring and apple cider vinegar, mixing until the color is evenly distributed and the batter gleams with that signature crimson tone.
6. In a separate bowl, sift together the flour, cocoa powder, baking powder, and salt. Sifting prevents lumps and guarantees an even mix.
7. Gradually fold the dry ingredients into the wet mixture, stirring gently until just combined. Be careful not to overmix, or you’ll risk a tougher texture.
8. Fold in the white chocolate chips until they’re evenly dispersed throughout the batter, promising pockets of sweet creaminess in every bite.
9. Pour the batter into the prepared pan, using a spatula to spread it evenly from edge to edge.
10. Bake for 30–35 minutes, or until a toothpick inserted into the center comes out with a few moist crumbs clinging to it—this ensures a perfectly fudgy interior.
11. Allow the brownies to cool completely in the pan on a wire rack before cutting into squares. This resting step helps them set and makes slicing easier.
SERVING SUGGESTIONS FOR RED VELVET BROWNIES
Serving Red Velvet Brownies is where creativity meets comfort. The bright red interior peeking through each square invites admiration, and with the right touch, you can elevate these brownies from delightful home bake to eye-catching dessert centerpiece. Serving them at the perfect temperature, adding complementary textures, and pairing with the right flavors makes every bite memorable. Whether you’re aiming for a glossy presentation at a dinner party or a cozy treat for a movie night, these ideas will help you showcase your brownies in style and amplify their luscious texture.
- Top with a swirl of cream cheese frosting, piping it in decorative rosettes or a simple zigzag for that classic cake-and-brownie mashup. The tangy cream cheese balances the sweetness and elevates the presentation.
- Serve warm with a generous scoop of vanilla bean ice cream and a drizzle of warm hot fudge sauce. The contrast between hot and cold intensifies every flavor note and creates an indulgent experience.
- Give a delicate finishing touch by dusting the squares with powdered sugar and garnishing with fresh raspberries or strawberries. The fruit’s bright acidity cuts through the richness, while the sugar dusting offers subtle sweetness.
- For a more festive vibe, arrange brownies on a platter and sprinkle with white chocolate shavings and edible rose petals or mint leaves. The added color and texture make them irresistible at special gatherings.
HOW TO STORE RED VELVET BROWNIES
Proper storage keeps your Red Velvet Brownies tasting as fresh as the day they came out of the oven. With the right methods, you’ll maintain that moist, fudgy crumb and vibrant red color for days or even weeks. Whether you need a quick fix for leftovers or want to reserve a portion for later, these tips will help you preserve taste, texture, and visual appeal. Follow these guidelines to enjoy brownie perfection whenever you’re ready for another sweet moment.
- Room Temperature Storage: Once completely cooled, place brownies in a single layer inside an airtight container, separating layers with parchment paper. Store on the counter for up to three days without losing that soft, tender texture.
- Refrigeration: Seal the cooled brownies in an airtight container or wrap them tightly in plastic wrap. Keep in the fridge for up to five days. Chilling enhances the fudgy quality but brings them to something closer to a chewier bite.
- Freezing: For longer storage, wrap individual squares snugly in plastic wrap, then place them all in a zip-top freezer bag. Freeze for up to two months. Thaw at room temperature for about 30 minutes before serving, or gently warm in the microwave.
- Reheating: To revive that fresh-baked warmth, microwave a brownie square on a microwave-safe plate for 10–15 seconds, or pop them in a 300°F oven for 5 minutes. The brief heat brings back that just-out-of-the-oven magic.
CONCLUSION
Baking Red Velvet Brownies is more than following a recipe—it’s an opportunity to create moments of joy, share a slice of warmth, and indulge in a dessert that feels truly special. We’ve covered everything from the key ingredients that give these brownies their signature color and texture to step-by-step instructions that ensure a flawless bake. You’ve learned why unsalted butter and sugars combine to build a fudgy foundation, how eggs and leavening work together to offer lift, and the role of cocoa powder and vinegar in creating that balanced red velvet profile. We also explored creative serving ideas—like luscious cream cheese frosting swirls, warm ice cream pairings, and elegant powdered sugar garnishes—that transform each square into a show-stopping treat. Plus, you’ve got all the storage know-how to keep your brownies tasting sensational days or weeks after they’re baked. Whether you’re an intermediate home baker or a dessert enthusiast looking for a new favorite, this recipe is designed to delight at every turn.
Feel free to print this article or save it for future baking adventures—you’ll find the recipe details, ingredient breakdown, and step-by-step guidance all in one place. You can also review the FAQ below for quick answers to common questions about red velvet baking, ingredient swaps, or troubleshooting tips. If you try this recipe, I’d love to hear how it turned out! Leave a comment, share your experience, or ask any questions if you need clarification on a step. Your feedback and baking stories make this community so much fun, and I’m here to help if you hit any bumps along the way. Happy baking!
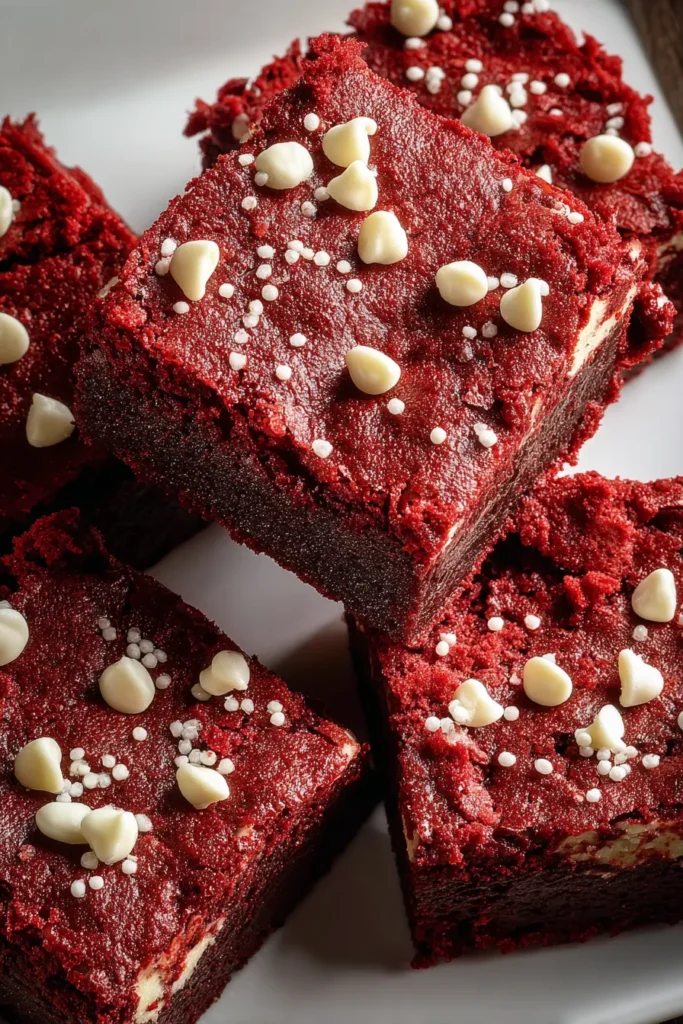

Red Velvet Brownies
Description
These Red Velvet Brownies offer a luxurious, fudgy texture combined with the subtle flavor of cocoa, accented by creamy white chocolate chips that melt in your mouth.
Ingredients
Instructions
-
Preheat your oven to 350°F (175°C). Grease a 9x13-inch baking pan lightly with butter or line it with parchment paper for easy removal.
-
In a medium saucepan, melt the butter over low heat until completely liquid. Remove from heat and let it cool for a few minutes.
-
In a large mixing bowl, combine the granulated sugar, brown sugar, melted butter, and vanilla extract. Stir until the mixture is smooth and fully incorporated.
-
Add the eggs one at a time, beating well after each addition until the mixture is light and fluffy.
-
Stir in the red food coloring and apple cider vinegar, mixing until the color is evenly distributed.
-
In a separate bowl, sift together the flour, cocoa powder, baking powder, and salt.
-
Gradually add the dry ingredients into the wet mixture, stirring gently until just combined. Do not overmix.
-
Fold in the white chocolate chips until they're evenly distributed throughout the batter.
-
Pour the batter into the prepared baking pan, spreading it evenly with a spatula.
-
Bake in the preheated oven for 30-35 minutes, or until a toothpick inserted into the center comes out with a few moist crumbs.
-
Allow the brownies to cool in the pan on a wire rack before cutting them into squares.
Note
- Red velvet is traditionally known for its moist texture and vibrant color.
- You can add a cream cheese frosting on top for extra flavor reminiscent of a classic red velvet cake.
- If you cannot find red food coloring, beetroot powder can be a natural alternative.
- Be sure to monitor the baking time closely as overbaking can result in dry brownies.

