

There’s something utterly comforting about a dessert that marries creamy pumpkin filling with a golden, crunchy oat topping. This Pumpkin Pie Crisp is exactly that—an autumnal hug in every bite. Warm up your fall with this delightful Pumpkin Pie Crisp, a cozy twist on a classic dessert that’s easy to make and impossible to resist! Whether you’re gathering around a crackling fireplace or hosting friends for game night, this recipe brings the best of pumpkin pie and crisp together in one glorious dish. It’s a beginner-friendly dessert that doesn’t skimp on flavor or texture, offering a smooth, spiced center beneath a buttery, oat-packed crust that sings of brown sugar and cinnamon.
With just fifteen minutes of prep and forty minutes in the oven (plus a short fifteen-minute rest), you’ll have a gorgeous 9×13 inch pan that serves twelve, each portion clocking in around 350 calories. The combination of pantry staples like pure pumpkin puree, old-fashioned oats, and sweetened condensed milk means you can dive into easy baking without hunting down obscure ingredients. As the oven timer ticks away, you’ll notice that beautiful rise in the middle and the gentle bubbling at the edges. Once it’s cooled slightly, every forkful offers the warm spices of cinnamon, nutmeg, and ginger—each one coming together to celebrate the season beautifully.
KEY INGREDIENTS IN PUMPKIN PIE CRISP
Before we roll up our sleeves and get to the fun of baking, let’s take a moment to appreciate the simple, flavorful ingredients that make this Pumpkin Pie Crisp so irresistible. Each item contributes to the creamy base, the sweet warmth of fall spices, or the satisfyingly crunchy topping. Having these staples on hand means you can whip up a treat that feels special without a ton of fuss.
- Pumpkin puree – Provides the smooth, velvety foundation for the filling and brings all those classic pumpkin pie vibes.
- Sweetened condensed milk – Adds luscious sweetness and helps create a rich, custard-like texture in the filling without extra sugar granules.
- Eggs – Act as a binding agent, giving structure to the pumpkin layer so it sets just right when baked.
- Vanilla extract – Deepens the overall flavor profile, rounding out the spices and enhancing the pumpkin’s natural sweetness.
- Ground cinnamon – The star warming spice that evokes bakeries and cozy kitchens, infusing each bite with aromatic sweetness.
- Ground nutmeg – Brings a delicate nutty warmth that complements the cinnamon and adds depth to the filling.
- Ground ginger – Offers a subtle zing and spicy kick, balancing the sweetness and brightening the flavor.
- Salt – A small amount sharpens all the other flavors, ensuring the crisp isn’t cloying and each ingredient sings.
- Old-fashioned rolled oats – Form the heart of the crisp topping, giving it that irresistible chew and crunch.
- All-purpose flour – Works with the oats to create a tender, golden crust that holds its shape and offers gentle resistance to your spoon.
- Brown sugar – Imparts a deep, molasses-like sweetness to the topping while helping it caramelize to a perfect golden brown.
- Granulated sugar – Balances the brown sugar and enhances the crispy texture with a bit of sweetness that doesn’t overpower.
- Unsalted butter – Binds the dry ingredients in the topping, ensuring a melt-in-your-mouth crumbly texture that browns beautifully.
- Chopped pecans or walnuts (optional) – Introduce extra crunch and a toasty, nutty layer for those who want a little more bite in every forkful.
HOW TO MAKE PUMPKIN PIE CRISP
Ready to bake up this cozy dessert? Follow these steps closely, and you’ll end up with a tray of sweet, spiced perfection. The process is straightforward, making it perfect for beginner bakers and busy home cooks alike.
1. Preheat your oven to 350°F (175°C). Generously grease a 9×13 inch baking dish with butter or non-stick cooking spray to ensure easy release and beautifully crisp edges.
2. In a large mixing bowl, combine the pumpkin puree, sweetened condensed milk, eggs, vanilla extract, cinnamon, nutmeg, ginger, and salt. Use a whisk to blend until the mixture is smooth and uniform in color, with no streaks of spice or unmixed egg.
3. Pour the pumpkin mixture into the prepared baking dish. With a spatula, spread it out evenly, smoothing the surface so every bit of the dish is covered in that creamy layer.
4. In another bowl, stir together the rolled oats, flour, brown sugar, granulated sugar, and melted butter. Mix until the topping is crumbly and holds together in small clumps. If you’re using chopped nuts, gently fold them in for pockets of extra crunch.
5. Evenly sprinkle the oat mixture over the pumpkin layer, making sure no bare spots remain and the topping is distributed uniformly.
6. Bake in the preheated oven for 35-40 minutes, or until the topping is a gorgeous golden brown and you see the pumpkin filling set around the edges (it should jiggle slightly in the center but not look liquid).
7. Remove the crisp from the oven and let it cool for about 10-15 minutes. This rest time allows the filling to firm up, making portions neat and helping flavors meld. Serve warm or at room temperature.
SERVING SUGGESTIONS FOR PUMPKIN PIE CRISP
After your Pumpkin Pie Crisp has that perfect warm rest, it’s time to talk about the best ways to plate and serve this autumnal crowd-pleaser. Whether you’re aiming for a cozy family dessert or an eye-catching offering at a potluck, these serving ideas will elevate every bite. Consider each option for a little extra flair, ensuring your guests go back for seconds (and maybe thirds!).
- Top each slice with a generous dollop of whipped cream for a light, airy contrast to the rich pumpkin and crunchy topping. Use a piping bag or simply spoon it on for a homey look.
- Pair warm servings with a scoop of vanilla ice cream, allowing it to slowly melt into the nooks of the oat crisp. The cold-and-warm interplay is downright irresistible.
- Garnish with a sprinkle of toasted pecans or walnuts and a dusting of extra cinnamon for a festive presentation and amplified crunch.
- Drizzle warm caramel sauce in a zigzag pattern over each portion. This sweet, buttery finish deepens the flavor and adds a glossy, picture-perfect shine.
HOW TO STORE PUMPKIN PIE CRISP
Knowing how to store your Pumpkin Pie Crisp properly ensures every serving maintains that delightful contrast between creamy filling and crunchy topping. Whether you’re prepping ahead, saving leftovers, or planning to transport this treat to an event, these storage methods have you covered. Keep in mind that cool, airtight conditions preserve the best texture and flavor over time.
- Refrigeration: Once the crisp has cooled completely, cover the baking dish tightly with plastic wrap or transfer pieces to an airtight container. Store in the fridge for up to 3 days, reheating individual portions before serving.
- Freezing: Slice the crisp into individual servings, then wrap each piece in plastic wrap followed by aluminum foil. Place them in a freezer-safe bag and freeze for up to 1 month. Thaw overnight in the fridge, then warm in the oven for crisp edges.
- Oven Reheat: Preheat to 325°F (163°C), place slices on a baking sheet, and cover loosely with foil. Heat for about 10 minutes, then remove the foil for 2-3 minutes to recrisp the topping.
- Make-Ahead Prep: Assemble the pumpkin filling and topping separately. Store the filling in one airtight container and the crumb topping in another in the fridge for up to 24 hours. When ready, layer and bake as directed for fresh-from-the-oven goodness.
CONCLUSION
This Pumpkin Pie Crisp has everything you crave in a fall dessert: a velvety pumpkin core infused with classic spices, a golden oat topping that shatters at each bite, and ease-of-prep that doesn’t demand hours in the kitchen. We covered the key ingredients—everything from pumpkin puree to old-fashioned oats—explained their roles, and walked you through every step, from preheating the oven to letting your crisp rest. You’ve also got plenty of serving ideas, whether you’re dolloping on whipped cream, melting vanilla ice cream over warm slices, or adding a drizzle of caramel. Don’t forget the storage tips that keep this dish tasting fresh, whether you’re refrigerating for a quick snack or freezing to enjoy weeks down the line.
Feel free to print this article and tuck it into your recipe binder or bookmark it for next time you’re craving that perfect fall dessert. You can also find an FAQ below to answer any lingering questions. If you give this Pumpkin Pie Crisp a whirl, I’d love to hear how it turned out! Drop a comment with your feedback, share any personal twists you tried, or let me know if you have questions about the process. Happy baking, and may your kitchen always smell of cinnamon and autumn cheer!
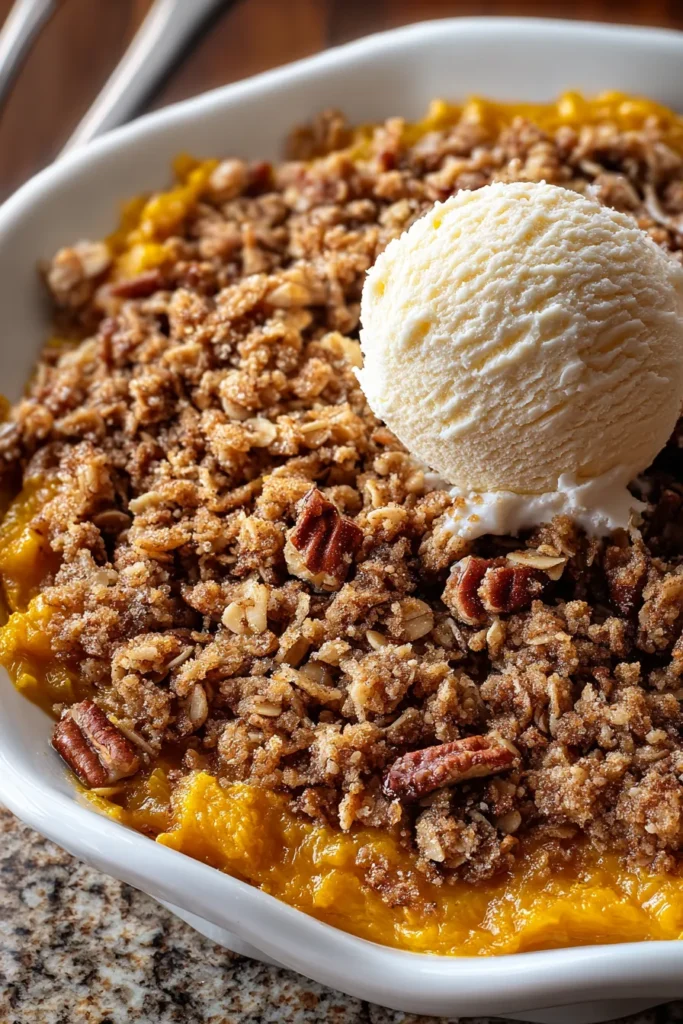

Pumpkin Pie Crisp
Description
This Pumpkin Pie Crisp features creamy pumpkin filling topped with a crunchy oat mixture, delivering warm spices and textures that celebrate the season beautifully.
Ingredients
Instructions
-
Preheat your oven to 350°F (175°C). Grease a 9x13 inch baking dish with butter or non-stick cooking spray.
-
In a large mixing bowl, combine the pumpkin puree, sweetened condensed milk, eggs, vanilla extract, cinnamon, nutmeg, ginger, and salt. Whisk until the mixture is well blended and smooth.
-
Pour the pumpkin mixture into the prepared baking dish, spreading it out evenly with a spatula.
-
In another bowl, mix together the rolled oats, flour, brown sugar, granulated sugar, and melted butter. Stir until the mixture is crumbly and well combined. If using, fold in the chopped nuts.
-
Evenly sprinkle the oat mixture over the pumpkin layer in the baking dish.
-
Bake in the preheated oven for 35-40 minutes or until the top is golden brown and the pumpkin filling is set.
-
Remove from the oven and let it cool for about 10-15 minutes before serving. This can be served warm or at room temperature.
Note
- Serve with whipped cream or vanilla ice cream for a delicious contrast.
- This recipe can be made ahead and stored in the refrigerator for up to 3 days.
- You can substitute the nuts with your favorite toasted seeds for a nut-free version.
- Feel free to experiment by adding spices like cloves or allspice for extra flavor.
- Leftovers can be easily reheated in the oven or microwave for a quick treat.

