

Protein Snack Cheese Stuffed Mini Peppers are a vibrant, guilt-free treat that combine crunchy sweetness with a creamy, protein-packed filling. These bite-sized wonders cradle a blend of Greek yogurt, mozzarella, and Parmesan, laced with fresh chives and smoked paprika. Whether you chill them for a cool party appetizer or bake them for a melty twist, each colorful pepper offers a perfect balance of tangy cheese and fresh herbs. Grab your tray and get ready to fuel your day—or your next gathering—with this effortless, high-protein snack that’s as delicious as it is nutritious!
Key Ingredients
To whip up these Protein Snack Cheese Stuffed Mini Peppers, you’ll need a handful of simple, wholesome ingredients that pack a punch of protein and flavor.
- 20–24 mini sweet peppers (about 1 lb / 450 g): Low-carb vessels bursting with vibrant color and crisp texture.
- 8 oz (225 g) reduced-fat cream cheese, softened: Creamy base that keeps the filling rich yet lower in fat.
- 1 cup (115 g) shredded part-skim mozzarella cheese: Melty stretch that brings classic cheesiness without the full-fat calories.
- 1/3 cup (35 g) grated Parmesan cheese: Sharp, nutty flavor to boost both taste and protein.
- 1/2 cup (115 g) plain Greek yogurt (2% or 0%): Tangy binder that ups the protein and lightens the mix.
- 2 tbsp finely chopped fresh chives (or green onions): Mild oniony notes for a fresh herb lift.
- 2 tbsp finely chopped fresh parsley (optional): Bright green flecks for color and subtle earthiness.
- 1 small garlic clove, very finely minced or grated: Pungent kick that layers in savory depth.
- 1/2 tsp onion powder: Adds concentrated sweet-onion flavor without extra texture.
- 1/2 tsp smoked paprika (or sweet paprika): Warm, smoky undertones or a milder sweetness.
- 1/4 tsp ground black pepper: Subtle heat to balance the creamy filling.
- 1/4–1/2 tsp salt, to taste: Essential seasoning to make flavors pop.
- 1–2 tbsp milk or water, only if needed to loosen the mixture: Adjusts consistency for easy piping or spooning.
- 2–3 tbsp unflavored whey or pea protein powder (optional): Extra protein boost without altering flavor.
- 1/4 cup (30 g) finely grated hard cheese (extra Parmesan) (optional): Intensifies savory depth and protein content.
- Crushed red pepper flakes (optional topping): Sprinkles of heat for a spicy crunch.
- Everything bagel seasoning (optional topping): Savory, seed-studded texture that adds zing.
- Extra chopped herbs (optional topping): Fresh parsley, dill, basil, or cilantro for garnish.
- Toasted breadcrumbs or panko (optional topping): Golden crunch if you bake them.
How To Make Protein Snack Cheese Stuffed Mini Peppers
Ready to transform simple ingredients into a show-stopping protein snack? This recipe walks you through prepping the peppers, creating a luscious cheese filling, and finishing with tasty toppings. You’ll learn both no-bake and baked variations, plus tips on chilling, piping, and storing—so you can serve these at your next gathering or keep them on hand for easy snacking.
1. Prepare the mini peppers:
Wash each mini sweet pepper under cold water and pat completely dry with a clean towel. Slice them in half lengthwise—keeping the stem intact for presentation—and use a small spoon or paring knife to remove seeds and membranes. Arrange the pepper halves cut-side up on a large tray or, if you plan to bake, on a parchment-lined baking sheet.
2. Soften and prep the cheese base:
Place the reduced-fat cream cheese in a medium mixing bowl and let it sit at room temperature for 15–20 minutes if firm. Then use a spoon or spatula to mash until smooth, ensuring there are no lumps and the texture is easily spreadable.
3. Make the protein cheese filling:
Add the Greek yogurt to the bowl and stir until fully combined and creamy. Sprinkle in shredded mozzarella, grated Parmesan, chives, parsley, garlic, onion powder, smoked paprika, black pepper, and salt. Mix thoroughly so the herbs and seasonings distribute evenly. If you’re using protein powder or extra Parmesan, fold it in gradually until the mixture remains thick but still spoonable. If it feels too stiff, drizzle in milk or water 1 teaspoon at a time until the filling is smooth and pipe-friendly.
4. Taste and adjust seasoning:
Spoon a small taste of the filling and tweak the flavors—add a pinch more salt, a dash of paprika, or a dollop of extra Greek yogurt for tang. This step ensures your snack is perfectly seasoned.
5. Fill the peppers:
For a casual, rustic look, scoop the filling into each pepper half with a small spoon, letting it mound slightly. For a polished, party-ready presentation, transfer the mixture into a piping bag or zip-top bag with a snipped corner and pipe it neatly into each pepper. Level or swirl the tops with the back of a spoon if you like.
6. Add toppings:
Sprinkle your stuffed peppers with your choice of toppings: crushed red pepper flakes for heat, everything bagel seasoning for savory crunch, extra chopped herbs for freshness, or toasted breadcrumbs/panko if you’re baking and want a golden crust.
7. Option 1 – Serve as a no-bake snack:
Chill the filled peppers in the refrigerator for at least 20–30 minutes to let flavors meld and the filling set. Serve cold or at cool room temperature as a high-protein snack or appetizer.
8. Option 2 – Bake for a warm, melty version:
Preheat your oven to 375°F (190°C). Place the stuffed peppers on a parchment-lined baking sheet, ensuring they sit flat. For extra cheesiness, sprinkle a bit more mozzarella or Parmesan on top. Bake for 10–14 minutes, until peppers are just tender and cheese edges turn golden. Let rest for 5–10 minutes before serving—the filling will be very hot!
9. Storage and make-ahead:
Store leftovers in an airtight container in the refrigerator for up to 3 days. For meal prep, stuff the peppers and keep them unbaked until you’re ready to serve. If you’re using breadcrumbs, add them just before baking or serving to keep them crisp.
Serving Suggestions
Whether you’re hosting a casual get-together or fueling up after a workout, these cheese-stuffed mini peppers shine in many settings. Their gorgeous color and creamy filling make them a crowd-pleaser—here’s how to elevate the presentation and pairings.
- As a colorful appetizer platter: Arrange the peppers on a long board with clusters of olives, cucumber slices, and nuts for a vibrant, healthy spread.
- With a crisp garden salad: Serve alongside mixed greens dressed in lemon vinaigrette to balance the rich cheese with zesty freshness.
- On a post-workout snack board: Pair with hard-boiled eggs, turkey slices, and hummus for a protein powerhouse.
- Garnished with fresh herbs: Sprinkle extra parsley, dill, or basil over the top just before serving for a burst of green color and aroma.
Tips For Perfect Protein Snack Cheese Stuffed Mini Peppers
These mini peppers are almost effortless, but a few insider tricks guarantee flawless results every time. Whether you’re making them for a quick snack or a party platter, follow these friendly pointers to level up your game.
- Use Greek yogurt instead of sour cream to boost protein while keeping the filling creamy.
- To make them higher protein and lower fat, stick with reduced-fat cream cheese, 0% Greek yogurt, and part-skim mozzarella.
- For a vegetarian but extra-protein option, stir in a spoonful of unflavored whey or pea protein slowly so the texture stays smooth.
- Add finely chopped cooked chicken breast, turkey, or crisp turkey bacon bits to turn this into a more filling snack.
- Mini peppers can be stuffed up to 24 hours in advance and chilled, making them ideal for parties or meal prep.
- Swap herbs based on what you have—dill, basil, or cilantro all give the peppers a different flavor profile.
- For a low-carb party platter, serve these alongside cucumber slices, olives, and nuts for a full high-protein snack board.
How To Store It
Keeping your stuffed mini peppers fresh and flavorful is easy with the right storage methods. Follow these tips to maintain texture, avoid sogginess, and stay ready for impromptu snacking.
- Refrigerate in an airtight container: Store fully filled or baked peppers in a sealed container for up to 3 days to lock in moisture and flavor.
- Keep unbaked peppers chilled: If you prefer to bake or serve later, stuff the peppers and refrigerate them unbaked; bake or serve chilled when needed.
- Separate crunchy toppings: Add breadcrumbs, panko, or everything bagel seasoning just before serving or baking to keep them crisp.
- Label and date: For meal prep peace of mind, note the prep date on your container so you enjoy them at peak freshness.
Frequently Asked Questions
Here are a few quick answers to common questions about making and storing these stuffed mini peppers.
- How do I ensure the cheese filling is smooth and easy to pipe?
Start by letting the cream cheese soften at room temperature for 15–20 minutes, then mash thoroughly until no lumps remain. Add Greek yogurt and mix until fully combined, then stir in the shredded cheeses and seasonings. If the mixture is too thick to pipe, add 1 teaspoon of milk or water at a time until it reaches a smooth, spoonable consistency.
- Can I prepare the peppers and filling ahead of time?
Yes. You can wash, halve, and deseed the mini peppers up to 24 hours in advance; store them in an airtight container in the fridge. You can also mix the filling and refrigerate it covered. When ready to serve, fill the peppers and either chill for 20–30 minutes or bake them right before your event.
- What’s the best way to keep stuffed peppers upright during baking?
Arrange the peppers on a parchment-lined baking sheet so that the cut-side faces up. You can nestle them closely together so they support one another, or use an oven-safe muffin tin to hold each half in place. This prevents tipping and ensures even baking.
- How can I boost protein content without changing the flavor too much?
Stir in 2–3 tablespoons of unflavored whey or pea protein powder or ¼ cup finely grated hard cheese (extra Parmesan). Add slowly and mix thoroughly to maintain a smooth texture. You can also fold in finely chopped cooked chicken breast or turkey for additional protein.
- What storage methods work best for leftovers?
Store uneaten stuffed peppers in an airtight container in the refrigerator for up to 3 days. If you’ve already baked them, reheat in a 350°F (175°C) oven for 5–7 minutes to warm through. Avoid microwaving to keep the filling texture creamy and the peppers from becoming soggy.
- How do I prevent the peppers from releasing too much water?
Pat the washed peppers completely dry with a clean towel before slicing. Remove all seeds and membranes, then fill and chill or bake immediately. If you opt for a no-bake version, chill in the fridge right after filling to firm the cheese and minimize moisture release.
- What are some tasty seasoning and topping variations?
Try crushed red pepper flakes for heat, everything bagel seasoning for a savory crunch, or extra chopped fresh herbs for brightness. If baking, sprinkle toasted breadcrumbs or panko on top for a golden, crispy finish. Swap fresh parsley for dill, basil, or cilantro to change the flavor profile.
What Makes This Special
This recipe is a match made in snack heaven: mini sweet peppers hugging a protein-rich, herb-infused cheese blend that can be served chilled or baked for melty goodness. It works because the balanced textures—crisp pepper, creamy filling, optional crunch—keep every bite exciting. Plus, the make-ahead flexibility and high-protein boost make it perfect for parties, post-workout fuel, or simply stashing in the fridge. Feel free to print this article, save it for later, and drop a comment below if you try the recipe or have any questions. Enjoy!
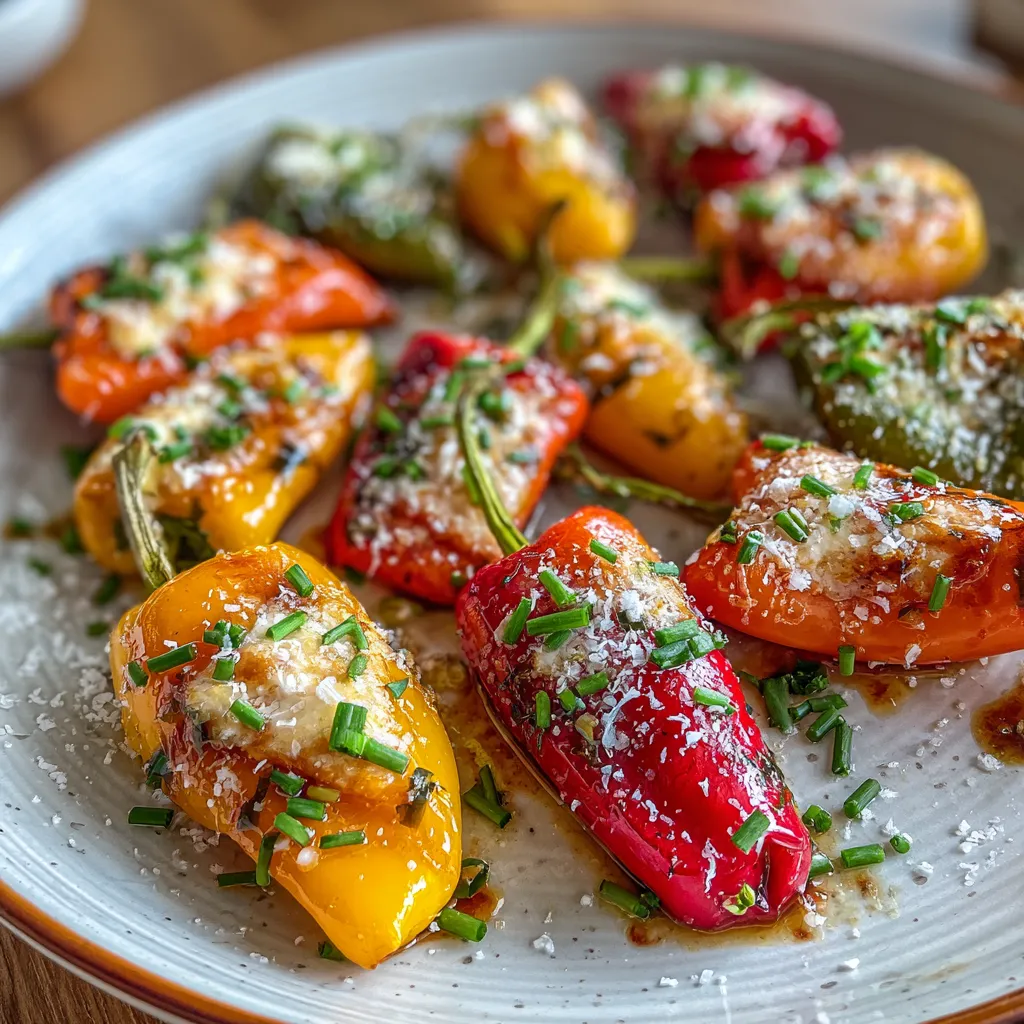

Protein Snack Cheese Stuffed Mini Peppers
Description
Tiny sweet peppers cradle a creamy blend of Greek yogurt, mozzarella, and Parmesan, laced with fresh chives and paprika. Chilled or baked, each vibrant bite marries mellow crunch with tangy, herb-infused richness.
Ingredients
Instructions
-
Prepare the mini peppers:
-
- Wash the mini sweet peppers and pat them completely dry with a clean towel.
-
- Slice each pepper in half lengthwise, keeping the stem attached if possible for presentation.
-
- Use a small spoon or paring knife to gently remove seeds and membranes.
-
- Arrange pepper halves cut-side up on a large tray or plate; if baking, place on a parchment-lined baking sheet.
-
Soften and prep the cheese base:
-
- Place the cream cheese in a medium mixing bowl and let it sit at room temperature for 15–20 minutes if it’s very firm.
-
- Using a spoon or spatula, mash the cream cheese until smooth and spreadable with no big lumps.
-
Make the protein cheese filling:
-
- To the cream cheese, add Greek yogurt and mix until fully combined and creamy.
-
- Add shredded mozzarella, grated Parmesan, chives, parsley, garlic, onion powder, smoked paprika, black pepper, and salt.
-
- Mix thoroughly until the herbs and seasonings are evenly distributed.
-
- If using extra protein (whey/pea protein powder or extra Parmesan), sprinkle it in and stir well. Start with a small amount; the mixture should be thick but spoonable.
-
- If the filling becomes too thick or pasty, add milk or water 1 teaspoon at a time, just until it becomes smooth and easy to pipe or spoon.
-
Taste and adjust seasoning:
-
- Taste a small amount of the filling.
-
- Add a pinch more salt, pepper, or paprika as needed. If you want more tang, add a spoonful of extra Greek yogurt and mix again.
-
Fill the peppers:
-
- For a rustic look, use a small spoon to scoop the cheese mixture into each pepper half, mounding it slightly.
-
- For a neater, party-ready look, transfer the filling to a piping bag or a zip-top bag. Push the filling to one corner and snip a small tip off the corner, then pipe the mixture into each pepper half.
-
- Lightly level or swirl the tops with the back of a spoon if desired.
-
Add toppings:
-
- Sprinkle each stuffed pepper with your choice of toppings:
-
- Crushed red pepper flakes for heat.
-
- Everything bagel seasoning for a savory crunch.
-
- Extra chopped herbs for freshness.
-
- Toasted breadcrumbs or panko if baking and you want a golden crust.
-
Option 1 – Serve as a no-bake snack:
-
- Once filled, chill the stuffed peppers in the refrigerator for at least 20–30 minutes to let the flavors meld and the filling firm slightly.
-
- Serve cold or at cool room temperature as a high-protein snack or party appetizer.
-
Option 2 – Bake for a warm, melty version:
-
- Preheat the oven to 375°F (190°C).
-
- Place the stuffed peppers on a parchment-lined baking sheet, making sure they sit flat and don’t tip over.
-
- If using, sprinkle a light layer of extra mozzarella or Parmesan over the tops for extra melt and color.
-
- Bake for 10–14 minutes, until the peppers are just tender and the cheese is melted and starting to turn golden at the edges.
-
- Let cool for 5–10 minutes before serving, as the filling will be very hot.
-
Storage and make-ahead:
-
- Store leftover stuffed peppers in an airtight container in the refrigerator for up to 3 days.
-
- For meal prep, stuff the peppers and keep them refrigerated unbaked; bake or serve chilled when ready.
-
- If adding breadcrumbs, add them right before baking or serving so they stay crisp.
Note
- Use Greek yogurt instead of sour cream to boost protein while keeping the filling creamy.
- To make them higher protein and lower fat, use reduced-fat cream cheese, 0% Greek yogurt, and part-skim mozzarella.
- For a vegetarian but extra-protein option, stir in a spoonful of unflavored whey or pea protein; add slowly so the texture stays smooth.
- Add finely chopped cooked chicken breast, turkey, or crisp turkey bacon bits to turn this into a more filling snack.
- Mini peppers can be stuffed up to 24 hours in advance and chilled, making them ideal for parties or meal prep.
- Swap herbs based on what you have: dill, basil, or cilantro all give the peppers a different flavor profile.
- For a low-carb party platter, serve these alongside cucumber slices, olives, and nuts for a full high-protein snack board.

