

Elevate Your Dishes with Zesty Pickled Red Onions is not just a recipe title—it’s an invitation to transform your everyday meals into vibrant, flavor-packed experiences. When you welcome these pink-hued beauties onto your plate, you’re adding more than just a garnish. You’re infusing every bite with a delightful crunch, a tangy kick, and a subtle sweetness that dances across your taste buds. Whether you’re assembling tacos for a casual weeknight dinner, tossing together a refreshing salad for lunch, or creating an upscale charcuterie spread for guests, these quick-pickled red onions are your new secret weapon. Best of all? This beginner-friendly recipe takes just 10 minutes to prep, 5 minutes to cook, and then needs an hour of rest before it’s ready to shine—so you can whip up gourmet-level condiments without breaking a sweat.
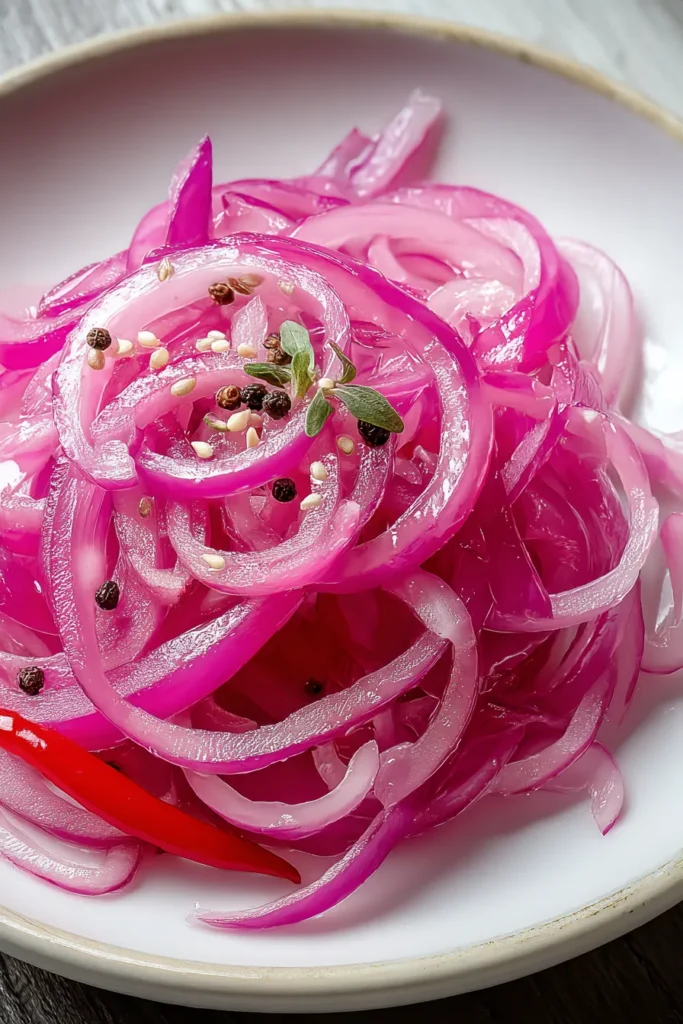
While the natural vibrancy of red onions seeps into the brine, creating a gorgeous pink glow that’s almost too pretty to eat, the real magic happens when that color translates into flavor. Each bite offers a balanced symphony of acidity from apple cider vinegar, sweetness from granulated sugar, and savory depth from optional garlic slices or a hint of chili heat. At only 30 calories per serving, these pickles are a guilt-free way to amp up appetizers, lunches, and dinners alike. And because the process uses simple pantry staples and minimal hands-on time, you’ll wonder why you ever bought store-bought condiments again. Get ready to fall in love with homemade pickles that elevate everything they touch—one crunchy, zesty slice at a time.
KEY INGREDIENTS IN PICKLED RED ONIONS
Every memorable recipe starts with thoughtfully chosen ingredients—and these pickled red onions are no exception. From the crisp texture of fresh onions to the aromatic spices that infuse every bite, each component plays a vital role in creating that signature tangy crunch. Below, you’ll find the essentials that make this condiment so irresistible, along with why they matter.
- Red onions
These are the star of the show, offering a vibrant color and crunchy texture that soaks up the pickling brine beautifully. Their mild, slightly sweet flavor ensures they become irresistibly tangy without turning harsh.
- Apple cider vinegar
This adds the essential acidity that preserves the onions and gives them that bright, zingy flavor. Its fruity undertones complement the natural sweetness of the onions, creating a balanced tang.
- Water
Used to dilute the vinegar just enough to soften the bite, water ensures that the acidity isn’t overpowering while allowing the flavors to meld gently.
- Granulated sugar
A touch of sweetness offsets the vinegar’s sharpness and rounds out the overall taste. It also helps with the texture, ensuring the onions remain crisp rather than soggy.
- Salt
Essential for seasoning, salt draws moisture out of the onions, intensifying their flavor and helping to create the pickling brine.
- Whole black peppercorns
These provide subtle warmth and a gentle peppery bite, adding depth and complexity to each crunchy slice.
- Mustard seeds
Offering a mild, pungent pop, mustard seeds contribute a hint of spice and a delightful texture that contrasts the onions’ crispness.
- Bay leaf
Aromatic and herbal, the bay leaf infuses the brine with earthiness, rounding out the sharp and sweet notes.
- Garlic (optional)
Adds savory depth and a hint of pungency for those who love an extra layer of flavor.
- Chili pepper (optional)
A thin slice or two brings in a subtle heat that lingers, making every mouthful more exciting.
HOW TO MAKE PICKLED RED ONIONS
Transforming raw red onions into tangy, crunchy delights is easier than you might think. In just a few straightforward steps, you’ll have a jar of homemade pickled onions that’s guaranteed to impress. Let’s break down the process so you can follow along with confidence and clarity.
1. Begin by sterilizing a glass jar or container with a tight-fitting lid. Wash it thoroughly in hot, soapy water, then rinse and let it air-dry. This essential step prevents unwanted bacteria and ensures your pickles stay fresh.
2. Peel the red onions and slice them as thinly as possible—aim for uniform rings to ensure even pickling. Place the delicate slices neatly into the clean jar, layering them gently so they fit snugly.
3. In a small saucepan over medium heat, combine the apple cider vinegar, water, sugar, and salt. Stir the mixture continuously until the sugar and salt are completely dissolved, creating a smooth, clear brine.
4. Add the whole black peppercorns, mustard seeds, and bay leaf to the brine. If you’re craving extra punch, slide in the garlic and chili pepper now. These optional additions will infuse the liquid with deeper savory and spicy notes.
5. Bring the mixture to a gentle simmer, watching carefully so it doesn’t boil over. Once you see small bubbles around the edges, remove the pan from the heat and let it rest for a moment.
6. Carefully pour the hot liquid over the sliced onions in the jar. Ensure the brine fully covers the onions—press them down gently if needed, and add a bit more water if there’s any space at the top.
7. Let the jar cool to room temperature without sealing the lid. This gradual cool-down helps prevent condensation, which can dilute the brine.
8. Once cooled, close the lid tightly and place the jar in the refrigerator. Refrigerate for at least one hour before serving, though the flavor really shines after 24 hours. Store in the fridge for up to two weeks, enjoying as needed.
SERVING SUGGESTIONS FOR PICKLED RED ONIONS
Once your pickled red onions are ready, the fun really begins. Their bright flavor profile can elevate dishes across the board, bringing a delightful contrast of tang, crunch, and color. Whether you’re looking to jazz up a casual snack or add a gourmet flair to your main course, these zesty pickles fit right in. Feel free to get creative—there’s no wrong way to use them—but here are four of my all-time favorite serving ideas that showcase just how versatile these onions can be.
- Top your tacos with a generous handful of drained pickled onions for an instant flavor upgrade. The tang cuts through rich meats like carnitas or shredded chicken, while the crunch adds a satisfying texture.
- Toss a few slices into a mixed green salad alongside creamy avocado, cherry tomatoes, and feta cheese. The vibrant color of the onions makes the dish pop, and the acidity acts as a built-in dressing boost.
- Layer slices on your next sandwich or burger—from classic grilled cheese to a hearty veggie burger—to add brightness and a gourmet touch. They marry perfectly with melted cheeses and savory spreads.
- Serve as part of a charcuterie board, featuring cured meats, artisanal cheeses, and olives. The pickled onions act as a palate-cleansing bite between richer bites, keeping your guests’ taste buds engaged.
HOW TO STORE PICKLED RED ONIONS
Proper storage is key to keeping your pickled red onions tasting fresh, crisp, and vibrant. Because they rely on a simple vinegar brine, these onions are naturally shelf-stable in the fridge—but a few best practices will ensure they maintain their peak flavor and food safety. Here’s what you need to know to store them like a pro and make every jar last up to two weeks of delicious enjoyment.
- Refrigerate promptly in a clean, airtight jar immediately after sealing. A tight lid prevents excess air from entering, which helps preserve the crunch and flavor.
- Use a sanitized utensil setiap kali you scoop out onions. Introducing crumbs or residue can speed up spoilage. For best results, always use clean forks or spoons.
- Keep the onions submerged under the brine. If the liquid level dips below the slices, add a splash of vinegar-water mixture to maintain full coverage and prevent any pieces from drying out.
- Store on a middle refrigerator shelf, away from door openings where temperature fluctuates. A stable, cold environment helps the onions stay crisp longer, extending that zesty tang up to the two-week mark.
CONCLUSION
From the vibrant pop of color to the irresistible tangy crunch, pickled red onions offer an easy, low-calorie way to transform any dish from ordinary to extraordinary. In this article, we’ve explored everything you need to know to master this quick-pickling method: assembling the key ingredients, following step-by-step instructions to achieve perfect results, discovering creative serving suggestions, and learning how to store your homemade condiment for maximum freshness. With just 10 minutes of prep, 5 minutes of simmering, and an hour of rest, you’ll have beginner-friendly, restaurant-quality pickles ready to jazz up tacos, salads, sandwiches, or even charcuterie boards. Don’t forget that you can print this article and save it for later use—keep it handy in your kitchen so you can revisit these tips whenever inspiration strikes. And if you’re curious about more detailed questions, be sure to check out the FAQ below.
I hope you’ve enjoyed reading this guide as much as I’ve loved sharing it. If you try the recipe, experiment with different vinegars, or toss in fresh herbs like thyme or rosemary, let me know how it turns out! I’d love to hear your thoughts, see your photos, and help troubleshoot any questions you might have along the way. Your feedback and personal tweaks are what make cooking such a joyful, communal experience—so don’t hesitate to leave a comment, ask for advice, or simply share your favorite ways to use these zesty pickled red onions. Happy pickling!

Pickled Red Onions
Description
Transform ordinary meals with these vibrant pickled red onions. They offer a crunchy, tangy burst of flavor, perfect for enhancing tacos, salads, or sandwiches!
Ingredients
Instructions
-
Begin by sterilizing a glass jar or container with a tight-fitting lid by washing it in hot, soapy water.
-
Peel the red onions and slice them thinly, placing the slices in the clean jar.
-
In a small saucepan over medium heat, combine the apple cider vinegar, water, sugar, and salt. Stir until the sugar and salt are completely dissolved.
-
Add the whole black peppercorns, mustard seeds, and bay leaf to the mixture. If you are using garlic and chili for extra flavor, add them as well.
-
Bring the mixture to a gentle simmer and then carefully pour the hot liquid over the sliced onions in the jar, ensuring the liquid fully covers the onions.
-
Allow the mixture to cool to room temperature, then close the lid tightly on the jar.
-
Refrigerate the pickled onions for at least one hour before serving. For the best flavor, let them sit for at least 24 hours.
-
Store in the refrigerator for up to two weeks.
Note
- Pickled red onions add a burst of flavor to tacos, sandwiches, salads, and more.
- The type of vinegar used can alter the flavor profile; feel free to experiment with different kinds for a unique taste.
- For an added touch, you can include fresh herbs like thyme or rosemary in the mixture.
- The natural color of the red onions will leach into the liquid, giving the pickling brine a beautiful pink hue.

