

No Bake Mini Lemon Cheesecake Cups deliver a burst of creamy, tangy flavor in every spoonful. These tiny lemon cheesecakes set in the fridge on a buttery graham cracker crust, crowned with fresh berries and whipped filling that’s whipped to airy perfection. No baking is needed—just a few simple steps and a short chill time before you can dive into this easy, elegant dessert. Perfect for busy days or last-minute gatherings, it’s a sweet treat you’ll come back to again and again!
Key Ingredients
Before you start whipping up these mini cups, gather your ingredients. Each plays a vital role in creating the perfect balance of tang, creaminess, and crunch.
- 1 cup graham cracker crumbs: Provides the buttery, crunchy base that forms the sturdy crust.
- 2 tbsp granulated sugar: Adds sweetness and helps bind the crumbs together for a cohesive crust.
- 4 tbsp unsalted butter, melted: Binds the graham crumbs and enriches the crust with a melt-in-your-mouth texture.
- 8 oz cream cheese, softened: Delivers the rich and creamy foundation of the cheesecake filling.
- 1/4 cup powdered sugar: Sweetens the cream cheese filling without adding graininess.
- 1/2 cup heavy cream: Whipped to stiff peaks, it creates a light and airy texture in the filling.
- 2 tbsp fresh lemon juice: Instills bright, citrusy tang for that signature lemon cheesecake flavor.
- 1 tsp lemon zest: Boosts the lemon aroma and adds tiny bursts of fragrant oils.
- 1/4 cup fresh berries for garnish: Tops each cup with juicy color and a hint of natural sweetness.
How To Make No Bake Mini Lemon Cheesecake Cups
Now that you’ve prepped your ingredients, let’s walk through the simple steps to assemble these No Bake Mini Lemon Cheesecake Cups. From creating a crumb crust to whipping the filling to stiff peaks, each stage is straightforward, and the end result is pure bliss in a bite-sized cup. Follow the steps below, and you’ll have luscious, tangy cheesecakes ready to chill and impress.
1. In a small bowl, combine graham cracker crumbs, granulated sugar, and melted butter, stirring with a spatula until the mixture resembles wet sand, ensuring even coating.
2. Divide the crumb mixture evenly among 6 to 8 small cups or jars, pressing down firmly with the back of a spoon to form a compact crust layer.
3. In a medium bowl, beat the cream cheese and powdered sugar using an electric mixer until smooth and creamy, stopping to scrape the bowl sides for uniform texture.
4. In a separate bowl, whip the heavy cream with a hand mixer until stiff peaks form, then gently fold it into the cream cheese mixture to keep the filling light.
5. Add fresh lemon juice and lemon zest to the cheesecake filling, stirring until all ingredients are fully incorporated and the mixture is uniformly pale yellow.
6. Spoon or pipe the lemon cheesecake filling over the crust in each cup, smoothing the tops with the back of a spoon or using a piping bag for a decorative finish.
7. Cover the cups with plastic wrap or lids and refrigerate for at least 2 hours, allowing the filling to set and flavors to meld.
8. Just before serving, top each cup with fresh berries for garnish, adding a pop of color and extra burst of fruity sweetness.
Serving Suggestions
These No Bake Mini Lemon Cheesecake Cups shine on their own, but a thoughtful presentation can take them over the top. Whether you’re hosting afternoon tea, potlucks, or family dinners, these cups are versatile. Here are a few creative ways to serve them that highlight the lemon tang, buttery crust, and berry garnish to their fullest.
- Tea-Time Pairing: Serve alongside a pot of Earl Grey or green tea; the tea’s gentle bitterness balances the cheesecake’s creamy sweetness.
- Citrus Zest Dusting: Sprinkle extra lemon zest on top for a vibrant finish and an extra hit of citrus aroma.
- Mint Sprig Accent: Garnish each cup with a fresh mint leaf to introduce a cool contrast and elegant look.
- Dessert Platter Display: Arrange the cups on a tiered stand with assorted berries and citrus slices for a visually stunning centerpiece.
Tips For Perfect No Bake Mini Lemon Cheesecake Cups
Achieving flawless mini lemon cheesecake cups is all about small details that make a big difference. From the temperature of your ingredients to creative twists you can try, these tips ensure your dessert turns out smooth, stable, and bursting with flavor. Keep these pointers in mind as you assemble, and you’ll impress everyone with your no-bake skills.
- Make sure the cream cheese is at room temperature for a smooth filling.
- You can substitute citrus zest like lime or orange for a different twist.
- For extra crunch, toast the graham cracker crumbs lightly before mixing.
- Store leftovers in the refrigerator for up to 3 days.
How To Store It
Proper storage preserves the texture and flavor of your mini lemon cheesecakes, so you can enjoy them days after making them. Keep moisture at bay and maintain that buttery crust by following these simple storage methods.
- Airtight Container: Place cups in a single layer inside an airtight container and refrigerate for up to 3 days.
- Plastic Wrap Seal: Press a layer of plastic wrap directly onto the cheesecake surface to prevent a skin from forming.
- Separate Garnish Storage: Store berries separately and add them just before serving to keep them fresh and juicy.
- Avoid Stacking: Store the cups without stacking to maintain the crust’s crispness and prevent any squishing.
Frequently Asked Questions
Here’s a quick rundown of questions I often get about these mini lemon cheesecake cups:
- Q: How long does it take to prepare and chill the mini lemon cheesecake cups?
A: It takes about 15 minutes to prepare the crust and filling, plus at least 2 hours of refrigeration for the filling to set properly. If you include cooling time for lightly toasting the graham crackers, add another 5–7 minutes.
- Q: Can I make substitutions if I don’t have heavy cream?
A: Yes. You can substitute an equal amount of chilled whipping cream or a nondairy whipped topping that holds its shape when beaten. Just be sure it reaches stiff peaks so the filling remains light and stable.
- Q: What’s the best way to get a smooth, lump-free cheesecake filling?
A: Make sure the cream cheese is at room temperature before you begin. Beat it with the powdered sugar until completely smooth, scraping down the bowl sides. Whip the heavy cream separately to stiff peaks, then gently fold it in to avoid deflating the air you’ve incorporated.
- Q: How many servings does this recipe yield?
A: This recipe makes 6 to 8 mini cups, depending on the size of your jars or cups. Plan on one cup per person, or serve two smaller portions if you’re making a dessert platter.
- Q: Can I prepare these cheesecake cups ahead of time for a party?
A: Absolutely. You can assemble them up to 24 hours in advance and keep them covered in the refrigerator. This allows the flavors to meld and ensures the crust stays crisp. Garnish with fresh berries just before serving.
- Q: How should I store leftovers, and how long will they keep?
A: Store any leftovers in an airtight container in the refrigerator for up to 3 days. To prevent moisture from softening the crust, avoid stacking the cups and add fresh berries only when you’re ready to eat.
What Makes This Special
These No Bake Mini Lemon Cheesecake Cups stand out because they blend zesty lemon filling whipped to airy perfection on a buttery graham crust without firing up the oven. They’re perfect for last-minute entertaining or when you crave a fresh, tangy dessert with minimal effort. Feel free to print and save this recipe for easy reference, then let me know how they turn out! Drop a comment below if you have questions or fun variations to share—happy cheesecaking!
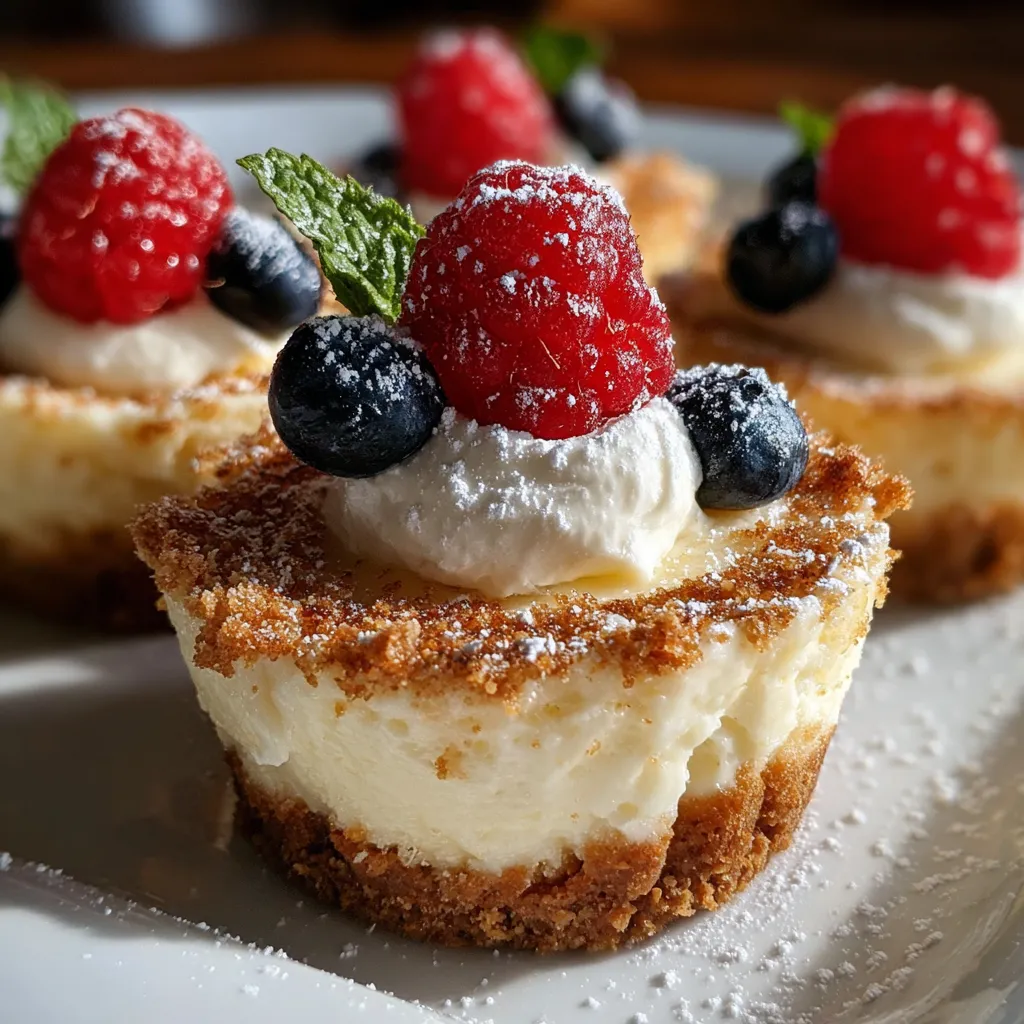

No Bake Mini Lemon Cheesecake Cups
Description
Zesty lemon filling whipped to airy perfection rests on a buttery graham crust, crowned with juicy berries. No baking required—just chill for two hours and dive into creamy tang and crumbly crunch in each mini cup.
Ingredients
Instructions
-
In a small bowl combine graham cracker crumbs, granulated sugar, and melted butter until the mixture resembles wet sand.
-
Divide the crumb mixture evenly among 6 to 8 small cups or jars, pressing down firmly to form a crust.
-
In a medium bowl beat the cream cheese and powdered sugar until smooth and creamy.
-
In a separate bowl whip the heavy cream until stiff peaks form, then gently fold it into the cream cheese mixture.
-
Add lemon juice and lemon zest to the cheesecake filling and stir until fully incorporated.
-
Spoon or pipe the lemon cheesecake filling over the crust in each cup.
-
Cover and refrigerate for at least 2 hours, or until the filling is set.
-
Just before serving, top each cup with fresh berries for garnish.
Note
- Make sure the cream cheese is at room temperature for a smooth filling.
- You can substitute citrus zest like lime or orange for a different twist.
- For extra crunch, toast the graham cracker crumbs lightly before mixing.
- Store leftovers in the refrigerator for up to 3 days.

