

Craving a bright, creamy dessert that doesn’t heat up the kitchen? This No Bake Lemon Cheesecake brings together a crisp digestive biscuit crust with a tangy, velvety filling, brightened by fresh lemon juice and zest. With just a few simple ingredients and no oven required, you’ll whip up a refreshing treat that sets in the fridge to silky perfection. Dive into this zesty, airy delight—every slice is pure sunshine!
Key Ingredients
Here are the star ingredients that make this No Bake Lemon Cheesecake shine:
- 200 g digestive biscuits: Crushed to form a crunchy, sturdy base that holds the luscious filling.
- 100 g unsalted butter: Melted and mixed into the crumbs to bind the crust and add a buttery depth.
- 500 g cream cheese: Provides a rich, tangy backbone for the smooth, creamy filling.
- 100 g icing sugar: Sweetens the filling seamlessly without any grainy texture.
- 200 ml heavy cream: Whipped to stiff peaks for that airy, light texture in the cheesecake.
- 7 g powdered gelatin: Bloomed and dissolved to stabilize the filling without baking.
- 30 ml cold water: Hydrates the gelatin during blooming for a smooth, lump-free set.
- 30 ml lemon juice: Infuses bright, zesty tang into every silky bite.
- 1 medium lemon zest, grated: Adds concentrated citrus aroma and bursts of lemon flavor.
- 1 tsp vanilla extract: Rounds out the tang with a warm, sweet vanilla note.
How To Make No Bake Lemon Cheesecake
Let’s walk through the simple steps to transform these ingredients into a stunning No Bake Lemon Cheesecake. You’ll start by preparing a crisp biscuit base, then bloom and integrate the gelatin for a perfectly set filling, followed by folding in whipped cream to keep that light texture. From crushing biscuits to smoothing the final layer, each step is straightforward and requires just a bit of patience as the cheesecake chills into its creamy glory. Let’s dive in!
1. Crush digestive biscuits until they form fine, uniform crumbs, using a food processor or a heavy rolling pin inside a sealed plastic bag to ensure even texture.
2. Melt the unsalted butter in a small saucepan or microwave-safe bowl, then stir it into the biscuit crumbs until every crumb is evenly coated and shiny.
3. Press the crumb mixture firmly into the bottom of a lined springform pan, using the back of a spoon or a flat-bottomed glass to create an even, compact crust. Chill in the refrigerator for at least 15 minutes.
4. Sprinkle the powdered gelatin over the cold water, allowing it to bloom for 5 minutes. Then gently heat the mixture—either over a double boiler or in short bursts in the microwave—until fully dissolved and clear.
5. In a large bowl, beat the cream cheese with icing sugar, lemon juice, lemon zest, and vanilla extract until completely smooth and free of lumps, scraping down the sides as needed.
6. In a separate chilled bowl, whip the heavy cream on medium-high speed until it holds stiff peaks, taking care not to overwhip.
7. Gradually pour the dissolved gelatin into the cream cheese mixture in a thin stream, stirring continuously to prevent hot spots and ensure even distribution.
8. Gently fold the whipped cream into the cream cheese base using a spatula, combining until there are no streaks left and the mixture is light and airy.
9. Pour the completed filling over the chilled biscuit base, then smooth the top with an offset spatula or the back of a spoon to create a clean, level surface.
10. Refrigerate the assembled cheesecake for at least 4 hours—or ideally up to 6 hours—until it’s fully set and holds its shape.
11. Release the sides of the springform pan, slice into neat pieces, and serve chilled for the best texture.
Serving Suggestions
This No Bake Lemon Cheesecake is versatile and elegant, perfect for afternoon tea or a summery finale. Whether you’re hosting a backyard gathering or craving a personal treat, these serving ideas will elevate each slice. From fresh fruit complements to flavor-boosting drizzles, you’ll discover simple tweaks that add visual appeal and bursts of freshness. Grab your prettiest plates—this light, zesty cheesecake deserves to shine every time you serve it.
- Fresh Berry Medley: Top each slice with a mix of raspberries, blueberries, and strawberries for vibrant color and a juicy contrast to the creamy filling.
- Lemon Curd Drizzle: Spoon a thin layer of warm lemon curd over the cheesecake to intensify the citrus punch and add a glossy finish.
- Mint Garnish: Add a few sprigs of fresh mint leaves alongside each slice for an herbal aromatic note and elegant presentation.
- Toasted Almonds: Scatter slivered, lightly toasted almonds on top for a crunchy texture and subtle nutty flavor that complements the sweet-tart filling.
Tips For Perfect No Bake Lemon Cheesecake
Perfecting a No Bake Lemon Cheesecake is all about balance and timing—get your ingredients at the right temperature, treat the gelatin with patience, and chill thoroughly for a clean slice. The next tips will help you dial in texture and flavor so every bite is silky, zesty, and perfectly set. Follow these pointers to avoid common pitfalls and make your cheesecake foolproof, whether it’s your first time or your fifteenth.
- Use full-fat cream cheese for the richest, creamiest texture that holds structure without feeling heavy.
- Ensure the gelatin is completely dissolved by gently heating until clear, preventing any lumps in your filling.
- Chill the cheesecake thoroughly, giving it at least 4–6 hours in the fridge so it sets properly and slices cleanly.
- Store leftovers covered in the refrigerator in an airtight container to maintain freshness and prevent the cheesecake from absorbing other odors.
How To Store It
Storing your No Bake Lemon Cheesecake correctly is key to preserving its silky texture and vibrant lemon flavor. With the right wrapping or container, you can keep slices ready for an impromptu dessert or make it ahead for an event without any fuss. Follow these storage methods to ensure each piece stays moist, fresh, and delicious whenever you’re ready to indulge.
- Refrigerator: Wrap the cheesecake or place slices in an airtight container, storing at 4°C to maintain creaminess for up to 3 days.
- Wrap Tightly: Cover the pan or individual slices with plastic wrap to prevent moisture loss and protect from absorbing fridge odors.
- Separate Layers: If stacking slices, place a piece of parchment paper between each to avoid them sticking together.
- Avoid Freezing: Although possible, freezing can alter the silky mouthfeel and create ice crystals—refrigeration is best for preserving texture.
Frequently Asked Questions
Here are answers to common questions about making and enjoying your No Bake Lemon Cheesecake:
- Q: How long does it take to prepare and set this no bake lemon cheesecake?
A: Preparing the crust and filling takes about 25–30 minutes total, which includes crushing the biscuits, melting butter, pressing the base, blooming and dissolving the gelatin, and mixing the cheese filling and whipped cream. After assembly, you must refrigerate the cheesecake for at least 4 hours—or ideally up to 6 hours—to ensure it sets firmly before slicing and serving.
- Q: Can I substitute the powdered gelatin with a vegetarian alternative?
A: Yes, you can use agar-agar powder as a vegetarian substitute. Use about 1 teaspoon of agar-agar dissolved in the same 30 ml of cold water, then bring it to a gentle boil until fully dissolved before folding into the cream cheese mixture. Keep in mind that agar-agar sets more firmly and at a higher temperature than gelatin, so work quickly and chill the cheesecake immediately to achieve a smooth texture.
- Q: What’s the best way to whip the heavy cream to stiff peaks without overwhipping?
A: For the best results, chill your mixing bowl and whisk attachment in the freezer for 10–15 minutes beforehand. Pour in cold heavy cream and begin whipping on medium speed until soft peaks form—when the peak tips gently fold over. Then increase to medium-high speed and whip just until peaks stand straight without drooping. Stop immediately to avoid turning the cream grainy or overbeating into butter.
- Q: My filling seemed perfectly thick but didn’t set after chilling. What went wrong and how can I fix it?
A: If your filling remains runny, it often means the gelatin wasn’t fully dissolved or was added to a mixture that was too cool. Ensure the bloomed gelatin is gently heated until completely liquid and mix it swiftly into the creamy base while it’s still warm, then pour into the whipped cream quickly. If it still won’t set, you can melt a small additional amount of gelatin (about 2 g) in warm water, stir it into a small portion of the set filling, then fold that back into the rest and chill again.
- Q: How should I store leftover cheesecake and how long will it stay fresh?
A: Store any uneaten slices in an airtight container or cover the springform pan tightly with plastic wrap. Keep it refrigerated at all times and consume within 2–3 days for optimal flavor and texture. Avoid freezing slices if possible, as freezing can alter the creamy consistency and cause ice crystals that affect mouthfeel.
- Q: Can I prepare this cheesecake a day in advance for an event?
A: Absolutely. You can complete the crust, filling, and initial chilling the day before your event. After the first 4–6 hours of chilling to set the cheesecake fully, release it from the pan, cover it, and keep it refrigerated overnight. This will save you time on the day of serving and still deliver a firm, creamy dessert.
- Q: Are there simple ways to customize the flavor or add a topping to this cheesecake?
A: To add variety, you can swirl in a berry compote or passion fruit pulp into the filling just before pouring it over the crust, creating rippled color and flavor. Once the cheesecake has set, top it with fresh berries, lemon curd, or a dusting of powdered sugar and extra lemon zest for brightness. Just be sure any wet topping is added shortly before serving to avoid softening the set filling.
What Makes This Special
There’s something magically satisfying about setting a velvety lemon cheesecake in the fridge and slicing into that cool, tangy center—no oven stress required! The crisp biscuit base meets a light-as-air filling studded with bursts of citrus, making each bite both zesty and dreamy. It’s perfect for summer gatherings or a peaceful homemade treat, and it’s so friendly you can make it days ahead, print this recipe, and save it for whenever you need a dose of sunshine. If you give it a whirl, leave a comment or share your twists—questions or feedback are always welcome as you master this fun, fridge-set dessert.
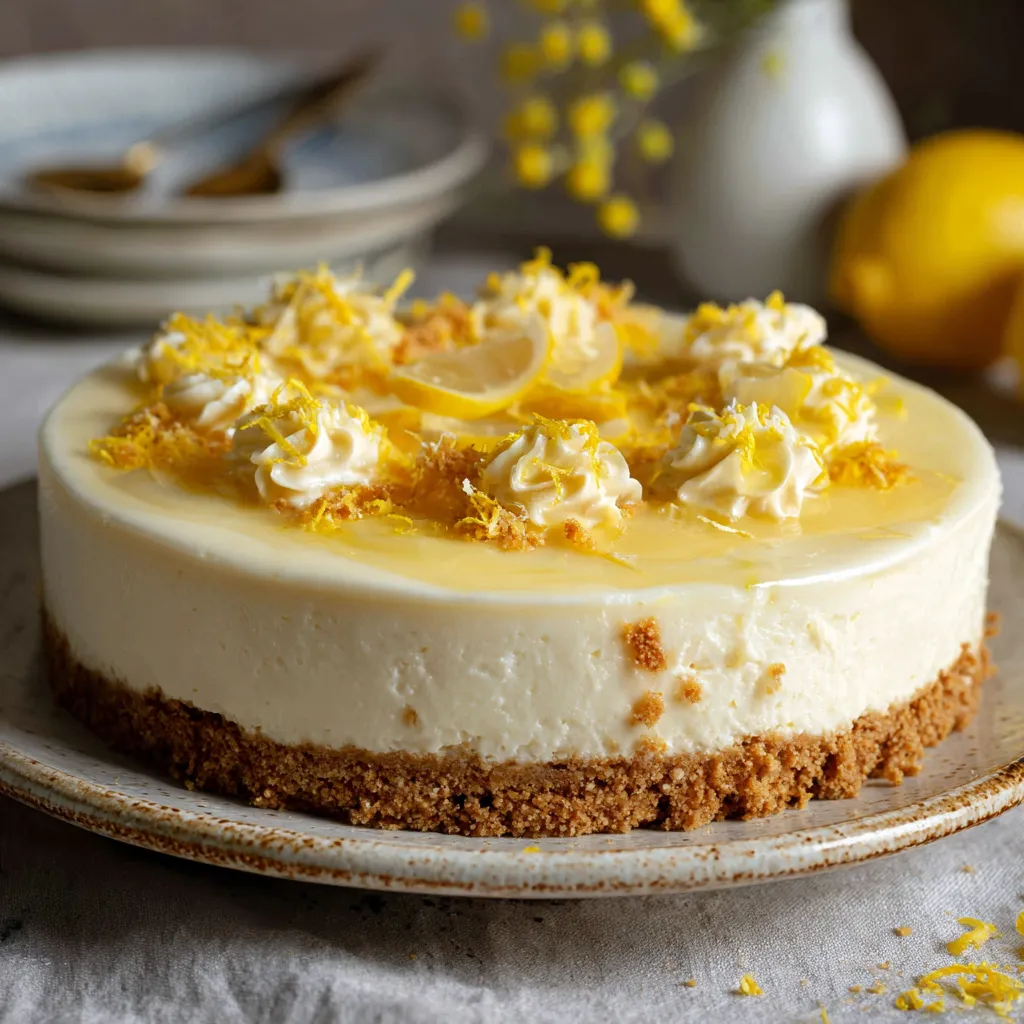

No Bake Lemon Cheesecake
Description
Tangy lemon and rich cream cheese swirl into a fluffy, no-bake filling atop a crunchy biscuit crust. Just beat, chill, and slice for a refreshingly creamy dessert that's bright, smooth, and perfectly set.
Ingredients
Instructions
-
Crush digestive biscuits until fine crumbs form.
-
Melt butter and stir into biscuit crumbs until evenly coated.
-
Press the crumb mixture firmly into the base of a springform pan and chill in the refrigerator.
-
Sprinkle gelatin over cold water and let bloom for 5 minutes, then gently heat until fully dissolved.
-
In a bowl beat cream cheese with icing sugar, lemon juice, lemon zest, and vanilla extract until smooth.
-
In a separate bowl whip heavy cream to stiff peaks.
-
Gradually pour the dissolved gelatin into the cream cheese mixture, stirring continuously.
-
Gently fold the whipped cream into the cream cheese mixture until no streaks remain.
-
Pour the filling over the chilled biscuit base and smooth the top with a spatula.
-
Refrigerate the cheesecake for at least 4 hours or until fully set.
-
Release the cake from the pan, slice, and serve.
Note
- Use full-fat cream cheese for the creamiest texture.
- Make sure the gelatin is completely dissolved to avoid lumps.
- Chill the cheesecake thoroughly to ensure it sets properly.
- Store leftovers covered in the refrigerator for up to 3 days.

