

Everyone loves a holiday treat that looks impressive but requires absolutely zero oven time, especially when the kitchen is already chaotic during the festive season. These No-Bake Christmas Cheesecake Bites are my absolute go-to when I need a dessert that screams holiday cheer without the stress of baking or complex techniques. The combination of creamy cheesecake, rich cocoa, and that cooling peppermint kick makes them impossible to eat just one. They are perfectly poppable, and rolling them in bright sprinkles is a fun activity for the whole family. You are going to love how effortless and delicious these little gems are!
Key Ingredients
To get started with these delightful bites, you will need a handful of pantry staples and some refrigerated items. The beauty here is simplicity; we are using ingredients that deliver maximum flavor and texture without a long shopping list. It is all about balancing the tang of the cheesecake with the sweetness of the chocolate and the crunch of the coatings.
- 8 oz cream cheese, softened: This acts as the tangy, sturdy base for the bites, so make sure it is fully room temperature for smooth mixing.
- 1/2 cup powdered sugar: Provides the necessary sweetness and dissolves easily into the cream cheese without leaving a grainy texture.
- 1 tsp vanilla extract: Adds a warm, aromatic background flavor that enhances the overall sweetness of the cheesecake filling.
- 1 cup whipped topping (thawed): Gives the mixture a light, airy consistency, preventing the bites from becoming too dense or heavy.
- 1/2 cup crushed graham crackers: Adds structure and a classic cheesecake crust flavor directly into the filling for a nice textural contrast.
- 1/4 cup unsweetened cocoa powder: Infuses the mixture with a deep, rich chocolate flavor that pairs perfectly with the peppermint.
- 1/2 cup mini chocolate chips: These provide little bursts of texture and extra chocolatey goodness in every single bite.
- 1/4 tsp peppermint extract: Delivers that signature cooling holiday flavor that cuts through the richness of the cheese and chocolate.
- Red and green sprinkles for decoration: Adds a festive visual pop and a slight crunch to the exterior of the finished bites.
- 1/4 cup chopped nuts (optional): Offers a savory crunch and nutty flavor that complements the sweet, creamy interior perfectly.
How To Make No-Bake Christmas Cheesecake Bites
Making these treats is honestly a breeze and a perfect way to get into the holiday spirit without heating up the house. The process is straightforward: we start by creating a luscious, creamy base, gently fold in our texture elements like the graham crackers and chocolate chips, and then let the fridge do the hard work of firming everything up. It is really important to handle the mixture gently once you add the whipped topping to keep things fluffy. After a quick chill, the fun part begins with rolling them into festive decorations. It is a beginner-friendly method that yields professional-looking results every time.
1. In a large mixing bowl, beat the softened cream cheese with a hand mixer until it is completely smooth and creamy.
2. Gradually add the powdered sugar while continuing to mix, ensuring there are absolutely no lumps remaining in the bowl.
3. Mix in the vanilla extract and peppermint extract until they are evenly combined throughout the cheese mixture.
4. Gently fold in the whipped topping until the mixture is light and fluffy, taking care not to deflate the air bubbles.
5. In a separate bowl, combine the crushed graham crackers and cocoa powder, and mix them well until uniform.
6. Add the graham cracker mixture and mini chocolate chips to the creamy mixture, folding gently to combine all ingredients thoroughly.
7. Using a small cookie scoop or your hands, form the mixture into bite-sized balls and place them onto a parchment-lined baking sheet.
8. Once all the mixture is formed into bites, pop the baking sheet into the refrigerator for about 1 hour to firm up the cheesecake bites.
9. After chilling, remove the bites from the refrigerator and roll them in the chopped nuts (if using) and then in the red and green sprinkles to give a festive touch.
10. Place the decorated cheesecake bites back on the baking sheet and refrigerate until ready to serve. Enjoy them cold!
Serving Suggestions
When it comes to serving these festive bites, presentation is everything, and luckily, they naturally look stunning with their colorful coatings. Since they are small and self-contained, they are the ideal finger food for mingling crowds where you don't want to deal with forks and plates. I love arranging them on a tiered platter to give them some height, or nesting them in mini cupcake liners for a cleaner grab-and-go experience. Whether you are hosting a formal dinner or a casual sweater party, these bites fit right in.
- The Ultimate Cookie Tray: Arrange these bites alongside gingerbread men and sugar cookies; the creamy texture offers a perfect contrast to the crunch of traditional baked goods.
- Hot Cocoa Companion: Serve these on a small saucer next to a steaming mug of hot chocolate, as the peppermint flavor echoes the classic holiday drink perfectly.
- Festive Skewers: For a fun twist, place a bite on a decorative toothpick or skewer with a strawberry or marshmallow to create a mini dessert kabob.
- Edible Gift Boxes: Place individual bites in mini muffin liners inside a decorative tin; they make a thoughtful, handmade gift that travels well if kept cool.
Tips For Perfect No-Bake Christmas Cheesecake Bites
Let's chat about ensuring success with this recipe, because even simple recipes have little secrets that take them from good to great. The most important thing here is temperature and texture. You want to make sure you aren't rushing the chilling process, as that firmness is crucial for rolling them in the toppings without making a sticky mess. I also love how adaptable this base recipe is; it is like a blank canvas for your favorite holiday flavors. Whether you are making these for a crowded party or just a quiet night in, a few small tweaks can tailor them exactly to your needs.
- These cheesecake bites can be stored in an airtight container in the refrigerator for up to one week, making them great for making ahead.
- You can easily customize the flavors by adding crushed peppermint candies or other festive toppings to switch up the texture and look.
- They are absolutely perfect for holiday parties or as a sweet treat for gift-giving since they hold their shape well when chilled.
- For a gluten-free version, simply substitute the graham cracker crust element with gluten-free crumbs, and no one will taste the difference!
How To Store It
Since we are dealing with cream cheese and whipped topping, proper storage is non-negotiable to keep these bites safe and delicious. You definitely don't want to leave them sitting out on the counter for hours on end, or they might get too soft. I always recommend planning your fridge space before you start making them, because you will need a flat spot for the tray or container. Keeping them cold ensures that the cheesecake texture stays dense and creamy, just like a slice of the real thing, and it keeps the chocolate chips nice and snappy.
- Airtight Container: Transfer the finished bites into a sealed plastic or glass container to prevent them from absorbing other fridge odors.
- Parchment Layering: If you need to stack the bites to save space, place a sheet of wax paper or parchment between layers so the sprinkles don't stick to the ones above.
- Keep Refrigerated: Always store these in the main part of the fridge rather than the door, ensuring they stay at a consistent cold temperature.
- Serve Chilled: Only pull out as many as you intend to serve at one time, keeping the rest in the fridge to maintain that perfect firm consistency.
Frequently Asked Questions
I know that when trying a new recipe, questions always pop up, so here are some answers to the most common things people ask about these treats!
- Q: How should I store the cheesecake bites and how long do they last?
A: You should place the decorated cheesecake bites in an airtight container and keep them in the refrigerator. They can be stored for up to one week.
- Q: Is it possible to make a gluten-free version of this recipe?
A: Yes, the recipe notes state that you can create a gluten-free version by simply substituting the graham cracker crumbs with gluten-free crumbs.
- Q: Why is it important to soften the cream cheese before starting?
A: Softening the cream cheese allows you to beat it until it is smooth and creamy. This step, along with gradually adding the powdered sugar, ensures that the final mixture has no lumps.
- Q: How long do I need to chill the mixture before adding the final decorations?
A: After forming the mixture into bite-sized balls, you must place the baking sheet in the refrigerator for about 1 hour. This allows the cheesecake bites to firm up so they are easier to roll in the nuts and sprinkles.
- Q: Can I customize the flavors or toppings for these bites?
A: Yes, the recipe suggests you can customize the flavors by adding crushed peppermint candies or using other festive toppings. You can also choose to include or omit the optional chopped nuts during the decoration step.
- Q: How should I combine the whipped topping with the cream cheese mixture?
A: You should gently fold in the thawed whipped topping until the mixture becomes light and fluffy, rather than beating it aggressively, to maintain the correct texture.
What Makes This Special
Let's be real, nobody wants to wash extra pans during the holidays, and that is exactly why this recipe works so well! It captures all the decadence of a fancy cheesecake—that tangy richness, the chocolatey depth, and the peppermint sparkle—without ever touching the oven dial. It is the kind of treat that makes you look like a kitchen wizard even if you just rolled out of bed. Make sure to print this article or save it to your bookmarks because I guarantee you will be looking for it next December. If you give these a try, please drop a comment below and let me know how they turned out; I would love to hear about your decorating adventures!
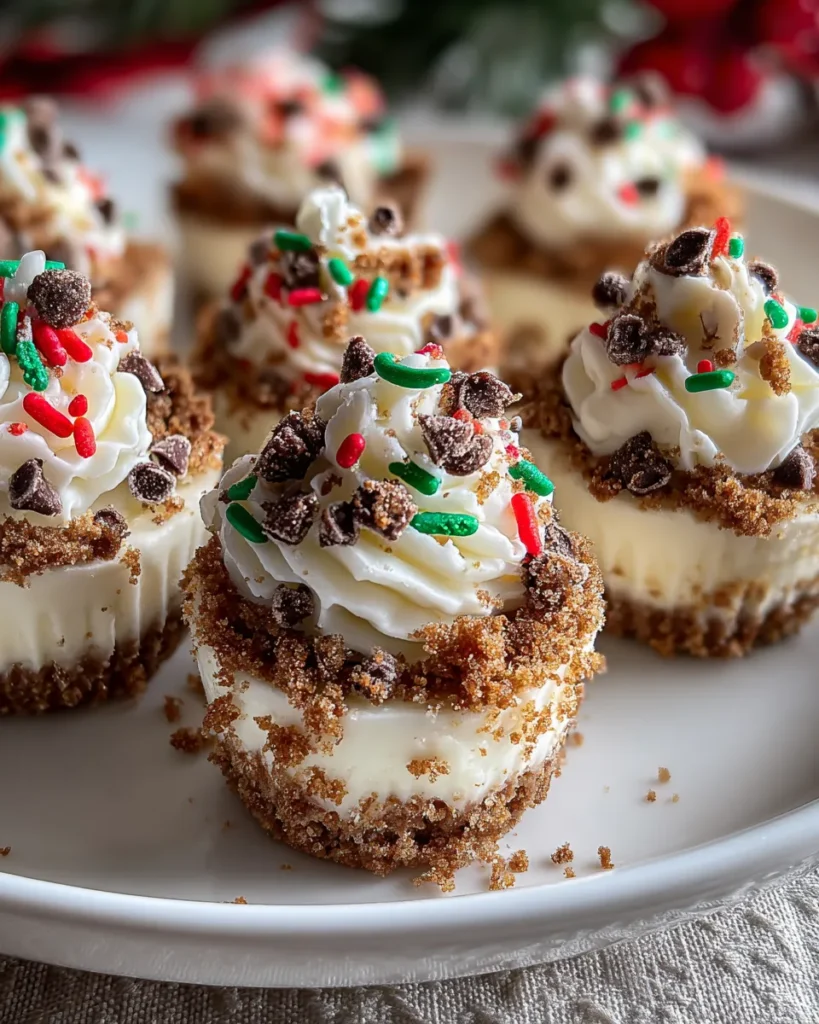

No-Bake Christmas Cheesecake Bites
Description
Creamy cheesecake filling meets rich cocoa and cooling peppermint in these poppable treats. Rolled in crunchy nuts and bright holiday sprinkles, they make an effortless addition to any cookie tray.
Ingredients
Instructions
-
In a large mixing bowl, beat the softened cream cheese with a hand mixer until smooth and creamy.
-
Gradually add the powdered sugar while continuing to mix, ensuring there are no lumps.
-
Mix in the vanilla extract and peppermint extract until evenly combined.
-
Gently fold in the whipped topping until the mixture is light and fluffy.
-
In a separate bowl, combine the crushed graham crackers and cocoa powder. Mix well.
-
Add the graham cracker mixture and mini chocolate chips to the creamy mixture, folding gently to combine all ingredients.
-
Using a small cookie scoop or your hands, form the mixture into bite-sized balls and place them onto a parchment-lined baking sheet.
-
Once all the mixture is formed into bites, pop the baking sheet into the refrigerator for about 1 hour to firm up the cheesecake bites.
-
After chilling, remove the bites from the refrigerator and roll them in the chopped nuts (if using) and then in the red and green sprinkles to give a festive touch.
-
Place the decorated cheesecake bites back on the baking sheet and refrigerate until ready to serve. Enjoy them cold!
Note
- These cheesecake bites can be stored in an airtight container in the refrigerator for up to one week.
- You can easily customize the flavors by adding crushed peppermint candies or other festive toppings.
- Perfect for holiday parties or as a sweet treat for gift-giving!
- For a gluten-free version, substitute the graham cracker crust with gluten-free crumbs.

