

This No Bake Biscoff Cheesecake is a game-changer for anyone who loves a dreamy, no-fuss dessert. With creamy layers of spiced cookie butter goodness nestled on a buttery biscuit base, it’s a treat that needs zero oven time yet promises total crowd-pleasing vibes. Whether you’re a baking beginner or a seasoned dessert fanatic, you’ll find this recipe super simple to pull together. Stick around and let me show you how easy it is to whip up pure cookie butter bliss.
Key Ingredients
Before diving in, let’s gather the essentials that make this cheesecake shine. Each component plays a perfect role, from the crunchy crust to the silky filling.
- 200g Biscoff biscuits (or any speculoos biscuits): Provides the spiced, crunchy base that pairs perfectly with the creamy filling.
- 100g unsalted butter, melted: Binds the biscuit crumbs together and adds rich, buttery flavor.
- 400g cream cheese, softened: Forms the velvety backbone of the cheesecake for that classic tangy richness.
- 100g powdered sugar: Sweetens the filling smoothly without any grainy texture.
- 200ml heavy whipping cream: Whipped to stiff peaks for a light and airy filling that holds shape.
- 100g Biscoff spread: Infuses every bite with deep cookie butter flavor and silky texture.
- 1 teaspoon vanilla extract: Enhances the overall sweetness with a warm, aromatic note.
- A pinch of salt: Balances the sweetness and brings out the Biscoff spices.
- Additional Biscoff biscuits for topping (optional): Adds extra crunch and a decorative touch.
How To Make No Bake Biscoff Cheesecake
Let’s walk through the simple steps to assemble this luscious no-bake treat. From pulsing biscuits into a crumbly crust to folding airy whipped cream into rich Biscoff-infused cheese, these instructions will help you achieve that perfect set and irresistible flavor in every slice.
1. In a food processor, crush the Biscoff biscuits into fine crumbs. If you don’t have a processor, place them in a zip-seal bag and use a rolling pin to crush until uniformly fine.
2. In a mixing bowl, combine the crushed biscuits with the melted unsalted butter. Stir until every crumb is coated and the mixture resembles wet sand.
3. Press the mixture firmly into the bottom of a 9-inch springform pan using the back of a measuring cup or your fingers to compact it evenly. Chill in the fridge to let the crust set while you prepare the filling.
4. In a large bowl, beat the softened cream cheese on medium speed with an electric mixer until smooth and creamy.
5. Add the powdered sugar, Biscoff spread, vanilla extract, and a pinch of salt. Mix until fully combined and silky.
6. In a separate bowl, whip the heavy cream until stiff peaks form (about 3–5 minutes).
7. Gently fold the whipped cream into the cream cheese mixture in two additions, taking care to preserve the light and airy texture.
8. Spread the combined filling over the chilled crust and smooth the top with a spatula.
9. Warm the Biscoff spread briefly in the microwave to loosen it, then drizzle over the cheesecake for a decorative finish.
10. Refrigerate for at least 4 hours—or overnight—to let the cheesecake fully set.
11. Once firm, carefully remove the springform pan sides. Optionally, garnish with extra Biscoff biscuits.
12. Slice and serve cold. Enjoy your delicious No Bake Biscoff Cheesecake!
Serving Suggestions
When it comes to serving this No Bake Biscoff Cheesecake, presentation is key. Whether you’re hosting a dinner party or just indulging at home, these ideas will help you showcase each slice beautifully.
- Fresh berries on the side: Pair a slice with raspberries or strawberries for a pop of color and bright, tart contrast.
- Caramel or chocolate drizzle: Elevate each serving with an artistic swirl of warm caramel sauce or melted chocolate ganache.
- Coffee or tea pairing: A cup of espresso, latte, or spiced chai complements the cookie butter flavors perfectly.
- Whipped cream and nut sprinkle: Top each piece with a dollop of fresh whipped cream and a dusting of chopped toasted hazelnuts.
Tips For Perfect No Bake Biscoff Cheesecake
A flawless no-bake cheesecake comes down to a few simple tricks and tasty tweaks. With the right chilling time and gentle folding technique, you’ll get a silky-smooth filling and a sturdy crust that holds its shape. Don’t rush the chilling—it’s what gives you those clean slices and that melt-in-your-mouth texture.
- For a richer flavor, add a tablespoon of cocoa powder to the cheesecake mixture.
- You can substitute the Biscoff biscuits with any other favorite cookies if desired.
- This cheesecake freezes well; simply wrap individual slices in plastic wrap and store them in an airtight container.
- Consider adding a layer of caramel or chocolate ganache on top for extra indulgence.
- Perfect for gatherings; this dessert is sure to impress family and friends!
How To Store It
Proper storage ensures your No Bake Biscoff Cheesecake stays fresh and delicious, whether you have leftovers or want to prepare ahead for a special event. Follow these guidelines to maintain the best texture and flavor.
- Refrigerator: Keep the whole cheesecake covered or wrapped in plastic wrap at 4 °C for up to 5 days.
- Individual slices: Wrap each slice tightly in plastic wrap, then place in an airtight container to prevent odors.
- Freezing: For longer storage, freeze tightly wrapped slices in a freezer-safe bag or container for up to 1 month.
- Thawing: To serve, thaw frozen slices overnight in the refrigerator for best texture.
Frequently Asked Questions
Have a few more questions? Here are some quick answers to help you master this crowd-pleasing dessert.
- How long does it take to prepare and set the No Bake Biscoff Cheesecake?
A: Active prep time is about 20–30 minutes, which includes crushing the biscuits, making the crust, whipping the filling, and assembling. After that, you need to refrigerate the assembled cheesecake for at least 4 hours so it firms up properly. For the best texture and flavor, chilling overnight (8–12 hours) is recommended.
- My crust is too soft and falls apart. How can I fix it?
A: A crumbly crust usually means there wasn’t enough butter or it wasn’t pressed firmly enough. Next time, ensure you use the full 100g of melted butter and mix until every biscuit crumb looks like wet sand. When pressing into the pan, apply even pressure with the back of a measuring cup or your fingers to compact it tightly. Chilling the crust alone for at least 10–15 minutes before adding the filling also helps it hold together better.
- The filling seems runny. How do I achieve the right consistency?
A: A few factors can cause a loose filling: cream cheese not at room temperature, under-whipped cream, or overmixing when folding. Make sure your cream cheese is completely softened so it blends smoothly. Whip the heavy cream to stiff peaks—when you lift the whisk, peaks should stand straight up without drooping. Fold the whipped cream into the cream cheese mixture gently in two additions; overfolding can deflate the air you just whipped in, resulting in a softer set.
- Can I substitute any ingredients to suit dietary preferences?
A: Yes. For a gluten-free version, use certified gluten-free speculoos or other gluten-free cookies. To reduce sugar, substitute powdered sugar with a 1:1 sugar replacement suitable for baking. For a lighter version, swap heavy cream for a stabilized whipped topping or use reduced-fat cream cheese, though the texture may be looser. Vegan alternatives include dairy-free cream cheese, plant-based whipping cream, and a butter substitute—just follow the same ratios and chilling times.
- How should I store leftovers, and how long will they keep?
A: Store any unserved cheesecake in the refrigerator, covered or in an airtight container, for up to 4–5 days. If you want to freeze slices, wrap each slice tightly in plastic wrap and place them in a freezer-safe container or bag. Frozen cheesecake will keep well for up to 1 month. Thaw overnight in the fridge before serving.
- What are some creative topping ideas besides extra Biscoff biscuits?
A: You can drizzle warmed caramel sauce or melted chocolate ganache over the top for extra decadence. A sprinkle of crushed nuts—like toasted hazelnuts or pecans—adds a nice crunch. Fresh berries or a dollop of whipped cream on each slice provide a pop of color and freshness. Even a sprinkle of sea salt on the Biscoff drizzle creates a lovely sweet-and-salty contrast.
- Can I make this cheesecake in advance for a party?
A: Absolutely. Since the cheesecake benefits from extended chilling, make it a day ahead. Assemble and chill overnight, then remove from the pan and keep refrigerated until serving. If you want to transport it, leave it in the springform pan, cover the top with plastic wrap, and secure the pan in a box to prevent tipping. Remove the wrap just before serving for a pristine presentation.
What Makes This Special
This No Bake Biscoff Cheesecake nails the perfect balance of crunch, creaminess, and that signature spiced cookie butter flavor without ever firing up the oven. The velvety cream cheese and whipped cream swirl with rich Biscoff spread atop a crisp biscuit crust, making each slice a heavenly bite that melts away in your mouth. Feel free to print this article and save it for your next sweet craving or get-together. If you give it a try or have any questions, leave a comment below—I’d love to hear how it turns out!
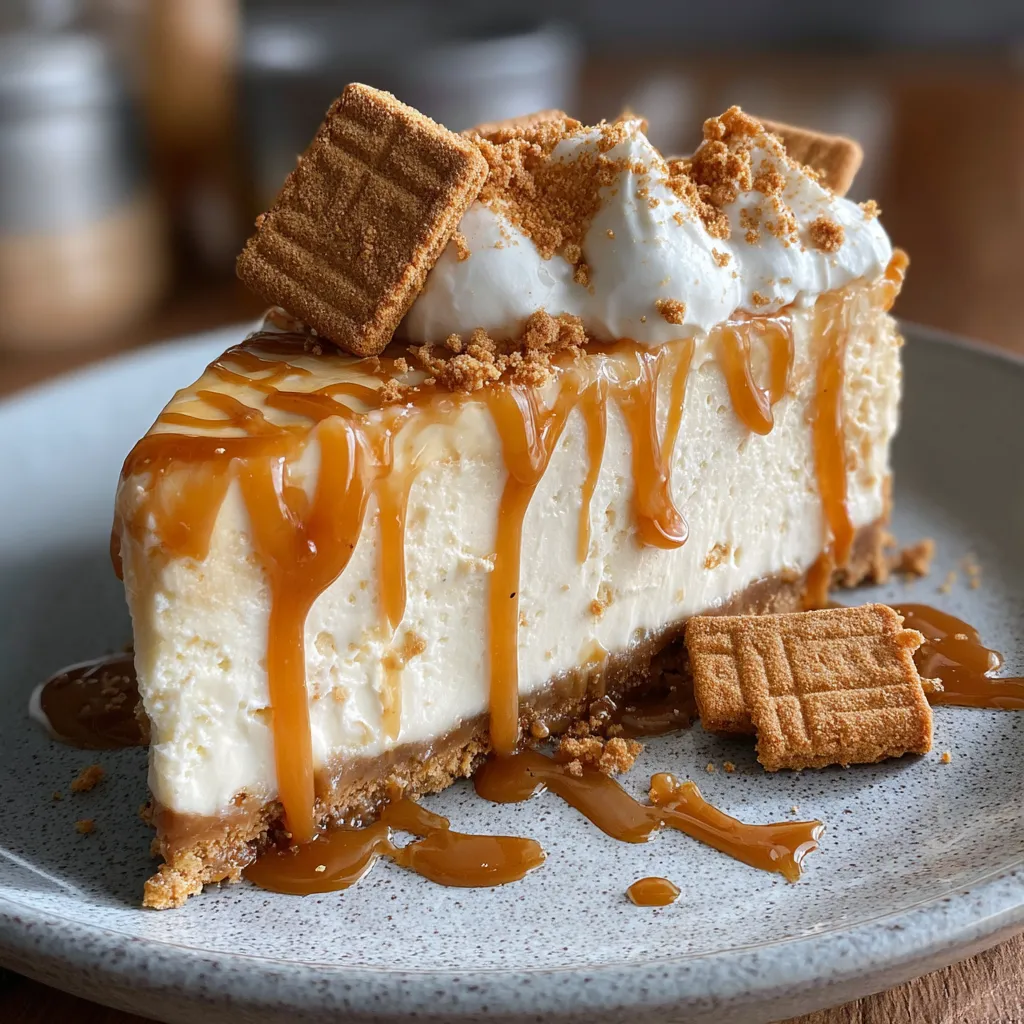

No Bake Biscoff Cheesecake
Description
Velvety cream cheese and whipped cream swirl with rich Biscoff spread atop a crunchy cookie crust, creating a melt-in-your-mouth cheesecake that sets in the fridge—pure cookie butter bliss.
Ingredients
Instructions
-
Start by preparing the crust. In a food processor, crush the Biscoff biscuits into fine crumbs. If you don’t have a food processor, you can place the biscuits in a zip-seal bag and crush them with a rolling pin until fine.
-
In a mixing bowl, combine the crushed Biscoff biscuits with the melted unsalted butter. Mix until all the crumbs are coated and the mixture resembles wet sand.
-
Press the biscuit mixture firmly into the bottom of a 9-inch springform pan to form an even layer. Use the back of a measuring cup or your fingers to compact it. Place the crust in the fridge to set while you prepare the cheesecake filling.
-
In a large mixing bowl, beat the softened cream cheese with an electric mixer on medium speed until smooth and creamy.
-
Add the powdered sugar, Biscoff spread, vanilla extract, and a pinch of salt to the bowl. Mix until well combined and smooth.
-
In another bowl, whip the heavy whipping cream until stiff peaks form. This should take about 3-5 minutes.
-
Gently fold the whipped cream into the cream cheese mixture in two additions. Be careful to maintain the light and airy texture as you fold.
-
Once everything is combined, spread the cheesecake filling over the chilled crust in the springform pan. Smooth the top with a spatula.
-
To create an additional drizzle effect, you can warm the Biscoff spread slightly in the microwave to make it easier to pour. Drizzle over the top of the cheesecake.
-
Refrigerate the cheesecake for at least 4 hours, or overnight if possible, to allow it to set properly.
-
Once set, carefully remove the sides of the springform pan. Optionally, garnish with additional Biscoff biscuits on top for decoration.
-
Slice and serve cold. Enjoy your delicious No Bake Biscoff Cheesecake!
Note
- For a richer flavor, add a tablespoon of cocoa powder to the cheesecake mixture.
- You can substitute the Biscoff biscuits with any other favorite cookies if desired.
- This cheesecake freezes well; simply wrap individual slices in plastic wrap and store them in an airtight container.
- Consider adding a layer of caramel or chocolate ganache on top for extra indulgence.
- Perfect for gatherings; this dessert is sure to impress family and friends!

