

Autumn baking just got a whole lot more fun with these adorable mini pumpkin pie pops that pack all the cozy flavors of a classic pumpkin pie into a perfectly portable treat. Imagine biting into a flaky, buttery crust that gives way to a creamy, warmly spiced pumpkin center—each pop is like a little celebration of fall in your hand. These bite-sized delights are a fantastic twist on the traditional dessert, making them ideal for parties, potlucks, or just a casual afternoon pick-me-up. Whether you’re curled up with a cup of coffee on a crisp morning or hosting a festive gathering, these pie pops are guaranteed to bring smiles and compliments.
I still remember the first time I whipped these up for a family gathering. The kitchen was filled with laughter as everyone juggled drinks and plates, but you’d better believe those pie pops disappeared faster than I could say “seconds, please!” They’re forgiven for their cuteness, but the real magic is in the easy assembly and friendly beginner-level steps. No fancy techniques required—just simple ingredients, straightforward instructions, and oodles of fall spice goodness. So grab your lollipop sticks, roll out those pie crusts, and let’s get baking. Trust me, once you try these mini pumpkin pie pops, they’ll become your new seasonal obsession.
KEY INGREDIENTS IN MINI PUMPKIN PIE POPS
Every delicious recipe starts with the right ingredients, and these mini pumpkin pie pops are no exception. From the flaky crust that cradles the filling to the warm spices that bring out the autumn vibe, each component plays a crucial role in creating that perfect handheld dessert.
- Refrigerated pie crusts
A time-saving, flaky base that provides structure and buttery flavor. Using pre-made crusts means you can get to the fun part—assembling your pie pops—sooner.
- Pumpkin puree
The heart of the filling, offering a creamy texture and natural sweetness. Opting for pure pumpkin (not pumpkin pie filling) ensures the perfect consistency and allows you to control the sugar and spice levels.
- Granulated sugar
Balances the earthiness of pumpkin and spices, giving the filling a gentle sweetness and helping it caramelize ever so slightly during baking.
- Ground cinnamon
Infuses warmth and a touch of sweetness, creating that quintessential pumpkin-spice flavor we all crave.
- Ground nutmeg
Adds a subtle nutty undertone, enriching the overall spice profile and complementing the cinnamon.
- Ground cloves
Offers a pungent warmth and depth, elevating the filling to something truly special.
- Ground ginger
Brings a hint of zing and brightness, balancing the richer spices and enhancing the pumpkin’s natural flavor.
- Salt
Essential for rounding out the flavors and preventing the filling from tasting flat or overly sweet.
- Egg
Helps bind the filling ingredients together and contributes to a custardy texture.
- Milk
Combined with an egg for the egg wash, it creates a gorgeous golden-brown finish on the crust.
- Graham cracker crumbs
Sprinkled over the filling for a little crunch and a toasty, buttery note that pairs beautifully with pumpkin.
- Lollipop sticks
Transform ordinary pie bites into fun, handheld pops that are perfect for parties and kids alike.
- Egg wash (egg + water)
Brushed on before baking to give each pop a glossy, golden crown and help the edges seal tightly.
- Whipped cream (optional)
A light, airy topper that contrasts the spiced filling, making each bite even more irresistible.
HOW TO MAKE MINI PUMPKIN PIE POPS
Ready to transform these pantry staples into something magical? Follow these detailed steps to achieve perfectly sealed, golden-brown pie pops that are as fun to make as they are to eat. Keep your lollipop sticks at the ready and let’s dive into the simple yet satisfying process.
1. Preheat your oven to 350°F (175°C) and line a baking sheet with parchment paper to prevent sticking and ensure easy cleanup.
2. Unroll the pie crusts onto a clean, flat surface. Using a round cookie cutter (around 3 inches in diameter), cut out circles; you should yield about 12 from each crust, giving you plenty of pops.
3. In a medium bowl, combine the pumpkin puree, granulated sugar, cinnamon, nutmeg, cloves, ginger, and salt. Stir until the mixture is completely homogeneous and the spices are evenly distributed.
4. In a small bowl, beat together the egg and milk to create a smooth egg wash that will give your pops a beautiful sheen.
5. Place about one teaspoon of the pumpkin mixture in the center of half of the dough circles, leaving enough space around the edges for sealing.
6. Insert a lollipop stick into each filled circle, ensuring it goes through the filling but stops before piercing the dough’s edge.
7. Sprinkle a pinch of graham cracker crumbs over the pumpkin filling to introduce a delightful crunch.
8. Brush the exposed edges of the dough circles with egg wash to help them adhere securely.
9. Top each filled circle with an unfilled dough circle. Press the edges firmly with a fork to seal the filling and secure the stick in place.
10. Give the tops of each pie pop a light brush of egg wash for that perfect golden finish.
11. Arrange the pie pops on your prepared baking sheet, spacing them slightly apart, and bake for 15–20 minutes or until the crusts turn a gorgeous golden brown.
12. Cool the pops for a few minutes before serving. Enjoy them warm or at room temperature, with an optional dollop of whipped cream for an extra touch of indulgence.
SERVING SUGGESTIONS FOR MINI PUMPKIN PIE POPS
Serving these mini pumpkin pie pops is where the real fun begins! Whether you’re hosting a fall gathering or simply treating yourself, presentation and pairings can take these sweet bites to the next level. Share them on a festive platter, toss in a basket lined with colorful napkins, or stand them upright in a decorative holder for a whimsical display that will have guests swooning.
- Autumn Brunch Spread
Arrange the pie pops alongside spiced lattes and cinnamon oatmeal. The warm spices in the pops complement savory quiches and fresh fruit, creating a balanced seasonal feast.
- Holiday Dessert Table
Stand each pop in a glass vase filled with dried autumn leaves or uncooked rice tinted orange. This vertical presentation adds height and visual appeal to your spread.
- After-School Snack
Place pops on a small tray with a side of mini marshmallows and hot cocoa. Kids will love the interactive aspect, dipping the whipped cream into cocoa for a double treat.
- Coffee Break Moment
Serve these with spiced coffee or chai tea—the bold flavors in the drinks contrast beautifully with the sweet, creamy pumpkin. A light dusting of powdered sugar or a sprinkle of extra cinnamon on top completes the ensemble.
HOW TO STORE MINI PUMPKIN PIE POPS
With these mini pumpkin pie pops, leftovers are just as delightful—if they last that long! Proper storage ensures each bite stays as flawless as the first, preserving that flaky crust and creamy filling. Whether you’re saving a few for an afternoon treat or stashing extras for the next day, following the right storage methods will keep them fresh and delicious.
For short-term enjoyment, arrange cooled pie pops in an airtight container. Place a layer of parchment or wax paper between layers to prevent sticking and keep the crust crisp. Store in the refrigerator for up to three days—just let them warm to room temperature or pop them in the oven at 300°F for a few minutes to revive the flakiness.
If you want to freeze these treats, flash-freeze them on a baking sheet for about an hour, then transfer to a freezer-safe bag. They can be stored for up to one month; reheat in a 350°F oven for 8–10 minutes, covered with foil to prevent over-browning, and then uncover for the last few minutes to crisp up.
For on-the-go convenience, individually wrap each pop in plastic wrap after cooling. This method keeps them sealed and prevents accidental smudging of icing or whipped cream. Pop them into lunchboxes or picnic baskets as a perfectly portable sweet.
Lastly, if you’re keeping a few at room temperature for a few hours, store them in a covered cake stand or dome. This protects from drying out while keeping the crust pleasantly tender—just avoid humid environments that could make the pastry soggy.
CONCLUSION
Bringing these mini pumpkin pie pops into your kitchen repertoire is like capturing the essence of fall in a handheld delight. From the first step of rolling out those refrigerated crusts to the final golden hue emerging from the oven, each moment of preparation is filled with fun and flavor. You’ve learned how simple ingredients—pumpkin puree, warm spices, a touch of sugar, and buttery crust—can be transformed into bite-sized wonders that charm every palate. Whether you’re a seasoned baker or a complete beginner, this recipe guides you through each stage with clarity and ease, ensuring perfect results every time.
Feel free to print this article and tuck it into your favorite recipe binder or save it for later reference. You’ll find a handy FAQ below to answer any last-minute questions you might have. And if you give these mini pumpkin pie pops a try, I’d love to hear how they turned out—drop a comment, share your tweaks, or let me know if you have any questions as you whip up these festive treats. Your feedback not only brightens my day but also helps fellow home bakers discover the joys of these delightful pie pops. Happy baking!
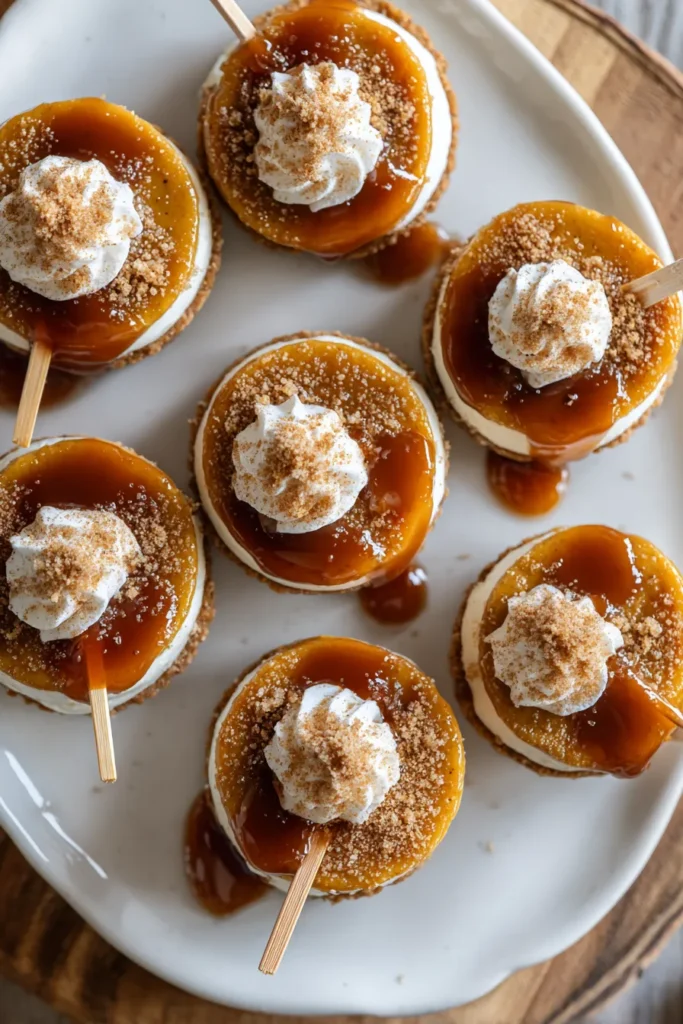

Mini Pumpkin Pie Pops
Description
These mini pumpkin pie pops are a delightful twist on a classic, featuring creamy pumpkin filling wrapped in a flaky crust. Perfect for parties and easy to enjoy on the go!
Ingredients
Instructions
-
Preheat your oven to 350°F (175°C) and line a baking sheet with parchment paper.
-
Unroll the pie crusts onto a flat surface. Use a round cookie cutter, preferably 3 inches in diameter, to cut out circles. You should get roughly 12 circles from each pie crust.
-
In a medium bowl, combine the pumpkin puree, granulated sugar, cinnamon, nutmeg, cloves, ginger, and salt. Stir until thoroughly mixed.
-
In a small bowl, beat together the egg and milk to create an egg wash.
-
Place about one teaspoon of the pumpkin mixture in the center of half of the pie circles.
-
Insert a lollipop stick into the pumpkin filling on each of these circles, ensuring the stick extends through the center but not all the way out of the dough.
-
Sprinkle a bit of graham cracker crumbs on top of the pumpkin filling (this adds a lovely texture and extra flavor).
-
Brush the edges of the filled circles with the egg wash.
-
Place the remaining pie dough circles on top of the filled ones. Press the edges together gently with a fork to seal the filling inside and ensure the stick is secured.
-
Brush the tops of the pie pops lightly with the egg wash.
-
Arrange the pie pops on the prepared baking sheet and bake in the preheated oven for 15-20 minutes or until the tops are golden brown.
-
Allow the pops to cool slightly before serving. Serve warm or at room temperature, optionally topped with a dollop of whipped cream.
Note
- These pie pops are perfect for parties because they are easy to hold and eat without a plate.
- If desired, customize the spice mix in the filling to your taste by adding more cinnamon or nutmeg.
- Store any leftovers in an airtight container in the refrigerator for up to three days.
- These treats are a delightful take on classic pumpkin pie and are excellent for adding a fun twist to holiday gatherings.

