

Who doesn’t love digging into a steaming bowl of mac & cheese that feels like a warm hug for your taste buds? This classic dish, renowned for its creamy, velvety cheese sauce embracing perfectly cooked pasta, never fails to bring a smile to the dinner table. With every forkful, you get that dreamy cheddar punch balanced by the subtle nutty notes of Parmesan, creating a cheese blanket so smooth it practically melts in your mouth. I still remember the very first time I made homemade mac & cheese—it was like discovering treasure hidden in my own kitchen. The way the sauce clung to each elbow macaroni was downright magical, and I couldn’t help but sneak spoonfuls before it even made it to the table.
Whether you’re feeding a crowd or craving a solo comfort feast, this easy-to-follow recipe will have you whipping up dinner in no time. There’s something incredibly satisfying about going from pantry staples to a bubbling casserole in under an hour. And don’t worry if you’re new to cooking; this Beginner-friendly recipe comes together with simple steps and common ingredients. With only 15 minutes of prep, about 30 minutes of cooking, and just a brief 5-minute rest, you’ll be indulging in cheesy goodness with minimal fuss. So grab your apron, dust off that whisk, and let’s turn those everyday ingredients into the ultimate mac & cheese experience!
KEY INGREDIENTS IN MAC & CHEESE
Before we dive into the cooking process, let’s chat about the heart and soul of our recipe: the ingredients. Each element plays its own starring role, from lending structure and texture to packing in bursts of cheesy flavor. Understanding what every component contributes helps you customize and elevate this dish to your taste.
- Elbow Macaroni
These little curved tubes capture pockets of luscious cheese sauce in every bite. Their firm texture when cooked al dente provides a satisfying chew and prevents the pasta from turning mushy beneath all that creamy goodness.
- Sharp Cheddar Cheese
This bold, tangy cheese forms the backbone of our sauce, delivering that unmistakable sharp richness. It melts smoothly, creating a luxurious base that clings to every piece of pasta.
- Parmesan Cheese
Parmesan contributes a salty, umami-packed depth that balances the cheddar’s intensity. Grated finely, it melds effortlessly into the sauce, adding complexity and a subtly nutty finish.
- Milk
The fluid foundation of our cheese sauce, milk adds both creaminess and body. As it simmers and thickens, it helps create a velvety texture without overwhelming the delicate flavors of the cheeses.
- Unsalted Butter
Butter serves as the starting point for our roux, imparting a rich mouthfeel and smooth base. Using unsalted ensures you can control the overall seasoning of your sauce.
- All-Purpose Flour
Flour is whisked into melted butter to create a roux, which acts as a thickening agent. This paste ensures the sauce develops the perfect consistency, neither too runny nor too stiff.
- Salt & Black Pepper
A dash of salt and freshly ground black pepper are essential for seasoning the sauce. They highlight the natural flavors of the cheese and bring a subtle heat that enhances the overall profile.
- Paprika, Garlic Powder & Onion Powder
These spices bring aromatic warmth and depth. Paprika adds a gentle smokiness, while garlic and onion powders infuse savory notes that round out the flavor spectrum.
- Dijon Mustard (Optional)
A spoonful of Dijon mustard brightens the sauce with a mild tang and sharpness, making the cheese flavors even more vibrant and nuanced.
- Breadcrumbs (Optional)
Sprinkled on top before baking, breadcrumbs create a crisp, golden crust that contrasts beautifully with the creamy interior, adding an irresistible crunch.
HOW TO MAKE MAC & CHEESE
Let’s roll up our sleeves and transform these ingredients into a bowl of comfort gold. The process is straightforward, and by following these steps, you’ll master a silky cheese sauce and perfectly coated pasta that’s destined to become a household favorite.
1. Cook the elbow macaroni according to the package instructions until al dente, then drain it thoroughly and set it aside so it’s ready to soak up all that sauce.
2. In a large saucepan, melt the unsalted butter over medium heat. Once melted, stir in the all-purpose flour, salt, black pepper, paprika, garlic powder, and onion powder, whisking constantly to form a smooth roux without any lumps.
3. Gradually pour in the milk, whisking vigorously to incorporate it into the roux. Continue to cook and stir over medium heat until the sauce thickens and coats the back of your spoon, about 5–7 minutes.
4. Reduce the heat to low and add the shredded sharp cheddar cheese, grated Parmesan cheese, and Dijon mustard (if using). Stir gently but continuously until the cheeses are fully melted and the sauce is luxuriously smooth.
5. Add the cooked macaroni to the cheese sauce, stirring well to ensure every noodle is generously coated in that creamy goodness.
6. Preheat your oven to 350°F (175°C). If you prefer a baked version, transfer the mac & cheese into a lightly greased baking dish. Sprinkle the breadcrumbs evenly over the top, then bake for 15–20 minutes until the crust is golden brown and crisp.
7. Serve your mac & cheese hot and savor every gooey, cheesy mouthful!
SERVING SUGGESTIONS FOR MAC & CHEESE
Whether it’s a cozy family dinner or a potluck with friends, serving mac & cheese in style elevates the entire experience. The golden, gooey dish pairs beautifully with bright, acidic side elements, crisp textures, and flavorful toppings. Consider these ideas to present your creation like a seasoned home chef.
- Grated Fresh Herbs: Sprinkle a handful of chopped parsley, chives, or green onions right before serving to introduce pops of color and a refreshing bite that cuts through the creaminess.
- Crispy Bacon Bits: Cook and crumble crispy bacon over the top for smoky, savory crunch. The contrast of tender pasta and crackling bacon elevates each spoonful.
- Roasted Vegetables: Serve alongside or stir in bite-sized roasted broccoli, bell peppers, or roasted tomatoes for added texture, vitamins, and a hint of charred sweetness.
- Hot Sauce Drizzle: For those who like a kick, offer your favorite hot sauce or sriracha on the side. A few drops add zesty heat that pairs incredibly well with the velvety cheese.
HOW TO STORE MAC & CHEESE
After enjoying a generous helping, you’ll likely have leftovers begging to be stored with care. Proper storage ensures that the flavors remain intact and the texture stays satisfying, whether you’re enjoying it later in the week or reheating individual portions.
- Refrigerator Storage: Transfer cooled mac & cheese into an airtight container or cover your baking dish tightly with plastic wrap. Stored properly, it will stay fresh for up to 4 days.
- Freezer Method: For longer preservation, portion the dish into freezer-safe containers, leaving a little headspace for expansion. Freeze for up to 3 months. Thaw overnight in the refrigerator before reheating.
- Reheating Tips: When you’re ready to enjoy leftovers, reheat gently on the stovetop over low heat, stirring occasionally and adding a splash of milk if the sauce has thickened too much. Alternatively, microwave individual portions in 30-second intervals, stirring in between.
- Crisping Topping Anew: If you miss that crispy breadcrumb topping, simply transfer the reheated mac & cheese into a baking dish, sprinkle fresh breadcrumbs mixed with a pat of butter, and bake at 350°F (175°C) for 10–12 minutes until golden.
CONCLUSION
Homemade mac & cheese is the epitome of comfort food—rich, creamy, and endlessly satisfying. From the first whisk of the roux to the final golden-brown breadcrumb crust, this recipe walks you through every step with ease, making it a perfect starter project for home cooks of all levels. You’ve learned which ingredients come together to create a silky cheese sauce, how to coax the best texture out of your pipes of elbow macaroni, and even how to crisp that delightful topping. Don’t forget the serving tips, whether you’re adding fresh herbs, smoky bacon, or a drizzle of hot sauce, and the proper storage methods to keep your leftovers just as delightful days later.
Feel free to print this article and save it for your recipe collection—you’ll want to revisit these gooey flavors again and again. Below, you’ll also find a handy FAQ section to address any lingering questions you might have, from troubleshooting a lumpy sauce to choosing the right cheese blend. If you try this mac & cheese recipe, please share your experience in the comments: Did you swap in Gruyère or add jalapeños for extra heat? Any tips you discovered along the way? Your feedback and questions are always welcome, and I’m here to help you make the creamiest, cheesiest mac & cheese of your dreams!
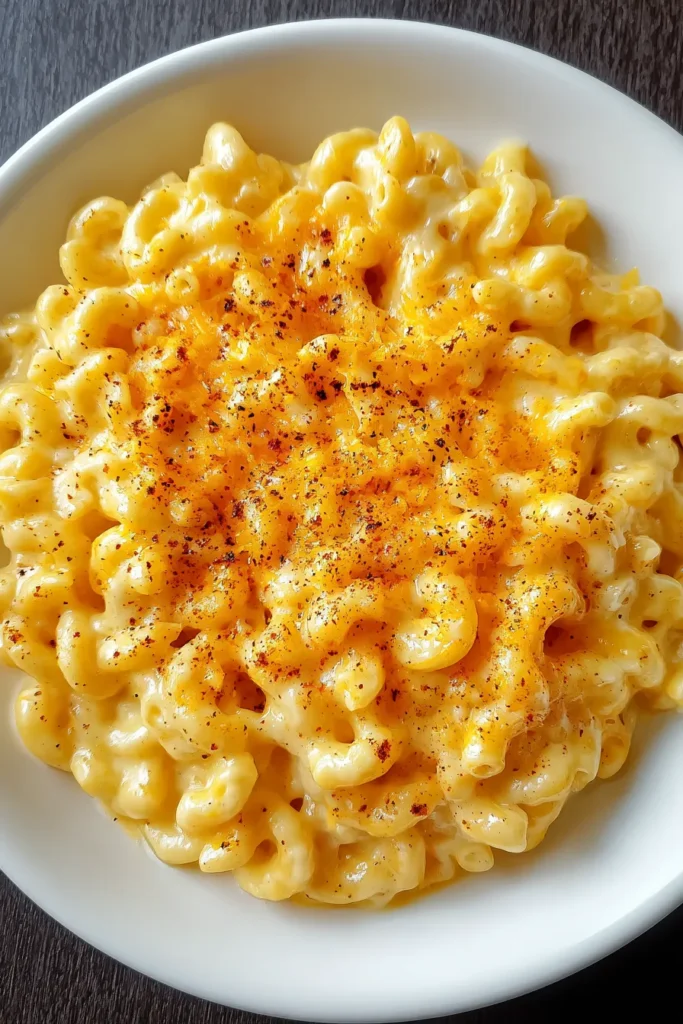

Mac & Cheese
Description
This classic Mac & Cheese features perfectly cooked pasta enveloped in a rich, velvety cheese sauce, offering a delightful blend of cheddar and Parmesan for an unforgettable taste.
Ingredients
Instructions
-
Cook the elbow macaroni according to the package instructions until al dente, then drain and set aside.
-
In a large saucepan, melt the butter over medium heat. Stir in the flour, salt, pepper, paprika, garlic powder, and onion powder to form a smooth paste (roux).
-
Gradually add the milk, whisking constantly to avoid lumps, and continue to cook and stir until the sauce thickens, about 5-7 minutes.
-
Reduce the heat to low and add in the cheddar cheese, Parmesan cheese, and Dijon mustard (if using), stirring until the cheeses are completely melted and the sauce is smooth.
-
Add the cooked macaroni to the cheese sauce and mix well to ensure all pasta is coated evenly.
-
Preheat the oven to 350°F (175°C). If you prefer a baked version, transfer the mac and cheese to a greased baking dish, top with breadcrumbs, and bake for 15-20 minutes until the top is golden brown.
-
Serve hot and enjoy your delicious homemade mac & cheese.
Note
- For a richer flavor, try using a combination of cheeses such as Gruyère, mozzarella, or fontina.
- You can add bacon bits, broccoli, or diced jalapenos for additional flavor and texture.
- If the sauce becomes too thick, you can thin it with a splash of milk.
- This recipe can be made gluten-free by using gluten-free pasta and flour.

