

Keto Stuffed Mushroom brings you warm mushroom cups brimming with creamy garlic-infused filling and crispy bacon bits. Bite into tender caps loaded with luscious cream cheese, nutty Parmesan, savory bacon, and fresh parsley baked to golden perfection. This easy beginner-friendly recipe is your new go-to low-carb appetizer or dinner treat—perfect for cozy nights or impressing friends.
Key Ingredients
To make these keto-friendly delights, you only need a handful of simple ingredients that pack big flavors.
- 12 large white mushrooms: The perfect low-carb “cup” for holding all that cheesy, bacony goodness.
- 4 ounce cream cheese: Adds rich, creamy texture and helps bind the filling.
- 1/4 cup grated Parmesan cheese: Brings a nutty, salty punch that browns beautifully.
- 2 clove garlic: Infuses that irresistible garlic aroma into every bite.
- 2 slice bacon: Crispy, smoky bits that elevate the savory profile.
- 2 tablespoon fresh parsley: Brightens the filling with a burst of herbal freshness.
- 1 tablespoon olive oil: Keeps the sautéed veggies and bacon from sticking.
- 1/4 teaspoon salt: Enhances all the flavors without overwhelming.
- 1/4 teaspoon black pepper: Adds a subtle heat and depth.
How To Make Keto Stuffed Mushroom
These stuffed mushrooms come together in just a few easy steps, blending sautéed stem bits, crispy bacon, and creamy cheeses before baking to golden perfection. The process highlights simple techniques—preheating, sautéing, and folding—to deliver maximum flavor with minimal fuss.
1. Preheat oven to 375°F and line a baking sheet with parchment paper to ensure even baking and easy cleanup.
2. Clean mushrooms and remove stems, reserving the caps for stuffing. Pat the caps dry to remove extra moisture.
3. Chop the mushroom stems and bacon finely so they blend seamlessly into the creamy filling.
4. Heat olive oil in a skillet over medium heat, add chopped stems, garlic, and bacon, and cook until the mixture is tender and fragrant.
5. Stir in cream cheese, Parmesan, salt, and pepper, cooking until well combined; remove from heat and fold in fresh parsley for a pop of color.
6. Spoon the filling into mushroom caps and place them on the prepared baking sheet, spacing evenly.
7. Bake for 15 minutes until mushrooms are tender and the tops turn golden and bubbly.
8. Let cool slightly before serving warm to allow the filling to set just enough.
Serving Suggestions
These mushrooms are so versatile—they’re just as happy on a dinner plate as they are on your next party platter. Here are four fun ways to serve them:
- Serve on a charcuterie board alongside cured meats, olives, and cheeses for an elegant appetizer spread.
- Garnish with extra fresh parsley and a delicate drizzle of olive oil for a vibrant finish.
- Pair with a crisp green salad tossed in lemon vinaigrette to balance the creaminess.
- Offer a side of garlic aioli or low-carb dipping sauce for an extra indulgent touch.
Tips For Perfect Keto Stuffed Mushroom
I’ve learned a few tricks over the years to keep these mushrooms from falling flat—literally—and to make them taste like they came from a gourmet kitchen instead of your home oven.
- Ensure mushrooms are patted dry to prevent sogginess.
- Use full fat cream cheese for best keto results.
- For extra flavor add a pinch of smoked paprika.
- Store leftovers in an airtight container in the refrigerator for up to 3 days.
How To Store It
Keeping these stuffed mushrooms fresh is easy, whether you’re planning ahead or saving leftovers for tomorrow’s snack. Proper storage helps preserve texture and flavor so every bite is as good as the first.
- Refrigerate in an airtight container: Let mushrooms cool completely, then layer them in a sealed container to keep them fresh for up to 3 days.
- Separate layers with parchment paper: Prevent the tops from sticking together by placing parchment between layers.
- Freeze for longer storage: After baking and cooling, freeze in a single layer on a sheet, then transfer to a freezer-safe bag for up to 1 month.
- Thaw overnight in the fridge: Bring frozen mushrooms back to life by thawing slowly before reheating.
Frequently Asked Questions
Here are answers to your top burning questions:
- Q: How long does it take to prepare and cook the Keto Stuffed Mushrooms?
A: Total time is about 30 minutes. It takes roughly 10 minutes to clean the mushrooms, chop stems and bacon, and mix the filling, plus 15 minutes baking at 375°F, and 5 minutes to let them cool slightly before serving.
- Q: What’s the best way to prevent the mushrooms from becoming soggy?
A: Pat the cleaned mushroom caps dry with a paper towel before filling to remove excess moisture. Removing and cooking the chopped stems in a hot skillet also helps evaporate extra liquid before combining with the cheese. Ensuring the oven is fully preheated and baking on parchment paper allows the moisture to escape, keeping the bottoms crisp.
- Q: Can I make these mushrooms ahead of time and reheat them?
A: Yes. Assemble and bake the stuffed mushrooms, then let them cool completely. Store in an airtight container in the refrigerator for up to 3 days. To reheat, place them on a baking sheet in a 350°F oven for 8–10 minutes until warmed through and the tops turn golden again.
- Q: Are there any suitable substitutions for the cream cheese or Parmesan cheese?
A: For a dairy-free version, use a full-fat vegan cream cheese alternative and a plant-based grated cheese that melts well. If you’d like more tang, swap Parmesan for Pecorino Romano. Just ensure any substitutes are low-carb to keep the recipe keto-friendly.
- Q: How can I customize the flavor or add extra ingredients?
A: Stir in a pinch of smoked paprika or chili flakes with the filling for a smoky, spicy kick. You can also add finely chopped spinach or sun-dried tomatoes (in oil, drained) when folding in the parsley. For a cheesier top, sprinkle a little extra shredded mozzarella or cheddar before baking.
- Q: What is the ideal internal temperature or visual cue to know when they’re done baking?
A: The mushrooms are done when the filling is bubbling lightly and the tops begin to turn golden, usually about 15 minutes. The mushroom caps should feel tender when pierced with a fork but still hold their shape without collapsing.
- Q: How should I store and reheat leftovers for best texture?
A: Refrigerate leftovers in an airtight container for up to 3 days. To preserve texture, reheat in a preheated 350°F oven on a wire rack over a baking sheet for about 10 minutes. This method allows steam to escape and prevents sogginess better than microwaving.
What Makes This Special
These Keto Stuffed Mushrooms are basically flavor rockets—combining creamy cheese, smoky bacon, and earthy mushrooms in one bite. They’re shockingly simple, beginner-friendly, and endlessly customizable, so you can add your favorite spices or extras. Plus, they fit right into your low-carb lifestyle without skimping on indulgence. Feel free to print this recipe and save it for game nights, dinner parties, or cozy weeknight dinners. Got questions, tips, or foodie tales to share? Drop a comment and let me know how your muffin-cap masterpieces turned out!
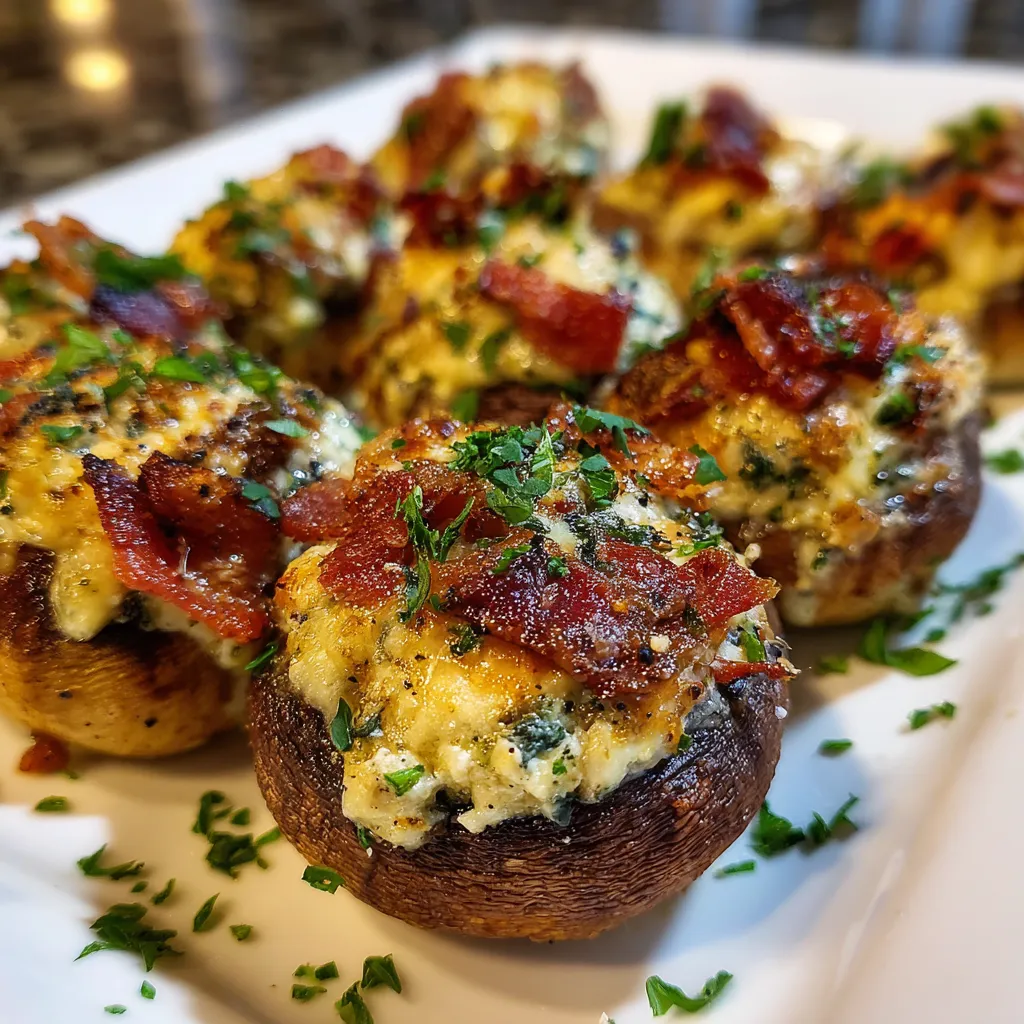

Keto Stuffed Mushroom
Description
Bite into tender mushroom caps packed with luscious cream cheese, nutty Parmesan, savory bacon, and fresh parsley, baked until golden and irresistible.
Ingredients
Instructions
-
Preheat oven to 375°F and line a baking sheet with parchment paper.
-
Clean mushrooms and remove stems, reserving the caps.
-
Chop the mushroom stems and bacon finely.
-
Heat olive oil in a skillet over medium heat, add chopped stems, garlic, and bacon, and cook until tender.
-
Stir in cream cheese, Parmesan, salt, and pepper, cooking until well combined, then remove from heat and fold in parsley.
-
Spoon the filling into mushroom caps and place them on the prepared baking sheet.
-
Bake for 15 minutes until mushrooms are tender and the tops are golden.
-
Let cool slightly before serving warm.
Note
- Ensure mushrooms are patted dry to prevent sogginess.
- Use full fat cream cheese for best keto results.
- For extra flavor add a pinch of smoked paprika.
- Store leftovers in an airtight container in the refrigerator for up to 3 days.

