

When summer hits, nothing beats the cool delight of an Ice Cream Sandwich Cake. This layered masterpiece takes classic vanilla ice cream sandwiches and transforms them into an unforgettable dessert that’s both decadent and easy to assemble. Each slice unveils a chorus of flavors: creamy whipped topping, rich chocolate fudge, sweet caramel, and crunchy candy pieces. As you cut through those chilly layers, the soft squish of whipped cream gives way to the satisfying snap of melted chocolate chips and crushed bars. It’s a sensory rollercoaster where temperature and texture dance together, delivering pure bliss in every bite.
I still remember the first time I made this cake for a backyard barbecue. The sun was high, laughter filled the air, and my friends gathered around as I unveiled the frosty creation. Their eyes lit up when they saw the mosaic of toppings glistening under the summer sun. We dug in with spoons and spatulas, marveling at how such simple ingredients could feel so indulgent. Whether you’re feeding a crowd of twelve or sneaking a slice for yourself at midnight, this dessert is a surefire way to make memories—and maybe even start a delicious tradition.
KEY INGREDIENTS IN ICE CREAM SANDWICH CAKE
Before diving into the assembly, let’s highlight the star ingredients that bring this cake to life. Each component plays a specific role, from providing the base to adding that final flourish of flavor and texture.
- Vanilla Ice Cream Sandwiches
These nostalgic treats form the foundation of the cake. Their soft wafer exterior and creamy core create sturdy layers that hold the dessert together while lending a classic vanilla flavor.
- Whipped Topping
Light and airy, the whipped topping creates a fluffy barrier between ice cream layers. It adds a silky mouthfeel and helps the sauces and toppings adhere without sinking through.
- Chocolate Fudge Sauce
Drizzled generously, this sauce offers deep cocoa notes and a gooey texture that contrasts beautifully with the cold ice cream sandwiches.
- Caramel Sauce
Smooth and buttery, the caramel sauce introduces a sweet, slightly salty element. It adds richness and a glossy finish to every layer.
- Mini Chocolate Chips
These tiny morsels bring bursts of chocolate crunch throughout the cake. They punctuate each bite with just the right amount of texture.
- Crushed Candy or Chocolate Bars
A mix like Oreo crumbs, Snickers chunks, or Reese’s Pieces adds a playful crunch and additional flavor complexity. Choose your favorite for a personalized twist.
HOW TO MAKE ICE CREAM SANDWICH CAKE
Bringing this dessert together is as simple as layering your prepared ingredients. With minimal hands-on time and no baking required, it’s perfect for beginners and anyone who craves a showstopper without the fuss.
1. Begin by organizing your workspace and ensuring that all ingredients are ready and accessible. Having everything within arm’s reach will help you work swiftly before the ice cream sandwiches start to soften.
2. In a 9×13 inch baking dish, arrange a layer of 12 ice cream sandwiches. Make sure they cover the entire bottom of the dish in a neat grid so each slice has a stable base.
3. Spread half of the whipped topping evenly over the layer of ice cream sandwiches. Use a spatula to create a smooth, uniform layer that reaches all edges.
4. Drizzle half of the chocolate fudge sauce and half of the caramel sauce over the whipped topping. Let the sauces swirl together in ribbons for that irresistible marbled look.
5. Sprinkle half of the mini chocolate chips and half of the crushed candy or chocolate bars over the sauces. This adds texture and extra bursts of flavor in every bite.
6. Add another layer of the remaining 12 ice cream sandwiches on top of the previous layers. Press gently to ensure good contact but avoid squishing them too much.
7. Spread the rest of the whipped topping over this new layer of ice cream sandwiches, creating a smooth canvas for your final decorations.
8. Once again, drizzle the remaining chocolate fudge sauce and caramel sauce over the whipped topping in even streams.
9. Finish by sprinkling the remaining mini chocolate chips and crushed candy or chocolate bars over the top for a festive, crunchy crown.
10. Cover the dish with plastic wrap and freeze the cake for at least 2 hours, or until it is firm and set.
11. Remove from the freezer, slice into pieces, and serve immediately to maintain that perfect chilled texture.
SERVING SUGGESTIONS FOR ICE CREAM SANDWICH CAKE
When your cake has set and you’re ready to share, presentation and accompaniments can elevate it even further. Each serving suggestion below will help you pair flavors, textures, and visuals that complement the cake’s playful layers.
- Garnish with Fresh Berries
Top each slice with a few raspberries or strawberries. The bright fruit adds a pop of color and a tangy contrast to the rich sauces, making the dessert feel lighter and more balanced.
- Drizzle Extra Sauce Tableside
Serve additional chocolate fudge or caramel sauce in small pitchers. Let guests customize their portions, adding an interactive element and ensuring each person gets their preferred sweetness level.
- Pair with a Mint Sprig
A single sprig of fresh mint tucked into the side of each slice adds an aromatic lift. The cool herbaceous note accentuates the vanilla and chocolate flavors and makes the dessert look magazine-worthy.
- Add a Scoop of Sorbet
For a double-chill effect, accompany each slice with a small scoop of lemon or raspberry sorbet. The fruity sorbet cleanses the palate and provides an extra layer of refreshing contrast.
HOW TO STORE ICE CREAM SANDWICH CAKE
Proper storage ensures your cake stays fresh, flavorful, and ready for another round of indulgence. Because this dessert relies on frozen layers, keeping it at the right temperature is key to maintaining its texture and taste.
- Store the cake in the deepest compartment of your freezer where temperatures are most consistent. Avoid doors or shelves that fluctuate with frequent openings.
- Keep the dessert covered with a layer of plastic wrap directly on the surface of the whipped topping. This prevents ice crystals from forming and keeps the layers silky smooth.
- If you need to transport or share, slip the baking dish into an insulated cooler with ice packs. This method maintains ideal cold temperatures until you’re ready to serve.
- For individual servings, wrap each slice in wax paper and place in a resealable freezer bag. This lets you defrost just what you need without exposing the entire cake to warm air.
CONCLUSION
This Ice Cream Sandwich Cake combines simplicity and showmanship in a single dessert. We’ve walked through each ingredient, from the humble vanilla ice cream sandwiches to the decadent caramel and fudge sauces, explaining how they work together to build layers of taste and texture. The detailed steps guide you through setting up your workspace, layering and decorating, and the importance of a thorough freeze time to achieve that perfect slice. Serving suggestions encourage creativity, from fresh fruit accents to interactive sauce drizzles, and storage tips help preserve that just-made quality until your next craving strikes.
Feel free to print this article and save it for future summer barbecues, birthday parties, or spontaneous dessert cravings. You’ll also find a FAQ below to answer common questions and troubleshoot any concerns. If you try this recipe or need help along the way, I’d love to hear your thoughts—whether it’s a tweak you made or a question about freezing times. Comments, questions, or feedback are always welcome, so don’t hesitate to share your experiences and let me know how your Ice Cream Sandwich Cake turns out!
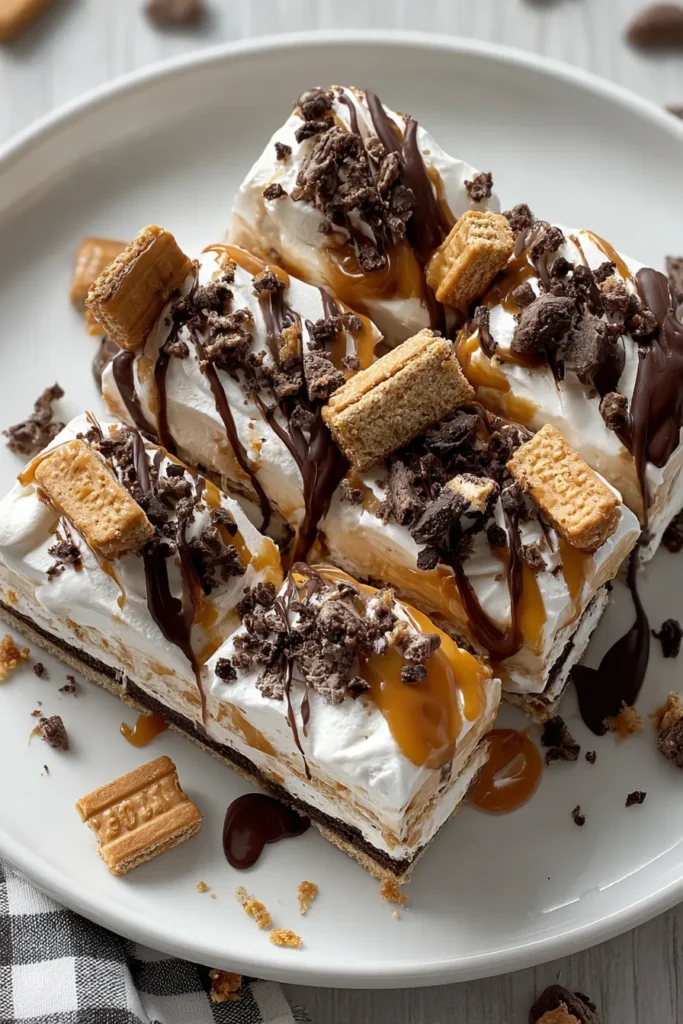

Ice Cream Sandwich Cake
Description
This ice cream sandwich cake layers rich chocolate fudge, creamy caramel, and crunchy toppings, creating a refreshing treat perfect for gatherings and parties. It's a chill dessert you won't forget!
Ingredients
Instructions
-
Begin by organizing your workspace and ensuring that all ingredients are ready and accessible.
-
In a 9x13 inch baking dish, arrange a layer of 12 ice cream sandwiches. Make sure they cover the entire bottom of the dish.
-
Spread half of the whipped topping evenly over the layer of ice cream sandwiches.
-
Drizzle half of the chocolate fudge sauce and half of the caramel sauce over the whipped topping.
-
Sprinkle half of the mini chocolate chips and half of the crushed candy or chocolate bars over the sauces.
-
Add another layer of the remaining 12 ice cream sandwiches on top of the previous layers.
-
Spread the rest of the whipped topping over this new layer of ice cream sandwiches.
-
Once again, drizzle the remaining chocolate fudge sauce and caramel sauce over the whipped topping.
-
Finish by sprinkling the remaining mini chocolate chips and crushed candy or chocolate bars over the top.
-
Cover the dish with plastic wrap and freeze the cake for at least 2 hours, or until it is firm and set.
-
Remove from the freezer, slice into pieces, and serve immediately.
Note
- Feel free to customize the cake by using different flavors of ice cream sandwiches.
- For a fruitier version, add slices of banana or strawberries between the layers.
- To make it even more decadent, consider adding a layer of chocolate or peanut butter spread.
- This cake is perfect for summer gatherings and celebrations.
- If you like a little crunch, consider adding some nuts like pecans or almonds in the layers.

