

Nothing beats a chilly evening like sinking your teeth into warm cookies oozing chocolate and marshmallow. Last winter, on a snowy evening, I whipped up a batch of these Hot Coco Cookies for friends, and the cozy combination became an instant hit. These soft, chewy treats bring that same snug feeling—in every bite you’ll find rich cocoa-infused dough dotted with melty chips and pillowy marshmallows. Quick and beginner-friendly, they’re perfect for festive bake sessions or an indulgent night in.
Key Ingredients
Gathering your ingredients is half the fun. Let’s check what you’ll need for these meltingly soft Hot Coco Cookies.
- 1 cup unsalted butter, softened: creamy fat that helps create a rich, tender base and ensures a soft texture.
- 1 cup granulated sugar: adds sweetness and helps with browning and spread.
- 1 cup brown sugar, packed: contributes moisture and a hint of caramel flavor for chewiness.
- 2 large eggs: provide structure and lift, keeping the cookies light.
- 2 teaspoons vanilla extract: enhances the overall sweetness with aromatic depth.
- 2 cups all-purpose flour: forms the structure and gives cookies their perfect chew.
- 1/2 cup cocoa powder: infuses the dough with deep chocolate flavor.
- 1 teaspoon baking soda: leavens the dough for proper rise and texture.
- 1/2 teaspoon salt: balances sweetness and brings out the cocoa’s richness.
- 1 cup chocolate chips (semi-sweet or milk chocolate): melt into gooey pockets of chocolate throughout each cookie.
- 1/2 cup mini marshmallows: add sweet, chewy bursts that mimic classic hot cocoa.
- Optional: 1/2 teaspoon peppermint extract: gives a cool, minty twist perfect for the holidays.
How To Make Hot Coco Cookies
Ready to transform simple pantry staples into irresistibly cozy cookies? This recipe walks you through each step—from preparing your oven to folding in those gooey mix-ins—so you end up with soft edges, slightly underdone centers, and marshmallow-studded bites that will have everyone reaching for seconds.
1. Preheat your oven to 350°F (175°C). Line a baking sheet with parchment paper or a silicone baking mat to prevent sticking and ensure even baking.
2. In a large bowl, cream together the softened butter, granulated sugar, and brown sugar until the mixture is light and fluffy, about 2–3 minutes with an electric mixer.
3. Add the eggs one at a time, mixing well after each addition to maintain an even texture. Stir in the vanilla extract and optional peppermint extract until fully combined.
4. In a separate bowl, sift together the all-purpose flour, cocoa powder, baking soda, and salt. Gradually fold this dry mixture into the wet ingredients using a spatula, stirring until just combined—overmixing can lead to tougher cookies.
5. Fold in the chocolate chips and mini marshmallows gently, ensuring they’re evenly distributed without deflating the marshmallows.
6. Using a cookie scoop or tablespoon, drop rounded balls of dough onto the prepared baking sheet, leaving about 2 inches between each to allow for spreading.
7. Bake for 10–12 minutes, or until the edges are set and the centers still look slightly soft. The cookies will firm up as they cool.
8. Remove from the oven and let the cookies cool on the baking sheet for 5 minutes before transferring them to a wire rack to cool completely.
Serving Suggestions
These Hot Coco Cookies are as versatile as they are delicious. Whether you’re hosting a festive gathering or craving a solo treat, these ideas will elevate your cookie experience.
- Place cookies on a platter alongside a mug of hot cocoa topped with whipped cream for an ultra-cozy combo.
- Serve warm with a tall glass of cold milk for a classic pairing that balances the rich chocolate.
- Create an ice cream sandwich by gently pressing a scoop of vanilla or peppermint ice cream between two cookies for a decadent dessert.
- Arrange cookies in a decorative tin with crushed candy canes sprinkled on top for a festive look and extra minty pop.
Tips For Perfect Hot Coco Cookies
Every baker knows that small tweaks can make a big difference in cookie success. In this section, I’ll share a handful of simple yet impactful tips that help ensure your Hot Coco Cookies come out perfect every time—whether you’re aiming for maximum gooeyness or a sturdier treat for gift boxes. From the ideal butter temperature to chocolate chip swaps, these pointers will have you feeling like a pro and boost your confidence in the kitchen.
- These cookies are perfect for holiday gatherings or cozy nights in, bringing everyone together over a warm, chocolaty treat.
- You can customize the chocolate chips by using dark chocolate, milk, or white chocolate varieties for different levels of sweetness.
- If you love a stronger cocoa flavor, increase the cocoa powder to 3/4 cup to intensify the chocolate taste.
- For a decorative touch, sprinkle some crushed candy canes on top before baking if you’re using the optional peppermint extract.
- Store the cookies in an airtight container to keep them fresh for up to a week, preserving their soft, chewy texture.
How To Store It
Proper storage is key to preserving that fresh-baked taste and texture of your Hot Coco Cookies. Whether you want to enjoy them over the next week or freeze a batch for later, these methods will keep them tasting as good as the day they came out of the oven.
- Store at room temperature in an airtight container for up to one week; adding a slice of bread inside helps retain moisture and chewiness.
- Refrigeration: Place cooled cookies in a sealed container for up to two weeks; let them come to room temperature before serving to soften.
- Freezing cookie dough: Scoop dough balls onto a tray and freeze solid, then transfer to a freezer bag for up to three months; bake from frozen, adding 1–2 minutes to the time.
- Freezing baked cookies: Arrange cookies in a single layer in a freezer-safe bag or container, separating layers with parchment paper, and freeze for up to three months; thaw at room temperature before enjoying.
Frequently Asked Questions
Got questions? I’ve rounded up the most common queries to help you troubleshoot and get the best results.
- How long does it take to prepare and bake these Hot Coco Cookies?
You’ll spend about 10–15 minutes creaming the butter and sugars, mixing in the eggs and dry ingredients, and scooping the dough. Then bake for 10–12 minutes and let the cookies rest on the sheet for 5 minutes before transferring to a rack—roughly 30–35 minutes total from start to finish.
- Can I make the dough ahead of time or freeze it?
Yes. You can refrigerate the dough covered for up to 24 hours—just let it sit at room temperature for 10 minutes before scooping. To freeze, portion the dough into balls on a tray, freeze until solid, then store in a freezer bag for up to 3 months. Bake from frozen, adding 1–2 extra minutes to the baking time.
- How do I prevent the mini marshmallows from burning or disappearing into the dough?
Gently fold marshmallows in last to avoid deflating. If you want them more visible, press a few extra marshmallows onto each cookie halfway through baking or add them immediately after the cookies come out of the oven so they melt slightly but don’t burn.
- Why did my cookies spread too much or stay too thick?
Excess spreading usually means the butter was too soft or the dough room-temp too long—chill the dough 10–15 minutes before baking and measure flour by spooning into the cup and leveling off. Cookies that stay too thick may need a bit more creaming time to aerate the butter and sugar, or slightly less flour.
- How can I customize the chocolate flavor or add mix-ins?
Swap semi-sweet chips for dark, milk, or white chocolate chips—or even chunks. Stir in chopped nuts or dried cherries for texture. For a minty twist, add ½ teaspoon peppermint extract and sprinkle crushed candy canes on top before baking.
- Can I make these cookies gluten-free or dairy-free?
For gluten-free, use a one-to-one gluten-free flour blend with xanthan gum and let the dough rest 10 minutes before baking. For dairy-free, replace butter with a vegan stick butter and choose dairy-free chocolate chips; cookies may spread slightly differently but remain delicious.
- What’s the best way to store the cookies to keep them soft and fresh?
Once fully cooled, place cookies in an airtight container at room temperature for up to one week. For added chewiness, tuck a slice of white bread in the container. You can also freeze baked cookies in freezer-safe bags for up to 3 months—thaw at room temperature before serving.
What Makes This Special
These Hot Coco Cookies combine soft, cocoa-packed dough, melty chocolate chips, and pillowy marshmallows to create dessert magic that warms both belly and heart. The balance of rich cocoa flavor, chewy texture, and optional peppermint twist makes every bite irresistibly nostalgic yet exciting. Perfect for beginners, this straightforward recipe delivers crowd-pleasing results whether you’re gifting holiday treats, gathering around a fire, or simply satisfying a sweet craving. Feel free to print and stash this recipe for later bake days, and let me know how your batch turned out! I’d love to hear your feedback, answer questions, or celebrate your cookie triumphs with you in the comments.
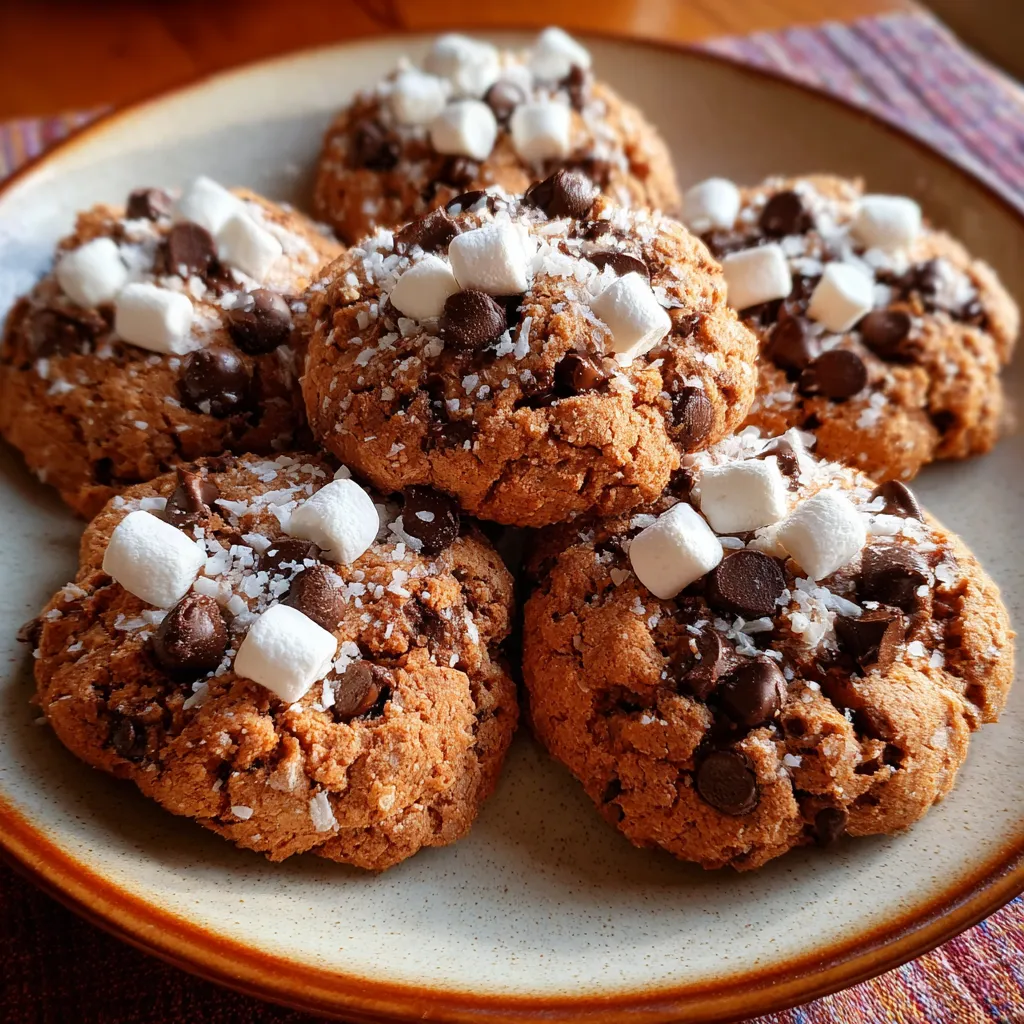

Hot Coco Cookies
Description
Rich cocoa flavor meets melty chocolate chips and fluffy marshmallows in every warm bite, leaving you with a tender, gooey cookie that melts on the tongue and warms the soul.
Ingredients
Instructions
-
Preheat your oven to 350°F (175°C). Line a baking sheet with parchment paper or a silicone baking mat.
-
In a large bowl, cream together the softened butter, granulated sugar, and brown sugar until the mixture is light and fluffy, about 2-3 minutes using an electric mixer.
-
Add the eggs, one at a time, mixing well after each addition. Then, add in the vanilla extract and optional peppermint extract for extra flavor. Mix until combined.
-
In a separate bowl, sift together the all-purpose flour, cocoa powder, baking soda, and salt. Gradually add this dry mixture to the wet mixture, stirring until just combined. Be careful not to overmix.
-
Fold in the chocolate chips and mini marshmallows, ensuring they are evenly distributed throughout the dough.
-
Using a cookie scoop or tablespoon, drop rounded balls of dough onto the prepared baking sheet, leaving about 2 inches of space between each cookie to allow for spreading.
-
Bake in the preheated oven for 10-12 minutes, or until the edges are set, and the centers still look slightly soft.
-
Remove from the oven and let the cookies cool on the baking sheet for about 5 minutes before transferring them to a wire rack to cool completely.
Note
- These cookies are perfect for holiday gatherings or cozy nights in.
- You can customize the chocolate chips by using dark chocolate or white chocolate for variety.
- If you love a stronger cocoa flavor, increase the cocoa powder to 3/4 cup.
- For a decorative touch, sprinkle some crushed candy canes on top of the cookies before baking if you're using peppermint extract.
- Store the cookies in an airtight container to keep them fresh for up to a week.

