

There’s something truly magical about stepping into your kitchen with a simple list of pantry staples and ending up with something warm, golden, and irresistibly soft. These homemade soft pretzels are the ultimate salty treats for any snack lover, offering that perfect balance between chew and crust in every bite. They’re beginner friendly, so even if you’re new to baking or a seasoned home cook like me, you’ll find the process both approachable and rewarding. With just 30 minutes of prep, 10 minutes of rest, and a quick 15-minute bake, you’ll have fresh pretzels in hand before you know it. Warm, chewy, and soft pretzels fresh from your oven are a true delight for any snack lover, promising that golden-brown exterior and pillowlike interior. Each one clocks in at around 120 calories, making them a guilt-free addition to your appetizer spread or an everyday treat. The coarse sea salt sprinkled on top gives that signature snap, and the possibilities for dipping—from tangy mustard to creamy cheese sauce—are endless.
These little twists of goodness are perfect for serving as an appetizer at casual get-togethers, movie nights, or even a mid-afternoon pick-me-up. Whether you’re treating your family to a weekend brunch or surprising friends at a game-day gathering, this easy recipe ensures everyone gets a taste of freshly baked happiness in under an hour. I love how the dough comes together with nothing more than warm water, yeast, a sprinkle of sugar, a pinch of salt, and all-purpose flour. And that brief baking soda bath in boiling water? It’s the secret that gives each pretzel its distinctive chewy bite and mahogany hue. Trust me: once you master this homemade approach to soft pretzels, you’ll be hooked.
I can’t help but grin when I think back to the first time I rolled out pretzel dough as a teenager. I remember it was late afternoon, the sun was filtering through the kitchen window, and my grandma was guiding me through each twist and fold. There was flour everywhere—on the counter, on my sleeves, even in my hair—but that only made the moment sweeter. As I learned to shape the dough into perfect U’s, the promise of salty crunch and soft, tender centers fueled my excitement. When those pretzels emerged from the oven—golden, steaming, and sprinkled with coarse salt—the whole house felt wrapped in comfort. That memory has inspired countless variations: from cinnamon sugar for a sweet spin to cheesy twists for a savory upgrade.
Over the years, this recipe has become my go-to for gatherings because it’s deceptively simple yet endlessly customizable. I’ve swapped in whole wheat flour for extra fiber, experimented with different salts, and even tried a herb-infused baking soda bath for an aromatic twist. Every batch feels like a little adventure in baking, and I love how everyone can pitch in rolling ropes and shaping loops. If you’re on the hunt for a snack that’s both interactive and comforting—one that fills your kitchen with warmth and brings instant smiles—this is it. Dive in, roll out, and savor each bite of these soft pretzels that turn kitchen time into memories.
KEY INGREDIENTS IN HOMEMADE SOFT PRETZELS
Every memorable batch of homemade soft pretzels starts with a handful of simple ingredients that work together to create that signature chew, shine, and golden crust. Here’s a closer look at what you’ll need and why each component is so essential to this easy recipe.
- Warm Water
Gently heated to the ideal temperature, warm water activates the yeast without killing it, ensuring a light and airy dough.
- Active Dry or Instant Yeast
This leavening agent feeds on the sugar to produce carbon dioxide, helping the dough rise and develop a soft, fluffy texture.
- Salt
Essential for flavor balance and controlling yeast activity, salt also strengthens gluten strands for better dough structure.
- Granulated Sugar
A pinch of sweetness gives the yeast a quick energy source while helping the crust brown beautifully during baking.
- All-Purpose Flour
The backbone of any good pretzel, this versatile flour provides the gluten network needed to achieve that satisfying chew.
- Baking Soda
Added to the hot water bath, baking soda raises the surface pH, creating the distinctive brown, glossy crust of a classic soft pretzel.
- Egg
Brushed on before baking, beaten egg adds a rich sheen and improves color, giving each pretzel a bakery-worthy finish.
- Coarse Sea Salt
Sprinkled on top just before baking, these crunchy crystals deliver bursts of salty flavor in every twist.
HOW TO MAKE HOMEMADE SOFT PRETZELS
Now that your pantry is stocked and your ingredients are ready, let’s walk through the step-by-step process of making these warm, chewy soft pretzels. From activating the yeast to achieving that perfect golden crust, each step brings you closer to a batch of irresistible snacks.
1. Preheat your oven to 450°F (232°C) and line two baking sheets with parchment paper to prevent sticking and ensure even browning.
2. In a large mixing bowl, dissolve the yeast in warm water. Let it sit for about 1 minute until the surface turns slightly foamy, indicating active yeast.
3. Add the salt and sugar, then gradually blend in the flour one cup at a time. Knead the dough for 3–5 minutes until it becomes smooth and elastic.
4. Shape the dough into a ball, place it in a lightly greased bowl, and cover with a clean towel. Allow it to rest for 10 minutes to relax the gluten.
5. Divide the dough into eight equal pieces. Roll each piece into a 20–22 inch rope, dusting lightly with flour if needed to prevent sticking.
6. Form each rope into a pretzel by first creating a U-shape, crossing the ends, twisting them once or twice, and folding them down toward the base of the U.
7. In a large saucepan, bring 10 cups of water and the baking soda to a rolling boil. Carefully dunk each pretzel in the solution for about 30 seconds; this step creates the chewy crust.
8. Transfer the boiled pretzels to the prepared baking sheets. Brush each one with the beaten egg and immediately sprinkle with coarse sea salt.
9. Bake for 12–15 minutes, or until the pretzels turn a deep golden brown and develop that characteristic shine.
10. Remove from the oven and let the pretzels cool on a wire rack. This prevents sogginess and helps maintain their perfect texture.
SERVING SUGGESTIONS FOR HOMEMADE SOFT PRETZELS
Serving freshly baked soft pretzels is as much about the company you keep as the flavors you combine. These golden brown twists taste incredible straight from the oven, but pairing them with the right dips and accompaniments elevates the experience into something truly memorable. Whether you’re hosting a relaxed movie night, a game-day gathering, or simply craving a cozy snack on a rainy afternoon, the way you present and season your soft pretzels can turn a simple recipe into a signature treat. When guests arrive, arrange your pretzels on a large wooden board or a slate platter, scattering dipping bowls around for easy access. Garnish the board with fresh herbs, colorful napkins, or rustic baskets to add visual appeal. Don’t forget to chill a pitcher of your preferred beverage—beer, iced tea, or sparkling lemonade—to complement the rich, salty flavor. You can even turn this into a playful DIY station, encouraging guests to assemble their own pretzel plates with toppings like melted garlic butter or tangy relish. As an enthusiastic home cook and host, I find that thoughtful presentation and a variety of dippers make all the difference.
- Classic Mustard Dip
Whisk together yellow mustard, a splash of vinegar, and a pinch of sugar for a tangy, smooth accompaniment.
- Creamy Cheese Sauce
Melt cheddar and Swiss cheeses with a little milk and butter, stirring until velvety, then serve warm in a dipping bowl.
- Cinnamon Sugar Twist
Brush baked pretzels with melted butter, then generously dust with a mixture of granulated sugar and ground cinnamon for a sweet finish.
- Savory Herb Butter
Combine softened butter with minced garlic, fresh parsley, and a squeeze of lemon juice; serve alongside hot pretzels for a fragrant spread.
HOW TO STORE HOMEMADE SOFT PRETZELS
Once you’ve savored every last bite of these soft pretzels, it’s natural to wonder how to keep any leftovers fresh and flavorful for later snacking. Pretzels are best enjoyed the day they’re baked, but a few smart storage techniques can extend their life without sacrificing that signature chew. Whether you plan to enjoy them within a day or freeze batches for future cravings, I’ve outlined some tried-and-true methods to maintain softness, prevent sogginess, and ensure that each reheated pretzel tastes almost as good as fresh from the oven. From airtight wraps at room temperature to freezer-friendly options that let you bake on demand, you’ll find a method that suits your kitchen habits and snack schedule. No one wants a stale pretzel, and with these simple tips, you can keep every batch tasting like it was just pulled from the oven.
- Room-Temperature Storage
Place cooled pretzels in an airtight container or resealable bag. Store at room temperature for up to 2 days, avoiding direct sunlight or heat.
- Refrigeration
Wrap pretzels individually in plastic wrap or foil and store in an airtight container in the fridge. Enjoy within 4–5 days for best texture.
- Freezing Unbaked Pretzels
After shaping and before the baking soda bath, freeze the raw pretzels on a parchment-lined tray. Once solid, transfer to a freezer bag; bake directly from frozen, adding a couple of extra minutes to the baking time.
- Freezing Baked Pretzels
Let baked pretzels cool completely, then wrap each in plastic wrap and place in a freezer-safe bag. Reheat in a 350°F (175°C) oven for 5–7 minutes to restore softness.
CONCLUSION
As you’ve seen, making these homemade soft pretzels brings the warmth and satisfaction of a cozy bakery right into your kitchen. Beginning with straightforward ingredients—warm water, active yeast, a touch of sugar and salt, and all-purpose flour—and following simple techniques like kneading until the dough is smooth and scoring a quick baking soda bath for that signature crust, you’re guided step by step toward the perfect golden-brown twist. I love how each pretzel emerges with a pillowy interior and that characteristic salty crunch, ideal for dipping or enjoying on its own. With just a 30-minute prep, a 10-minute rest period, and a 15-minute bake, this recipe fits seamlessly into busy schedules, all while delivering 120-calorie treats that feel absolutely indulgent. Whether you’ve arranged them as appetizers with tangy mustard or transformed leftovers into sweet cinnamon sugar delights, they showcase the endless possibilities of homemade baking. This guide has covered everything—from key ingredients to serving suggestions and storage strategies—so you’re fully equipped to whip up a batch of irresistible soft pretzels whenever the craving strikes.
Before you head off to roll dough, remember you can print this article and keep it handy in your recipe collection for times when you want to share freshly baked pretzels with friends, family, or simply treat yourself. Don’t forget that beneath this guide lies a FAQ section designed to address any questions you might have about dough consistency, shaping options, or flavor variations. I’m genuinely excited to hear about your baking adventures, so if you try out this easy recipe or experiment with your own twists, please leave a comment below. Your insights, photos, and feedback help our community grow stronger and more inspired. Furthermore, storing and reheating leftover pretzels is a breeze once you master the techniques outlined above, ensuring you can enjoy that same fresh-baked taste throughout the week or even weeks later when you freeze batches in advance. From airtight containers at room temperature to freezer-friendly methods, these strategies keep each bite as delightful as Day One. Baking is best when shared, learned, and celebrated together—happy twisting!
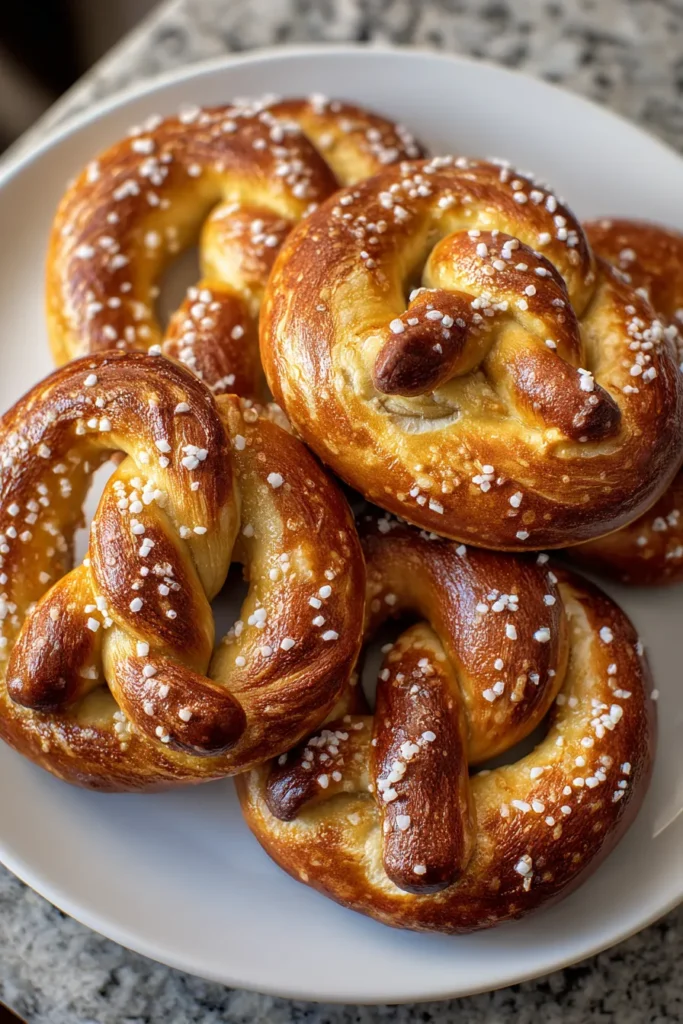

Homemade Soft Pretzels
Description
Experience the joy of soft pretzels that are golden brown, sprinkled with coarse salt, and perfect for dipping. These homemade treats are a fun twist on snacking!
Ingredients
Instructions
-
Preheat your oven to 450°F (232°C). Line two baking sheets with parchment paper.
-
Dissolve the yeast in warm water in a large mixing bowl. Let it sit for about 1 minute until slightly foamy.
-
Add the salt and sugar, then blend in the flour 1 cup at a time. Knead the dough for 3-5 minutes until smooth.
-
Shape the dough into a ball, place it in a greased bowl, and cover it. Allow it to rest for 10 minutes.
-
Divide the dough into 8 equal pieces and roll each piece into a 20-22 inch rope.
-
Shape each rope into a pretzel form by making a U-shape, crossing the ends, twisting, and folding them down towards the bottom of the U.
-
In a large saucepan, bring 10 cups of water and the baking soda to a boil. Dunk each pretzel into the boiling solution for about 30 seconds.
-
Place boiled pretzels onto the prepared baking sheets. Brush each one with the beaten egg and sprinkle with coarse sea salt.
-
Bake for 12-15 minutes or until pretzels are golden brown.
-
Remove from the oven and allow to cool on a wire rack.
Note
- To make cinnamon sugar pretzels, combine 1/3 cup granulated sugar and 1 teaspoon cinnamon. Brush baked pretzels with melted butter and sprinkle with cinnamon sugar.
- For a cheesy variation, sprinkle shredded cheese on pretzels before baking.
- Freeze unbaked pretzels after shaping, and bake fresh whenever you crave one.
- Enjoy with mustard, cheese sauce, or your favorite dip.

