

There’s something about sinking your teeth into a slice of homemade apple pie that warms both the heart and soul. From the moment you wrap your fingers around that flaky, buttery crust, you can feel the love and care that went into every fold of pastry. The subtle crunch gives way to soft, tender apple slices enveloped in a cozy blend of cinnamon and nutmeg, each spice whispering memories of crisp fall afternoons and family gatherings. Experience the warmth of homemade goodness with this classic apple pie that’s sure to become a family favorite, whether you’re baking to celebrate the season or just to treat yourself to a timeless comfort dessert. Every bite is a reminder that the simplest ingredients—flour, butter, apples, and a sprinkle of sugar—can create something truly extraordinary.
Bite into a slice of this homemade apple pie and discover how sweet, tender apples wrapped in a flaky, golden crust can turn any moment into an occasion. This dessert is classified as Intermediate difficulty, making it perfect for home cooks who want to level up their baking game without getting overwhelmed. You’ll spend about 1 hour preparing the dough and filling, 1 hour baking at two different temperatures to achieve that crisp top and soft interior, then let it rest for 30 minutes before diving in. At roughly 350 calories per slice (based on 8 servings), it’s a delightful treat you can feel good about sharing. So gather your ingredients, preheat your oven, and get ready to fill your kitchen with the kind of aroma that feels like a warm hug on a chilly day.
KEY INGREDIENTS IN HOMEMADE APPLE PIE
Before diving into the step-by-step instructions, let’s break down the roles each ingredient plays in creating this picture-perfect dessert. Understanding why we use each component will help you bake with confidence and even inspire delicious tweaks of your own.
- All-purpose flour
Provides the sturdy base for the pie crust and helps thicken the apple filling, ensuring each slice holds its shape beautifully.
- Salt
Enhances the natural flavors in both the crust and filling, balancing sweetness and preventing the dough from tasting flat.
- Sugar
Sweetens the dough and the filling, caramelizes during baking, and brings out the natural juices of the apples for a luscious bite.
- Unsalted butter
Gives the crust its signature flakiness and rich, creamy flavor. Chilled and diced, it creates those beautiful layers when worked into the flour.
- Ice water
Hydrates the dough just enough to bring it together while keeping the butter cold, which is crucial for achieving a tender, flaky crust.
- Apples
The star of the show. Choosing a mix of sweet and tart apples provides complexity and ensures tender, juicy slices once baked.
- Ground cinnamon
Infuses the filling with warm, spicy notes that complement the sweetness of the apples perfectly.
- Ground nutmeg
Adds a subtle, earthy aroma that rounds out the spice profile without overpowering the fruit.
- Lemon juice
Brightens the flavor of the apples and prevents them from oxidizing and turning brown before baking.
- Butter
Dotted over the filling, it melts into tiny pools of richness, adding depth and a silky finish to every forkful.
- Egg yolk
Combined with milk to create an egg wash, it gives the top crust a glossy, golden-brown hue.
- Milk
Thins out the egg wash for even application and helps promote a uniform, appetizing color on the baked crust.
HOW TO MAKE HOMEMADE APPLE PIE
Ready your rolling pin and preheat your enthusiasm—this section walks you through every step of assembling and baking your perfect homemade apple pie.
1. In a large bowl, combine the flour, salt, and sugar. Add the diced butter and use a pastry blender or your fingertips to cut the butter into the flour until the mixture resembles coarse crumbs. Add the ice water, starting with 6 tablespoons, a little at a time, stirring with a fork until the dough just comes together. Divide the dough in half, shape each into a disc, wrap in plastic wrap, and refrigerate for at least 1 hour.
2. Preheat your oven to 425°F (220°C), ensuring it reaches the right temperature before your pie goes in.
3. In a large bowl, toss the sliced apples with sugar, flour, cinnamon, nutmeg, and lemon juice until the fruit is evenly coated and aromatic.
4. On a lightly floured surface, roll out one dough disc into a circle large enough to line a 9-inch pie pan. Gently transfer the dough, letting the excess hang over the edges.
5. Spoon the apple mixture into the dough-lined pan, spreading the slices evenly. Dot the filling with small pieces of butter for extra richness as it bakes.
6. Roll out the second dough disc and drape it over the apples. Trim the overhang, then fold and crimp the edges to seal. Cut several small slits in the top crust to allow steam to escape.
7. In a small bowl, whisk together the egg yolk and milk to create an egg wash. Gently brush it over the top crust to promote a shiny, golden finish.
8. Bake at 425°F (220°C) for 15 minutes. Then reduce the oven temperature to 350°F (175°C) and continue baking for 35 to 45 minutes, or until the apples are tender and the crust is deeply golden.
9. Remove the pie from the oven and cool on a wire rack for at least 30 minutes before slicing to ensure the filling sets properly.
SERVING SUGGESTIONS FOR HOMEMADE APPLE PIE
Nothing makes your efforts feel more worthwhile than serving this classic dessert with thoughtful accompaniments. Whether you’re hosting a cozy family dinner or just treating yourself to a slice, these serving ideas will elevate your homemade apple pie experience and make every forkful feel a bit more special.
- Serve warm with a scoop of vanilla ice cream nestled on top, allowing the cool cream to melt into the sweet apple filling for an irresistible contrast of temperatures.
- Offer a generous dollop of freshly whipped cream sweetened with a hint of cinnamon, adding airy texture and a touch of spice that complements the rich, buttery crust.
- Dust the top crust lightly with powdered sugar and garnish with a sprig of fresh mint or a twist of lemon zest to add a pop of color and a refreshing note.
- Drizzle warm caramel sauce over each slice, letting it sink into the slits of the crust and pool around the plate for an extra layer of gooey goodness.
HOW TO STORE HOMEMADE APPLE PIE
Preserving that flaky crust and tender filling is just as important as baking the perfect pie. Whether you’re saving leftovers for later or want to prepare ahead of time, proper storage techniques will keep your apple pie tasting fresh and delicious.
- Room temperature: Cover loosely with foil or a pie carrier and store at room temperature for up to 2 days. This helps maintain the crust’s flakiness and prevents the filling from becoming soggy.
- Refrigerator: For up to 4 days, wrap the cooled pie tightly in plastic wrap or place it in an airtight container. Chilling slows bacterial growth and keeps the filling firm.
- Freezer (whole): Wrap the unbaked or fully baked pie securely in two layers of plastic wrap followed by foil. Freeze for up to 3 months. Thaw overnight in the refrigerator before reheating.
- Freezer (slices): Cut the pie into individual portions, then wrap each slice in plastic wrap and place in a sealed freezer bag. Reheat slices directly from frozen in a warm oven until heated through.
CONCLUSION
What started as a handful of simple ingredients has transformed into a heartwarming, crowd-pleasing homemade apple pie that’s rich in flavor and nostalgia. From the first step of mixing flour, butter, and ice water to the final brush of egg wash that gives the crust its lustrous sheen, every moment of this intermediate-level recipe is an opportunity to sharpen your baking skills and create something truly special. With preparation time of about one hour, one hour of baking, and a half-hour of rest, you’ll find this pie strikes the perfect balance between accessible and impressive. Don’t forget to print and save this article for future reference—you’ll be able to revisit these instructions whenever you’re ready for that flaky, golden perfection. You’ll also find a FAQ section below to troubleshoot any baking queries you might have.
I’d love to hear about your pie-baking adventures! If you try this recipe, please leave a comment with your thoughts, questions, or tweaks. Did you experiment with a mix of apple varieties? How did your crust turn out? Your feedback is incredibly valuable and helps me refine these recipes for everyone. Feel free to ask for help if you run into any hiccups along the way—after all, sharing our kitchen successes and lessons is what makes baking together so much fun. Happy baking, and may every slice bring warmth and joy to your table!
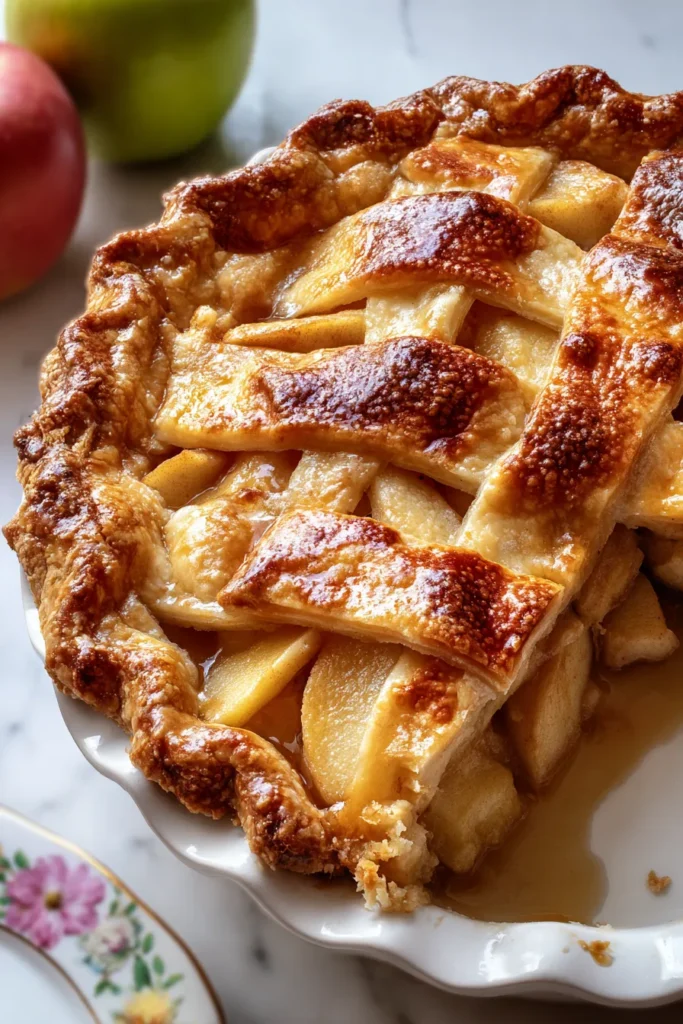

Homemade Apple Pie
Description
Bite into a slice of this homemade apple pie, filled with sweet, tender apples and wrapped in a buttery, flaky crust. Perfect for any occasion!
Ingredients
Instructions
-
In a large bowl, combine the flour, salt, and sugar. Add the diced butter and use a pastry blender or your fingertips to mix until the mixture resembles coarse crumbs. Add the ice water, starting with 6 tablespoons, a little at a time, stirring with a fork until the mixture forms a ball. Divide the dough in half, shape into two discs, wrap in plastic wrap, and refrigerate for at least 1 hour.
-
Preheat your oven to 425°F (220°C).
-
In a large bowl, mix sliced apples, sugar, flour, cinnamon, nutmeg, and lemon juice until apples are well coated.
-
Roll out one of the dough discs on a lightly floured surface to fit a 9-inch pie pan. Place the rolled dough in the pie pan, letting the excess dough hang over the edge.
-
Spoon the apple filling into the dough-lined pie pan, distributing the slices evenly. Dot the filling with small pieces of butter.
-
Roll out the second disc of dough and place it over the filling. Trim and fold the edges to seal the crust. Cut slits in the top crust to allow steam to escape during baking.
-
In a small bowl, mix the egg yolk and milk. Brush the mixture over the top crust to promote a golden brown finish.
-
Bake for 15 minutes in the preheated oven. Reduce the temperature to 350°F (175°C) and continue baking for 35 to 45 minutes, or until the apples are soft and the crust is golden.
-
Allow the pie to cool for at least 30 minutes before serving.
Note
- If you don’t have a pastry blender, use two forks or knives to cut the butter into the flour until the mixture resembles coarse crumbs.
- Try using a variety of apples for a more complex flavor profile.
- If the crust edges begin to brown too much during baking, cover them with foil to prevent burning.
- Serve the pie with vanilla ice cream or whipped cream for an added treat.
- Use any leftover pie dough to make decorative shapes for the top crust.

