

I’ve got to tell you, these Healthy Sticky Chicken Bowls feel like a hug in a bowl—tender chicken tossed in a glossy honey-soy glaze, nestled on fluffy brown rice (or cauliflower rice if you like!), with crisp carrots, cabbage, and bell pepper adding the perfect crunch. Topped with creamy avocado, a sprinkle of sesame seeds, and a squeeze of lime, every bite hits that sweet-savory spot and makes weekday dinners feel like a celebration. Trust me, once you try this, it’ll become a weekly must-make!
Key Ingredients
Before we get cooking, let’s meet the lineup that makes these bowls shine:
- 1 ½ lbs (680 g) boneless skinless chicken thighs, trimmed and cut into bite-size pieces: Juicy, flavorful protein that soaks up every drop of the marinade.
- 2 tbsp low-sodium soy sauce or tamari (for gluten-free): Provides deep umami and saltiness without overwhelming the dish.
- 1 tbsp rice vinegar or apple cider vinegar: Balances the sweetness with a bright, tangy note.
- 1 tbsp fresh lime juice: Adds a burst of citrus freshness to lift all the flavors.
- 1 tbsp avocado oil or olive oil: Keeps the chicken moist while searing and prevents sticking.
- 2 cloves garlic, minced: Pungent aromatics that infuse the chicken with savory depth.
- 1 tsp fresh ginger, finely grated: Brings a warm, zesty bite to the marinade.
- ½ tsp sea salt: Enhances all the flavors without adding too much sodium.
- ¼ tsp black pepper: A mild heat to round out the marinade.
- 3 tbsp low-sodium soy sauce or tamari: Forms the salty base of the glossy sticky sauce.
- 2 tbsp honey (or pure maple syrup for a deeper flavor): Sweetens and caramelizes for that irresistible glaze.
- 1 tbsp rice vinegar: Keeps the sauce bright and balanced.
- 1 tbsp hoisin sauce (use a reduced-sugar version if desired): Adds complexity and a hint of sweetness.
- 1 tbsp tomato paste or ketchup (no-sugar-added if possible): Boosts umami and color in the sauce.
- 1–2 tsp sriracha or chili garlic sauce (optional, to taste): A kick of heat for those who like it spicy.
- 2 tbsp water: Thins the sauce for proper consistency and helps dissolve cornstarch.
- 1 ½ tsp cornstarch or arrowroot starch: Thickens the sauce into a glossy coating.
- 2 cups cooked brown rice, quinoa, or cauliflower rice (for low-carb): The hearty base that soaks up extra sauce.
- 1 medium carrot, julienned or shredded: Adds sweetness and vibrant color.
- 1 small cucumber, thinly sliced or cut into half-moons: Provides a cool, crisp contrast.
- 1 small red bell pepper, thinly sliced: Sweet crunch and bright red hue.
- 1 cup shredded purple cabbage or coleslaw mix: Earthy crunch and a pop of color.
- 1 cup steamed or roasted broccoli florets: Nutty bites of green goodness.
- 1 ripe avocado, sliced: Creamy texture that mellows the sweet-savory flavors.
- 2 green onions, thinly sliced: Sharp, fresh garnish for a final flavor boost.
- 1 tbsp toasted sesame seeds (white or black): Nutty crunch and visual appeal.
- Fresh cilantro or mint leaves, roughly chopped: Herbaceous brightness on top.
- Lime wedges, for serving: Extra citrus zing to squeeze over the bowl.
- Extra sriracha or chili flakes (optional): Customize the heat to your preference.
How To Make Healthy Sticky Chicken Bowls
Let’s walk through the steps to bring these bowls together—from marinating the chicken to assembling all those gorgeous layers. You’ll build flavor in the marinade, master a glossy sticky sauce, and prep vibrant veggies so every element shines. Ready? Lace up your apron—this is fun!
1. Marinate the chicken
In a medium bowl, whisk together soy sauce, rice vinegar, lime juice, avocado oil, minced garlic, grated ginger, sea salt, and black pepper. Add the bite-size chicken thigh pieces, toss until each piece is coated, then cover and refrigerate for 20–30 minutes (or up to 4 hours) to deepen the flavor.
2. Cook the base (grain or cauliflower rice)
If you’re using brown rice or quinoa, cook it in low-sodium broth following package instructions, then fluff with a fork and keep it covered to stay warm. For cauliflower rice, heat a nonstick skillet over medium, add a splash of oil and a pinch of salt, and sauté for 3–5 minutes until just tender.
3. Prepare the vegetables and toppings
Julienne or shred the carrot, thinly slice the cucumber and red bell pepper, and shred the cabbage. Steam broccoli in a basket for 4–5 minutes or roast at 400°F (200°C) for 10–12 minutes with a drizzle of oil, salt, and pepper. Slice avocado just before serving, and thinly slice green onions and herbs for garnish.
4. Make the sticky sauce mixture
In a small bowl, whisk together soy sauce, honey, rice vinegar, hoisin sauce, tomato paste, and sriracha (if using). In another bowl, stir water and cornstarch until smooth. Pour the cornstarch slurry into the sauce and whisk until glossy with no lumps.
5. Sear the marinated chicken
Heat a large nonstick skillet or wok over medium-high heat with a light drizzle of oil if needed. Remove chicken from the marinade, letting excess drip off (discard leftover marinade). Arrange pieces in a single layer (work in batches if necessary), and cook for 4–6 minutes, turning occasionally, until browned and cooked through (165°F / 74°C). If bits start to stick, splash in 1–2 tablespoons of water and scrape up the fond.
6. Add and thicken the sticky sauce
Reduce heat to medium-low and pour the prepared sauce over the chicken, tossing to coat. Simmer for 2–4 minutes, stirring often, until the sauce thickens and clings to each piece. If it becomes too thick, add water by the teaspoon until you reach your ideal consistency, then taste and adjust sweetness, acidity, or heat as desired.
7. Assemble the bowls
Divide cooked rice, quinoa, or cauliflower rice among 3–4 bowls. Arrange carrot, cucumber, bell pepper, cabbage, and broccoli around the edges for a vibrant mosaic. Spoon the sticky chicken over the center, making sure to drizzle any extra sauce from the pan on top.
8. Garnish and serve
Top each bowl with avocado slices, green onions, toasted sesame seeds, and chopped cilantro or mint. Serve with lime wedges and extra sriracha or chili flakes on the side. Enjoy immediately while the chicken is hot and the veggies are crisp!
Serving Suggestions
These Healthy Sticky Chicken Bowls are a complete meal on their own, but here are a few fun ways to elevate the experience:
- Serve alongside a light miso soup to warm up your meal and add umami depth.
- Offer a small bowl of quick-pickled cucumbers tossed in rice vinegar, sugar, and chili flakes for tangy crunch.
- Pair with a side of edamame sprinkled with sea salt for extra protein and texture.
- Drizzle a spoonful of spicy mayo (mayo mixed with sriracha) over the top for a creamy kick.
Tips For Perfect Healthy Sticky Chicken Bowls
I love sharing little hacks that take this bowl from great to unforgettable—here are my top notes for success:
- For a meal prep version, store the chicken and grains together and keep the fresh veggies and avocado separate until serving.
- Swap chicken thighs for chicken breast if desired; reduce cooking time slightly to avoid drying out.
- To make it fully gluten-free, use tamari or coconut aminos and check that your hoisin sauce is certified gluten-free.
- For a lower-sugar option, use half the honey and increase vinegar and tomato paste slightly for balance.
- Add extra vegetables like edamame, snap peas, or roasted sweet potato for more fiber and color.
- This dish works well served cold or at room temperature as a lunch bowl the next day.
How To Store It
These bowls are perfect for leftovers, and a little planning will keep everything fresh and delicious:
- Refrigerate in separate containers: Store chicken and grains in one airtight container, and keep veggies and avocado slices in another to preserve crispness.
- Use lime juice as an avocado guard: Toss sliced avocado with a bit of lime juice before sealing to prevent browning.
- Freeze cooked chicken and grains: Portion into freezer-safe bags for up to 2 months; thaw in the fridge overnight and reheat gently.
- Reheat gently: Warm chicken and grains in the microwave on medium power or in a skillet with a splash of water to avoid drying out.
Frequently Asked Questions
Here are answers to the questions you’re most curious about:
- How long should I marinate the chicken to achieve the best flavor without compromising texture?
For balanced flavor and tenderness, marinate for at least 20–30 minutes. Up to 4 hours will deepen the flavor without making the chicken mushy—avoid overnight marinades so the acids don’t break down the meat fibers too much.
- Can I prepare the bowls ahead of time for meal prep, and how should I store the components?
Absolutely! Cook chicken and grains together and portion into airtight containers. Store fresh veggies and avocado separately (add lime juice to avocado). Keep sauce in a small sealed container and assemble just before eating.
- What are the best ways to make this recipe fully gluten-free?
Swap tamari or coconut aminos for soy sauce and use a certified gluten-free hoisin sauce or replace it with extra tomato paste and honey. Double-check chili sauces for hidden gluten.
- How can I adjust the sauce if it’s too thick or not thick enough?
If too thick, stir in water a teaspoon at a time until you hit the right consistency. If too thin, simmer a bit longer over medium-low heat, stirring until the cornstarch can thicken it.
- I prefer chicken breast over thighs—how should I modify cooking times?
Chicken breast cooks faster—sear 3–4 minutes per side over medium-high heat, or until 165°F (74°C) internal temperature. Remove from heat promptly to avoid dryness, then toss in the sauce while still juicy.
- How can I tone down or boost the spiciness to suit different heat preferences?
To dial it down, omit or halve the sriracha; to amp it up, add up to 2 teaspoons or sprinkle in red pepper flakes. You can also serve hot sauce on the side.
- What are some additional vegetable or protein variations I can include?
Try edamame, snap peas, roasted sweet potato cubes, or sautéed mushrooms. For pescatarians, swap chicken for shrimp (2–3 minutes per side) or firm tofu (pan-fry until golden).
- How should I reheat leftovers so the chicken stays tender and the veggies crisp?
Microwave on medium power in short bursts or warm in a skillet with a teaspoon of water, covered briefly to trap steam. Add fresh veggies and avocado only when serving.
What Makes This Special
Healthy Sticky Chicken Bowls tick all the boxes: they’re packed with lean protein, rainbow veggies, and a glossy honey-soy sauce that clings to every tender bite. The contrast of textures—from creamy avocado to crunchy cabbage—keeps each mouthful exciting, and the simple swaps (cauliflower rice, tamari, extra veggies) make it yours. Go ahead and print this out, stick it on your fridge, and give it a whirl. If you try it, I’d love to hear how it went—drop a comment, ask questions, or just brag about your perfect sticky glaze!
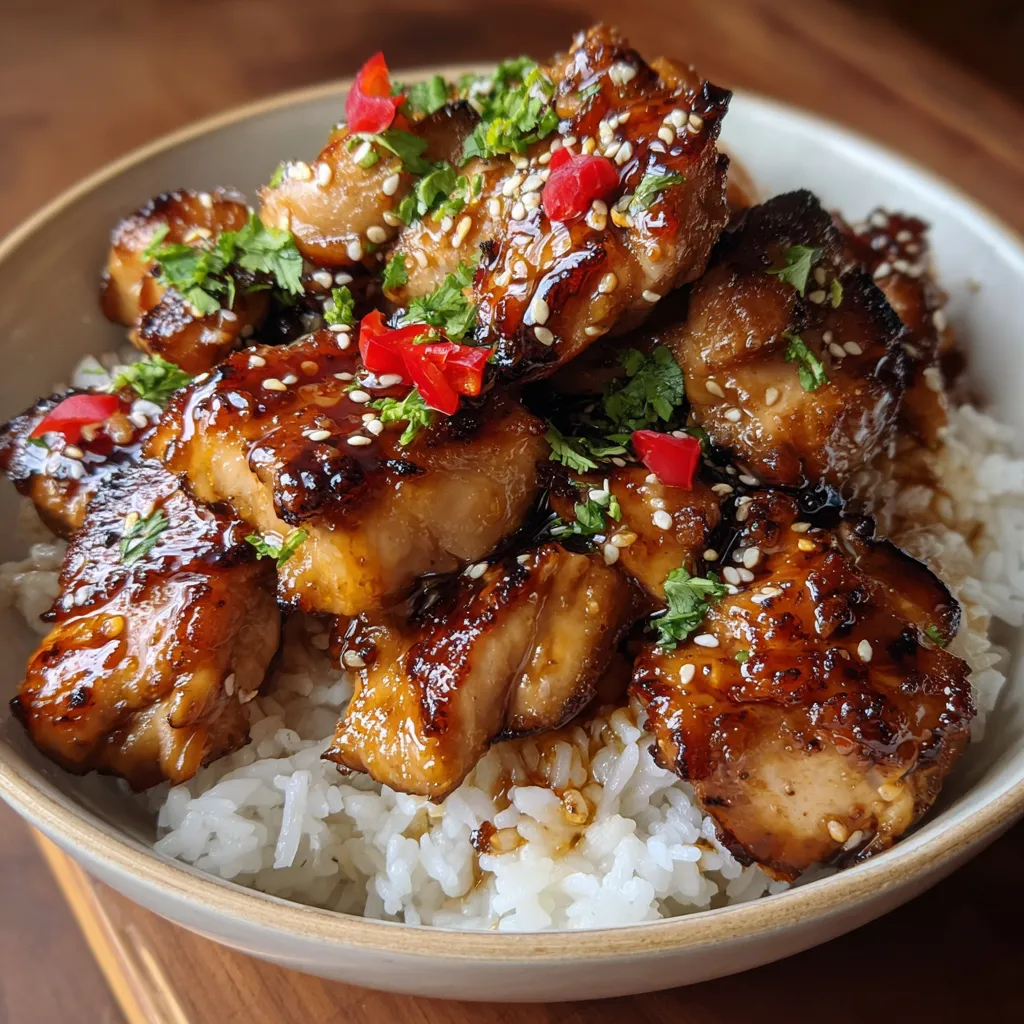

Healthy Sticky Chicken Bowls
Description
Glossy honey-soy chicken bites seared until caramelized, then layered over warm brown rice or cauliflower rice. Crisp carrots, cabbage, and bell pepper mingle with creamy avocado, all brightened by lime juice and sprinkled with sesame seeds.
Ingredients
Instructions
-
Marinate the chicken:
-
- In a medium bowl, combine the soy sauce, rice vinegar, lime juice, oil, minced garlic, grated ginger, salt, and pepper.
-
- Add the bite-size chicken thigh pieces and toss well to coat every piece.
-
- Cover and let marinate in the refrigerator for at least 20–30 minutes, or up to 4 hours for more flavor.
-
Cook the base (grain or cauliflower rice):
-
- If using brown rice or quinoa, cook according to package instructions, ideally in low-sodium broth for extra flavor.
-
- Fluff with a fork and set aside, covered, to keep warm.
-
- If using cauliflower rice, lightly sauté in a nonstick skillet with a small splash of oil and a pinch of salt for 3–5 minutes, just until tender but not mushy. Set aside.
-
Prepare the vegetables and toppings:
-
- Julienne or shred the carrot; slice the cucumber, bell pepper, and cabbage.
-
- Steam or roast the broccoli until bright green and tender-crisp (about 4–5 minutes steaming, or 10–12 minutes roasting at 400°F / 200°C with a little oil, salt, and pepper).
-
- Slice the avocado just before serving to prevent browning.
-
- Thinly slice the green onions and chop the cilantro or mint; set aside for garnish.
-
Make the sticky sauce mixture:
-
- In a small bowl or measuring cup, whisk together soy sauce, honey, rice vinegar, hoisin sauce, tomato paste or ketchup, and sriracha (if using).
-
- In a separate tiny bowl, stir together the water and cornstarch until completely dissolved with no lumps.
-
- Add the cornstarch mixture to the sauce and whisk again. This slurry will make the sauce thick and glossy once heated.
-
Sear the marinated chicken:
-
- Heat a large nonstick skillet or wok over medium-high heat. Add a light drizzle of oil if the pan is not nonstick.
-
- Remove the chicken from the marinade, letting excess drip off. Discard the leftover marinade.
-
- Arrange the chicken pieces in a single layer in the hot pan, working in batches if needed to avoid overcrowding.
-
- Cook for 4–6 minutes, turning occasionally, until the chicken is browned on the outside and cooked through (internal temperature 165°F / 74°C).
-
- If any browned bits start to build up, splash in 1–2 tbsp water and scrape the pan gently with a spatula to prevent burning.
-
Add and thicken the sticky sauce:
-
- Once the chicken is cooked, reduce heat to medium-low.
-
- Pour the prepared sticky sauce over the chicken, tossing immediately to coat all the pieces.
-
- Simmer for 2–4 minutes, stirring often, until the sauce thickens and becomes glossy, clinging to the chicken.
-
- If the sauce gets too thick, add a spoonful of water at a time to loosen to your preferred consistency.
-
- Taste and adjust: add a bit more vinegar for brightness, honey for sweetness, or sriracha for heat if desired.
-
Assemble the bowls:
-
- Divide the cooked rice, quinoa, or cauliflower rice between 3–4 serving bowls.
-
- Arrange the carrot, cucumber, bell pepper, cabbage, and broccoli around the edges of each bowl to create color and texture contrast.
-
- Spoon the sticky chicken over the grains, making sure to drizzle extra sauce from the pan on top.
-
Garnish and serve:
-
- Top each bowl with sliced avocado.
-
- Sprinkle with green onions, toasted sesame seeds, and chopped cilantro or mint.
-
- Serve with lime wedges on the side for squeezing over the top, and extra sriracha or chili flakes if you like more heat.
-
- Serve immediately while the chicken is hot and the vegetables are crisp and fresh.
Note
- For a meal prep version, store the chicken and grains together and keep the fresh veggies and avocado separate until serving.
- Swap chicken thighs for chicken breast if desired; reduce cooking time slightly to avoid drying out.
- To make it fully gluten-free, use tamari or coconut aminos and check that your hoisin sauce is certified gluten-free.
- For a lower-sugar option, use half the honey and increase vinegar and tomato paste slightly for balance.
- Add extra vegetables like edamame, snap peas, or roasted sweet potato for more fiber and color.
- This dish works well served cold or at room temperature as a lunch bowl the next day.

