

Every year as the leaves turn and the air takes on a crisp chill, I can’t help but feel the pull of cozy baking projects calling my name. These Hauntingly Delicious Chocolate Chip Spooky Cookies are the perfect answer to that seasonal craving. Soft, chewy, and dotted with melting pockets of semisweet and white chocolate chips, they bring a playful twist to classic treats. When you bite into one, you’ll experience a delightful tug between a buttery dough that yields under your teeth and chocolate that oozes ever so slightly, warmed by just-out-of-the-oven bliss. The festive decorations—quirky candy eyeballs, black-and-orange sprinkles, and cheeky Halloween candies—give each bite a dash of whimsy and nostalgia, transporting me back to childhood afternoons spent dunking cookies in glasses of cold milk.
In my kitchen, this recipe has become my annual tradition. I still recall the first time I tried stamping ghost shapes before adding gooey eyes on top—my kids squealed with delight, and my neighbors lined up for seconds. Each step, from whisking flour and baking soda to hearing that satisfying “plink” of dough dropping onto the baking sheet, feels like casting a little Halloween magic. Whether you’re hosting a party full of giddy trick-or-treaters or simply indulging in a quiet moment with a mug of coffee, these cookies will wrap you in warmth and festive cheer. They’re beginner-friendly, requiring just 15 minutes of prep, 12 minutes of baking, and a brief 5-minute rest before you dive in—180 calories of pure enchantment per cookie, if you’re counting.
KEY INGREDIENTS IN HAUNTINGLY DELICIOUS CHOCOLATE CHIP SPOOKY COOKIES
Every great cookie starts with the right components, and this recipe is no exception. Below you’ll find the starring players that come together to create soft, chewy dough, sweet bursts of chocolate, and the perfect balance of texture and flavor.
- All-purpose flour
Provides the structural backbone of the cookie, ensuring a tender crumb that still holds together under all those delicious mix-ins.
- Baking soda
Acts as a gentle leavening agent, giving each cookie just enough lift and slight spread for that signature chewy edge and a soft center.
- Unsalted butter
At room temperature, it creams smoothly with sugars to create pockets of air, resulting in melt-in-your-mouth texture and a rich, buttery taste.
- Granulated sugar
Contributes sweetness and helps cookies spread evenly, creating thin, crisp edges around a soft core.
- Light-brown sugar
Adds a touch of molasses flavor and extra moisture, deepening the cookie’s color and giving that signature chewiness.
- Salt
Enhances all the sweet flavors, balances the richness of butter, and brings depth to the chocolate chips.
- Pure vanilla extract
Infuses each bite with warm, aromatic notes that amplify the sweetness and round out the flavor profile.
- Eggs
Bond ingredients together, provide moisture, and help achieve a soft, cake-like interior.
- Semisweet and/or white chocolate chips
Offer bursts of contrasting sweetness and creamy texture, making every bite a delightful surprise.
- Assorted spooky decorations
Black and orange sprinkles, candy eyeballs, or Halloween-themed candies transform each cookie into a festive work of art.
HOW TO MAKE HAUNTINGLY DELICIOUS CHOCOLATE CHIP SPOOKY COOKIES
Baking these cookies is straightforward, but each step is important to achieve that irresistible texture and playful look. Gather all your ingredients and tools, then follow along as we whip up batches of these spooky delights.
1. Preheat your oven to 350°F (175°C). Line two baking sheets with parchment paper or silicone baking mats to prevent sticking and ensure even browning.
2. In a medium bowl, whisk together the flour and baking soda until fully combined, then set aside to keep them ready for gradual incorporation.
3. In a large bowl, using an electric mixer, beat the butter, granulated sugar, and light-brown sugar on medium speed for about 2 minutes, until the mixture is light and fluffy.
4. Add the salt, vanilla extract, and eggs to the butter mixture. Mix on low speed until everything is smooth, pausing to scrape down the sides of the bowl with a spatula for even blending.
5. Gradually add the flour mixture to the wet ingredients, beating at low speed until just combined—take care not to overmix, or the cookies may become tough.
6. Stir in the semisweet and/or white chocolate chips by hand with a wooden spoon or rubber spatula for gentle and even distribution.
7. Using a cookie scoop or tablespoon, drop rounded portions of dough onto the prepared sheets, spacing them about 2 inches apart to allow room for spreading.
8. Decorate each mound of dough with your spooky decorations, pressing candy eyeballs and sprinkles lightly so they adhere during baking.
9. Bake in the preheated oven for 10 to 12 minutes, until the edges turn golden brown but the centers remain soft and slightly underbaked.
10. Remove cookies from the oven and let them cool on the baking sheets for about 5 minutes before transferring to wire racks to cool completely, preserving their shape and chewiness.
SERVING SUGGESTIONS FOR HAUNTINGLY DELICIOUS CHOCOLATE CHIP SPOOKY COOKIES
Once these cookies are perfectly baked and decorated, the fun really begins. Serving them with thoughtful pairings and presentations makes the experience feel extra special. Whether you’re hosting a Halloween bash or treating yourself after a long day, these ideas will help you present your spooky creations with flair and delicious flavor.
- Spooky Dessert Platter
Arrange cookies on a large platter alongside other Halloween treats—think mini pumpkin muffins, gummy worms, and chocolate-drizzled popcorn. Layer decorative napkins or a doily underneath for contrast, and add faux spider webs for theatrical flair.
- Warm and Gooey Delight
Serve cookies slightly warm straight from the oven, placing them on a heatproof plate with a small bowl of room-temperature milk or spiced hot cocoa. The contrast between the warm chocolate and cool drink is pure comfort.
- Halloween Goodie Bags
Place individual cookies in clear cello bags with a twist tie or ribbon in orange and black. Add a personalized tag or a tiny plastic spider to make each treat bag feel like a mini gift for party guests.
- Cookie Sandwich Creations
Spread a thin layer of cream cheese frosting or marshmallow fluff between two cookies to make ghoulish sandwich cookies. Dust the edges with extra sprinkles or crushed Halloween candy for an extra festive finish.
HOW TO STORE HAUNTINGLY DELICIOUS CHOCOLATE CHIP SPOOKY COOKIES
Proper storage is key to preserving that fresh-baked taste and chewy texture of these spooky cookies. Whether you have leftovers from your Halloween party or you’re planning ahead for next week’s bake sale, following these storage tips will help maintain flavor, moisture, and that delightful soft center.
- Room Temperature in an Airtight Container
Place completely cooled cookies in a sealed container lined with parchment paper. Store at room temperature for up to one week, adding a slice of bread to help maintain moisture and prevent them from drying out.
- Refrigeration for Extended Freshness
If your kitchen is warm or your cookies have delicate decorations, store them in the fridge in an airtight container. This method will keep them fresh for up to two weeks—just allow them to come to room temperature before serving to regain their chewiness.
- Freezing Baked Cookies
Flash-freeze baked and cooled cookies on a tray, then transfer them to a zip-top freezer bag or container. Label with the date and freeze for up to three months. Thaw at room temperature for about an hour, or warm gently in a low oven.
- Freezing Cookie Dough
Scoop dough onto a baking sheet, freeze until firm, then store scoops in a freezer-safe bag. When you’re ready to bake, place frozen dough balls on a lined sheet and bake at 350°F (175°C) for an extra minute or two, skipping the thaw. This way, you’ll have fresh cookies on demand.
CONCLUSION
Baking these Hauntingly Delicious Chocolate Chip Spooky Cookies brings a special kind of joy to your fall celebrations. From mixing the silky dough to the ritual of pressing candy eyeballs into each mound, every moment feels like casting a little bit of Halloween magic in your kitchen. The blend of semisweet and white chocolate chips ensures a rich, creamy experience with every bite, while the festive decorations transform these treats into memorable party showstoppers. With just 15 minutes of preparation, 12 minutes of baking, and a short 5-minute resting period, you can whip up batch after batch of these soft, chewy cookies for family gatherings, neighborhood trick-or-treaters, or a cozy evening by the fire.
Feel free to print this article and save it in your recipe binder, so you’ll have it at the ready whenever the spirit of Halloween calls. You can also find an FAQ section below to answer common questions and help you master each step. If you give these cookies a try, I’d love to hear how they turned out—drop a comment with your own decorating ideas, flavor tweaks, or baking tips. Your feedback, questions, and stories make this baking journey even more fun, so don’t hesitate to share your thoughts and let me know if you need any guidance along the way. Happy hauntingly delightful baking!
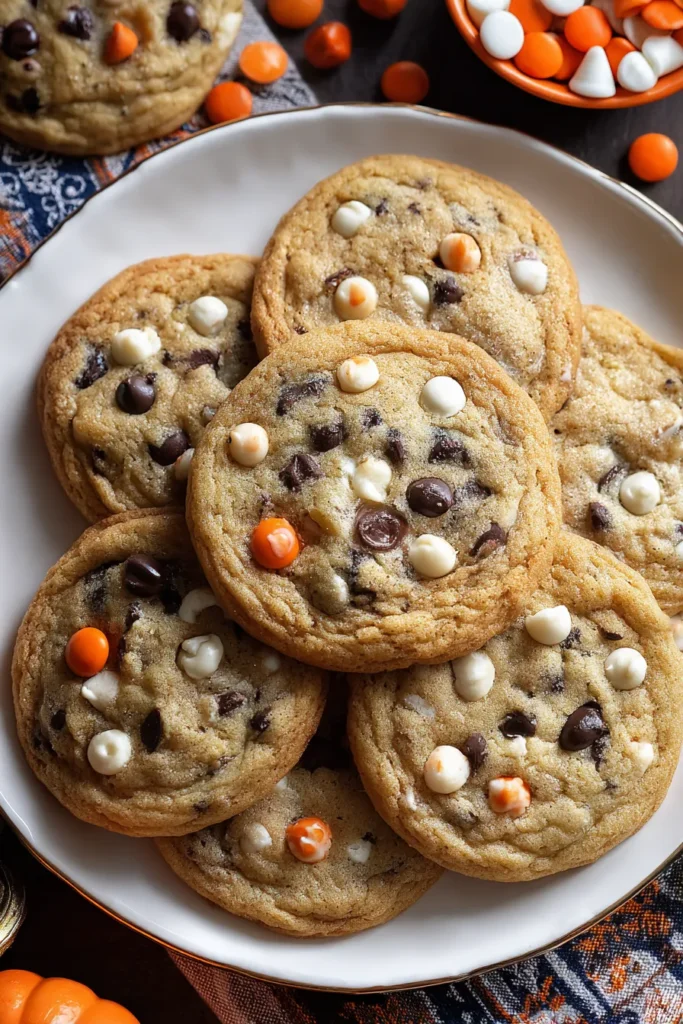

Hauntingly Delicious Chocolate Chip Spooky Cookies
Description
These cookies are soft and chewy, loaded with chocolate chips and adorned with festive spooky decorations. Each bite is a delightful blend of flavors that will leave your guests enchanted!
Ingredients
Instructions
-
Preheat your oven to 350°F (175°C). Line two baking sheets with parchment paper or silicone baking mats and set aside.
-
In a medium bowl, whisk together the flour and baking soda; set aside.
-
In a large bowl, using an electric mixer, beat the butter and sugars on medium speed until light and fluffy, about 2 minutes.
-
Add the salt, vanilla, and eggs to the butter mixture. Mix until well combined, scraping down the sides of the bowl as needed.
-
Gradually add the flour mixture to the butter mixture, beating at low speed until just combined.
-
Stir in the chocolate chips by hand using a wooden spoon or rubber spatula.
-
Using a cookie scoop or tablespoon, drop dough onto the prepared baking sheets about 2 inches apart.
-
Decorate each cookie with your spooky decorations, gently pressing them into the dough so they stick while baking.
-
Bake cookies in the preheated oven for 10 to 12 minutes or until edges are golden brown but centers are still soft.
-
Remove the cookies from the oven and let them cool on the baking sheets for about 5 minutes before transferring to wire racks to cool completely.
Note
- These cookies can be stored in an airtight container at room temperature for up to one week.
- For an extra spooky touch, use cookie stamps to create ghostly shapes before decorating.
- You can mix in colored dough chunks using gel food coloring for an eclectic Halloween swirl effect.
- These cookies make for an ideal treat to serve at Halloween parties or as a festive gift.

