

As Halloween creeps closer, there’s nothing quite like biting into a handcrafted treat that merges rich peanut butter and silky chocolate, all dressed up for the spookiest night of the year. These Halloween Peanut Butter Cups bring together everything you love about a creamy candy—velvety peanut butter, just the right hint of caramel sweetness from light brown sugar, and a festive twist that makes each bite a playful surprise. Get spooky this Halloween with these delightful homemade peanut butter cups that are perfect for sharing! Whether you’re hosting a haunted house party or handing out treats to trick-or-treaters, these little treasures are sure to delight every ghost, ghoul, and goblin in your life. Made by a beginner in about 20 minutes of prep, 10 minutes of active cooking, and a short one-hour chill time, they’re an achievable yet impressive addition to any spooky spread.
One of my favorite memories involves sneaking into the kitchen after a late pumpkin carving session, candlelight flickering off the countertop as I unwrapped a peanut butter cup that seeped with nostalgia. In that moment, the creamy filling felt like a cozy hug, and the glossy chocolate shell whispered stories of childhood Halloween magic. These cups aren’t just a dessert—they’re a portal to sweet moments and warm laughter shared around a kitchen island. With approximately 320 calories per cup, you’ll want to dole them out carefully (or hide a secret stash!). As a dessert that’s beginner-friendly and loaded with festive flair, they invite you to customize with dark chocolate for extra depth or a pinch of cinnamon for an autumnal twist. Gather your ingredients, line up those spooky cupcake liners, and let the fun begin—it’s time to make a treat that’s as enchanting as October itself.
KEY INGREDIENTS IN HALLOWEEN PEANUT BUTTER CUPS
Before you dive into the fun of layering chocolate and peanut butter, let’s talk about the magic makers behind these spooky snacks. Each ingredient has a special role in creating the perfect balance of creamy, sweet, and chocolatey goodness that defines these Halloween Peanut Butter Cups.
- Creamy peanut butter
This is the heart of the filling, offering a smooth texture and nutty depth. It binds easily with sugar and feels indulgent against the contrasting chocolate shell.
- Unsalted butter
Melted into the peanut butter, it adds richness and helps the filling hold its shape. Without added salt, it lets the natural flavors of peanut butter and chocolate shine.
- Light brown sugar
Adds a warm, caramel-like sweetness that complements the nuttiness of the peanut butter. It also contributes a slightly chewy texture that makes the filling irresistible.
- Salt
A pinch balances the sweetness and enhances the chocolate’s depth. It’s a small but mighty player in flavor harmony.
- Vanilla extract
Lends aromatic warmth and rounds out the flavors, giving the filling a subtle, sophisticated edge.
- Powdered sugar
Thickens the peanut butter mixture into a firm, moldable dough. It ensures the filling holds together without crumbling.
- Semi-sweet chocolate chips
Create the glossy shell that encases the peanut butter filling. The moderate sweetness pairs perfectly with the salty-nutty center.
- Vegetable oil
Smooths out melted chocolate, making it easier to coat the liners and achieve a sleek finish without streaks.
- Candy eyeballs or Halloween-themed candies
Optional but highly encouraged for a playful, spooky touch. They stick to warm chocolate and instantly transform each cup into a mini monster.
HOW TO MAKE HALLOWEEN PEANUT BUTTER CUPS
Ready to turn these pantry staples into hauntingly good treats? Follow these steps for a seamless, fun-filled kitchen adventure.
1. In a medium bowl, combine the peanut butter, melted butter, light brown sugar, salt, and vanilla extract. Use a sturdy spatula or electric mixer to stir until the mixture is smooth and free of lumps, creating a cohesive base for your filling.
2. Gradually add the powdered sugar, stirring after each addition. Continue until the mixture is firm and holds its shape when pressed between your fingers. If it feels too soft, sprinkle in a bit more powdered sugar until you can roll small balls without it sticking.
3. Line a 12-cup muffin tin with Halloween-themed cupcake liners. Choose bold blacks, deep purples, or orange stripes to set the festive mood.
4. In a microwave-safe bowl, combine the semi-sweet chocolate chips and vegetable oil. Microwave on high in 30-second increments, stirring vigorously between each, until the chocolate is fully melted and velvety smooth.
5. Spoon about one tablespoon of melted chocolate into each liner, then tilt and rotate the pan or use the back of a spoon to coat the sides evenly. Leave a small reservoir of chocolate in the bottom for later sealing. Reserve some chocolate for the tops.
6. Scoop 1 to 2 tablespoons of the peanut butter mixture into each chocolate-lined cup. Press it down gently with a small spoon to remove air pockets and create a flat surface.
7. Drizzle and spread the remaining melted chocolate over the top of each cup, ensuring the peanut butter is completely sealed beneath a glossy layer. Smooth the tops for a professional finish.
8. While the chocolate is still warm, press candy eyeballs or Halloween-themed candies into the centers to create playful faces or eerie accents.
9. Refrigerate the entire tray for about 1 hour, or until the chocolate shell is firm to the touch and snaps cleanly when bitten.
10. Peel away the liners and enjoy your homemade Halloween Peanut Butter Cups with friends and family, sharing both the treats and the fun stories behind them.
SERVING SUGGESTIONS FOR HALLOWEEN PEANUT BUTTER CUPS
Elevate these festive bites with a presentation that’s as memorable as the flavor itself. Whether you’re hosting a full-blown haunted gathering or simply indulging in a cozy movie night, serving these cups creatively will delight your guests and spark conversation.
- Spooky Dessert Platter
Arrange your peanut butter cups on a dark slate tray or a black serving board. Scatter faux spider webs, miniature pumpkins, and plastic spiders around the edges for a haunting touch that contrasts with the glossy chocolate.
- Hot Cocoa Pairing
Serve alongside steaming mugs of rich hot cocoa topped with whipped cream and a sprinkle of cinnamon. The warm drink complements the chilled cups, creating a comforting balance of temperatures and textures.
- Festive Cellophane Favors
Wrap each cup in clear cellophane, tie with orange and purple ribbons, and tuck in candy corn or mini ghost confetti. These make adorable party favors or take-home treats for trick-or-treaters.
- Brunch Spread Accent
Incorporate the cups into a Halloween brunch alongside mini pumpkin muffins, savory quiches, and spiced apple cider. Offering a mix of sweet and savory ensures every guest finds something to love at the table.
HOW TO STORE HALLOWEEN PEANUT BUTTER CUPS
Proper storage will keep these Halloween Peanut Butter Cups tasting their best, whether you’re saving them for a week-long party or stashing extras for late-night cravings. Follow these tips to preserve both texture and flavor.
- Refrigerator (up to 1 week)
Place the cups in an airtight container with layers separated by parchment paper to prevent sticking. Keep them on a middle shelf away from strong-smelling foods to maintain their pure chocolate and peanut butter taste.
- Freezer (up to 1 month)
For longer storage, freeze the cups in a single layer on a baking sheet until solid. Transfer them to a freezer-safe bag or container, with parchment between layers. Thaw in the refrigerator for a few hours before serving.
- Room Temperature (1–2 days)
If you prefer a slightly softer shell, store the cups at room temperature in a cool, dry spot inside a covered tin or box. Make sure the room stays below 70°F to prevent melting.
- Individual Wrapping
Wrap each cup in wax or parchment paper for easy grab-and-go snacks. This also helps maintain shape and prevents the cups from absorbing moisture in humid environments.
CONCLUSION
What started as a simple craving for peanut butter and chocolate has turned into a full-blown Halloween tradition with these homemade Peanut Butter Cups. We’ve walked through every step—from selecting the key ingredients and mastering the chocolate shell to adding playful decorations that bring out the spirit of the season. With beginner-friendly instructions and a total time commitment of just over an hour, this recipe strikes the perfect balance between ease and wow factor. Whether you’re making them for a haunted house party, a cozy movie night, or unexpected guests at the door, you’ll love how these treats look and taste. Don’t forget: you can print this article and save it for later so you’ll have a handy guide when Halloween rolls around again. For quick reference, recall the overall prep time of 20 minutes, cooking time of 10 minutes, and one hour of resting time—all fitting neatly into your spooky-season schedule. You’ll also find a FAQ section below if any questions pop into mind as you plan your candy-making adventure.
I truly hope these Halloween Peanut Butter Cups become a staple in your holiday repertoire. If you try the recipe, please share your experiences, tweaks, or any creative twists you’ve added—maybe a dash of cinnamon or a surprise candy center? Your feedback helps everyone in our kitchen community grow more confident and adventurous with homemade sweets. If you have questions about substituting ingredients, troubleshooting chocolate tempering, or even decorating tips for an extra eerie effect, leave a comment or drop a question below. I love hearing from fellow home cooks and can’t wait to see how your peanut butter cups turn out. Happy haunting—and happier baking!
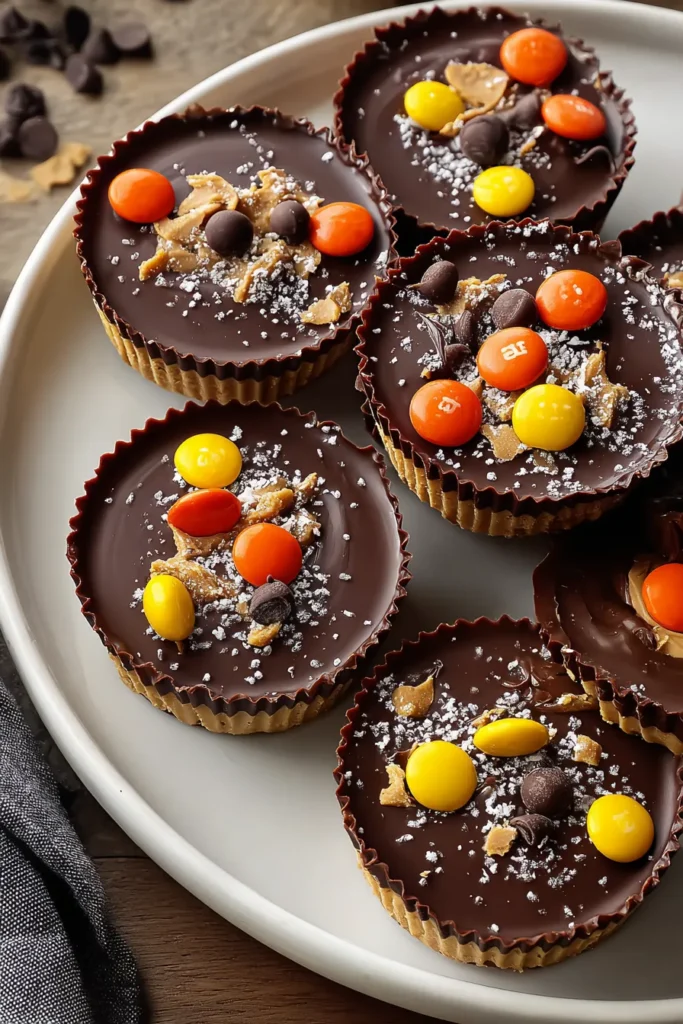

Halloween Peanut Butter cups
Description
These Halloween Peanut Butter Cups are a creamy and chocolaty treat that combines the richness of peanut butter with a fun festive twist, making them ideal for any spooky celebration.
Ingredients
Instructions
-
In a medium bowl, combine the peanut butter, melted butter, light brown sugar, salt, and vanilla extract. Mix until smooth and well-combined.
-
Gradually add powdered sugar to the peanut butter mixture, stirring until the mixture is firm and holds its shape. You should be able to form small balls with it; if it's too soft, add more powdered sugar as needed.
-
Line a 12-cup muffin tin with Halloween-themed cupcake liners.
-
In a microwave-safe bowl, combine the chocolate chips and vegetable oil. Microwave in 30-second increments, stirring between each, until the chocolate is melted and smooth.
-
Drop about a tablespoon of melted chocolate into each liner, tilting the pan to coat the sides. You might use a spoon to help spread the chocolate evenly. Reserve some chocolate for the tops.
-
Place about 1 to 2 tablespoons of the peanut butter mixture into each cup, pressing it down gently.
-
Top each cup with additional melted chocolate, ensuring the peanut butter mixture is completely covered.
-
If desired, add candy eyeballs or Halloween-themed candies on top of the cups while the chocolate is still warm.
-
Refrigerate the peanut butter cups for about 1 hour or until the chocolate has fully set.
-
Enjoy your homemade Halloween Peanut Butter Cups with friends and family!
Note
- For a spooky touch, use dark chocolate and top with candy spiders or bats.
- Make sure the peanut butter mixture is compacted well to prevent crumbling.
- Store the peanut butter cups in the refrigerator for up to one week.
- Consider using different types of chocolate or adding a pinch of cinnamon for a unique flavor.
- These treats can be wrapped individually in festive cellophane bags for party favors.

