

There’s something delightfully whimsical about baking treats that look like they’ve just emerged from a bubbling witch’s cauldron—except these bewitching delights are perfectly edible and utterly irresistible. Halloween Cauldron Cookies bring that playful, spooky spirit right into your kitchen. With their vibrant green dough studded with semi-sweet chocolate chips and green candy-coated chocolates, each bite is a sweet surprise. Topped with fluffy marshmallows and edible candy eyes, these cookies practically wink at you from the baking sheet. The contrast of the soft, buttery cookie base against the melt-in-your-mouth candy interior creates a symphony of textures and flavors that’s equal parts festive and fantastically fun.
Whether you’re planning a cozy movie night curled up with classic horror films or hosting a full-blown Halloween bash, these cauldron cookies fit the bill. They’re beginner-friendly and require just 20 minutes of prep time, 12 minutes in the oven, and a short five-minute rest before you scoop them up with eager fingers. At around 150 calories per cookie, they strike the perfect balance between treat-yourself indulgence and portion-controlled enjoyment. As a dessert, they steal the show—no fancy piping or sculpting skills required. Pull out the green food coloring, rally the family or your best ghost-obsessed pals, and watch these spooky treats disappear faster than a costume at midnight.
KEY INGREDIENTS IN HALLOWEEN CAULDRON COOKIE
Before you dive into the cauldron of creativity, let’s chat about the star players that make these cookies so creepily crave-worthy. Each ingredient brings its own magic, transforming simple dough into a spooky sweet sensation.
- All-purpose flour
Provides structure and body to the cookies, ensuring they hold their shape while staying tender inside.
- Baking soda
Acts as a leavening agent, helping cookies rise just enough to maintain a soft, slightly chewy center.
- Baking powder
Works alongside baking soda to promote an even, light texture without making them cake-like.
- Salt
Balances sweetness and enhances the overall flavor profile, ensuring each bite pops.
- Unsalted butter
Yields a rich, creamy mouthfeel and helps achieve those golden edges that hint at toasty, caramelized flavor.
- Granulated sugar
Sweetens the dough and contributes to a light, crisp exterior when baked.
- Brown sugar
Adds moisture and a hint of caramel depth, giving cookies a lovely chew and subtle gourmet note.
- Large eggs
Bind ingredients, add moisture, and help cookies set up with the perfect balance of softness and sturdiness.
- Vanilla extract
Infuses warm, sweet fragrance that elevates all the other flavors and brings harmony to the dough.
- Green food coloring
Transforms ordinary dough into an eerily vibrant cauldron hue—feel free to amp up the spooky factor with extra drops.
- Semi-sweet chocolate chips
Offer pockets of melted chocolate in every bite, contrasting the buttery dough with rich sweetness.
- Green candy-coated chocolates
Provide crunchy bursts of color and texture, doubling down on the festive green theme.
- Mini marshmallows
Melt slightly on top, creating gooey, cloud-like puffs that peek through the dough like popping bubbles.
- Edible candy eyes
Turn each cookie into a mischievous little creature, perfect for startling party guests in the best way.
HOW TO MAKE HALLOWEEN CAULDRON COOKIE
Ready to conjure up these spooky treats? Follow these steps to blend vibrant color, gooey candy surprises, and buttery cookie goodness into one bewitching batch.
1. Preheat the oven to 350°F (175°C) and line your baking sheets with parchment paper. This ensures even baking and prevents the cauldrons from sticking or spreading too thin.
2. In a medium bowl, whisk together the flour, baking soda, baking powder, and salt until well combined. This dry mix is the backbone of your cookie structure.
3. In a large mixing bowl, cream the softened butter, granulated sugar, and brown sugar on medium speed until the mixture is light and fluffy. This aeration step creates tender, melt-in-your-mouth cookies.
4. Add the eggs one at a time, mixing thoroughly after each addition. Then stir in the vanilla extract to infuse that classic, comforting flavor.
5. Gradually incorporate the dry ingredients into the wet mix, stirring until just combined. Overmixing can lead to tough cookies, so stop once you see no streaks of flour.
6. Drop in several drops of green food coloring and mix until the dough reaches your desired shade—feel free to experiment with darker or lighter tones for extra spookiness.
7. Gently fold in the semi-sweet chocolate chips and green candy-coated chocolates, distributing them evenly without overworking the dough.
8. Using a cookie scoop or tablespoon, drop dough balls onto the prepared baking sheets, spacing them at least 2 inches apart to allow room for spreading.
9. Lightly press mini marshmallows and edible candy eyes onto the tops of each dough ball, creating the illusion of bubbling cauldrons filled with curious critters.
10. Bake for 10–12 minutes or until the cookies are set around the edges and still slightly soft in the center; they’ll firm up as they cool.
11. Allow to cool on the baking sheets for about 5 minutes before transferring to a wire rack. This brief rest helps them hold their shape and finish setting perfectly.
SERVING SUGGESTIONS FOR HALLOWEEN CAULDRON COOKIE
When it comes to presenting these bubbling delights, a little creativity goes a long way. Whether you’re aiming for a creepy snack table or a whimsical dessert experience, these serving ideas are sure to enchant your guests.
- Gothic cookie platter
Arrange cookies on a dark slate board, interspersed with black licorice twists and tiny orange pumpkins. The contrast of colors makes the green hues pop and creates an eerie yet elegant display.
- Mini cauldron cups
Serve each cookie in individual paper baking cups shaped like cauldrons. Stack them on a tall cake stand to simulate bubbling potion tiers—perfect for a Halloween buffet.
- Spooky milk shooters
Pour chilled milk into shot glasses and place a single cookie on a small plate beside each glass. Encourage guests to dunk their cauldrons for an interactive, fun pairing that highlights the cookies’ chewiness.
- Witch’s brew tabletop décor
Scatter the cookies around dry ice‐filled bowls or large cauldron props. The smoky effect draws attention and immerses guests in a magical setting while they nibble on these festive treats.
HOW TO STORE HALLOWEEN CAULDRON COOKIE
Maintaining that fresh-baked flavor and chewy texture doesn’t have to be a ghostly mystery. With a few simple storage strategies, you can keep your Halloween Cauldron Cookies ready for snacking over several days—or even weeks.
- Airtight container at room temperature
Once completely cooled, place cookies in a single layer inside an airtight container. Keep them at room temperature for up to five days. Adding a small slice of bread helps retain moisture and chewiness.
- Refrigeration for extended freshness
If you live in a warm climate or want to stretch their lifespan to a week, store cookies in an airtight container in the refrigerator. Bring them to room temperature before serving to restore softness.
- Freezing baked cookies
Lay cookies in a single layer on a parchment-lined tray and freeze until solid, then transfer to a sealed freezer bag. They’ll stay fresh for up to three months. Thaw at room temperature for 30 minutes before enjoying.
- Freezing unbaked dough
Scoop dough balls onto a tray, freeze until firm, then store in a freezer bag. When craving a fresh batch, bake directly from frozen—just add an extra minute or two to the baking time.
CONCLUSION
Creating these Halloween Cauldron Cookies is more than just baking; it’s a chance to infuse your kitchen with playful creativity and share memorable moments with friends and family. From mixing the vivid green dough to pressing on candy eyes that peer back at you, every step brings a little extra excitement to your spooky season festivities. You’ve got a beginner-level recipe that yields a stunning, candy-packed dessert—no specialized equipment or advanced skills required. Feel free to experiment with color intensity, mix-ins like crushed pretzels or nuts, and serving styles that suit your haunted gathering. This recipe’s flexibility makes it a Halloween staple you’ll return to year after year.
You’re welcome to print this article and tuck it into your favorite recipe binder, or save it digitally for quick reference next October. Below you’ll find a helpful FAQ section to address any queries or troubleshoot common baking bumps. If you give these cauldron cookies a try or discover your own wicked twist on the recipe, please leave comments, questions, or feedback. I’d love to hear about your spooky successes, any delightful disasters that turned into happy accidents, or simply how these treats vanished from your party table. Happy haunting—and even happier baking!
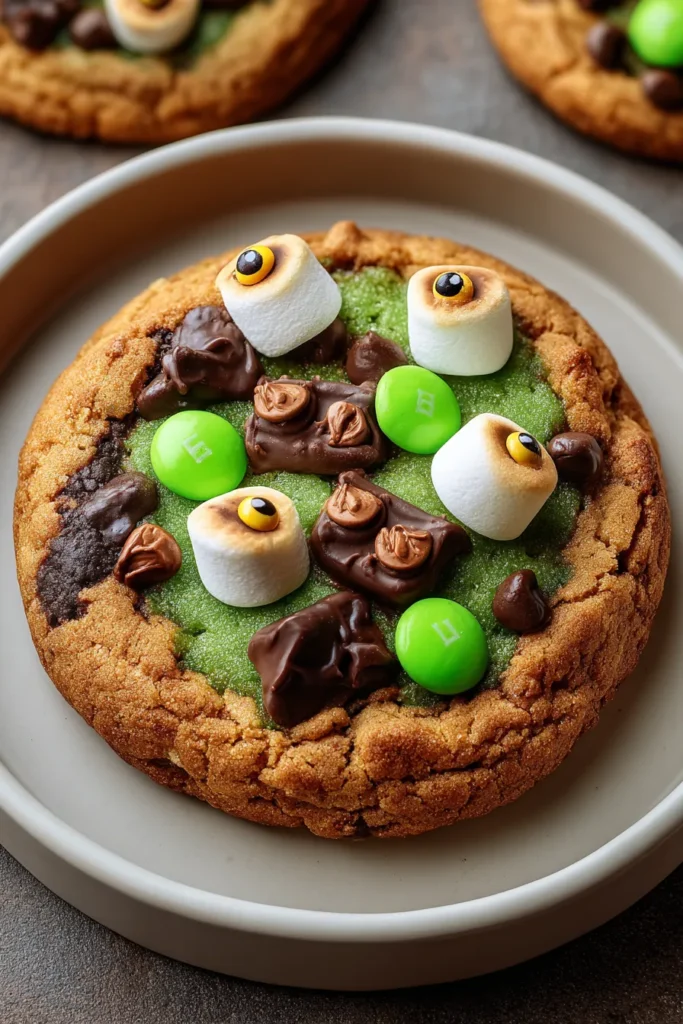

Halloween Cauldron Cookie
Description
These vibrant green cookies are packed with chocolatey goodness, topped with mini marshmallows and candy eyes, making them a treat that’s both delicious and delightfully spooky for Halloween.
Ingredients
Instructions
-
Preheat the oven to 350°F (175°C) and line baking sheets with parchment paper.
-
In a bowl, whisk together the flour, baking soda, baking powder, and salt.
-
In a large mixing bowl, beat together the softened butter, granulated sugar, and brown sugar until light and fluffy.
-
Add in the eggs one at a time, mixing well after each addition. Stir in the vanilla extract.
-
Gradually mix in the dry ingredients until just combined.
-
Add several drops of green food coloring and mix until the dough reaches your desired shade of green.
-
Gently fold in the chocolate chips and green candy-coated chocolates.
-
Using a cookie scoop or tablespoon, drop dough balls onto the prepared baking sheets, leaving enough space between each.
-
Lightly press mini marshmallows and edible candy eyes onto the top of each cookie dough ball.
-
Bake for 10-12 minutes or until the cookies are set and slightly golden on the edges.
-
Allow the cookies to cool on the baking sheets for about 5 minutes, then transfer them to a wire rack to cool completely.
Note
- These cookies can be stored in an airtight container for up to a week.
- Adding extra drops of green food coloring can make the cookies look even more spooky.
- Make sure not to overmix the dough, as it can make the cookies tough.
- You can add crushed pretzels or nuts for extra texture and flavor.
- Perfect for Halloween parties or themed gatherings.

