

Everyone loves a personal-sized treat, and these Gnome Mini Cheesecakes are the ultimate crowd-pleaser for any gathering. There is something incredibly satisfying about biting into a crisp buttery crust topped with a velvety, tangy filling that is perfectly portioned just for you. Whether you are hosting a festive party or just craving a sweet bite after dinner, these little delights deliver big flavor without the hassle of a water bath. I promise that once you make a batch, they will disappear from the serving plate faster than you can say "cheesecake!"
Key Ingredients
Let's talk about what goes into these tiny treats. It is all about simple pantry staples coming together to create magic in your kitchen.
- 1 cup crushed graham crackers: Provides the classic, sweet, and crunchy foundation that contrasts perfectly with the creamy filling.
- 1/4 cup granulated sugar: Adds just the right amount of sweetness to bind the crust layer and enhance the graham flavor.
- 1/2 cup unsalted butter, melted: Acts as the delicious glue that holds the crumbs together and adds a rich, buttery depth.
- 16 ounces cream cheese, softened: The star of the show, creating that tangy and velvety texture we crave in every bite.
- 1 cup powdered sugar: Sweetens the filling smoothly without leaving any gritty texture behind like regular sugar might.
- 1 teaspoon vanilla extract: Enhances the overall flavor profile with a warm, aromatic background note that balances the tang.
- 3 large eggs: Essential for structure, giving the cheesecake its lift and rich custard-like consistency during baking.
- 1/4 cup sour cream: Adds necessary moisture and that signature tangy bite to perfectly balance the sweetness of the dessert.
- Optional: fresh berries or chocolate for topping: Allows you to customize your cakes with a burst of fresh fruit or a decadent drizzle.
How To Make Gnome Mini Cheesecakes
Making cheesecake can sometimes feel intimidating, but this mini version is surprisingly approachable and fun. You don't need a complicated water bath or hours of cooling time before you can enjoy them. The process involves creating a quick crust, whipping up a smooth batter, and keeping an eye on the oven temperature. I love how the smell fills the kitchen, reminding me of family holidays. The secret here is patience during the mixing and cooling stages to ensure that ultra-smooth texture. Let’s dive into the steps so you can get these in the oven!
1. Preheat your oven to 325°F (163°C). Line a muffin tin with paper liners or grease the cups with nonstick spray to prevent the cheesecakes from sticking.
2. In a medium bowl, combine the crushed graham crackers, granulated sugar, and melted butter. Mix until the mixture resembles wet sand.
3. Divide the graham cracker mixture evenly among the muffin tin cups, pressing down firmly with the back of a spoon to create an even crust. Bake in the preheated oven for about 5 to 7 minutes, or until set and lightly golden. Remove from the oven and let cool.
4. In a large mixing bowl, use an electric mixer on medium speed to beat the softened cream cheese until creamy and smooth.
5. Gradually add the powdered sugar and vanilla extract, mixing until fully incorporated and there are no lumps.
6. Add the eggs, one at a time, mixing just until combined after each addition. Be careful not to overmix the batter.
7. Fold in the sour cream until well combined.
8. Spoon the cheesecake batter over the cooled graham cracker crusts in the muffin tin, filling each cup about 2/3 full.
9. Bake the cheesecakes in the oven for 18 to 22 minutes, or until the edges are set but the centers are slightly jiggly.
10. Turn off the oven and crack the door open, allowing the mini cheesecakes to cool gradually in the oven for about 30 minutes. This helps prevent cracks.
11. After cooling, refrigerate the cheesecakes for at least 2 hours or until firm.
12. Before serving, decorate your mini cheesecakes with fresh berries or a drizzle of chocolate if desired.
Serving Suggestions
When it is time to serve these little gems, the presentation can be just as fun as the baking. Because the base recipe is so classic and versatile, you have a blank canvas to get creative. Whether you are aiming for an elegant dinner party vibe or a fun afternoon treat for the kids, a few simple touches can elevate the experience. I personally love setting up a DIY topping bar so guests can customize their own. Here are a few favorite ways to plate these up for maximum impact.
- Fresh Berry Medley: Top each cheesecake with a vibrant mix of fresh raspberries, blueberries, or sliced strawberries to add a tart contrast that cuts through the rich filling beautifully.
- Decadent Chocolate Drizzle: Melt high-quality semi-sweet chocolate and zigzag it over the chilled cheesecakes for a dessert that looks like it came straight from a fancy bakery.
- Whipped Cream Cloud: Pipe a tall swirl of homemade whipped cream on the center and garnish with a small mint sprig for a refreshing, light, and airy finish.
- Salted Caramel Crunch: Spoon a generous amount of salted caramel sauce over the top and sprinkle with crushed pretzels for that irresistible sweet and salty combination.
Tips For Perfect Gnome Mini Cheesecakes
Over the years, I have learned that a few small tricks can make the difference between a good cheesecake and a great one. These tips are all about giving you flexibility and ensuring success, especially if you are preparing for a party. I used to stress about timing, but knowing I can prep these in advance changed everything for my holiday hosting. Plus, dealing with dietary restrictions is much easier when you know how to swap the crust ingredients. Here are some helpful pointers to keep in your back pocket while you bake.
- These mini cheesecakes can be made ahead of time and stored in the refrigerator for up to 5 days.
- Experiment with various toppings, such as caramel sauce or lemon curd, for different flavor profiles.
- For a gluten-free version, substitute the graham crackers with gluten-free cookies or almond flour.
- Mini cheesecakes can also be frozen; just wrap them tightly in plastic wrap and aluminum foil for up to 3 months.
How To Store It
Leftovers are rare in my house, but when we do have them, storing them correctly is crucial to maintain that velvety texture. You want to avoid them absorbing other fridge odors or getting a soggy crust. Proper storage also means you can meal prep these desserts for the week ahead, which is a total lifesaver during busy seasons. Here is how I keep my mini cheesecakes tasting just as fresh as the day they were baked using simple kitchen tools.
- Refrigeration: Place the cheesecakes in an airtight container to keep them fresh in the fridge for up to 5 days.
- Freezing: Wrap each individual cheesecake tightly in plastic wrap followed by a layer of aluminum foil to prevent freezer burn for up to 3 months.
- Thawing: Move frozen cheesecakes to the refrigerator overnight to thaw slowly before serving to preserve the creamy texture.
- Separation: If stacking them in a container, place a sheet of parchment paper between layers to keep the toppings or surfaces from sticking together.
Frequently Asked Questions
I know questions often pop up when trying a new recipe, so I’ve gathered the most common ones I get about these mini cheesecakes. Here are the answers to help you bake with confidence.
- Q: How do I know when the mini cheesecakes are finished baking?
You should bake the cheesecakes for 18 to 22 minutes at 325°F (163°C). You will know they are done when the edges are set but the centers remain slightly jiggly.
- Q: How can I prevent the cheesecakes from cracking on top?
To help prevent cracks, do not remove the cheesecakes immediately after baking. Instead, turn off the oven and crack the door open, allowing the mini cheesecakes to cool gradually inside the oven for about 30 minutes.
- Q: Can I prepare these cheesecakes ahead of time or store leftovers?
Yes, these mini cheesecakes can be made ahead of time and stored in the refrigerator for up to 5 days. You can also freeze them for up to 3 months by wrapping them tightly in plastic wrap and aluminum foil.
- Q: Is it possible to make a gluten-free version of this recipe?
Yes, you can make a gluten-free version by substituting the crushed graham crackers in the crust mixture with gluten-free cookies or almond flour.
- Q: What is the best way to mix the batter to ensure it is smooth?
You should start by beating softened cream cheese until it is creamy and smooth, then add the powdered sugar and vanilla until fully incorporated. When adding eggs, mix them in one at a time just until combined to avoid overmixing the batter.
- Q: Are there any suggestions for varying the flavor or presentation?
While the recipe suggests fresh berries or chocolate for toppings, the notes indicate you can experiment with various toppings such as caramel sauce or lemon curd to create different flavor profiles.
What Makes This Special
These little guys are the superheroes of the dessert world—small but mighty! What makes this recipe so special is how that rich, tangy filling sits perfectly atop the crisp buttery crust without requiring you to slice a giant cake and pretend you only want a sliver. They are single-serving crowd pleasers that cool gradually for a smooth finish, making you look like a pastry pro. You can easily print this article or save it for your next craving emergency. If you give these a whirl, drop a comment below or ask any questions; I would love to hear how your kitchen adventures turned out!
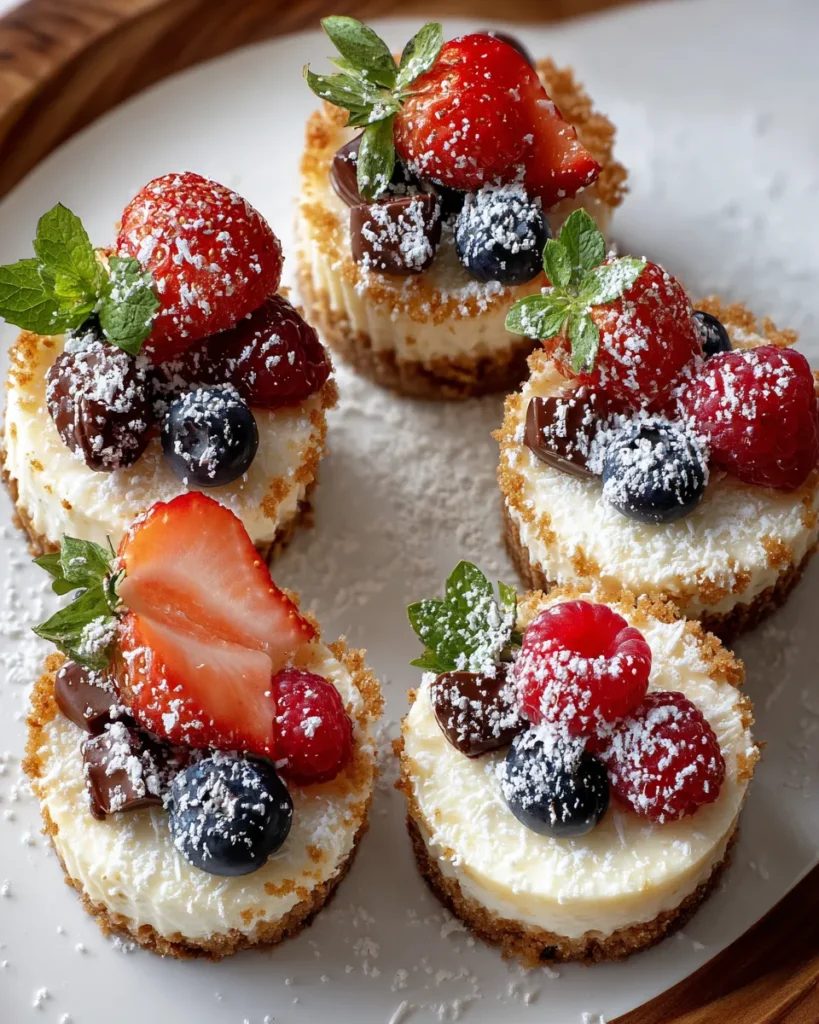

Gnome Mini Cheesecakes
Description
A buttery graham cracker crust holds a velvety, tangy cream cheese filling. These single-serve treats cool gradually for a smooth, crack-free finish, ready for your favorite berry topping.
Ingredients
Instructions
-
Preheat your oven to 325°F (163°C). Line a muffin tin with paper liners or grease the cups with nonstick spray to prevent the cheesecakes from sticking.
-
In a medium bowl, combine the crushed graham crackers, granulated sugar, and melted butter. Mix until the mixture resembles wet sand.
-
Divide the graham cracker mixture evenly among the muffin tin cups, pressing down firmly with the back of a spoon to create an even crust. Bake in the preheated oven for about 5 to 7 minutes, or until set and lightly golden. Remove from the oven and let cool.
-
In a large mixing bowl, use an electric mixer on medium speed to beat the softened cream cheese until creamy and smooth.
-
Gradually add the powdered sugar and vanilla extract, mixing until fully incorporated and there are no lumps.
-
Add the eggs, one at a time, mixing just until combined after each addition. Be careful not to overmix the batter.
-
Fold in the sour cream until well combined.
-
Spoon the cheesecake batter over the cooled graham cracker crusts in the muffin tin, filling each cup about 2/3 full.
-
Bake the cheesecakes in the oven for 18 to 22 minutes, or until the edges are set but the centers are slightly jiggly.
-
Turn off the oven and crack the door open, allowing the mini cheesecakes to cool gradually in the oven for about 30 minutes. This helps prevent cracks.
-
After cooling, refrigerate the cheesecakes for at least 2 hours or until firm.
-
Before serving, decorate your mini cheesecakes with fresh berries or a drizzle of chocolate if desired.
Note
- These mini cheesecakes can be made ahead of time and stored in the refrigerator for up to 5 days.
- Experiment with various toppings, such as caramel sauce or lemon curd, for different flavor profiles.
- For a gluten-free version, substitute the graham crackers with gluten-free cookies or almond flour.
- Mini cheesecakes can also be frozen; just wrap them tightly in plastic wrap and aluminum foil for up to 3 months.

