

These Garlic and Herb Chickpea Flour Snack Crackers are an absolute revelation for anyone craving a savory, wholesome nibble without fuss. Crafted from protein-packed chickpea flour, a sprinkle of nutritional yeast for that irresistible cheesy undertone, and a melange of garlic and aromatic herbs, these crackers strike the perfect balance between crunch and flavor. With just a handful of pantry staples and less than 15 minutes of active prep time, you’ll have a batch of golden, crispy crackers ready to delight your taste buds. They’re naturally gluten-free and vegan, making them a crowd‐pleasing option for plant-based gatherings or a cozy solo snack session.
On a busy weeknight when the fridge was running low, I whipped up these crackers in no time—my friends were incredulous that such bold, complex flavors could emerge from a recipe so simple. Plus, at roughly 200 calories per serving (about eight crackers), they’re an incredibly guilt‐free treat. Whether you’re serving them as an appetizer alongside your favorite dip or enjoying them straight from the jar while curled up with a good book, these crackers deliver. Beginner cooks will love the straightforward steps, and seasoned snack enthusiasts will appreciate the endless room for customization. Trust me, once you try this recipe, these crackers will become a staple in your snack arsenal!
KEY INGREDIENTS IN GARLIC AND HERB CHICKPEA FLOUR SNACK CRACKERS
Before we dive into the method, let’s break down the star players that make these crackers so crave-worthy. Each ingredient works in harmony to create that signature crispy texture, savory bite, and golden color.
- Chickpea flour
Chickpea flour forms the sturdy base of our crackers. Rich in protein and fiber, it bakes up into a nutty, firm sheet that holds up well for dipping and snacking.
- Nutritional yeast
This pantry hero lends a punch of cheesy, umami flavor without dairy. It deepens the savory profile and helps with browning for an irresistible golden hue.
- Garlic powder
Concentrated garlic infuses every bite with robust, aromatic warmth. It layers perfectly with herbs to ensure you get that garlicky kick.
- Dried oregano
A classic Mediterranean herb, oregano adds earthy, slightly peppery notes. It enhances the overall herbal character, tying together garlic and thyme.
- Dried thyme
Thyme brings subtle woodsy undertones and complexity. Its gentle aroma lifts the overall flavor, giving the crackers an elevated taste.
- Salt
Essential for seasoning, salt amplifies all the other flavors. It ensures a balanced savory profile without any single spice overpowering the rest.
- Black pepper
A dash of fresh-cracked pepper adds a hint of heat and brightness. It lends just enough zing to cut through the richness of the chickpea flour.
- Water
Water binds the dry ingredients into a cohesive dough, making it pliable and roll-able without weighing it down.
- Olive oil
Olive oil contributes both moisture and a silky mouthfeel while helping the crackers crisp up in the oven. Brushing a bit on top encourages golden edges.
- Fresh parsley (optional)
A sprinkle of chopped parsley brightens the final crackers with pops of green and fresh, herbaceous flavor. It’s a simple way to add color and lift.
HOW TO MAKE GARLIC AND HERB CHICKPEA FLOUR SNACK CRACKERS
Let’s transform these simple ingredients into irresistibly crispy crackers. The process is straightforward, and each step ensures a golden, crunchy result perfect for dipping or snacking on its own.
1. Preheat the oven to 350°F (175°C) and line a baking sheet with parchment paper. This prevents sticking and helps the crackers brown evenly.
2. In a large mixing bowl, combine the chickpea flour, nutritional yeast, garlic powder, dried oregano, dried thyme, salt, and black pepper. Stir thoroughly until all the dry ingredients are evenly distributed.
3. Create a well in the center of your dry ingredient mixture. Pour in the water and 2 tablespoons of olive oil into this well.
4. Mix until a dough forms. The texture should be slightly sticky but still workable. If it feels too dry, add a teaspoon of water at a time; if too wet, sprinkle in a bit more chickpea flour until it’s just right.
5. Turn the dough out onto a lightly floured surface. Using a rolling pin, roll the dough to about 1/8-inch thickness, ensuring an even layer for uniform baking.
6. With a knife or pizza cutter, cut the dough into small, cracker-sized squares, roughly 1 inch by 1 inch each.
7. Transfer the cut squares onto the prepared baking sheet, leaving a small gap between each cracker to allow hot air to circulate.
8. Brush the tops of the crackers lightly with olive oil. This extra step encourages browning and helps achieve maximum crispness.
9. Place the baking sheet in the preheated oven and bake for 15–20 minutes, or until the edges turn a gorgeous golden brown and appear crisp.
10. Once baked, remove the crackers from the oven and let them cool on the baking sheet for a few minutes. They’ll firm up and become even crispier as they rest.
11. Optional: While the crackers are still warm, sprinkle freshly chopped parsley on top for an extra burst of color and fresh herbal flavor.
12. Serve immediately for ultimate crunch, or allow them to cool completely before storing in an airtight container.
SERVING SUGGESTIONS FOR GARLIC AND HERB CHICKPEA FLOUR SNACK CRACKERS
When it comes to presenting these crackers, the possibilities are endless. From casual solo snacking to an elegant spread, these chickpea flour gems can adapt to any occasion. Their sturdy structure makes them ideal for hearty dips, while their savory, garlicky profile stands out even when enjoyed plain. Think beyond the snack bowl: these bites can add texture and flavor to lunch plates, serve as a crunchy topper for soups, or accompany your favorite cheeses in a vibrant appetizer board. Because they’re naturally gluten-free and vegan, you can confidently serve them at diverse gatherings—everyone from vegan friends to those with gluten sensitivities will appreciate the thoughtful snack. The best part? You can easily scale the recipe for a small family nibble or a large party platter. Just keep extra ingredients on hand to mix up another quick batch if these crackers disappear as fast as they’ll likely go!
- Serve alongside a creamy hummus or white bean dip to complement the garlic and herb flavors. The contrast between smooth dip and crispy cracker is irresistible—simply spoon your favorite spread onto a platter and arrange crackers around it.
- Pair with fresh salsa or pico de gallo for a zesty twist. The bright acidity of tomatoes and cilantro cuts through the richness of the chickpea base, creating a balanced, refreshing bite.
- Incorporate into a charcuterie board with cheeses, cured meats (or plant-based alternatives), olives, and fresh fruit. The crackers’ bold flavor stands up well to strong cheeses like sharp cheddar or tangy goat cheese.
- Enjoy as a standalone snack by filling a small bowl and placing it next to your favorite beverage—coffee, tea, or even a chilled glass of white wine work beautifully for an elevated snack time.
HOW TO STORE GARLIC AND HERB CHICKPEA FLOUR SNACK CRACKERS
Proper storage is key to keeping these crackers as crisp and flavorful as the day you baked them. Since moisture is the enemy of crunch, you’ll want to store them in a way that minimizes humidity. Whether you bake a single batch for a cozy evening or whip up double the dough for party prep, follow these guidelines to lock in that satisfying snap and savory taste.
- Store at room temperature in an airtight container. Use a glass or BPA-free plastic container with a tight-sealing lid to keep moisture out. Add a small food-safe desiccant packet or a folded paper towel to absorb any residual humidity.
- Refrigerate in a sealed jar if you live in a very humid climate. Chilling slows down moisture absorption, but be sure the jar is completely dry before transferring crackers, and allow them to come to room temperature before serving for maximum crispness.
- Freeze extras in a zip-top freezer bag. Layer the crackers between sheets of parchment paper to prevent sticking, then squeeze out excess air before sealing. Thaw at room temperature; they’ll regain most of their original texture.
- Refresh slightly stale crackers by placing them on a baking sheet in a 300°F (150°C) oven for 3–5 minutes. Let them cool completely before storing again to ensure they crisp up without becoming oily.
CONCLUSION
These Garlic and Herb Chickpea Flour Snack Crackers have everything you could want in a homemade treat: they’re quick, simple, and packed with vibrant flavor, making them the perfect snack or appetizer. From the hearty texture of chickpea flour to the cheesy essence of nutritional yeast and the fragrant punch of garlic and herbs, each cracker delivers a satisfying crunch that’s bound to disappear fast—whether you’re serving them at a backyard gathering or indulging during an evening wind-down. With a total time of just under 40 minutes from start to finish (15 minutes prep, 20 minutes baking, 5 minutes resting), and at about 200 calories per eight-cracker serving, this beginner-level recipe fits seamlessly into busy schedules and balanced lifestyles alike.
Feel free to print this article or save it in your digital recipe collection so it’s always there when snack cravings strike. You can also scroll down to check out a handy FAQ section below for any extra tips or troubleshooting you might need. And of course, if you try the recipe, I’d love to hear how your crackers turned out—drop a comment, share your flavor twists, or ask any questions if you hit a snag in the kitchen. Your feedback and stories bring this recipe to life, so don’t hesitate to reach out. Happy baking—and here’s to many crunchy, herb-packed moments ahead!
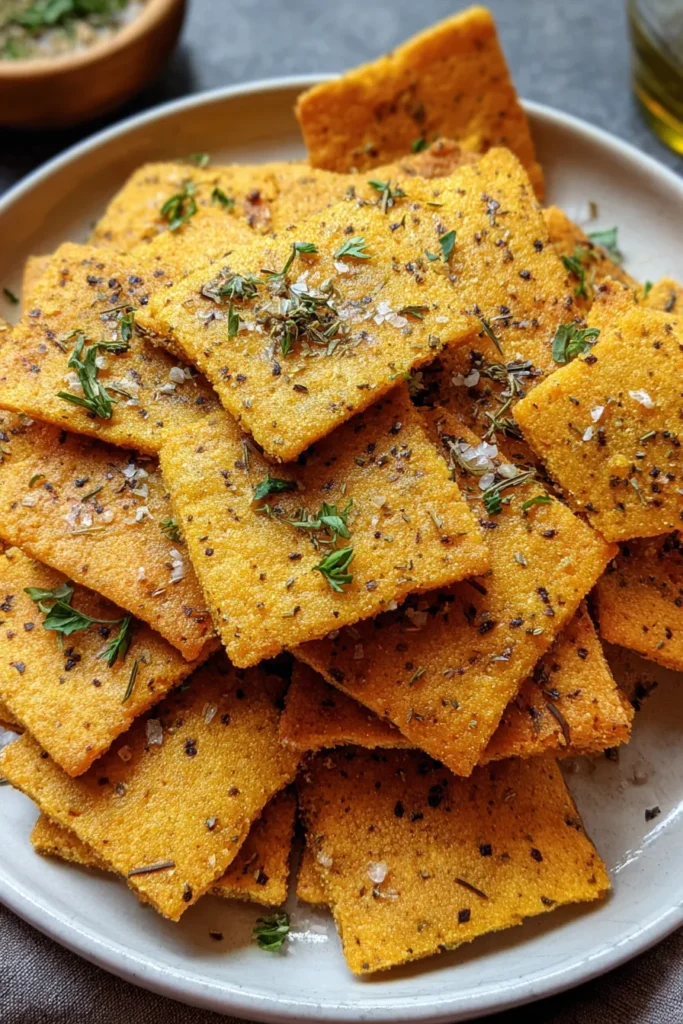

Garlic and Herb Chickpea Flour Snack Crackers
Description
With a delightful blend of garlic and herbs, these chickpea flour crackers deliver a satisfying crunch that’s perfect for snacking or dipping!
Ingredients
Instructions
-
Preheat your oven to 350°F (175°C) and line a baking sheet with parchment paper.
-
In a large mixing bowl, combine the chickpea flour, nutritional yeast, garlic powder, dried oregano, dried thyme, salt, and black pepper. Mix well until all dry ingredients are thoroughly combined.
-
Create a well in the center of your dry ingredients, then pour in the water and 2 tablespoons of olive oil.
-
Mix until a dough forms. It should be slightly sticky but workable. If too dry, add a teaspoon of water at a time; if too wet, add a bit more chickpea flour.
-
Turn the dough out onto a lightly floured surface and roll it out to about 1/8 inch thickness using a rolling pin.
-
Use a knife or pizza cutter to cut the dough into small, cracker-sized squares, approximately 1 inch by 1 inch.
-
Transfer the cut dough onto the prepared baking sheet, leaving space between each cracker.
-
Lightly brush the tops of the crackers with a little olive oil to help them brown and crisp up.
-
Place the baking sheet in the preheated oven and bake for approximately 15–20 minutes or until the edges are golden brown and crisp.
-
Once baked, remove from the oven and let them cool on the baking sheet for a few minutes. They will become crispier as they cool.
-
Optional: Sprinkle freshly chopped parsley on top of the warm crackers if desired for an extra burst of flavor and color.
-
Serve immediately, or store in an airtight container once completely cooled.
Note
- Chickpea flour is naturally gluten-free, making these crackers suitable for those with gluten sensitivities.
- You can experiment with different herbs and spices to create your own unique flavor combinations.
- These crackers make a great accompaniment to dips and soups or enjoy them on their own as a healthy snack.
- Nutritional yeast adds a cheesy flavor, so feel free to adjust the amount to suit your taste.

