

With every bite of these Fruity Pebbles Cheesecake Tacos, you’ll find yourself grinning from ear to ear as crunchy cereal meets velvety cheesecake in a playful dance of textures and flavors. This beginner-friendly dessert tacos recipe transforms your dessert game with these colorful treats that require only 30 minutes of prep, a quick 7-minute bake, and a 2-hour chill time. Bursting with rainbow hues and an explosion of fruity notes, it’s no wonder these dessert tacos have become the ultimate party food and fun dessert for any gathering, big or small.
Not only do these taco shells deliver an unforgettable crunch, but the creamy filling—lightly sweetened with granulated and powdered sugar, brightened with vanilla extract, and whipped to stiff peaks—offers a dreamy contrast that melts on your tongue. At around 350 calories per taco, they feel indulgent without tipping the scale. Whether you’re hosting a birthday bash, a casual brunch, or simply craving a colorful treat, these cheesecake tacos will have everyone reaching for seconds. Let’s dive into how to bring this vibrant, turnkey recipe to life!
KEY INGREDIENTS IN FRUITY PEBBLES CHEESECAKE TACOS
Before we begin crafting these vibrant dessert tacos, let’s meet the essential players that make each bite unforgettable.
- Fruity Pebbles cereal: A colorful, crisp rice cereal that forms the fun, crunchy base for both the crust and the topping, adding bursts of berry-like flavor and playful texture.
- Unsalted butter: Provides richness and binds the crushed cereal together to create a sturdy, golden crust once baked.
- Cream cheese: The silky core of the cheesecake filling, lending a tangy creaminess that balances the sweetness of the sugar and cereal.
- Granulated sugar: Sweetens the cream cheese layer, ensuring a perfectly balanced dessert without overpowering the fruity notes.
- Heavy whipping cream: Whipped to stiff peaks, this component introduces airiness and volume, resulting in a luxuriously light filling.
- Vanilla extract: Infuses the whipped cream with warm, aromatic undertones that complement the cereal’s fruity flavors.
- Powdered sugar: Stabilizes and sweetens the whipped cream, helping the cheesecake mixture set firmly in the shells.
- Small taco shells or soft tortillas: The edible vessels that hold the luscious cheesecake, offering a contrasting texture to the creamy center.
- Additional Fruity Pebbles cereal: Sprinkled on top for a pop of color, extra crunch, and to tie every layer together.
- Fresh fruits (optional): Strawberries or blueberries add a juicy freshness, extra color, and a burst of natural sweetness that elevates each serving.
HOW TO MAKE FRUITY PEBBLES CHEESECAKE TACOS
Now that our ingredients are lined up and ready, it’s time to walk through the step-by-step process of assembling these delightful dessert tacos from base to finish.
1. Preheat your oven to 350°F (175°C). This initial heat ensures the cereal-butter crust sets quickly, locking in its crunchy texture.
2. Crush your Fruity Pebbles cereal in a zip-top bag or food processor until you have a fine, colorful crumb. In a mixing bowl, stir together the crushed cereal and melted unsalted butter until every bit of cereal is coated.
3. Spread the cereal-butter mixture on a baking sheet lined with parchment paper. Bake for 5–7 minutes or until slightly golden at the edges—don’t let it brown too much, as you want a gentle crisp. Remove from the oven and allow it to cool to room temperature.
4. In a large bowl, beat the softened cream cheese with granulated sugar until the mixture is smooth and creamy, free of lumps.
5. In a separate chilled bowl, whisk the cold heavy whipping cream on high speed until stiff peaks form. Gently add vanilla extract and powdered sugar, then fold this light whipped cream into the cream cheese mixture until fully incorporated and airy.
6. Place the taco shells or tortillas on a baking tray and warm in the oven for about a minute to make them slightly pliable without becoming too soft.
7. Fill each shell with the cheesecake mixture, using a piping bag or a spoon for a neat, lofty presentation.
8. Refrigerate the filled tacos for at least 2 hours to let the cheesecake filling firm up and the flavors meld beautifully.
9. Just before serving, top each taco with additional Fruity Pebbles cereal and garnish with fresh fruit for a pop of color and extra flavor.
SERVING SUGGESTIONS FOR FRUITY PEBBLES CHEESECAKE TACOS
When your Fruity Pebbles Cheesecake Tacos are chilled and ready, the way you present them can take this colorful treat from delightful to downright spectacular. These vibrant desserts aren’t just fun to eat—they’re a feast for the eyes, too. Whether you’re serving at a birthday party, a backyard barbecue, or a cozy dessert night in, thoughtful plating and complementary garnishes will make these tacos the highlight of any spread. From simple swirls of whipped cream to elegantly arranged fresh berries, your serving style sets the tone. Below are four creative serving suggestions to help you showcase these dessert tacos at their best.
- Rustic Dessert Board: Arrange the cheesecake tacos on a wooden board alongside mini bowls of extra cereal, whipped cream, and fresh berries. The natural wood grain contrasts with the vivid colors, making each taco look like an art piece.
- Individual Display: Place each taco in a dessert taco stand or a small glass with crinkled parchment paper at the bottom. This elevates each portion, giving them a boutique feel that’s perfect for bridal showers or intimate gatherings.
- Whipped Cream Drizzle: Pipe a dollop of fresh whipped cream atop each taco, then drizzle with berry coulis or chocolate syrup. The sweet sauce adds shine and an extra layer of flavor, creating a gourmet dessert moment.
- Fruit Mosaic Platter: Surround the tacos with a carpet of diced strawberries, blueberries, and kiwi on a large platter. This colorful framework not only supports the dessert visually but also offers guests a refreshing bite between cheesecake tacos.
HOW TO STORE FRUITY PEBBLES CHEESECAKE TACOS
Proper storage ensures your Fruity Pebbles Cheesecake Tacos stay as fresh and vibrant as the day you made them. While the crunchy cereal base and creamy filling can be delicate, a little care goes a long way in preserving both texture and taste. Whether you’re prepping them ahead for an event or saving leftovers for a sweet reunion, following these storage methods will keep your dessert tacos in top form. Let’s explore the best ways to store these colorful treats.
- Refrigerator Storage: Place the chilled tacos on a flat tray covered loosely with plastic wrap. Keep them in the coldest part of the fridge for up to 48 hours. This method preserves the creamy filling and prevents the cereal from becoming too soft.
- Airtight Container: For maximum protection, store individual tacos in an airtight, shallow container lined with parchment paper. Separate layers with sheets of parchment to prevent sticking. Consume within two days to enjoy that signature cereal crunch.
- Partial Assembly Ahead: If you need to prep early, bake the cereal crust and make the cheesecake filling up to 24 hours in advance. Store each component in separate airtight containers, then assemble just before serving to maintain peak freshness.
- Avoid Freezing: Freezing is not recommended, as the whipped cream and cream cheese filling can develop an icy texture and lose its smooth consistency upon thawing. Instead, stick to refrigeration for best results.
CONCLUSION
From the vibrant hues of Fruity Pebbles to the luxuriously creamy cheesecake filling tucked inside fun little taco shells, this recipe has everything you need to bring joy to your dessert table. We’ve covered all the essentials: the bright and crunchy key ingredients, a detailed step-by-step how-to guide, imaginative serving suggestions, and foolproof storage tips. Whether you’re a beginner home cook or a seasoned dessert enthusiast, these cheesecake tacos deliver an eye-catching, playful treat that’s perfect for parties, family gatherings, or a cheerful twist on everyday dessert. Feel free to print this article and save it in your recipe binder, so you can whip up colorful treat after colorful treat with ease.
Below, you’ll find a handy FAQ section to troubleshoot common questions and refine any details you might be curious about. We’d love to hear your feedback—drop a comment if you try this recipe, have questions about any step, or want to share your own creative twists. Your experiences and insights help our community grow, so don’t hesitate to reach out with comments, questions, or even photos of your delicious Fruity Pebbles Cheesecake Tacos!
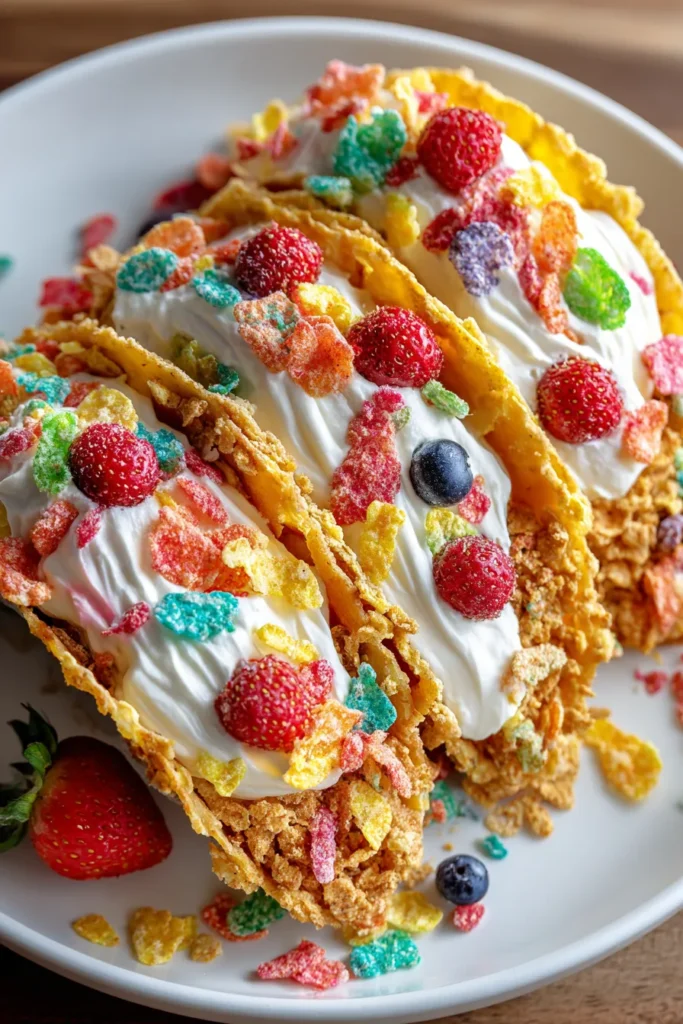

Fruity Pebbles Cheesecake Tacos
Description
These Fruity Pebbles Cheesecake Tacos bring vibrant colors and a creamy, crunchy dance of flavor, perfect for parties or a special treat. Each bite is a delightful explosion of sweetness!
Ingredients
Instructions
-
Preheat your oven to 350°F (175°C).
-
Crush 1 ½ cups of Fruity Pebbles cereal and mix it with 2 tablespoons of melted butter until well combined.
-
Spread the mixture onto a baking sheet lined with parchment paper and bake for 5-7 minutes until slightly golden and set.
-
In a large mixing bowl, beat the softened cream cheese with granulated sugar until smooth and creamy.
-
In a separate chilled bowl, whisk the cold heavy whipping cream with a mixer on high speed until stiff peaks form. Add vanilla extract and powdered sugar, and gently fold this whipped mixture into the cream cheese mixture until well combined.
-
Carefully warm the taco shells or tortillas in the oven for a minute to make them slightly pliable.
-
Fill each taco shell with the cheesecake mixture, using a spoon or piping bag for a clean look.
-
Place the filled tacos in the refrigerator for at least 2 hours to allow the cheesecake filling to set firmly.
-
Just before serving, top each cheesecake taco with additional Fruity Pebbles cereal and garnish with fresh fruits if desired.
Note
- You can use chocolate or berry-flavored cereal for a different twist.
- For extra flavor, try adding a tablespoon of lemon juice to the cheesecake filling.
- These cheesecake tacos make for a colorful and fun dessert for parties and gatherings.
- Adding a dollop of whipped cream on top can enhance presentation and taste.

