

Autumn mornings are the perfect backdrop for a little baking adventure, and nothing captures the season’s essence quite like a French Apple Tart. There’s something undeniably magical about layers of thinly sliced apples fanned out atop a blanket of buttery puff pastry, each slice glistening as it bakes to tender, caramelized perfection. As you weave your way through the steps—rolling out a golden sheet of dough, brushing on melted butter, and sprinkling just the right amount of sugar—you’ll find yourself swept up in the simple joy of creating something both elegant and approachable. The tart’s crisp, flaky crust yields to soft, warmly spiced apples, each bite singing of cozy afternoons and shared moments around the table.
Gathering the ingredients is half the fun. This recipe is perfect for beginners, with a total prep time of about 20 minutes, cooking time just under 40 minutes, and a brief 10-minute rest before you dive in. In just over an hour, you’ll have eight beautiful slices to savor, each containing roughly 350 calories—a delightful treat for dessert lovers and casual bakers alike. Serve it as a refined finale to a dinner party or enjoy a slice alongside your morning coffee. Savor the warmth of a classic French Apple Tart, where sweet apples embrace flaky pastry for a delightful dessert experience that feels both sophisticated and heartwarming.
KEY INGREDIENTS IN FRENCH APPLE TART
Before we dive into the method, let’s talk about the stars of this show. Each ingredient plays a crucial role in balancing flavor, texture, and that irresistible visual appeal. Gather these essentials to ensure your tart turns out beautifully every time.
- Puff pastry sheet
A ready-made sheet provides a buttery, flaky base that simplifies this recipe. As it bakes, it puffs up into crisp, golden layers that contrast perfectly with tender apples.
- Apples
Choose Granny Smith for a tart note or Golden Delicious for sweetness. Thinly slicing and arranging them in overlapping rows ensures even cooking and an elegant presentation.
- Granulated sugar
Sprinkled over the apples, it caramelizes during baking, creating a glossy, slightly crunchy top that complements the soft fruit.
- Unsalted butter
Melted and drizzled over the apples, it enriches the flavor and helps the sugar melt into a luscious glaze as the tart bakes.
- Apricot jelly or jam
Combined with water and warmed, it transforms into a shiny glaze that accentuates the apples’ color and adds a hint of fruity sweetness.
- Water
Used to thin the apricot jelly, ensuring a smooth consistency for brushing over the hot tart without clumping.
- Ground cinnamon
Optional but lovely, it adds a warm spice note that pairs beautifully with baked apples and buttered pastry.
HOW TO MAKE FRENCH APPLE TART
Let’s transform these simple ingredients into a show-stopping dessert. You’ll love how straightforward each step feels, yet how spectacular the result tastes. Gather your tools and get ready to work your pastry magic.
1. Preheat your oven to 400°F (200°C) and line a baking sheet with parchment paper. This ensures the tart bakes evenly and releases easily when done.
2. On a lightly floured surface, roll out the thawed puff pastry into a 9×13-inch rectangle. Use gentle, even strokes with a rolling pin to keep the pastry’s layers intact. Carefully transfer it to the prepared sheet.
3. Neatly arrange the thin apple slices in overlapping rows, leaving a 1-inch border all around. This creates a graceful, tiled effect and keeps the edges of the pastry free for folding.
4. Evenly sprinkle granulated sugar over the apples. If you’re adding cinnamon, dust it now to introduce a gentle spiced aroma as the tart bakes.
5. Drizzle the melted butter over the sugared apples, ensuring it seeps into crevices and coats each slice for rich flavor.
6. Fold the exposed pastry edges over the apples to form a neat border. Press lightly to seal, creating a rustic frame that holds in juices.
7. Bake for 35–40 minutes, or until the pastry edges are golden brown and the apples have softened to tender perfection.
8. While baking, heat the apricot jelly and water in a small saucepan over low heat, stirring until smooth and easily brushable.
9. Once the tart is out of the oven, use a pastry brush to coat the apple surface with the warm apricot glaze, adding a shiny finish.
10. Allow the tart to cool slightly—about 10 minutes—so the glaze sets and the apples firm up before slicing and serving.
SERVING SUGGESTIONS FOR FRENCH APPLE TART
Serving this French Apple Tart is all about complementing its warm, buttery flavors with perfect accompaniments. Whether you’re hosting a dinner or enjoying a cozy weekend treat, the right pairing will elevate every mouthful. Offer a combination of creamy, tangy, and sweet elements that highlight the caramelized apples and flaky crust. Create a little dessert station with multiple options so guests can customize their slice, or keep it elegantly simple with a single, luscious topping that really lets the tart shine.
- Serve a generous scoop of vanilla ice cream alongside a warm slice. The contrast between hot and cold, creamy and spiced, is absolutely heavenly.
- Dollop lightly sweetened whipped cream flavored with a hint of vanilla or cinnamon on top for a cloud-like finish that melts into the apples.
- Drizzle salted caramel sauce over each slice to introduce a rich, buttery note that enhances the tart’s natural sweetness and adds a gourmet touch.
- Pair slices with a steaming cup of black coffee or spiced tea for a balanced dessert course, letting the coffee’s bitterness or tea’s floral notes cut through the richness.
HOW TO STORE FRENCH APPLE TART
Whether you’re planning ahead for a gathering or simply want leftovers to enjoy, proper storage ensures your French Apple Tart retains its delightful texture and flavor. At room temperature or chilled, you’ll want to protect the pastry from drying out and keep the apples moist and glossy. Below are foolproof methods to preserve every aspect of this dessert, from the flaky crust to the sweet, tender filling.
- Room Temperature Storage
Place cooled slices in an airtight container lined with parchment paper. Store at room temperature for up to 2 days, maintaining the pastry’s crisp edges without letting it become soggy.
- Refrigerator Storage
For longer freshness, wrap the tart gently in plastic wrap or aluminum foil. Refrigerate for up to 4 days. Before serving, let it come to room temperature or warm it briefly in the oven to restore flakiness.
- Freezer Storage
If you need to stash it for later, wrap individual slices tightly in plastic wrap, then place them in a freezer-safe bag. Freeze for up to 1 month. Thaw overnight in the fridge, then reheat in a 350°F oven for 10 minutes to crisp up the pastry.
- Reheating Tips
Always reheat in the oven or a toaster oven rather than the microwave for the best flaky texture. Cover gently with foil if the glaze is browning too much, and bake at 325°F until warmed through.
CONCLUSION
This French Apple Tart recipe brings together buttery puff pastry, tender apples, and a glossy apricot glaze in a dessert that feels both elegant and utterly approachable. From beginner-friendly prep steps to vivid serving suggestions, you’ve now got all the know-how to create a memorable treat for family, friends, or just yourself. With a total hands-on time of less than an hour, you can whip up this tart on a weeknight or plan it as the star of a special occasion. Don’t forget—this is a standalone guide you can print and save for later, and you’ll also find a helpful FAQ below to address any tweaks or questions that pop up as you bake.
Whether you’re curious about swapping apple varieties, adjusting sweetness levels, or achieving that perfect golden crust, feel free to leave your questions or share your own tips in the comments. Trying the recipe and customizing it is part of the fun, so let me know how it turns out or if you need any extra guidance. Happy baking, and here’s to many warm, flaky slices of French Apple Tart in your future!
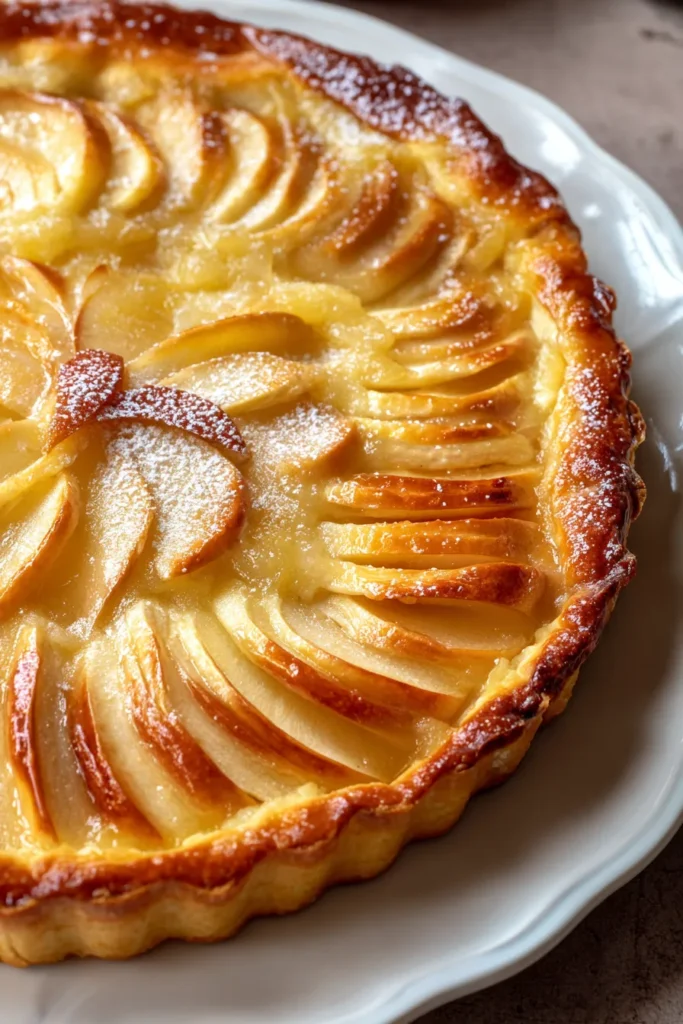

French Apple Tart
Description
This French Apple Tart combines tender, caramelized apples with a buttery, flaky crust, creating a perfect balance of flavors and textures that everyone will love!
Ingredients
Instructions
-
Preheat your oven to 400°F (200°C). Line a baking sheet with parchment paper.
-
Roll out the puff pastry on a lightly floured surface into a rectangle of about 9x13 inches. Carefully transfer the rolled-out pastry to the prepared baking sheet.
-
Arrange the apple slices in overlapping rows on the pastry, leaving a 1-inch border around the edges.
-
Sprinkle the sugar evenly over the apples. If you're using cinnamon, sprinkle it over the apples as well.
-
Drizzle the melted butter over the apples.
-
Fold the edges of the puff pastry over the apples to create a border. Press down lightly to seal the edges.
-
Bake in the preheated oven for 35-40 minutes, or until the edges of the pastry are golden brown and the apples are tender.
-
While the tart bakes, heat the apricot jelly and water in a small saucepan over low heat, stirring until smooth.
-
When the tart is done baking, brush the apricot glaze over the apples to give them a shiny finish.
-
Allow the tart to cool slightly before serving.
Note
- Serve warm or at room temperature for the best taste.
- This tart pairs beautifully with vanilla ice cream or whipped cream.
- The tart can be stored in an airtight container at room temperature for up to 2 days.
- Experiment with different types of apples for varied flavors.

