

Dill Pickle Cheese Ball is a tangy, creamy cheese ball dotted with crunchy pickles and fresh dill, ready to steal the show on your snack table. This no-bake appetizer blends cream cheese and sharp cheddar with pickle juice and seasonings, then chills into a firm, spreadable delight. Whether you’re hosting game day, a casual get-together, or just craving something zesty, this easy recipe will make your snack game pop with flavor—grab your crackers and let’s dive in!
Key Ingredients
Get ready to gather your flavor-packed lineup—each item brings its own twist to this Dill Pickle Cheese Ball.
- 8 ounces cream cheese, softened: Rich and creamy base that binds all ingredients and gives a velvety texture.
- 1 cup shredded sharp cheddar cheese: Adds bold, tangy depth and helps the ball hold its shape.
- 1/2 cup finely chopped dill pickles: Crunchy bursts of vinegary goodness that define the pickle flavor.
- 2 tablespoons pickle juice: Infuses extra tang and keeps the mixture moist and zesty.
- 1 tablespoon chopped fresh dill: Bright, herbaceous notes that elevate the pickle profile.
- 1/2 teaspoon garlic powder: Savory hint of garlic that balances the tanginess.
- 1/4 teaspoon onion powder: Subtle onion flavor that enhances overall depth.
- 1/4 teaspoon black pepper: A gentle kick of heat and bite.
- 1/4 teaspoon paprika: Adds mild smokiness and a touch of color.
- 1/4 cup chopped pecans or walnuts (optional): Crunchy exterior coating for texture contrast and nutty flavor.
How To Make Dill Pickle Cheese Ball
Creating this Dill Pickle Cheese Ball is a breeze—it all comes together in one bowl, then gets shaped, chilled, and dressed up for serving. Follow these steps to whip up a creamy, tangy cheese ball that’s perfect for spreading on crackers, veggies, or bread.
1. In a medium bowl, beat cream cheese until smooth using an electric mixer or sturdy spoon to ensure a lump-free base.
2. Stir in shredded sharp cheddar cheese, chopped dill pickles, pickle juice, fresh dill, garlic powder, onion powder, and black pepper until the mixture is uniform—scrape down the sides to mix evenly.
3. Place a sheet of plastic wrap on your work surface and scoop the cheese mixture onto the center, using a spatula for minimal mess.
4. Shape the mixture into a tight ball by gathering the plastic wrap around it and twisting the top, smoothing the surface as you go.
5. Chill the cheese ball in the refrigerator for at least 1 hour to allow it to firm up and develop flavor.
6. Spread chopped nuts or additional fresh dill around a plate and roll the chilled cheese ball in the coating, pressing gently to adhere evenly.
7. Serve your Dill Pickle Cheese Ball with an assortment of crackers, sliced veggies, or bread for guests to scoop and spread.
Serving Suggestions
Once your cheese ball is set and coated, it’s ready for its big debut. Here are four fun ways to present and enjoy it:
- Classic Cracker Platter: Arrange a variety of crackers—from buttery water biscuits to crunchy whole-grain wafers—around the cheese ball for simple, crowd-pleasing bites.
- Veggie Crudité: Serve with sliced cucumbers, bell peppers, and crunchy carrot sticks for a lighter, colorful display and refreshing crunch.
- Breadboard Spread: Include chunks of toasted baguette or sourdough for a rustic, hearty accompaniment that soaks up every creamy bite.
- Charcuterie Companion: Pair with cured meats like salami or prosciutto and some olives for an elevated snack board that balances tangy, salty, and creamy flavors.
Tips For Perfect Dill Pickle Cheese Ball
Nailing the perfect texture and flavor is a snap with these friendly pointers—your cheese ball will turn out just right every time!
- For extra tang, add more pickle juice to taste.
- Cheese ball can be prepared a day ahead and stored covered in the refrigerator.
- Nuts can be omitted or replaced with chopped fresh herbs for a nut-free option.
- Bring to room temperature for about 10 minutes before serving for easier spreading.
How To Store It
Storing your cheese ball properly keeps it fresh and flavorful for your next snack session. Whether you’re prepping ahead or saving leftovers, here’s how to lock in that tangy goodness:
- Refrigerate, wrapped: Tightly wrap the cheese ball in plastic wrap or place in an airtight container and refrigerate for up to 3 days.
- Prep in advance: Shape and wrap the ball, then store uncovered on a plate inside the fridge. Roll in nuts or herbs just before serving.
- Freeze for later: Wrap in plastic and place in a freezer bag for up to 1 month. Thaw overnight in the fridge, then bring to room temperature before serving.
- Separate coating: Store chopped nuts or herbs in a small container and apply right before serving to maintain their crunch and color.
Frequently Asked Questions
Got questions? Let’s clear up the most common queries so you can master this cheese ball like a pro!
- Q: How long does it take to prepare and chill this Dill Pickle Cheese Ball?
A: Active prep time is about 15 minutes, which includes beating the cream cheese until smooth, chopping pickles and herbs, and mixing everything together. After shaping the mixture into a ball, allow at least 1 hour of chilling in the refrigerator to firm it up before serving.
- Q: Can I prepare the cheese ball ahead of time?
A: Yes, you can assemble the cheese ball up to 24 hours before serving. After shaping the ball, wrap it tightly in plastic wrap and store it in the refrigerator. When you’re ready to serve, unwrap, roll it in nuts or herbs, and bring to room temperature for about 10 minutes to ensure easy spreading.
- Q: What are some good substitutions if I don’t have fresh dill or nuts?
A: If you don’t have fresh dill, swap in 1 teaspoon of dried dill weed, though you may wish to increase it slightly for a similar flavor. For a nut-free exterior, finely chop fresh parsley or chives and press them into the cheese ball for color and texture instead of pecans or walnuts.
- Q: How can I adjust the tanginess or texture of the cheese ball?
A: To boost tanginess, stir in an extra teaspoon or two of pickle juice or finely chopped pickles. If the mixture feels too loose, chill it briefly before shaping. If it’s too firm, let it sit at room temperature for 5 minutes or add a splash more pickle juice for creaminess.
- Q: What’s the best way to serve this cheese ball?
A: Place the chilled cheese ball on a serving platter surrounded by an assortment of crackers, sliced vegetables like cucumbers and bell peppers, or baguette slices. Bring it to room temperature for around 10 minutes before serving so it’s soft enough for easy spreading.
- Q: How do I ensure the cheese ball holds its shape?
A: Use plastic wrap to tightly wrap and twist the mixture into a firm, round ball, pressing out air pockets. Chill for at least an hour to allow the cheeses to firm up. Handle it gently when rolling in nuts or herbs to avoid denting the surface.
- Q: Are there any dietary modifications I can consider?
A: For a lower-fat version, substitute part of the cream cheese with light cream cheese and use reduced-fat cheddar. To make it gluten-free, simply choose gluten-free crackers or serve with vegetable sticks. For a paleo-friendly twist, use dairy-free cream cheese and omit cheddar, focusing on herbs and pickles for flavor.
What Makes This Special
This Dill Pickle Cheese Ball is a whirlwind of tangy, creamy, and crunchy sensations that’s as fun to make as it is to eat. The zesty pickle juice and crisp pickles cut through the rich cheeses, while fresh dill adds a garden-fresh twist. It’s the ultimate no-bake party hack—shape it, chill it, roll it, and watch it disappear. Don’t forget to print this recipe and save it for your next gathering, then drop a comment or question below if you give it a try or need any help perfecting your cheese ball masterpiece!
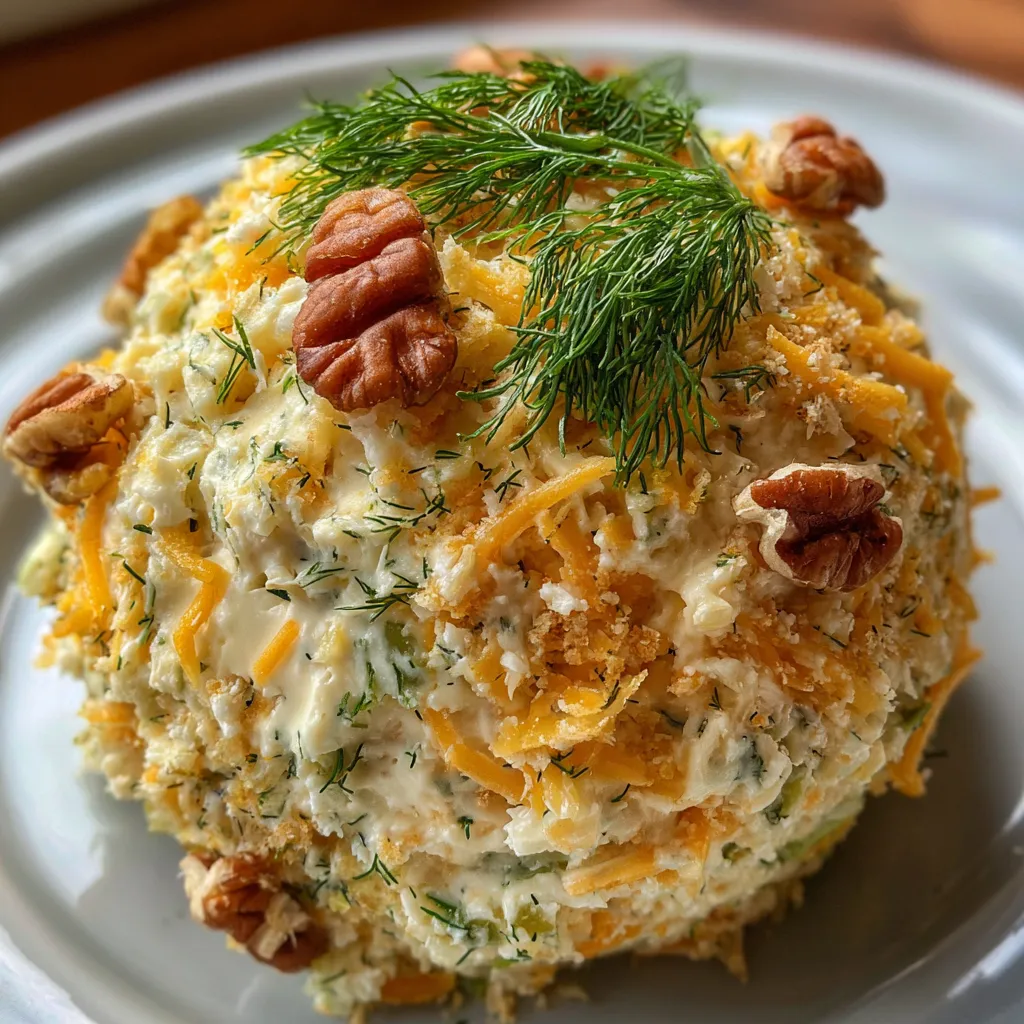

Dill Pickle Cheese Ball
Description
Cream cheese and sharp cheddar swirl with crunchy dill pickles and tangy pickle juice, creating a zesty spread. Chilled to set and rolled in nuts or herbs, every bite delivers creamy richness and a satisfying crunch.
Ingredients
Instructions
-
In a medium bowl, beat cream cheese until smooth.
-
Stir in shredded sharp cheddar cheese, chopped dill pickles, pickle juice, fresh dill, garlic powder, onion powder, and black pepper until well combined.
-
Place plastic wrap on a work surface and scoop the cheese mixture onto the center.
-
Shape mixture into a tight ball using the plastic wrap, twisting the wrap to form a smooth, round shape.
-
Chill the cheese ball in the refrigerator for at least 1 hour to firm up.
-
Spread chopped nuts or additional dill around a plate and roll the chilled cheese ball to coat the exterior.
-
Serve with crackers, sliced veggies, or bread.
Note
- For extra tang, add more pickle juice to taste.
- Cheese ball can be prepared a day ahead and stored covered in the refrigerator.
- Nuts can be omitted or replaced with chopped fresh herbs for a nut-free option.
- Bring to room temperature for about 10 minutes before serving for easier spreading.

